
What you need
2 colors of fleece fabric
t-shirt
tailor chalk or pen
scissors
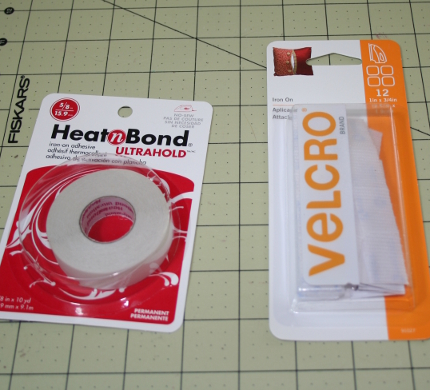
iron-on velcro
hem tape
letter stencil (optional)
acrylic paint
small paint brush
fabric glue
iron and iron board
piece of yarn (optional)
Instructions
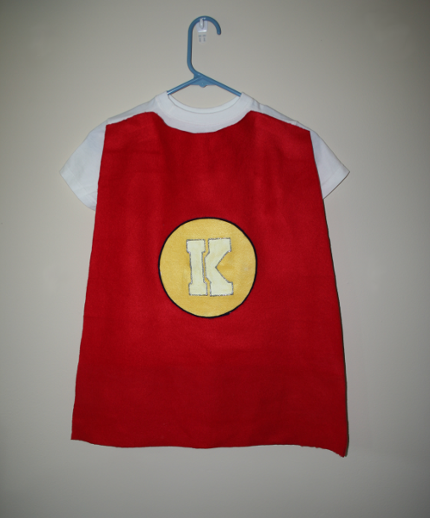
1. Choose which color of fleece you want for the cape and cut it so it measures 28” long by 22” wide.
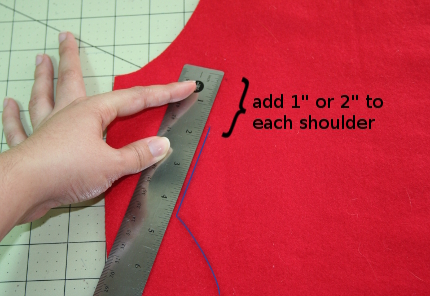
2. Take one of your child’s t-shirts (I bought a size t5 blank t-shirt for $4) and place it on top of the fleece. Fold the collar down and trace the contour to the fleece. Trace the shoulders too and add one or two inches of length to each one. 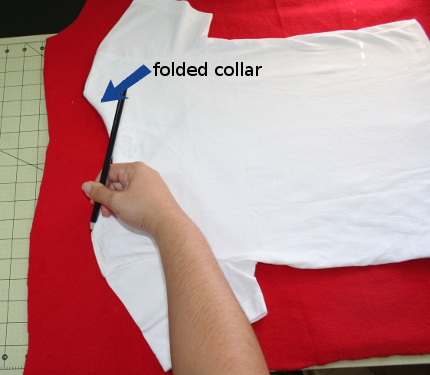
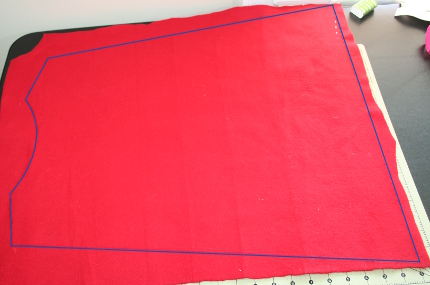
3. Now that you have the top of the cape drawn lets work on the sides. For the sides draw a diagonal line from the end of the shoulder to the bottom edge of the fabric. Do the same to the
other side. If the bottom of your fabric is straight leave it like that if not draw a line from each bottom corner. Cut the cape following the lines.
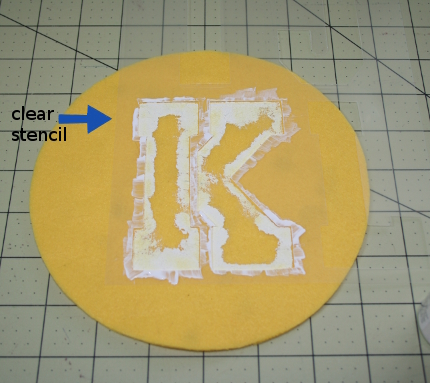
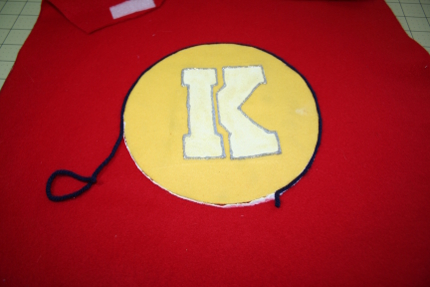
4. With the other color of fleece fabric cut a circle. I used a 2 quart saucepan that measured 7” in diameter to trace the shape into the fleece. Cut your circle (this is going to be the cape’s emblem).
5. For the “emblem” let’s make a letter. It could be your child’s initial, or an “S” for Superhero. Whatever you like. I bought a package of alphabet stencils for this, but you could print the letter from the computer, cut it, and trace it with a pencil. Fill in the letter using the small paint brush and acrylic paint. I added an extra detail with silver glitter paint going around the letter outline. Wait for the paint to dry.
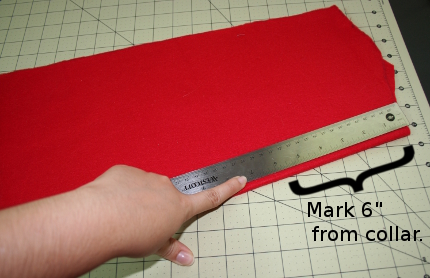
6. Take the cape and fold it in half lengthwise. Press the fold to find the center. Measure 6” from the collar and mark it. The top of your “emblem” should be in the 6” mark.
7. Following the hem tape instructions, iron on the hem tape to the back of the emblem, then the emblem to the cape. (You could also attach the emblem to the cape with fabric glue.)
8. To finish the emblem I added a piece of yarn around the circle and attached it with fabric glue. This is completely optional.
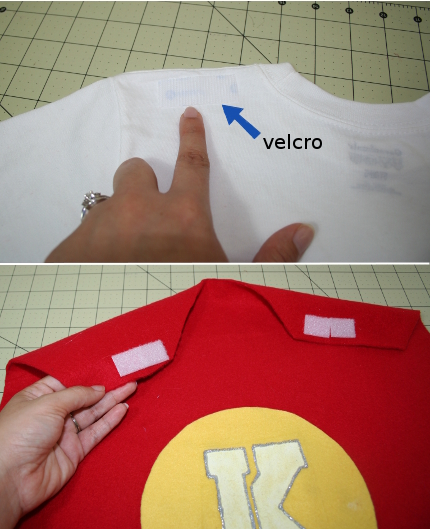
9. Iron the velcro (following the manufacturer instructions) to the back of the shoulders on the t-shirt and the back of the shoulders on the cape. I decided to use velcro on the back of the
shoulders instead of tying a cord in the neck because I think is a lot safer, especially when they are going to be running around with it. And, it comes with the added bonus that you could
make a bunch of interchangeable capes!
Call your child for a great surprise with this superhero cape. Have fun!!
All done! How did yours turn out?


Very cute! Once I got to the part about the velcro, and making several capes that can be attached and removed from the t-shirt, my mind started spinning with ideas of what kinds of different capes I could make! It doesn’t have to be superhero; it could be animals, dinosaurs, trucks & planes, fairies and woodsy themes, etc. For little kids who love to dress up, this is a super cute and easy way to give them lots of options.