
Get more details about this project
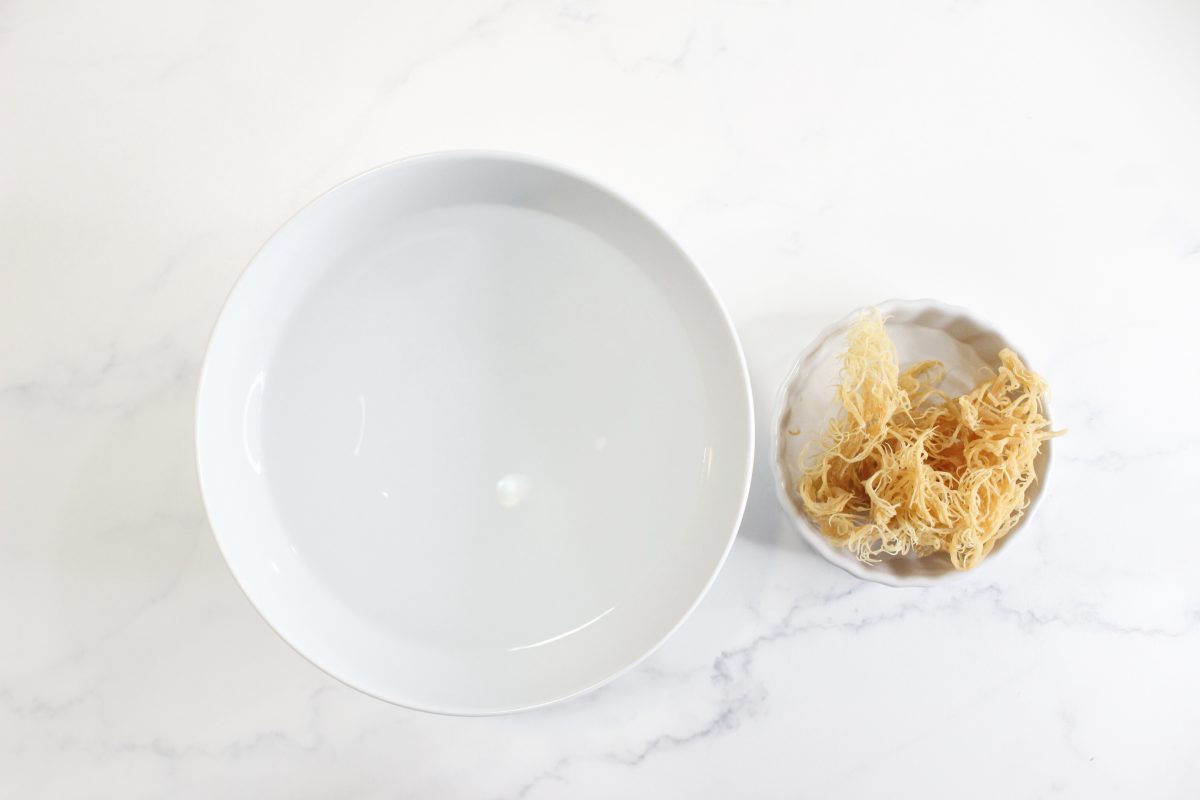
What you need
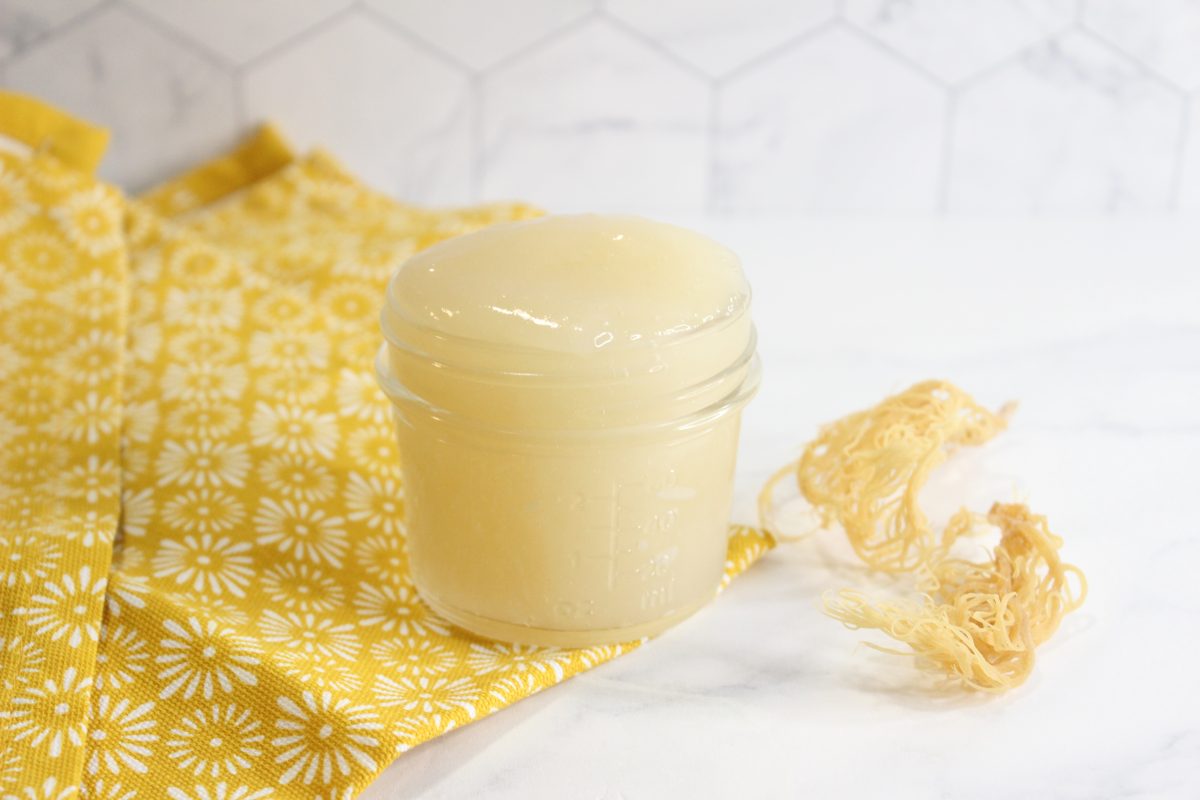
Chunk of sea moss
Water
Blender
Instructions
Hey there! So, let’s talk about sea moss, this ocean gem that’s making waves in the health world. Sea moss, also known as Irish moss or Chondrus crispus, is basically a type of seaweed that’s jam-packed with goodness. Here’s why it’s worth adding to your diet:
Benefits of Sea Moss:
Boosts your immune system: Think of it as your body’s little helper. Sea moss is loaded with vitamins and minerals, especially vitamin C, which can give your immune system a serious boost. So, say hello to fewer sick days!
Keeps your thyroid happy: Thanks to its iodine content, sea moss can keep your thyroid in check, helping it produce those important hormones your body needs to function properly.
Gives you that glow: Who doesn’t want radiant skin and luscious hair? Sea moss is like a beauty potion from the sea, packed with nutrients like collagen and sulfur that can work wonders for your skin and hair.
Keeps your gut in check: Gut health is all the rage these days, and sea moss can help you jump on the bandwagon. Its prebiotic properties can help your gut flora flourish, making digestion a breeze.
Protects your heart: Research suggests that sea moss might be a heart-healthy superstar. Some studies show it can help balance cholesterol levels and even act as a blood thinner, lowering your risk of heart disease.
Add the sea moss to a bowl of filtered water.

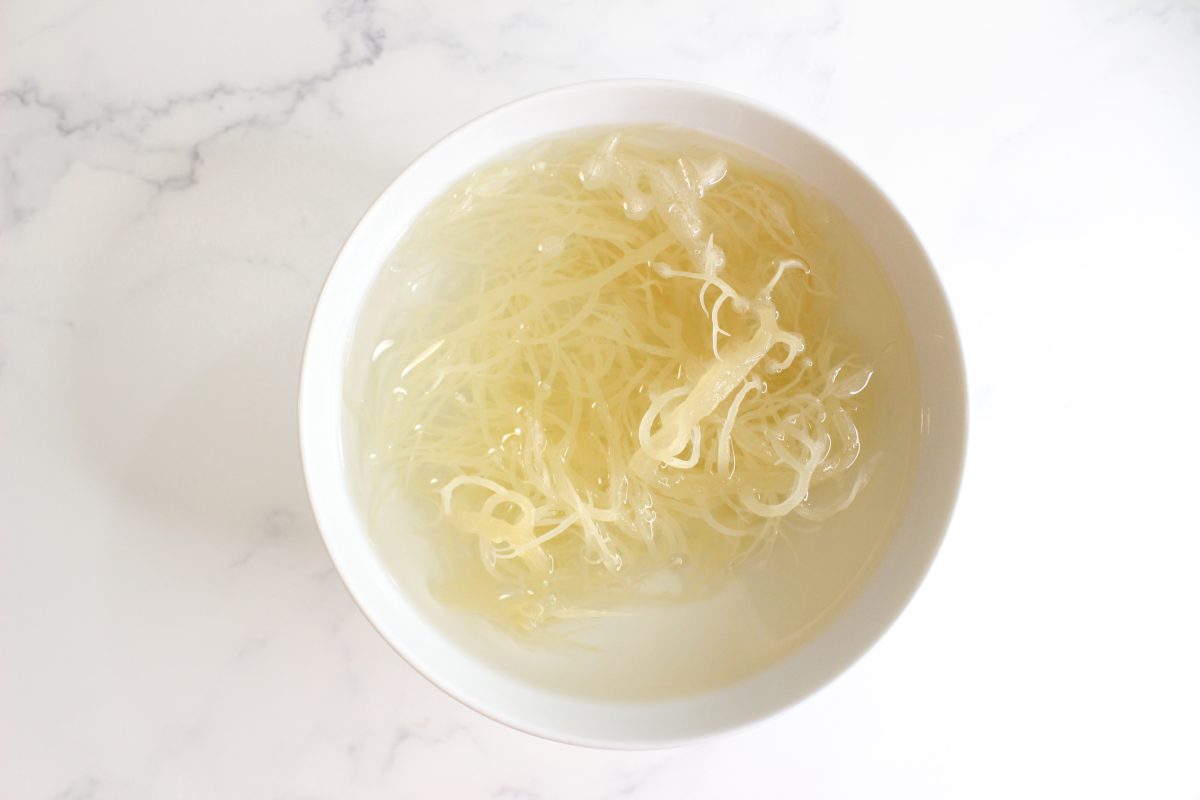
Make sure it is completely covered. Let sit for 48 hours covered. Make sure to use a bigger bowl since it will expand and get soft.
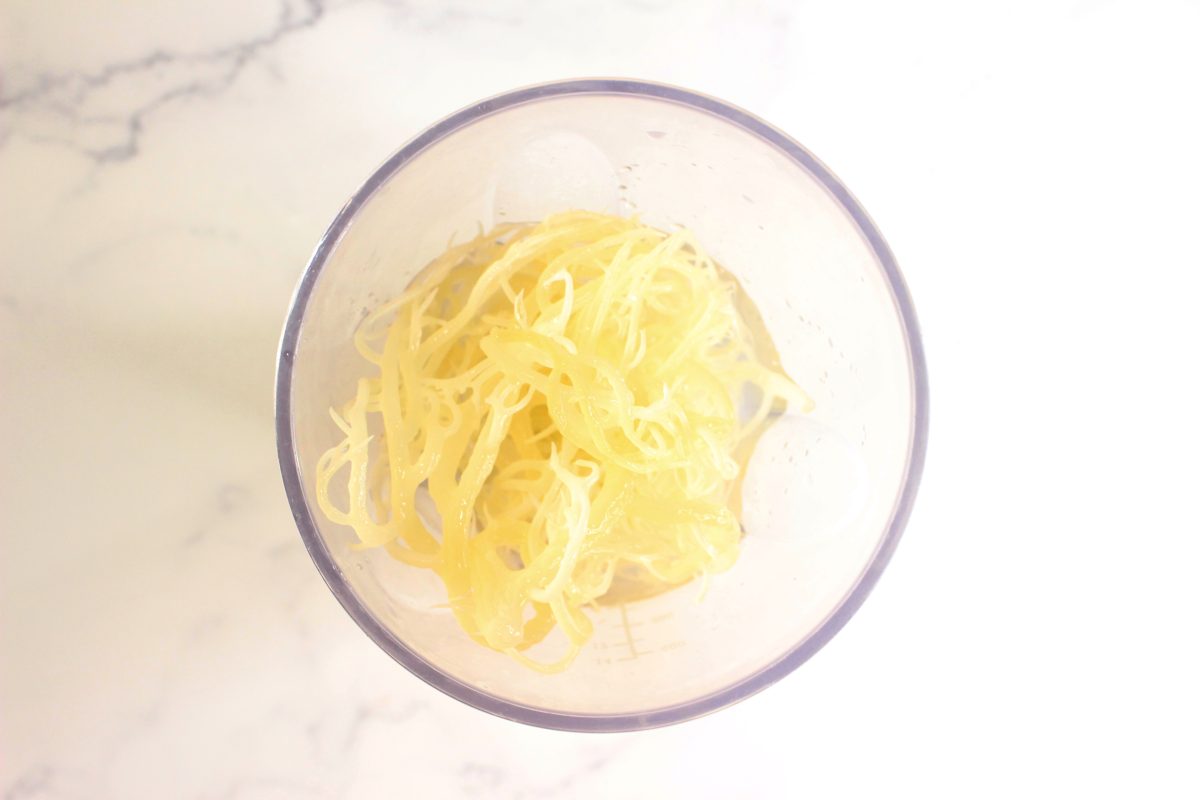
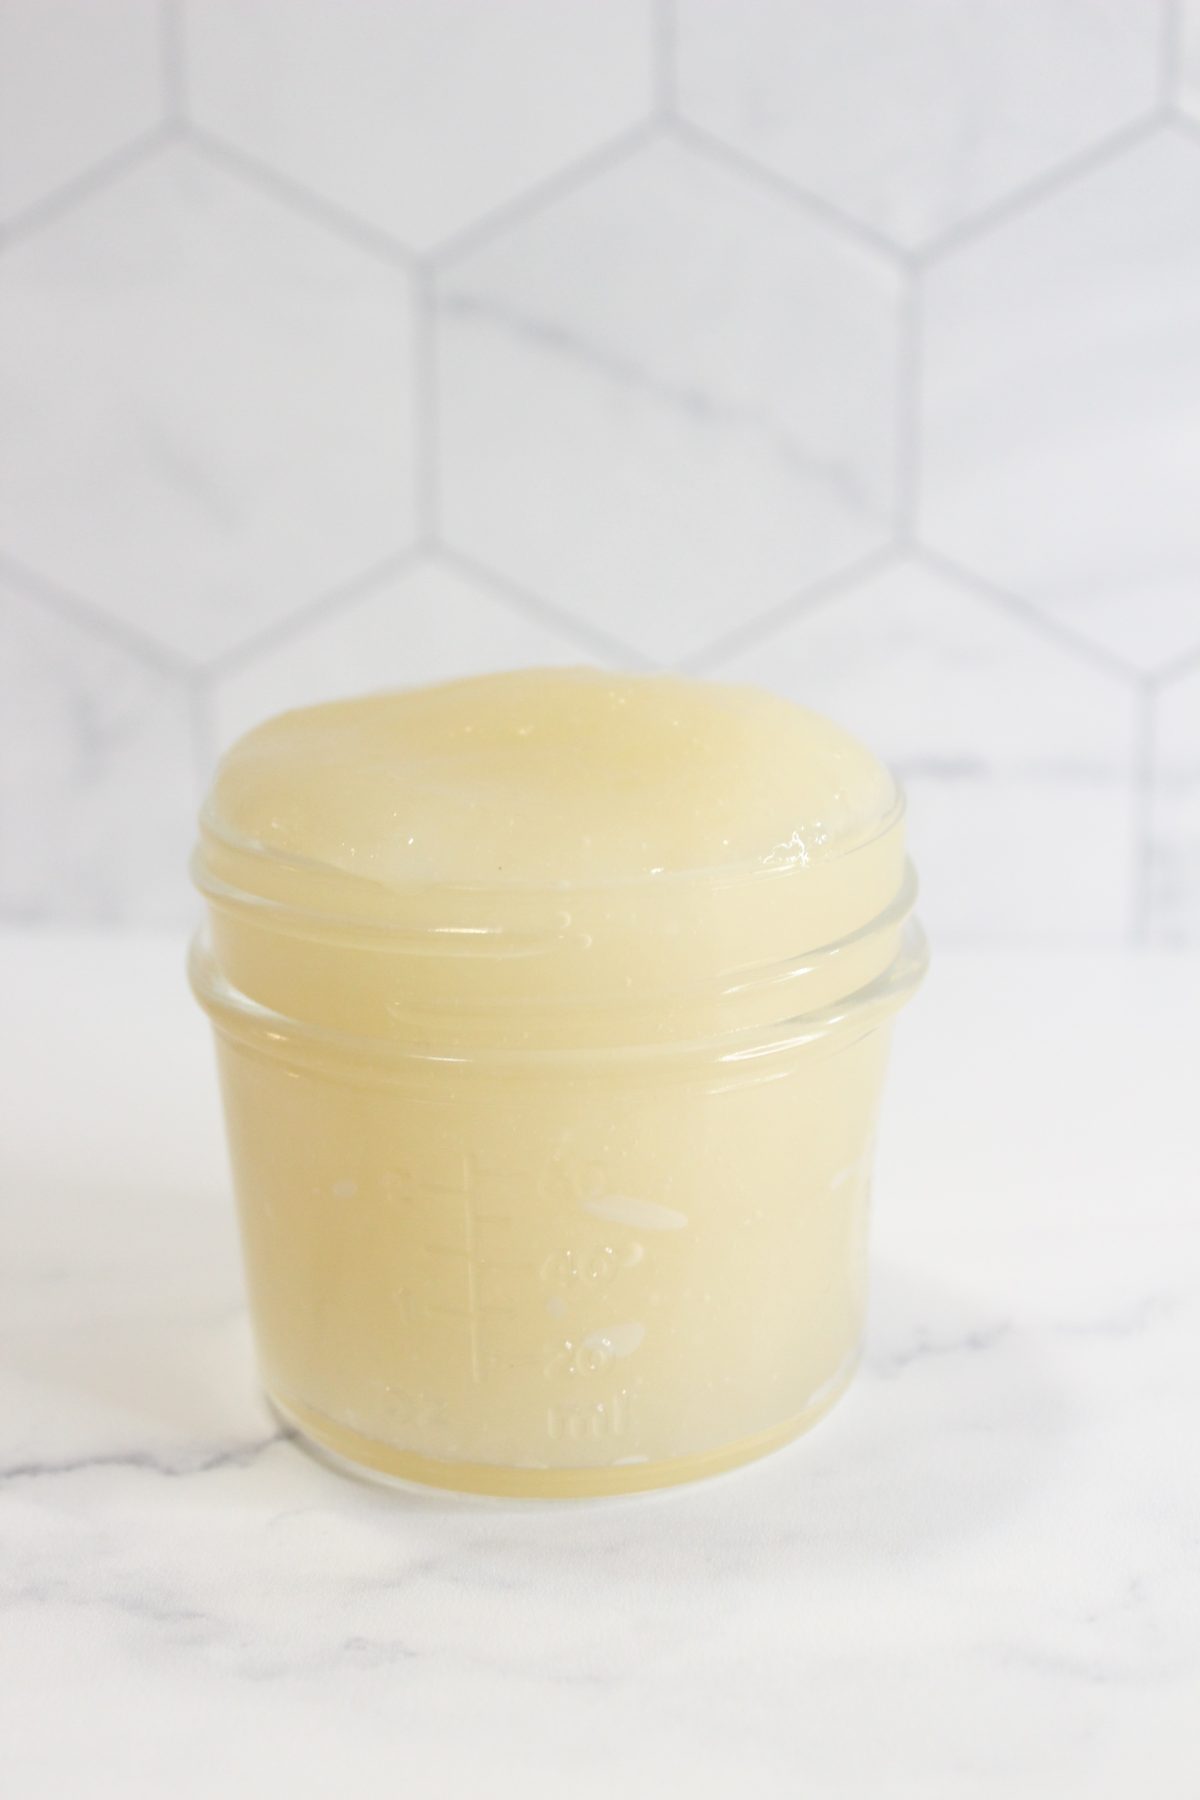
Drain the sea moss and add it to a blender with about 1 cup of filtered water. Blend until it is nice and smooth.
That’s it! Keep the sea moss gel in a closed container in your fridge for up to 4 weeks.
You will want a high-power blender to help you grind up the sea moss, otherwise it might be grainy.


So what do you do with this homemade sea moss gel ? This can be used in smoothies, oatmeal, face mask, soaps, pudding, jam, etc.
Creamy Sea Moss Smoothie Recipe
Ingredients:
- 1 cup almond milk (or any milk of your choice)
- 1 ripe banana, frozen
- 1/2 cup mixed berries (such as strawberries, blueberries, raspberries)
- 1 tablespoon homemade sea moss gel
- 1 tablespoon honey or maple syrup (optional, for sweetness)
- 1 teaspoon vanilla extract
- 1 tablespoon nut butter (such as almond or peanut butter, optional, for extra creaminess)
- Handful of spinach or kale (optional, for added nutrients)
Instructions:
- Prepare the Sea Moss Gel: To make the sea moss gel, rinse 1/4 cup of dried sea moss thoroughly to remove any debris. Soak the sea moss in water for 12-24 hours until it expands and becomes gel-like. Rinse again and blend with fresh water until smooth. Store the gel in an airtight container in the refrigerator for up to two weeks.
- Assemble Ingredients: In a blender, add the almond milk, frozen banana, mixed berries, homemade sea moss gel, honey or maple syrup (if using), vanilla extract, nut butter (if using), and spinach or kale (if using).
- Blend Until Smooth: Blend all the ingredients on high speed until smooth and creamy. If the smoothie is too thick, add more almond milk to reach your desired consistency.
- Serve and Enjoy: Pour the creamy sea moss smoothie into glasses and garnish with fresh berries or a sprinkle of chia seeds if desired. Serve immediately and enjoy the refreshing and nutritious boost!
Notes:
- Feel free to customize this smoothie recipe by adding your favorite fruits or superfoods.
- Adjust the sweetness by adding more or less honey or maple syrup according to your taste preferences.
- You can make a larger batch of sea moss gel and store it in the freezer for future smoothies or recipes.
- Experiment with different flavor variations by adding ingredients like cocoa powder, cinnamon, or protein powder.
Sea Moss Capsules are another great way to absorb sea moss into your system.
Frequently Asked Questions (FAQ):
Q: So, what exactly is sea moss?
A: Sea moss is basically a type of seaweed that grows in the ocean. It’s been used for centuries in various cultures for its health benefits.
Q: How do I use sea moss?
A: You can get creative! Blend it into smoothies, brew it into teas, or even use it as a thickening agent in soups and desserts. The possibilities are endless!
Q: Is sea moss safe to eat?
A: Yup, for most people it’s totally safe. But if you have any medical conditions or allergies, it’s always a good idea to check with your doc first.
Q: Can sea moss help me lose weight?
A: While it’s not a magic weight-loss cure, sea moss is low in calories and high in fiber, which can help keep you feeling full and satisfied.
Q: Are there any downsides to eating sea moss?
A: Well, like anything, moderation is key. Eating too much sea moss could cause some tummy troubles or allergic reactions in rare cases. Just listen to your body!
Can I take sea moss every day? Sea moss contains vitamins and minerals like vitamin C, which can help support a healthy immune system. Consuming it regularly may help your body fight off infections more effectively.
Nourishing Sea Moss Facial Mask Recipe
Ingredients:
- 1 tablespoon homemade sea moss gel
- 1 teaspoon raw honey
- 1 teaspoon aloe vera gel
- 1 teaspoon coconut oil (optional, for extra hydration)
- 2-3 drops of essential oil (such as lavender or tea tree oil, optional, for fragrance and additional benefits)
Instructions:
- Prepare the Sea Moss Gel: Ensure you have homemade sea moss gel ready. If not, refer to the previous recipe to make it.
- Combine Ingredients: In a small bowl, mix together the sea moss gel, raw honey, aloe vera gel, coconut oil (if using), and essential oil (if using). Stir well until all the ingredients are thoroughly combined.
- Apply to Face: Gently cleanse your face with a mild cleanser to remove any dirt or makeup. Pat your skin dry with a clean towel. Using clean fingertips or a facial brush, apply the sea moss facial mask evenly onto your face, avoiding the delicate eye area.
- Relax and Let it Work: Once applied, relax and let the nourishing mask work its magic for about 15-20 minutes. You may feel a slight tightening sensation as the mask dries.
- Rinse Off: After the mask has dried or when you’re ready to remove it, rinse your face thoroughly with lukewarm water. Gently pat your skin dry with a soft towel.
- Moisturize: Follow up with your favorite moisturizer to lock in hydration and keep your skin feeling soft and supple.
- Repeat Weekly: For best results, incorporate this sea moss facial mask into your skincare routine once a week to rejuvenate and nourish your skin.
Notes:
- Patch test the mask on a small area of your skin before applying it to your entire face, especially if you have sensitive skin or are prone to allergies.
- Customize the mask by adding ingredients like mashed avocado or cucumber puree for additional hydration and soothing properties.
- Store any leftover mask in an airtight container in the refrigerator for up to one week.
Soothing Sea Moss Acne Spot Treatment Gel Recipe
Ingredients:
- 1 tablespoon homemade sea moss gel
- 2-3 drops tea tree essential oil
- 1 teaspoon aloe vera gel
- 1 teaspoon witch hazel extract (optional, for additional astringent properties)
- 1/2 teaspoon raw honey (optional, for added antibacterial benefits)
Instructions:
- Prepare the Sea Moss Gel: Make sure you have homemade sea moss gel ready. If not, refer to the previous recipe to prepare it.
- Mix Ingredients: In a small bowl, combine the sea moss gel, tea tree essential oil, aloe vera gel, witch hazel extract (if using), and raw honey (if using). Stir well until all the ingredients are thoroughly mixed.
- Apply to Acne Spots: Cleanse your face with a gentle cleanser and pat dry. Take a small amount of the sea moss acne spot treatment gel on clean fingertips and dab it directly onto acne-prone areas or individual acne spots.
- Let it Absorb: Allow the gel to absorb into the skin for a few minutes. Avoid rubbing or touching the treated areas to prevent irritation.
- Repeat as Needed: Use the sea moss acne spot treatment gel twice daily, in the morning and evening, or as needed. It can be applied under makeup during the day and as part of your nighttime skincare routine.
- Moisturize: Follow up with a lightweight moisturizer to keep your skin hydrated and balanced.
Notes:
- Perform a patch test before applying the spot treatment gel to ensure you don’t have any adverse reactions, especially if you have sensitive skin.
- Tea tree oil is known for its antibacterial properties, making it effective for treating acne. However, some individuals may be sensitive to it, so use it cautiously.
- Aloe vera gel helps soothe inflammation and irritation, while witch hazel extract provides astringent properties that can help tighten pores and reduce oiliness.
- Raw honey has natural antibacterial properties that can help combat acne-causing bacteria and promote healing.
- Store any leftover spot treatment gel in a sealed container in a cool, dark place for up to one week.


What do you think of this project? Let us know!