
Get more details about this project
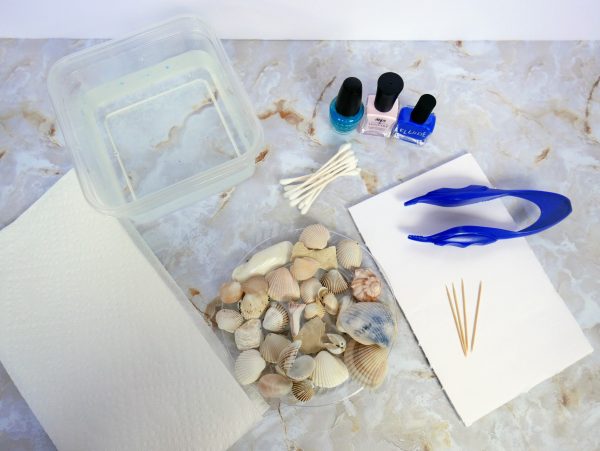
What you need
Medium bowl of lukewarm water
Seashells in all shapes and sizes
Tweezers (I used a large plastic pair from Dollar Tree, but any
tweezers could be used, or even a pair of tongs)
6-8 cotton swab sticks
4-6 toothpicks
Paper towels
Scrap piece of foam board, or plate covered in wax paper
Nail polish in varying colors
Instructions
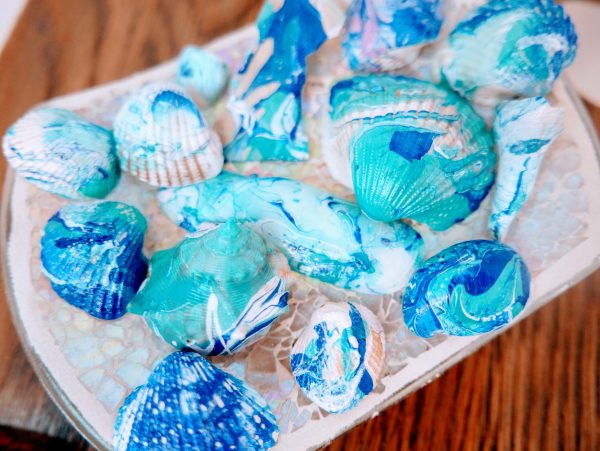
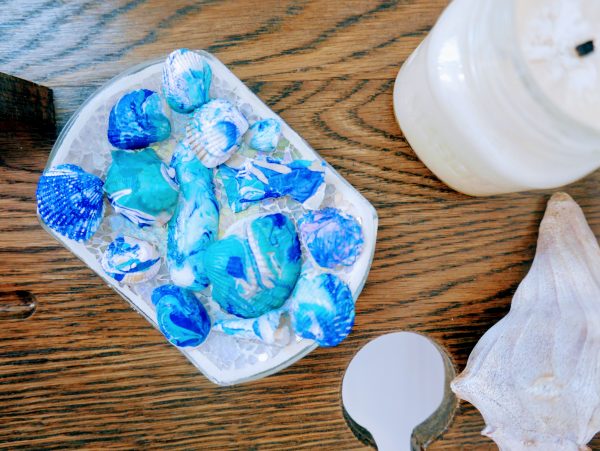
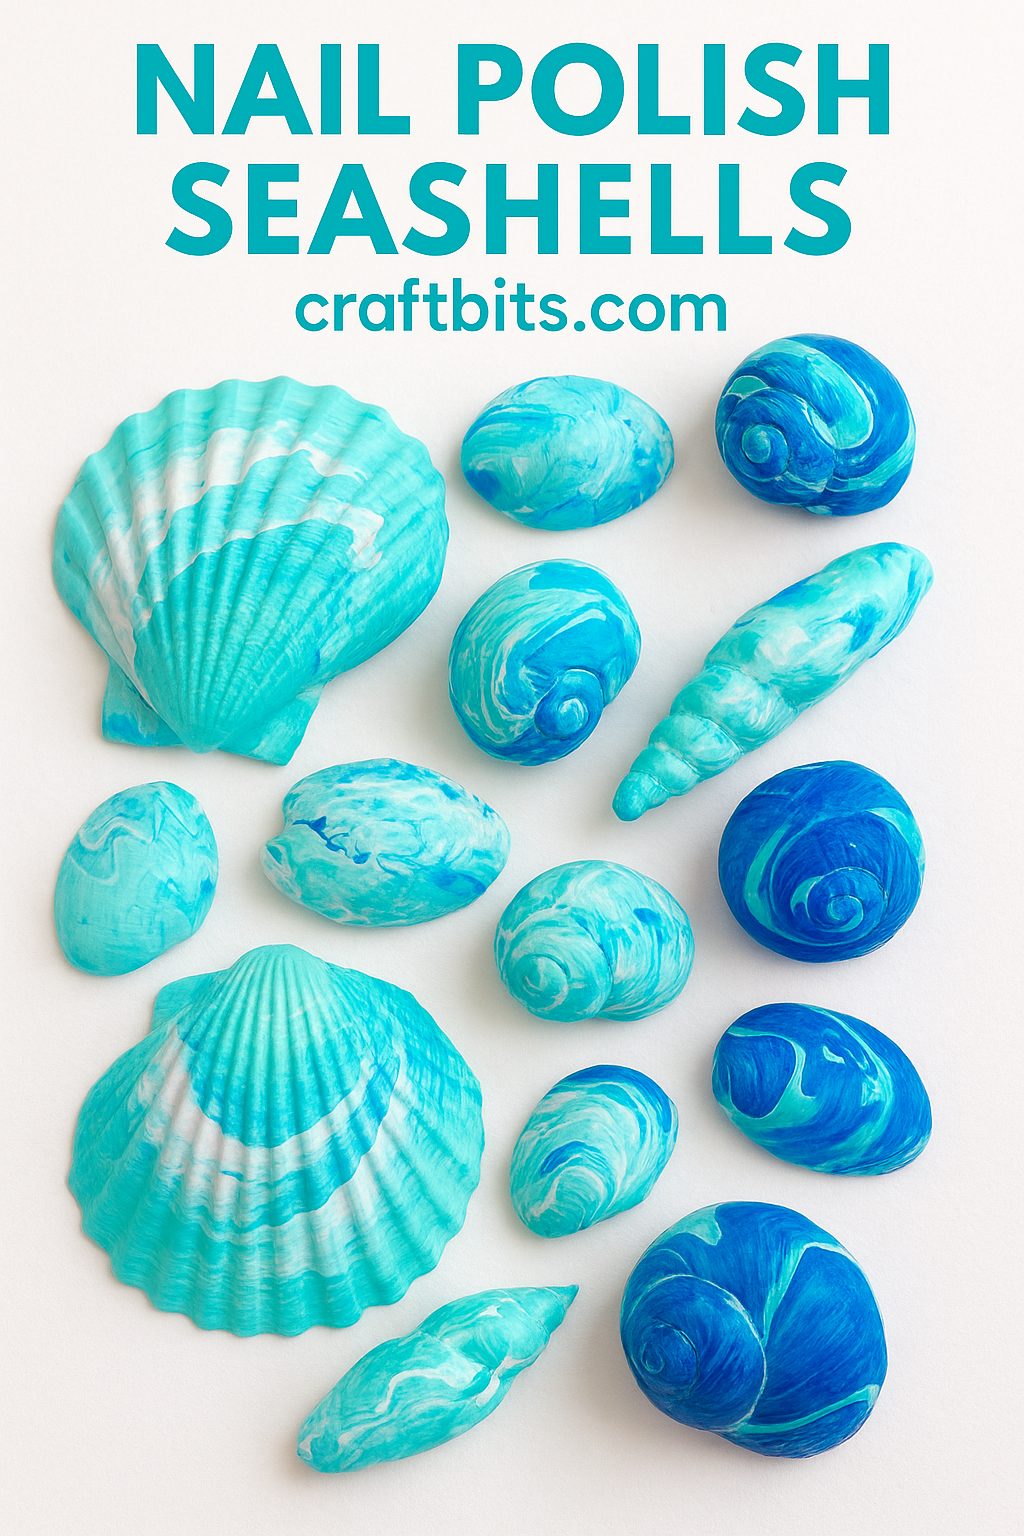
Decorating keepsake seashells with nail polish is a fun and creative way to add a personal touch to your collection of shells.
The process is simple, yet the results are stunning. All you need is a selection of seashells and some nail polish.
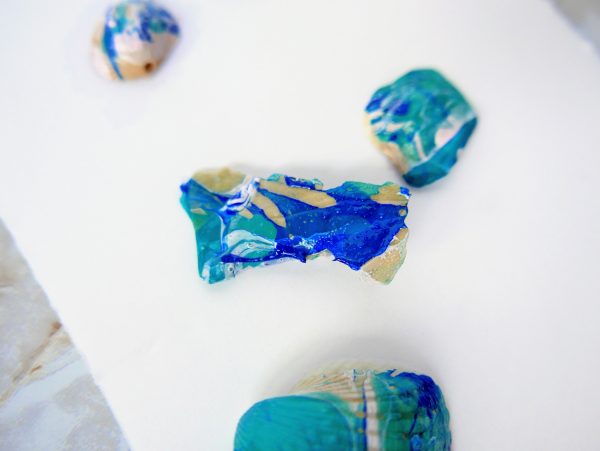
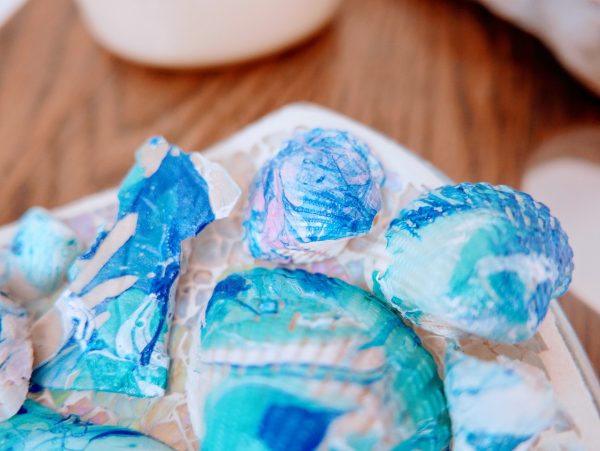
The technique involves dipping the shells into the nail polish, which creates a marbled effect that is both beautiful and unique. This is a great way to showcase your artistic side, and it’s a fun project to do with friends or family.
Not only will you have a beautiful collection of shells to display, but you will also have a fun and memorable experience creating them.
This activity is also great for an afternoon or weekend project and it’s perfect for both kids and adults.
Whether you’re a seasoned crafter or a beginner, you’ll find that decorating seashells with nail polish is a fun, easy and inexpensive way to add a little sparkle to your life.
So, gather your materials, roll up your sleeves and let’s get started on creating some beautiful, marbled keepsake seashells!
Directions:
1. Make sure you are working in a very well ventilated area. The nail polish has a very strong scent, so it’s best to do this project outside, or with the windows open.
2. Start by filling a medium bowl with lukewarm water. If the water is too cold, the nail polish won’t spread easily.
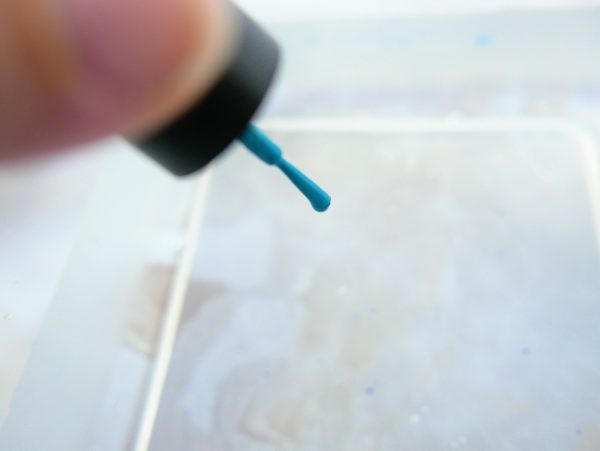
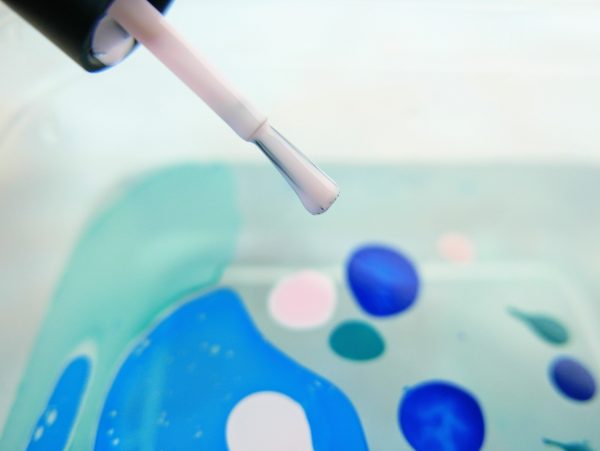
3. Open the lid to each nail polish you will be using. The nail polish dries on the surface of the water very quickly, so it’s important to work as fast as possible, and having the nail polish open helps speed up the process.
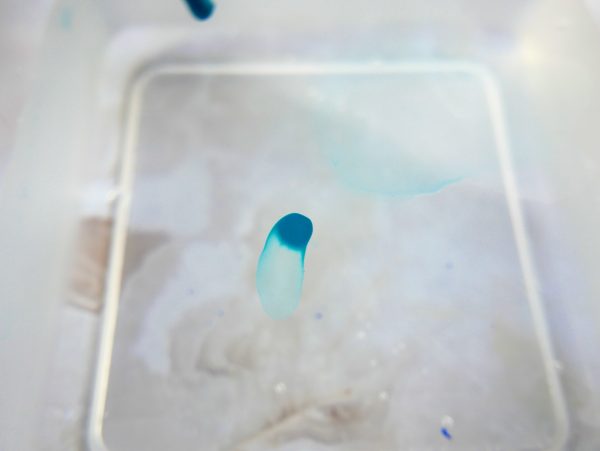
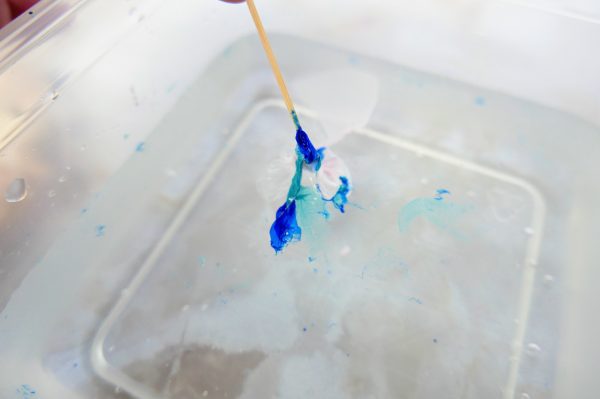
4. Starting with your first bottle of nail polish, hold the brush as close to the water as possible, and shake gently until the nail polish drips on the surface.
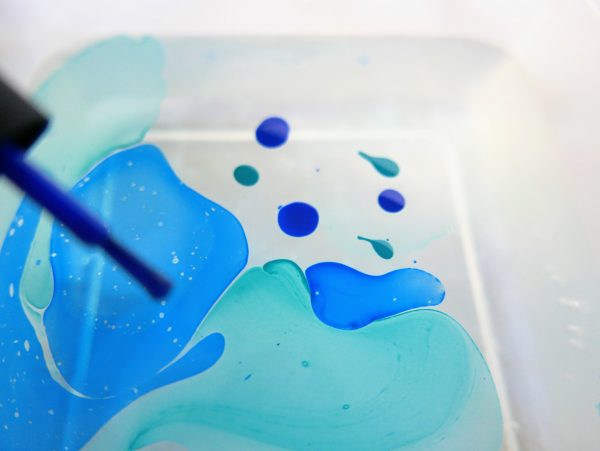
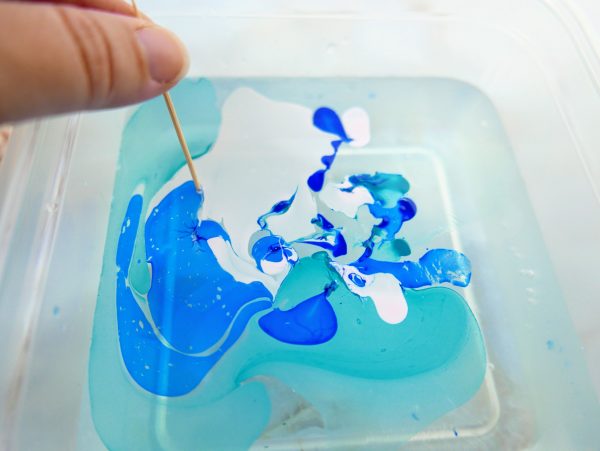
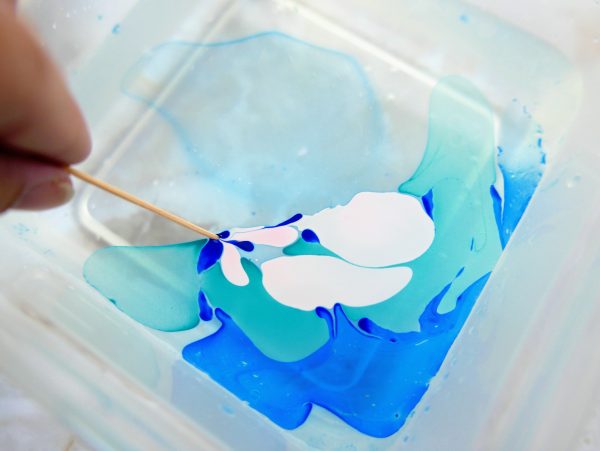
If you drop the polish from too far above, it will sink to the bottom. Add additional colors to the water, and then using a toothpick, lightly swirl the colors together.
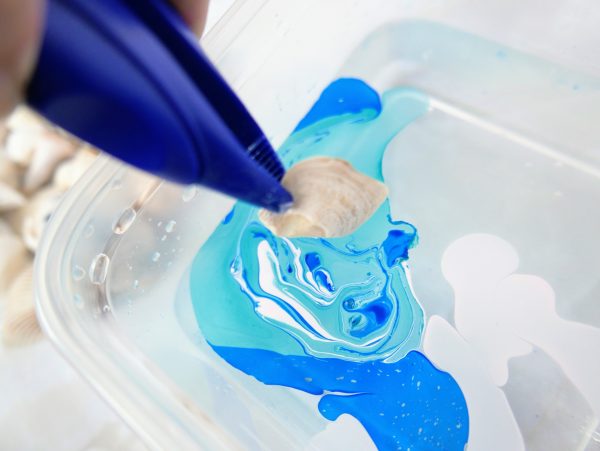
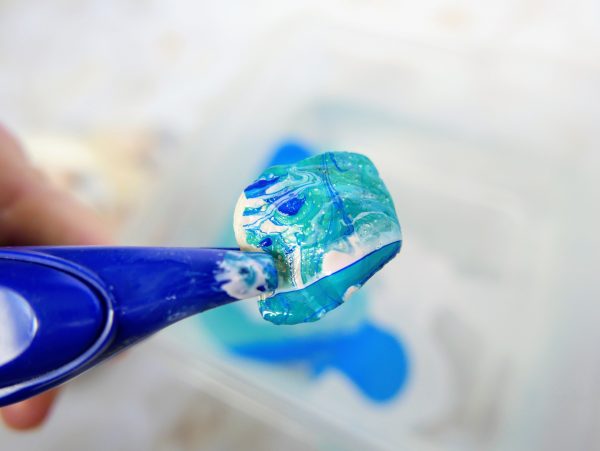
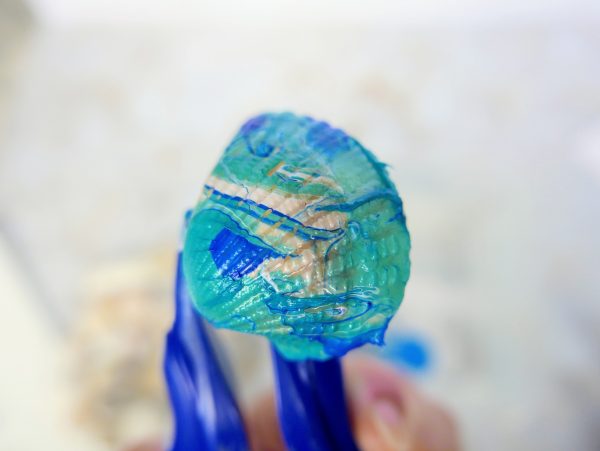
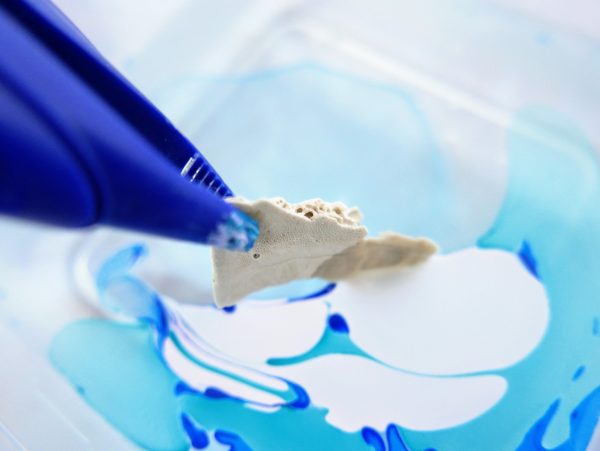
5. Remember the nail polish will dry rather quickly, so as soon as you finish swirling, hold the seashell with tweezers, dip into the water, then remove and place on the foam board to dry.
6. I was able to dip 1-2 seashells at a time before the nail polish dried on the surface of the water.
Once you have dipped the seashells, use a toothpick or cotton swab stick to swirl the remaining nail polish off the surface, and discard on a paper towel.
7. Repeat the process of dripping nail polish on the surface of the water, and dipping each seashell. You will also have to repeat the process of cleaning the excess off the surface with a toothpick or cotton swab stick.
8. Once all seashells have been dipped in the nail polish, leave them on the foam board until they are completely dry. Once dry, they are ready to be enjoyed as decoration.


would this work on rocks and tiles
Yes.It would work on rock s and tiles.
Do you think this can be done to glass as well?
I don’t see why you couldn’t use it on glass. I have successfully utilized this method for flower pots, and they have turned out to be absolutely stunning.
Oh my goodness These are so beautiful! I can’t wait to try your brilliant technique! I’m a beachy vibe loving kind of woman and these are so beachyThank you so very much for sharing your brilliant craftiness
I can hardly wait to try this. I have hundreds of seashells and plenty of bottles of fingernail polish.
Beautiful can’t wait to do some!!!
Fabulous can’t wait to try this
Looks like fun and beautiful shells!
Love this idea! I have loads of half used nail polishes so this is a brilliant way to use them up!
My nieces mermaid Bday is around the corner love these ideas for crafts my daughter and I can make as gifts! Thank You very easy to follow instructions with great tips!
Wonderful idea. Will try it out with a seniors craft group I am involved with,
Loved this idea! I run an after-school crafting club for teens, and we made fingernail dipped Christmas ornaments last year. When I saw this idea, I thought of using white tiles to make fingernail polish dipped coasters. The kids had a blast! They told me it was the most fun they had in Craft Club-ever! Thanks for the idea-
Do you think this technique would work on small rocks as well?
Yes 100%