
Get more details about this project
What you need
Supplies:
1. Felt
2. Hotglue gun
3. Scissors
4. Pencil – to trace patterns
5. Stuffing
Instructions
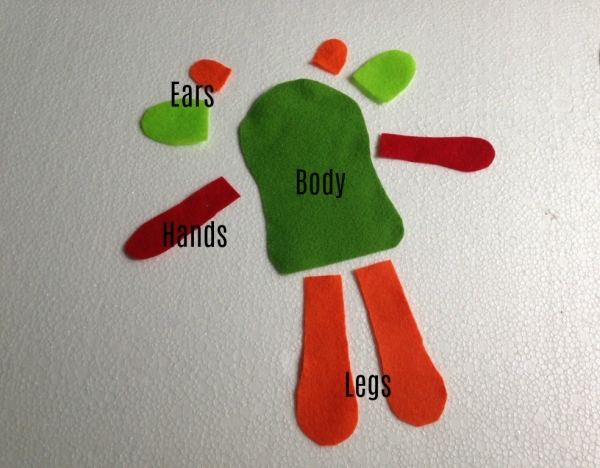
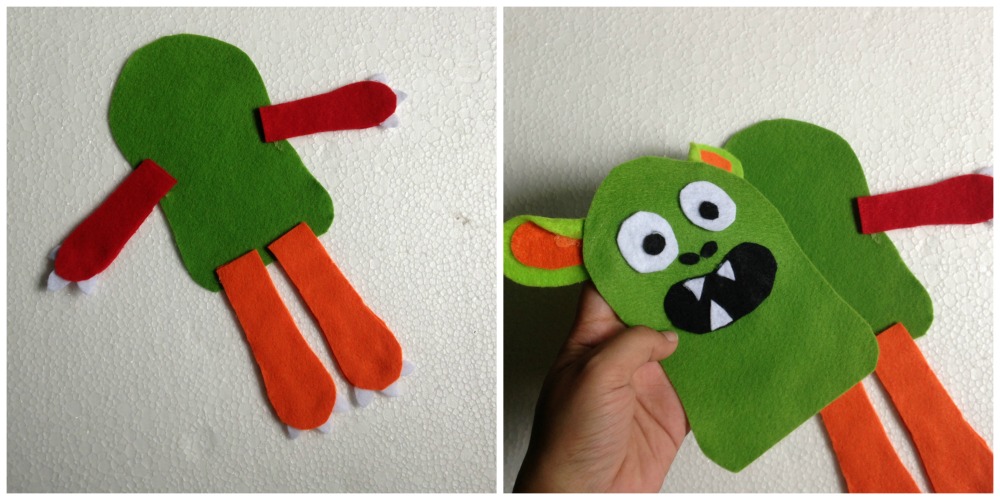
Step-1: Remember to choose bright colors for this plushie. In this picture you can see the basic pattern of the plush I made. It includes- body, legs, hands, ears. You will need 2 pieces of patterns for each leg, hand and the body.
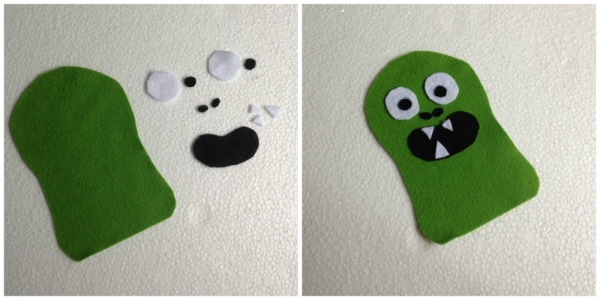
Step-2: For the face details I used black and white felts to create the eyes, nose, mouth and teeth. Use hotglue gun to attach the face details on their places, on the front pattern of the body.
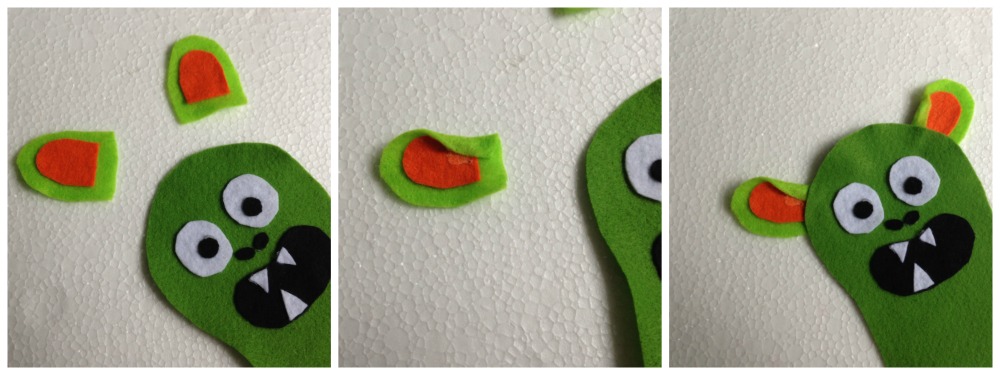
Step-3: Glue the orange ear piece on the top of the green ear piece and then slightly fold a side to create the ear for the plush. Attach the ear on the back side of the front body piece.
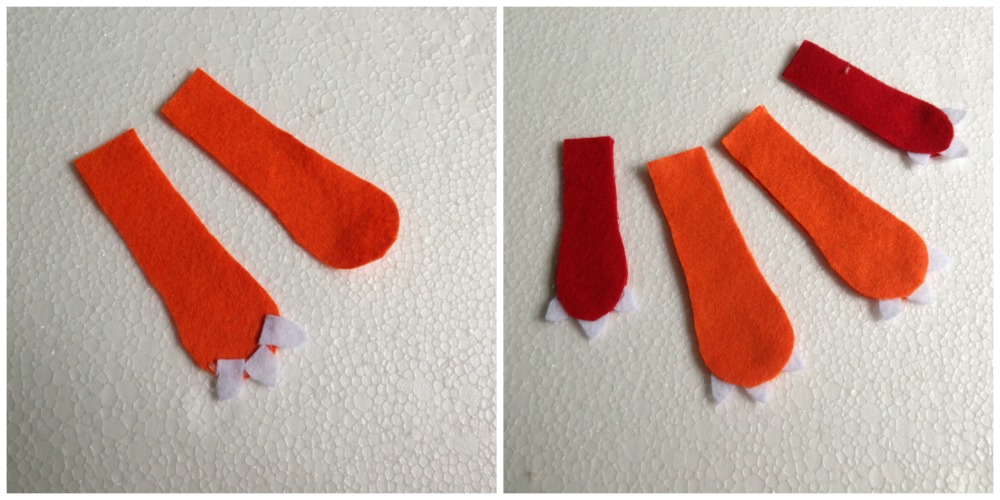
Step-4: Use white felt to cut out 12 triangular nail patterns and attach 3 nails on 2 leg and 2 hand patterns as shown in the picture. Place the other piece of the hands and legs on the top of the nail glued pieces. Use hot glue gun to attach both pieces together. This means that the nails need to be glued in between the 2 pieces of each part (hands and legs).
Step-5: Glue the hands and legs with the body piece for the back side of the plush. Now take the front piece with face details and place it on the top of the back piece. Carefully attach the sides of the front and back body pieces but don’t forget to keep a small open end for stuffing.
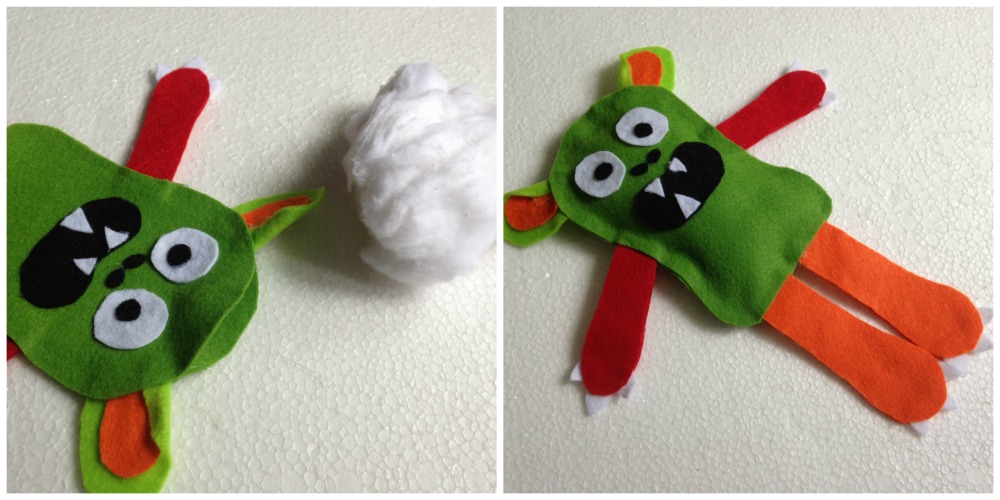
Step-6: Insert wool or scrap fabric through the open end of the plush. After you’re done filling the plush use hotglue gun to close the open end and secure the stuffing.
You can add more details if you wish to.
Happy crafting!


What do you think of this project? Let us know!