
What you need
Colorful wooden beads, beading string, scissors, jewelry end caps, jewelry closure (lobster claw clasp and jump ring) and extra chain.
Instructions
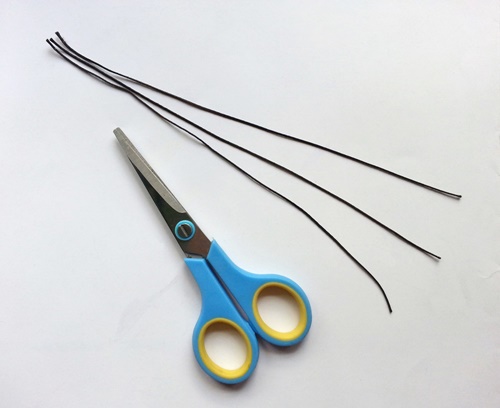
Step (1): Measure your bracelet size. Cut 3 or more strands of beading string by keeping an inch extra than the required bracelet size.
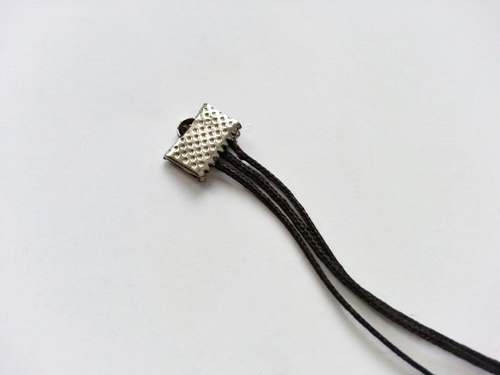
Step (2): Hold all the strings together and attach the jewelry end cap to secure the strings and for attaching the closure later.
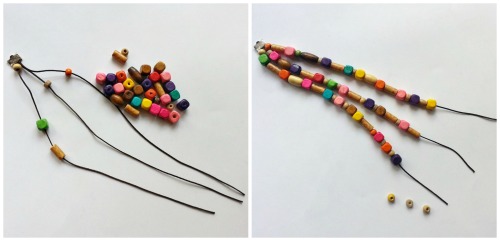
Step (3): Start beading the strings with the beads of your choice. I used different kinds and colored wooden beads for this bracelet, they look stunning! Try to keep a nice and sound combination while beading. Keep beading all the strings until they reach the required bracelet size.
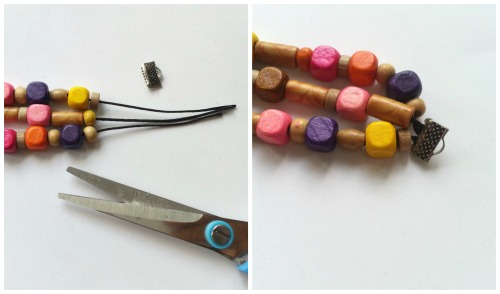
Step (5): After reaching the required bracelet size you may trim extra strings if needed. Hold the strings together carefully and prepare the other end cap. Attach the end cap at the end of the beaded strings.
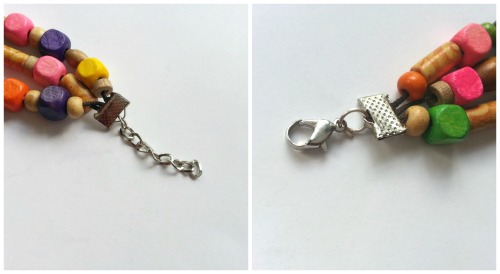
Step (7): Join an extra chain with any one of the jewelry end caps, so that you can adjust the bracelet size as you want. With the other jewelry end cap, join the lobster claw clasp. You may also use other kinds of jewelry closures, this depends on your choice.

Step (9): Done attaching the closure? Great! The bracelet is ready. Now wear it and enjoy!

Looking for more DIY Jewelry tutorials? Check out our DIY Jewelry Making blog with 100’s of free tutorials.


different and great way to use wood beads
like it a lot
Looks like fun!