
What you need
PDF pattern (See below)
Fabric
Bias tape
Batting

*Notes:
Print the PDF pattern without any page scaling.
Instructions
Ever felt lazy to change bags because it’s just easier to take that same old bag that you’ve been taking everywhere since it’s a hassle to transfer the contents inside your bag?
Well you can say goodbye to those problems with this simple bag organizer!
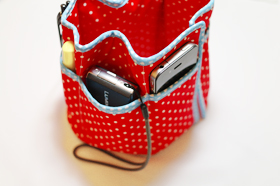
With 7 pockets that can fill a variety of things from notebooks to phones to mints, pens, and makeup, this collapsible form can fit medium to large sized bags with no difficulty – just open it up to increase the radius for larger bags (you can put big items in the middle, ie books, water bottle, sandwich bag), and wrap it around snugly to fit into smaller hand bags.
All your items will be easily accessible since they’ll always be standing inside your bag! Make it in bright colors for that pop of color to brighten your day, or in neutral hues for an inconspicuous look.
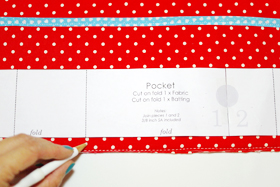
Step 1: Pattern
Download the Bag Organizer Pattern.

Print out pattern, join pieces 1 and 2 by aligning the grey circle as pictured above. Cut fabric and batting according to pattern instructions.
Step 2: Preparing the Pocket piece
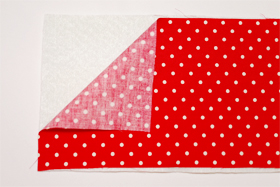
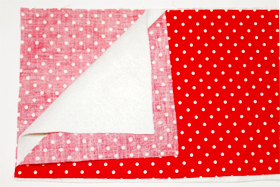
Place Pocket fabric wrong side down on top of the batting piece.
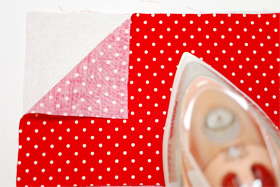
If your batting is fusible, the fusible side with the glue should be facing the wrong side of your fabric. Set your iron set to medium heat and press to fuse the fabric to the batting.
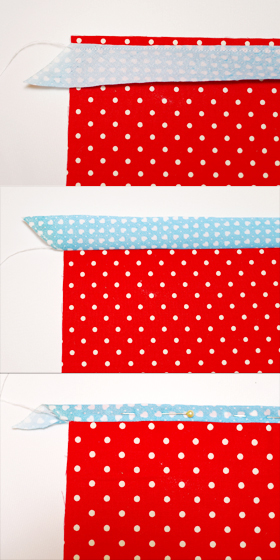
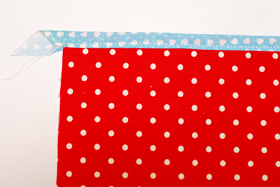
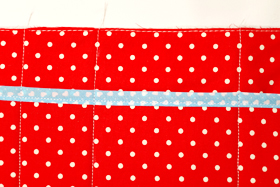
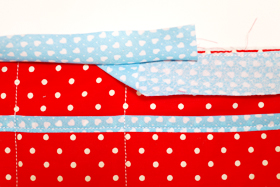
Now we will be wrapping the top edge of the Pocket piece with the bias tape. Place the bias tape face down so that the right side meets the right side of the Pocket fabric.
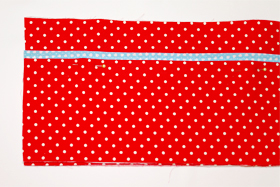
Stitch down, then flip over the bias tape so that it encases the raw edge and fold it under.
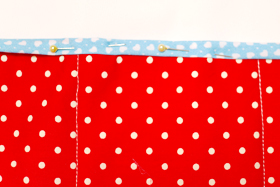
Carefully pin it in place so that the raw edge of the bias tape is tucked under enough to be caught by the stitches later.
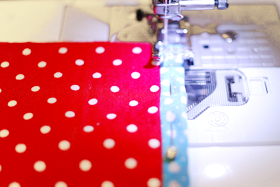
Top stitch all the way, removing the pins as you go along.
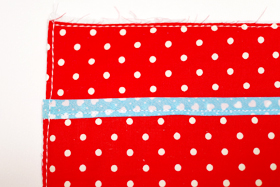
Done with the Pocket piece
Step 3: Preparing the Body piece
Sandwich the batting in between both the fabric for the Body piece. Fabric’s wrong sides should be facing out. If you’re using fusible batting, iron it on now with medium heat.
Place the Pocket piece on top of the Body piece, aligning the side and bottom edges together. Pin in place.
Stitch all around as close to the edge as possible to join both pieces together.
Using the Pocket pattern piece, mark the vertical dashed lines onto the fabric.
Tip: Use a ruler and draw a thin line for a clearer guide.
Top stitch from top to bottom, following the markings you made. You’ve successfully created the pockets!
Step 4: Bias tape finishing
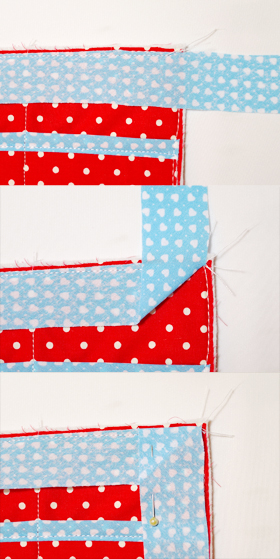
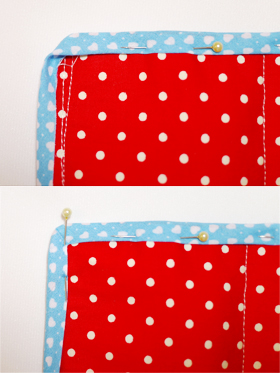
With right sides facing, pin down the bias tape until it reaches the corner, and stop. Fold the starting edge so that it angles 45 degrees, as this will help hide the raw edges later.
Stitch along where you’ve pinned, until it reaches the corner.
When you reach the corner, back stitch to end the stitch.
Fold the bias tape upwards so that it forms a 45 degree angle, and press down with your fingers.
Fold the bias tape down again so that it’s parallel to the side edge of the fabric. Pin down, and stitch from the top.
When you remove the pins, you should have this angled fold on the corner. Continue sewing the bias tape all around the entire piece, using the same technique on all corners.
When you reach the point you started, continue sewing the bias tape so that it overlaps your starting edge.
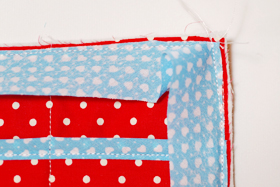
Flip over the bias tape so that it encases the raw edge of the fabric. Fold the raw edges of the bias tape under and pin it down. We will be top stitching all around later.
When you reach the corner, simply use your finger to press it down past the edge—you will notice there will be a 45 degrees angle being made on the top of the bias tape.
Then fold the perpendicular bias tape over, and you will have a nice folded corner on your bias tape.
Pin down, and continue all around.

Top stitch all round, making sure your stitches catch both sides of the bias tape.
You’re done! Enjoy your new bag organizer!


My printed out pattern was a miniature and doesn’t include dimensions. Could you provide those?
Thank you,
Sincerely,
Sharon
davieshaus@att.net
How much material?
just made one of those today, it’s brilliant! thank you so much for that easy to follow tutorial and the pattern. I will make a few more as presents for my girls. Stef xx
This is a great idea. I plan to make several.
Super! I have to give this a try!