
Get more details about this project
What you need
You only need a few materials to begin your cross stitch projects, all of which can be easily found at any craft store.
Fabric
The most commonly used fabric in modern cross stitch projects is Aida cloth. Aida cloth is a woven fabric which has evenly spaced holes that create a square grid.
Size 14 means that you can make 14 stitches per inch.
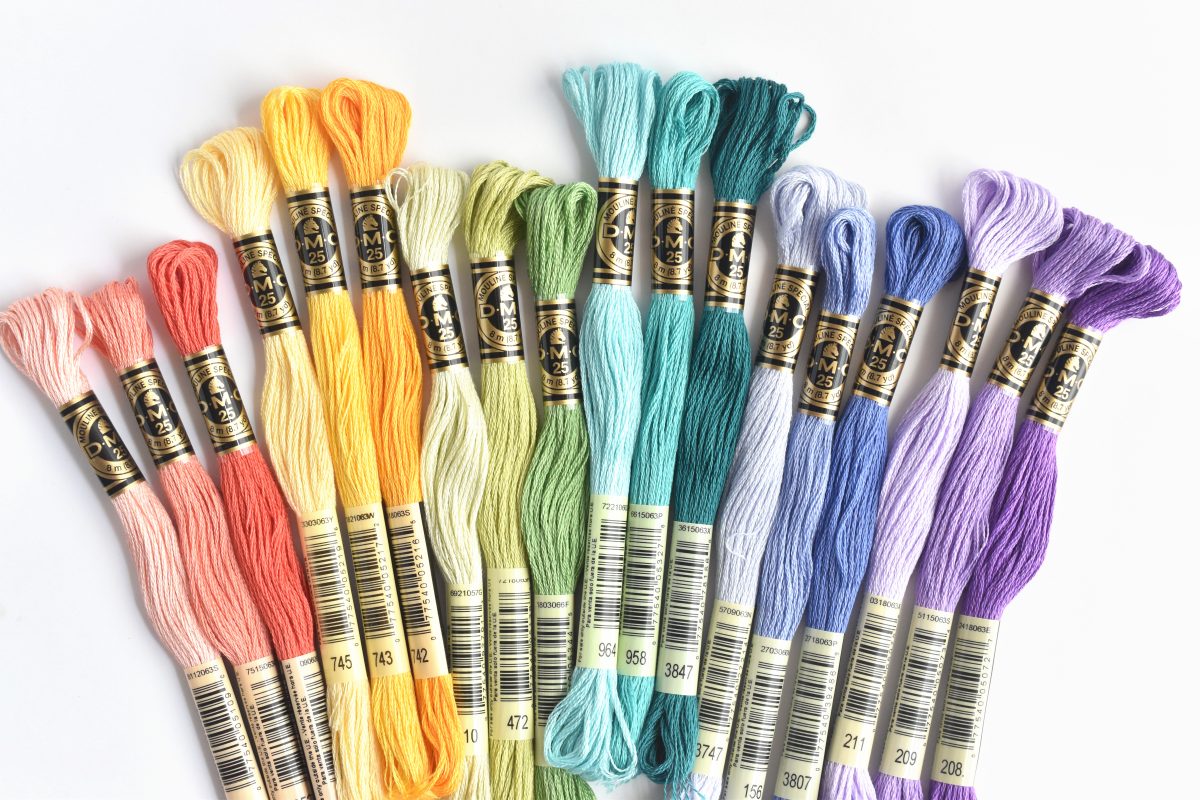
Floss
DMC is one of the largest brands of embroidery floss, and it is available at most craft and fabric stores.
Cross Stitch Needle
Cross stitch needles have a large eye and blunt tip (no worries of pricking your finger here!)
Embroidery Hoop
Embroidery hoops, generally made of either bamboo or plastic, hold the fabric taut while you’re stitching.
Additional Tools
Here are some other handy tools you’ll want to have available:
- Scissors to cut floss or fabric
- Water-soluble fabric marker for marking your fabric
- Pencil, in case you need to mark your pattern
Instructions
Using the Hoop (or Not)
Use an embroidery hoop to hold your fabric taut while you stitch. A 6-inch hoop is a popular size; it fits comfortably in your hand while you stitch, and it can fit in a backpack or purse for some stitching on the go.
PLACING YOUR FABRIC IN A HOOP
To place the fabric in a hoop, loosen the screw at the top of the hoop. Set the inner hoop on a flat surface and lay your fabric on top. Evenly press the outer hoop over the fabric and inner hoop. Tighten the screw.
If the fabric feels too stiff to place in a hoop, iron it a little and put it in the hoop while it’s warm.
MOVING THE HOOP
Some designs, including ones in this book, may be larger than your hoop can hold all at once. That doesn’t mean you should go buy a larger hoop. You will simply reposition the fabric as you work through the project. Once you complete the part of the pattern that is in the hoop, loosen the hoop and reposition the fabric so that the unstitched section is now within the hoop.
Please note that you will need to remove the fabric from the hoop at the end of each stitching session so that it will not damage the completed stitches. As long as you do this, any signs of squashed stitches will be removed once you wash your finished piece.
STITCHING WITHOUT A HOOP

You can also cross stitch without an embroidery hoop! This method is perfect for working on a large design and can also be a little faster. To stitch without a hoop, roll the extra fabric and hold it in your non-dominant hand. When stitching, dip your needle down through the fabric and then bring it back up through the hole for the next stitch.
Handling Embroidery Floss
Start by cutting a piece of embroidery floss that’s about 36 inches long. The six strands in each skein of floss are designed to be separated. Pull out one strand of thread and fold it in half. This forms two strands of floss to use for your stitching. Set the remaining strands aside for later use.
The folded piece of floss should be about as long as your arm, so you can use your arm as a measuring guide. Pulling a longer length of floss through the Aida cloth will have a higher risk of knots and tangles.
THREADING YOUR NEEDLE
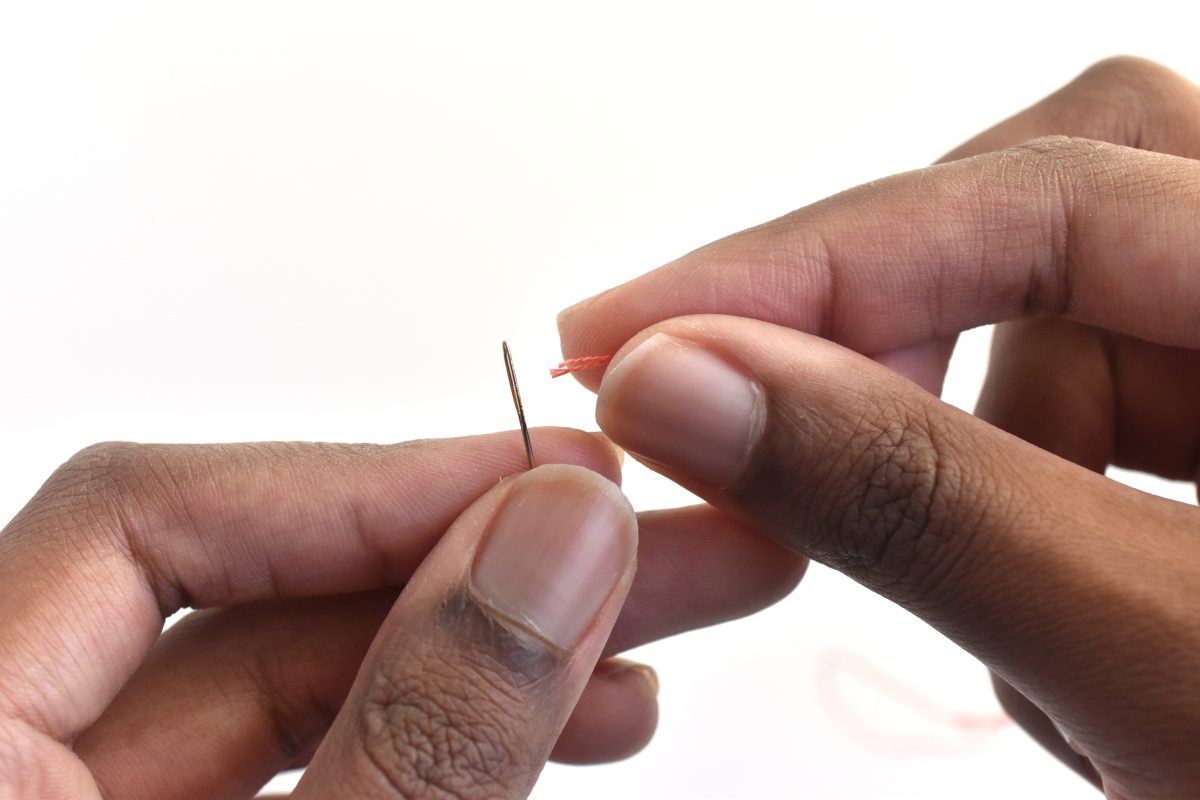

To thread your needle, pinch the very ends of the folded embroidery floss between your fingers and guide them through the eye of the cross stitch needle. These needles have a longer eye to make it easier to thread with several strands of floss.
STARTING YOUR STITCHING
Once your needle is threaded, you are ready to start stitching! First, secure the thread to the cloth using the loop method. Make sure your needle has the ends threaded through the needle with a folded loop at the other end.
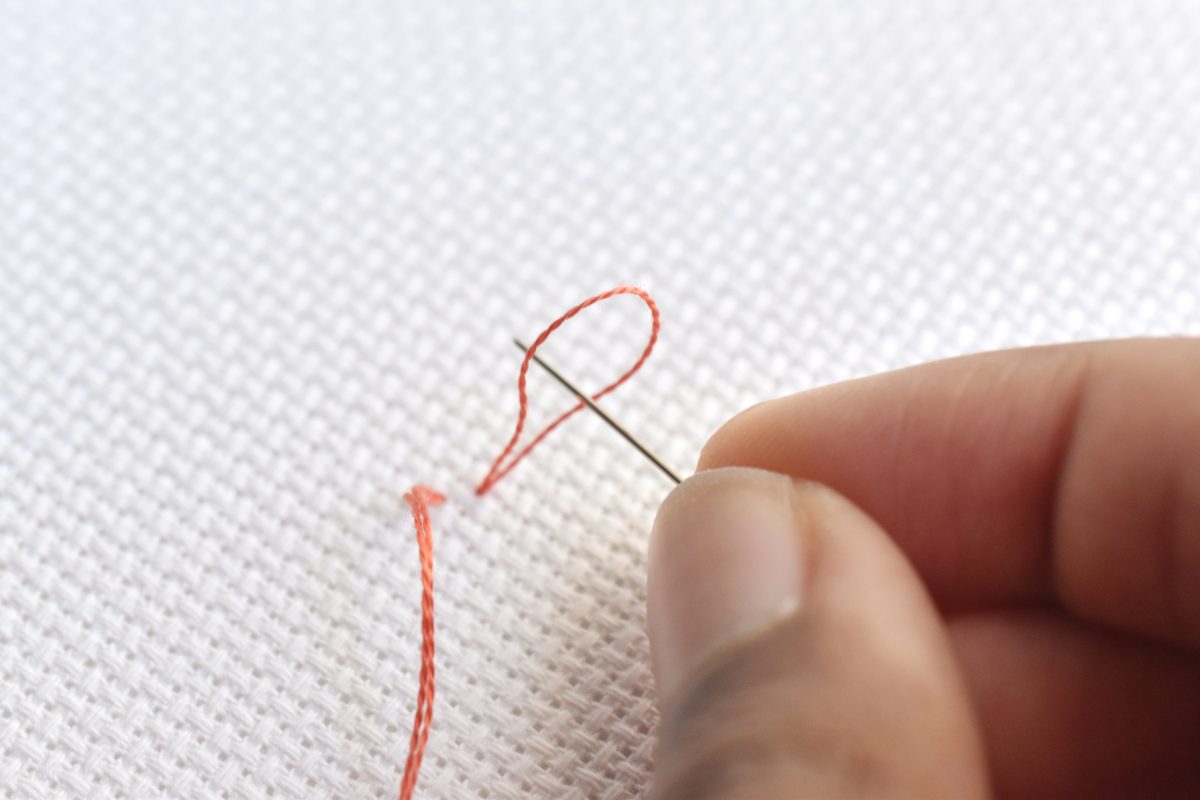
Bring your needle up through the fabric, leaving a bit of the loop end on the back of the fabric. Start your first stitch, going back down through the material. (Turn to the next page for instructions on basic stitches.) On the back of the fabric, slide your needle through the loop of embroidery floss. As you pull and tighten the loop, it secures your thread so you can continue stitching.
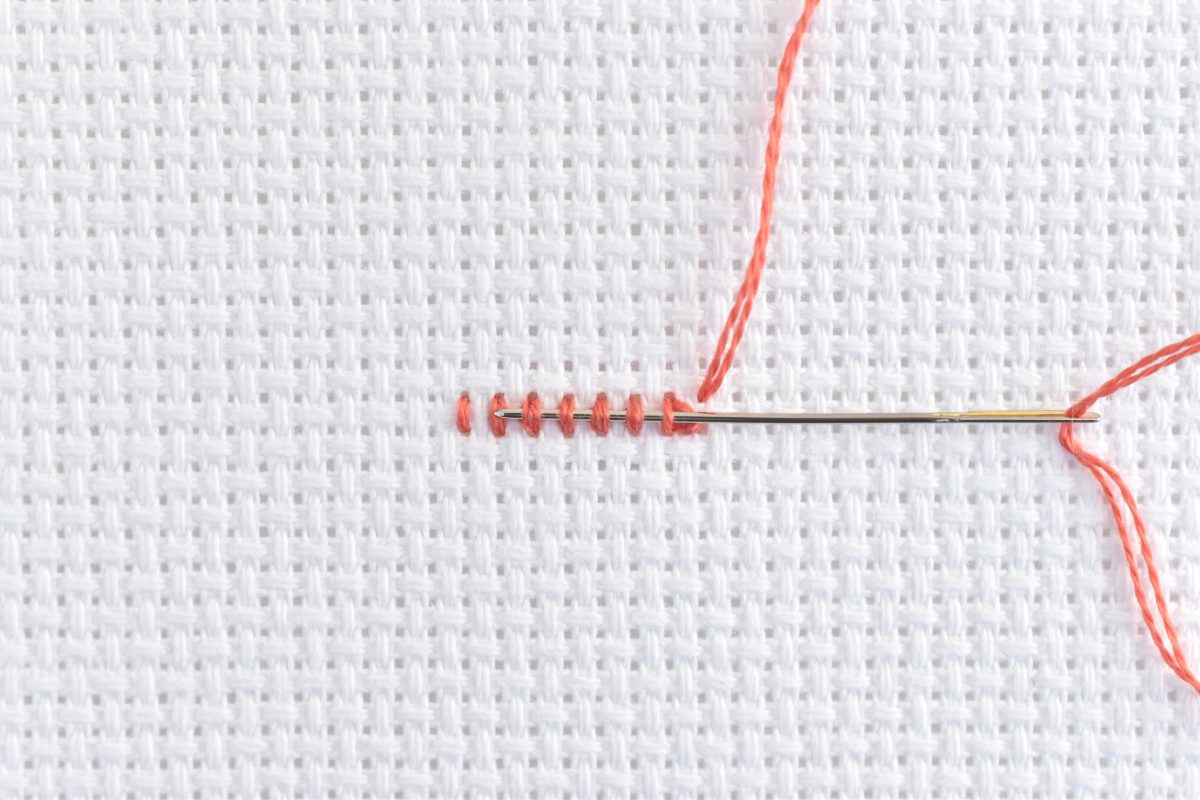
ENDING YOUR STITCHING
When you reach the end of a thread or need to change colors, take your needle to the back of your stitching. Slide the needle through the backs of a few stitches to secure it. Then snip the excess thread.
If you want to start a new thread without a loop, you can start by sliding your needle under a few stitches the same way you end the thread.
Creating Basic Stitches
These three stitches are all you need to follow all of the patterns in this book. If you have trouble with the French knot, there are ways to work around it. Whenever a pattern calls for a French knot, you can substitute it with regular cross stitches.
CROSS STITCH
Each cross stitch is made of two angled stitches that cross in the center and form an X shape. You can make cross stitches one at a time or in rows to save both time and embroidery floss.
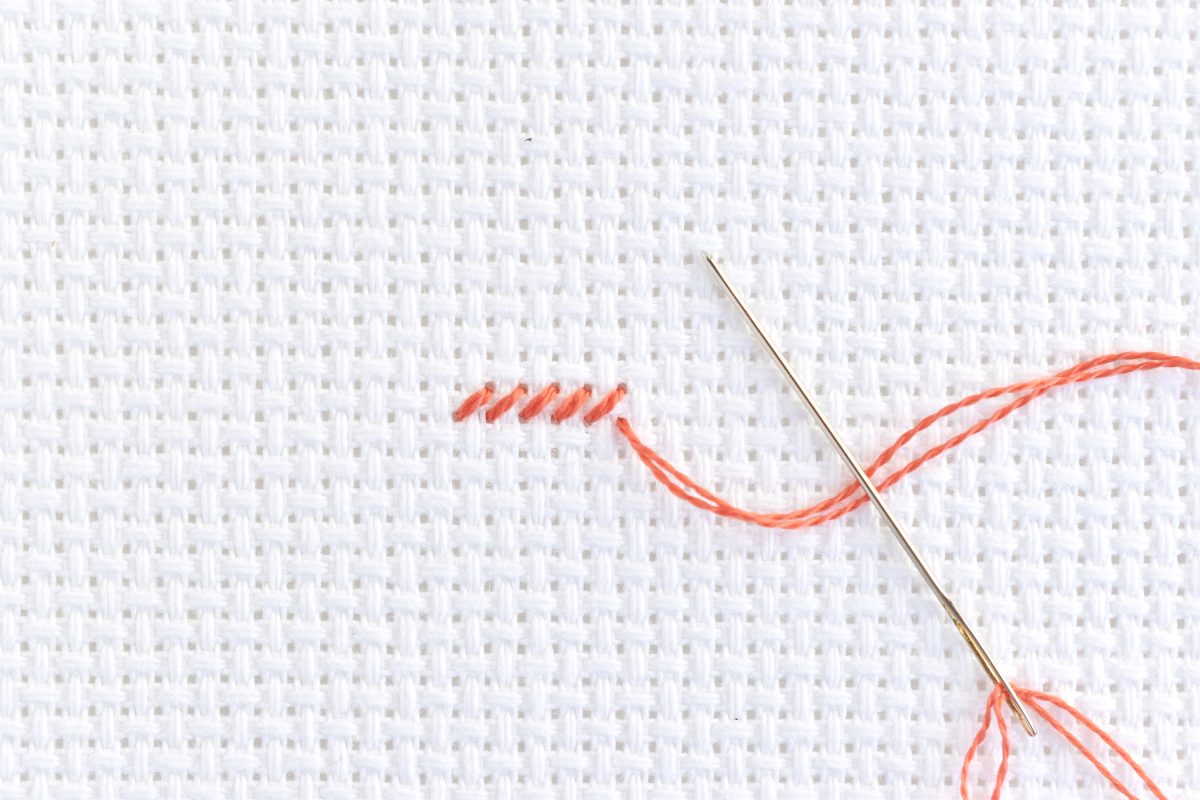
To make a cross stitch, insert the needle from the back of the fabric. This will be the bottom left of the stitch. Go back down one hole up and over from where you started (figure 1). This forms one half of the X, and you can make as many of these as you need.
To complete the stitch(es), repeat the process in the opposite direction (figure 2). Come up at the bottom-right of each stitch and then cross to the top-left. Make sure as you’re working that your stitches consistently cross in the same direction.
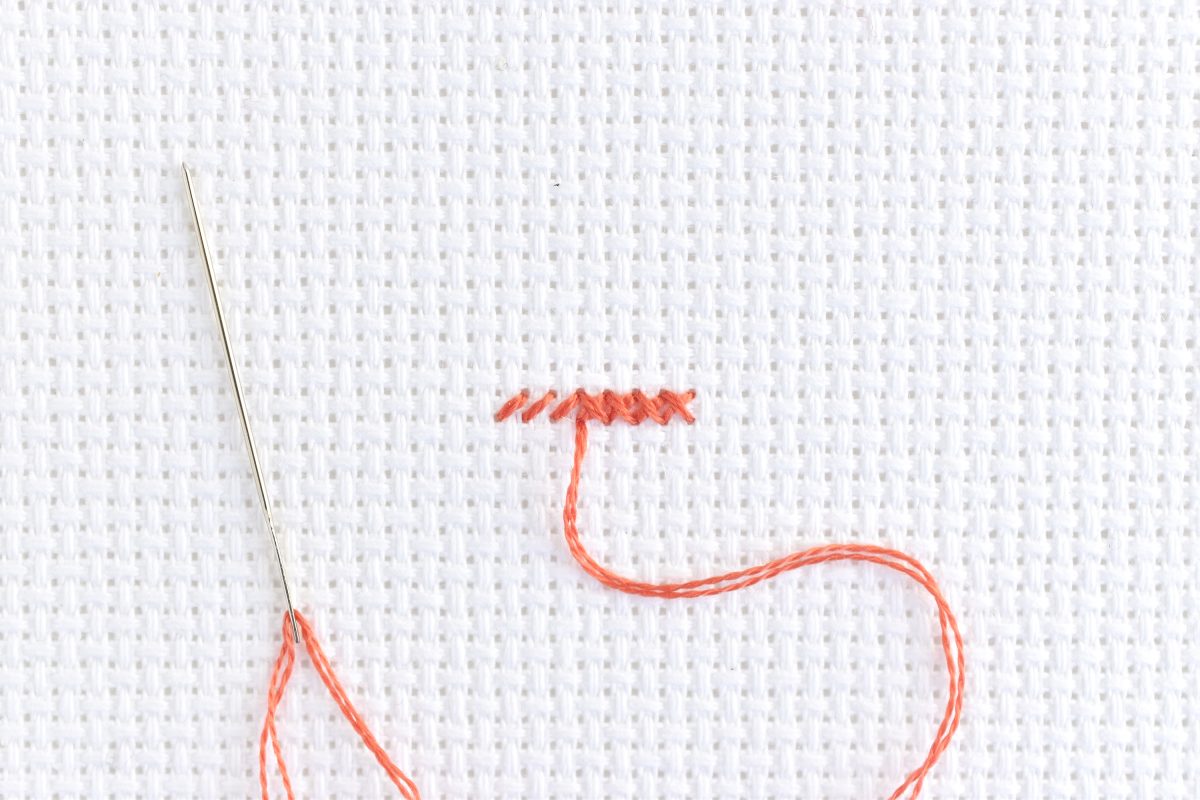
If you have a long stretch of a single color in one row, you can speed things up a bit. Instead of making individual cross stitches, work the whole row at once. First complete all of the right-slanting stitches along the row. Then turn around and work back across the row to complete all of the left-starting stitches.
BACKSTITCH
Backstitch is a helpful stitch for adding details to your cross stitch. As the name implies, these stitches are worked in a way that sometimes feels backward.
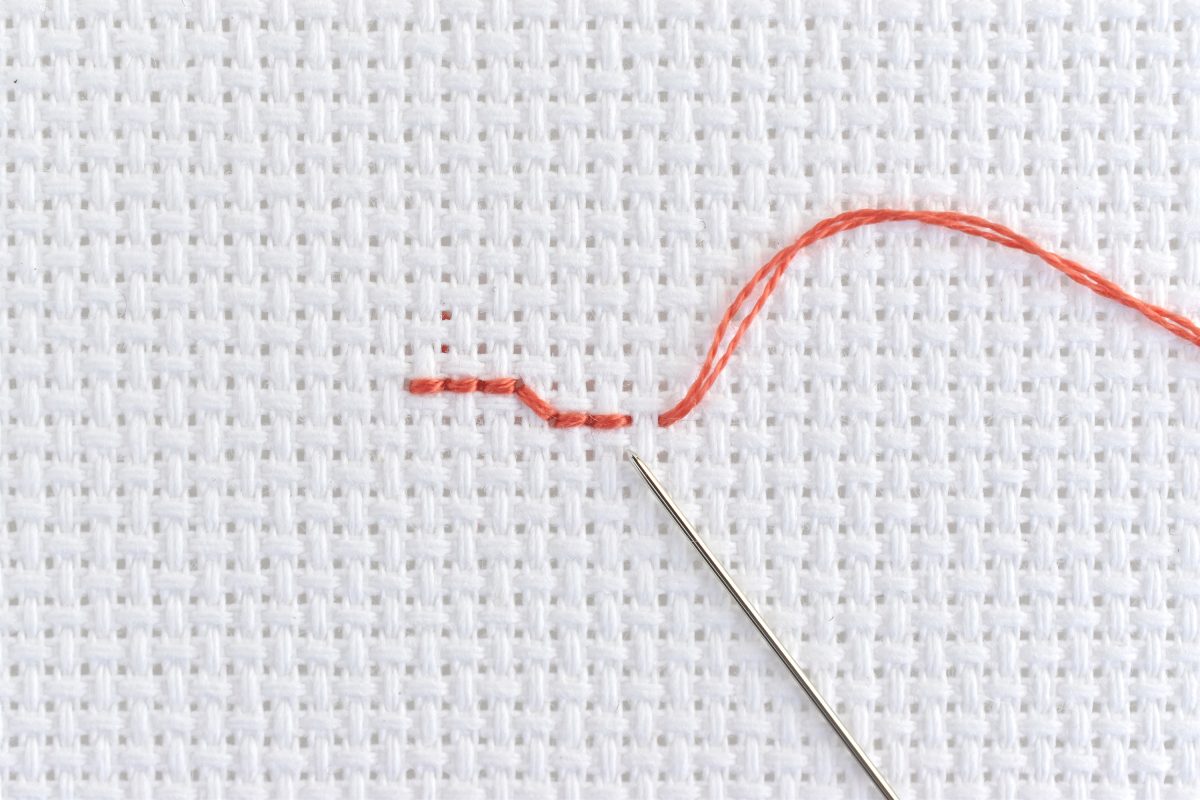

To work backstitch, come up through the fabric one hole away from where you want to start your stitch (figure 3). Go back to the empty hole and insert your needle there so the floss covers the area (figure 4). Continue the line by bringing your needle up one hole away from the previous stitch, and then inserting the needle back down into the empty hole.
When changing the direction of the line, the process will stay the same. Each new stitch comes up one square away from the previous stitch and back down into the empty hole that was left open.
FRENCH KNOT
This stitch can take some practice, but it’s worth it for patterns that have tiny dot details, such as eyes on little faces.

To make a French knot, come up through the fabric. Wrap the embroidery floss around the needle two times (figure 5).
Pull the thread taut around the needle and insert the needle through the fabric.
Keep holding the thread taut as you slowly pull the needle and embroidery floss through the fabric (figure 6).
To avoid pulling your knot through to the back of your work, never to be seen again, go back one thread over from where you came up.
Reading a Cross Stitch Pattern
In a cross stitch pattern, each square in the pattern grid corresponds with a square on your cross stitch fabric. And, within the pattern grid, each colored square represents one cross stitch in the same square on your fabric. The most important thing to remember about reading a cross stitch pattern is that counting and cross stitch go hand in hand—that’s why cross stitch is commonly referred to as counted cross stitch—and it’s really the key to success.
Always take the time to double-check your stitch counts and grid position to avoid making mistakes that can throw off your whole project or have you pulling out tons of stitches. Each pattern has a gray triangle marking the center of each side of the grid to help with orientation.
To make things easier, stitchers often mark both the center square on the fabric and the center square on the pattern grid and use them as reference points when counting squares on the pattern and on the fabric. This helps to ensure the correct placement of stitches.
Note that the symbols on the chart are there to make it easier to tell the colors apart. Some of the colors are similar, so the symbols are especially helpful for those with poor eyesight or who might be colorblind.

Solid lines on the chart (and in the color key) show you what to stitch with backstitch, while dots represent French knots.
Finishing Your Project
There’s nothing worse than stitching something beautiful that’s also covered in dirt, oils, or food. To keep your work as clean as possible, always wash your hands before you start stitching, keep food and beverages away from your cross stitch, and cover or protect your project when you’re not working on it.
While not absolutely essential, it’s a good idea to wash your cross stitch before framing, even if it looks clean. This removes any oils that may have been left from your skin.
To wash your cross stitch, place it in a basin of cool to lukewarm water with a drop or two of mild detergent. Let it soak for about 15 minutes, and then rinse it thoroughly. Place the material between several layers of bath towel and roll it tightly to remove as much excess water as possible.
Lay the cross stitch facedown on a towel and iron the back until it is fully dry.
The steam setting may be used, if needed. Once pressed, you can frame your project or affix it to the item of your choice. Make sure that the fabric isn’t stretched or skewed as you iron it!
Mollie Johanson has loved creating and crafting cute things for as long as she can remember. She is the author of Cross Stitch Creations: Bundle of Joy and a regular contributor to stitching and sewing magazines. Mollie lives near Chicago and is happiest with a cup of coffee, some stitching, and her family close at hand. Visit her at molliejohanson.com.
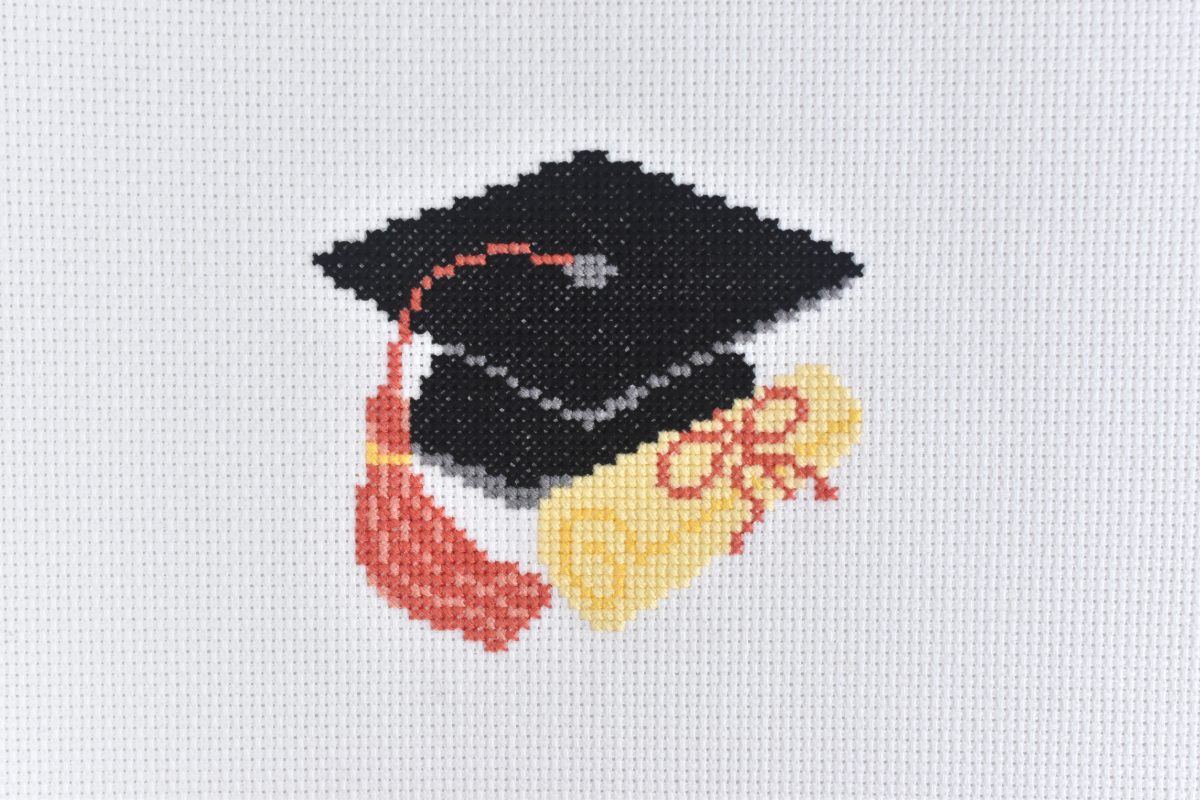
Excerpted with permission from Cross Stitch Celebrations: Graduation (Walter Foster Publishing, an imprint of The Quarto Group, 2023) by Mollie Johanson. Cross Stitch Celebrations: Graduation is available wherever fine books are sold. Learn more at quarto.com.


What do you think of this project? Let us know!