
Get more details about this project
What you need
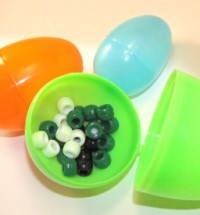
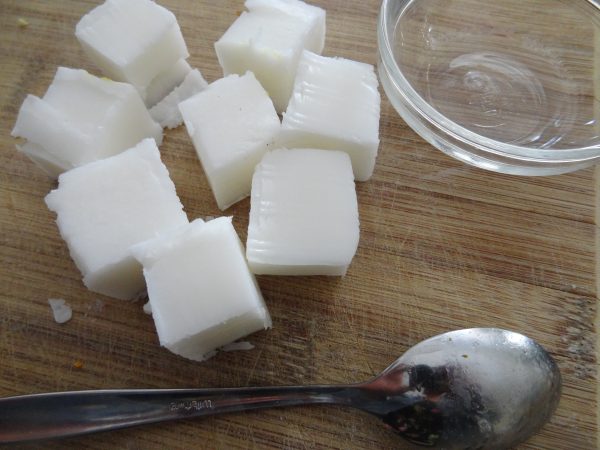
Plastic Easter Eggs any size (empty) – always check first for melting in clay oven
Polymer clay – any brand –spring colors
Clay extruder – optional
Clay knife or plastic knife
Toothpick or bamboo skewer
Work surface – ceramic tile, file folder or wax paper
Oven for baking
Extra beads – broken, leftovers, etc.
Crazy glue or other fast drying clear glue
Instructions
This Easter Project shows you how to make a decorated easter egg using plastic store bought easter eggs and decorating them with polymer clay for a beautiful decorated easter egg that is also a shaker.
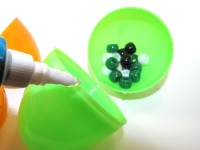
Use a few broken, leftover or unwanted beads to put inside an empty plastic egg.

Crazy Glue the egg shut & let it dry, so it won’t pop open while applying the clay.

Condition your clay by rolling and squeezing in your hands. Test to see if it cracks when you bend it – that means it needs more conditioning!
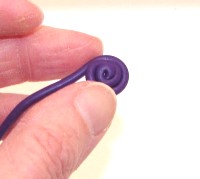
Roll your first color into a ball and then an even snake. If you use a clay extruder, this process is MUCH faster & the snakes are more even. You can also create a gradual blending of the colors, as in my example.


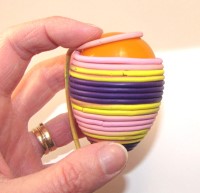
Starting at the one end of the egg, begin wrapping the clay snake around – it helps to make a small spiral to get it started (see pictures). Be careful to make sure the clay touches itself, so it will adhere once cooked.
When switching to a new color, use your clay knife to cut a flat edge so the colors “butt” up against each other.
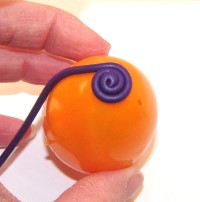

 Wrap the entire egg being sure it is covered and clay is touching clay, or it may fall off after baking.
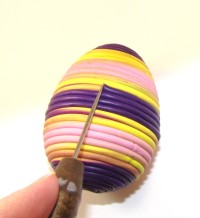
Add details with your toothpick or skewer to camouflage seams and add texture. You can also add flower shapes, etc. with a dab of liquid clay for interest and to hide any “boo boos”.


Bake according to manufacturer’s directions and let cool.
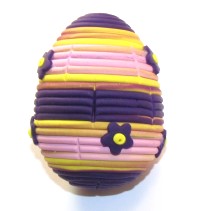
Glaze if desired. I use varathane – found in most hardware stores. For small projects, use the clay manufacturer’s glaze. The bottles are smaller & more affordable!
Fill an Easter basket or use them as unique and fun party favors! You can also hot glue a pretty ribbon to hang it.
***TIP***
***Experiment with different colors and spiral shapes!
***Dark colored clay can leave some pigment on your hands. To help keep the lighter shades clay from staining, handle most of the lightest clay first. You can also use baby wipes to clean your hands and tools (alcohol is a solvent for the clay) or wear latex gloves & switch in between colors.


What do you think of this project? Let us know!