
Silicone glue creates a more flexible attachment and may be easier to remove after Halloween. Superglue provides a stronger and more permanent bond. Whichever adhesive you choose, keep it away from the speaker openings, cable connections and any section that sits inside the ear.
Get more details about this project
What you need
White or light-coloured wired earbuds
Two miniature plastic rats or mice
Silicone adhesive or superglue
Rubbing alcohol
Cotton swab or lint-free cloth
Toothpick or wooden skewer
Tweezers, optional
Painter’s tape, optional
Baking paper or another protected work surface
Instructions
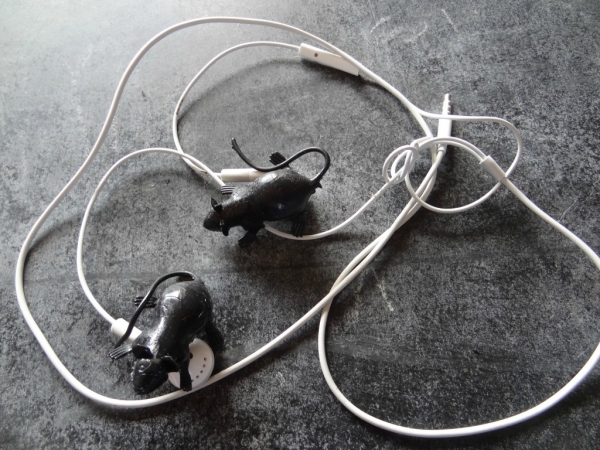
If rats and mice make your skin crawl, these creepy Halloween earphones should have exactly the effect you are looking for.
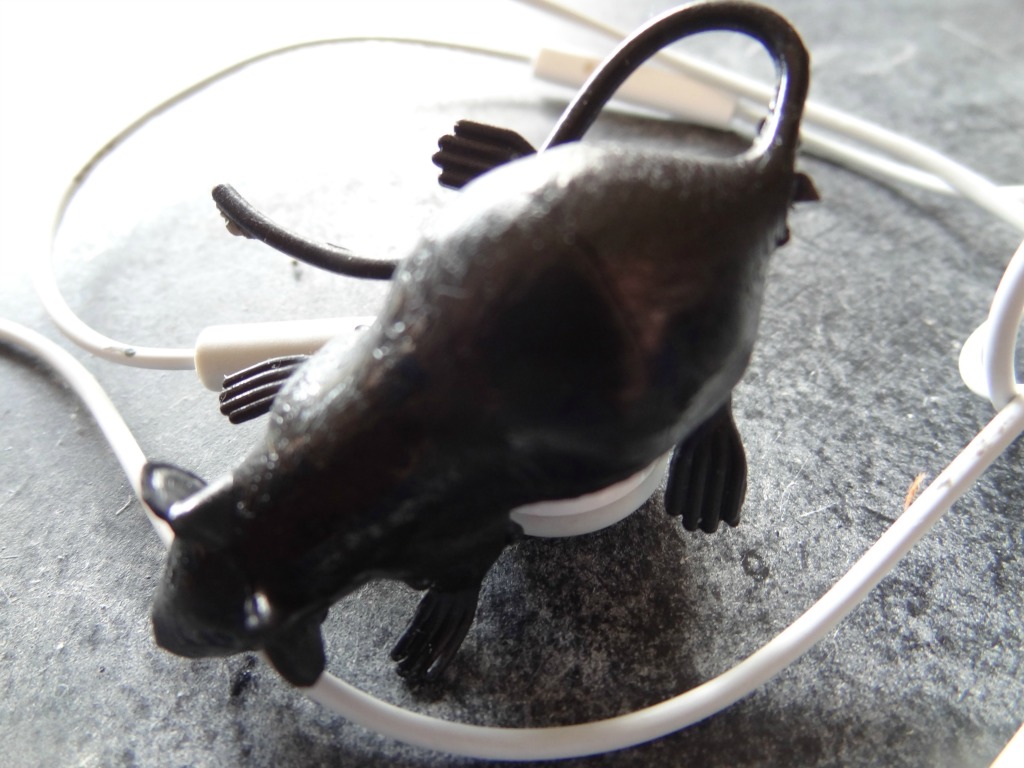
The project uses two lightweight plastic rats attached to the outside of an ordinary pair of wired earbuds. Once worn, the little rats appear to be sitting against your ears or crawling along the headphone cable.
You can use spiders or other small Halloween trinkets instead, but the decorations must be lightweight and small enough to sit comfortably without pulling the earbuds from your ears.
Silicone adhesive is a good choice if you would like to return the earphones to normal after Halloween. Superglue can also be used, but it may create a permanent bond or damage the earbud casing if you attempt to remove the decoration later.
Instructions
Step 1: Test the earphones
Connect the earbuds to a compatible device and make sure both sides work correctly before beginning.
Inspect the cable, plug and earbuds for cracks or exposed wires. Do not decorate damaged earphones.
Disconnect the earbuds from the device before using any adhesive.
Step 2: Clean the earbud casings
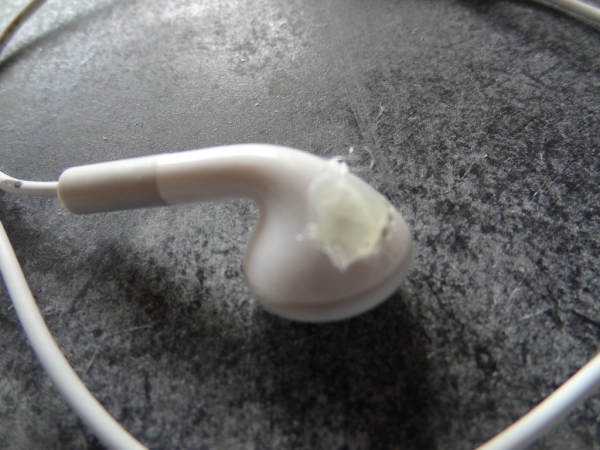
Use a cotton swab or lint-free cloth lightly dampened with rubbing alcohol to clean the outside back of each earbud.
Avoid getting moisture inside the speaker holes, microphone, controls or cable connections.
Allow the earbuds to dry completely.
Step 3: Check the plastic rats
Choose two lightweight plastic rats that are approximately the same size.
Trim away any sharp moulding marks or rough plastic edges. Check that the underside of each rat has a suitable flat or slightly curved area for attaching it to the earbud casing.
Do not use large or heavy rats because they may pull the earbuds from your ears.
Step 4: Plan the placement
Position one rat against the outside back of each earbud without using glue.
Make sure the rat does not cover the speaker opening, touch the ear canal or interfere with the cable connection.
Carefully hold the earbud in your ear to test the position. The rat should sit comfortably against the outer ear without scratching or pressing into the skin.
Remove the earbuds before continuing.
Step 5: Protect the speaker openings
Place a small piece of painter’s tape over each speaker opening while applying the adhesive.
Do not place tape over delicate mesh if removing it could cause damage. The purpose is simply to prevent accidental glue drips from entering the earbud.
Step 6: Apply the adhesive
Place the earbuds on baking paper or another protected surface.
Use a toothpick or wooden skewer to apply a small amount of silicone glue or superglue to the underside of the first plastic rat.
Use only enough adhesive to create a secure bond. Excess glue may spread into the earbud openings or onto the cable.
Follow all safety instructions supplied with the adhesive and work in a well-ventilated area.
Step 7: Attach the rats
Press the first rat gently against the outside casing of the earbud.
Hold it in position until the adhesive begins to grip. Repeat with the second earbud, making sure the rats face in complementary directions.
Tweezers may help you place the decorations without getting adhesive on your fingers.
Step 8: Allow the glue to cure
Place the earphones on a flat surface where the rats will not move while the glue dries.
Allow the adhesive to cure completely according to the manufacturer’s instructions. Do not wear, connect or test the earphones while the adhesive is still wet.
Remove any temporary painter’s tape once the glue has cured.
Step 9: Check the finished earphones
Gently check that both rats are firmly attached.
Inspect the speaker openings, cables and plug to make sure they remain clean and unobstructed.
Reconnect the earphones and test the sound at a low volume before wearing them.
Stop using the decorated earbuds if the rats press uncomfortably against your ears, the decorations begin to loosen or the sound becomes distorted.
Step 10: Remove the decorations after Halloween
If silicone adhesive was used, you may be able to gently peel the rats and dried glue away from a smooth plastic casing.
Work slowly and avoid pulling on the cable. A plastic scraper may help lift the edge of the silicone without scratching the earbud.
Do not use a sharp blade close to the cable, speaker openings or your hands. Superglue may be permanent and attempting to remove it could damage the earphones.




What do you think of this project? Let us know!