
Get more details about this project
What you need
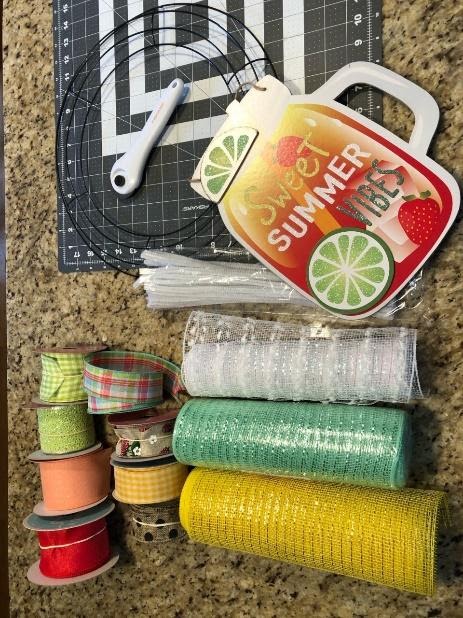
Supplies you will need:
14 inch wire wreath form (these are easily found at the Dollar Store)
Two 10 inch rolls of deco mesh
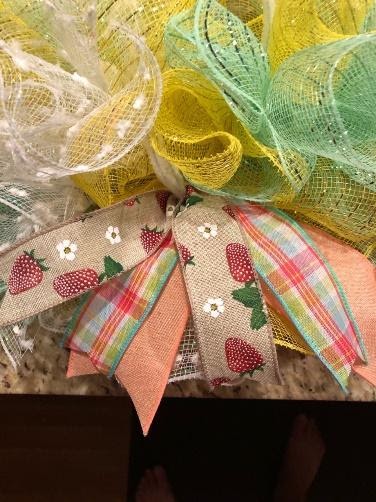
Two rolls of different coordinating 2 ½ inch wired ribbon
Two rolls of 1 ½ inch coordinating wired ribbon

Pipe cleaners that coordinate with your ribbon
A sign (this will be your focal point)
A self-healing mat

Scissors
Instructions
This amazing Summer wreath tutorial was contributed by Lisa from Get Crafty With Lisa you can purchase here handmade wreaths via her facebook page.
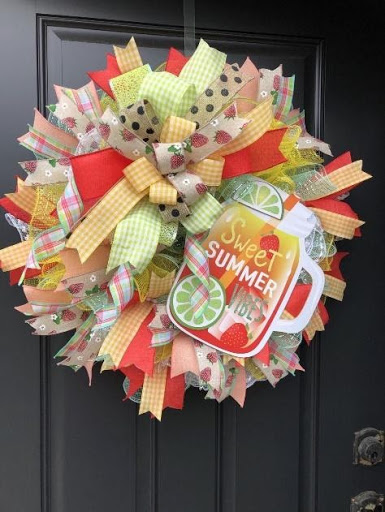
OK folks, I’m going, to be honest. I am obsessed with making wreaths. OBSESSED! Just ask my family. There isn’t a room in my house where you won’t find a bit of mesh, a scrap of ribbon, a runaway pipe cleaner or a premade bow that happened to take up residency on whatever surface it happened to land upon.
Now this wasn’t always the case. There was a time not that long ago where I said, and I quote, “I hated making that wreath. I’ll never make one again!” But that was a short lived and fleeting sentiment. With a bit of patience and practice I’ve come leaps and bounds from that dark day and now not a day goes by that I don’t create something new and beautiful. So don’t despair if you don’t master the technique on your first try. I promise it will get easier and you too will be on your way to becoming obsessed!
*Note…I always find my sign first and then choose the ribbons and mesh colors that coordinate with the colors in my sign. Your sign does not have to be as large as the one I used, in fact I usually use much smaller ones but this one was so bright and summery that I just had to use it
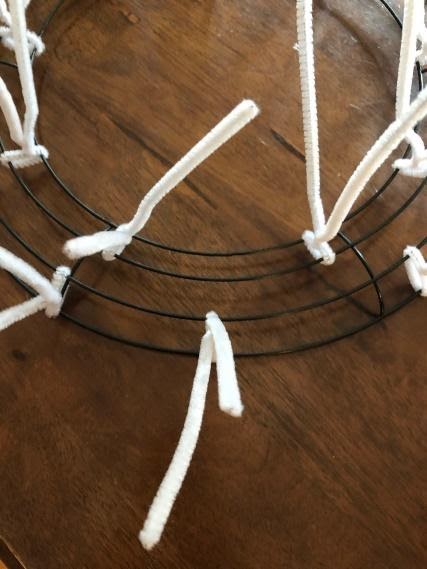
STEP 1
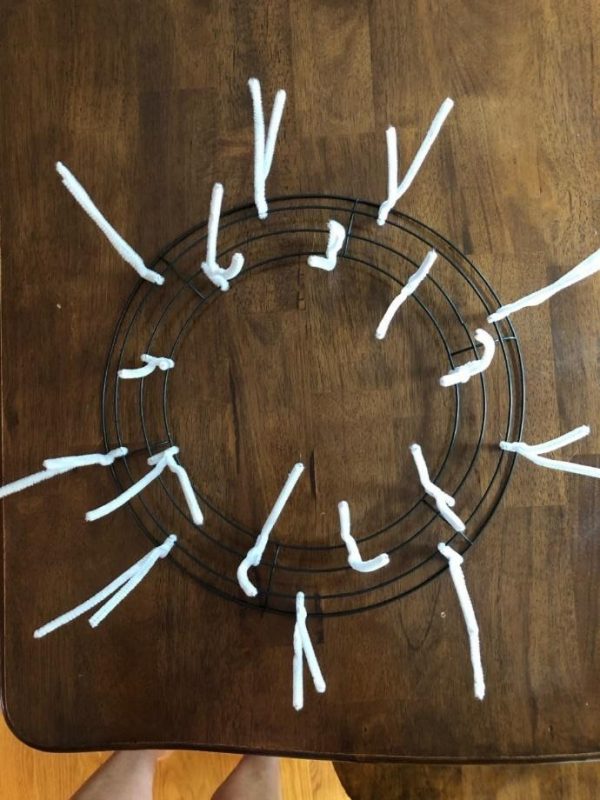
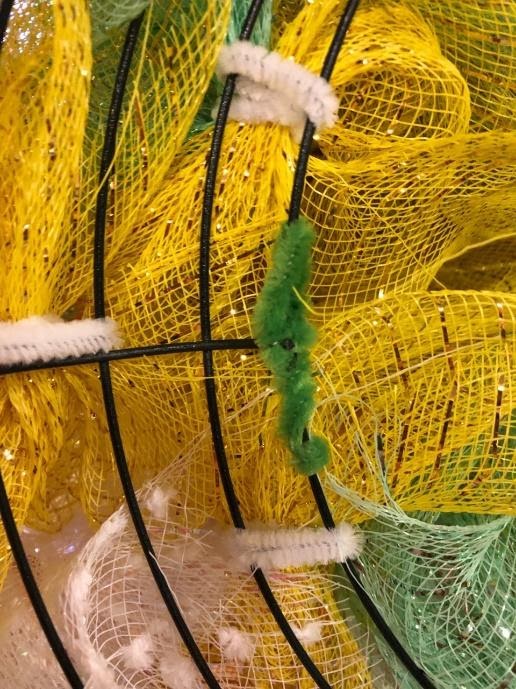
Create your wreath form. Notice that your wire wreath frame is divided into 6 sections. You will want to attach 3 pipe cleaners in each section. Start by attaching 2 pipe cleaners to the bottom 2 wires and the third pipe cleaner on the top two wires. In the next section you are going to also attach 3 pipe cleaners but in the opposite positions. This time attach one pipe cleaner to the bottom two wires and twist 2 pipe cleaners to the top 2 wires. Continue in this pattern all the way around the frame until all of your sections are complete. You should now have a total of 18 pipe cleaners. Be sure to refer to the photos to see the placement of the pipe cleaners.
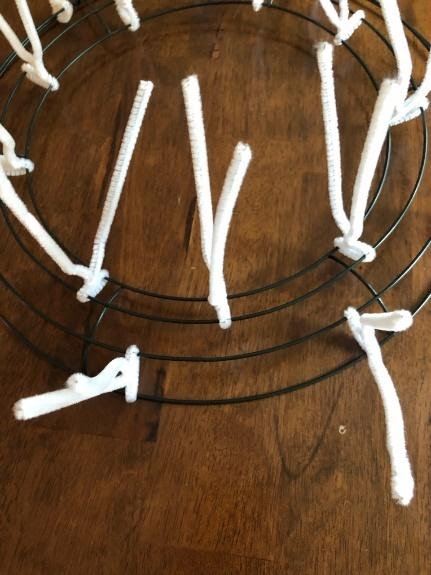
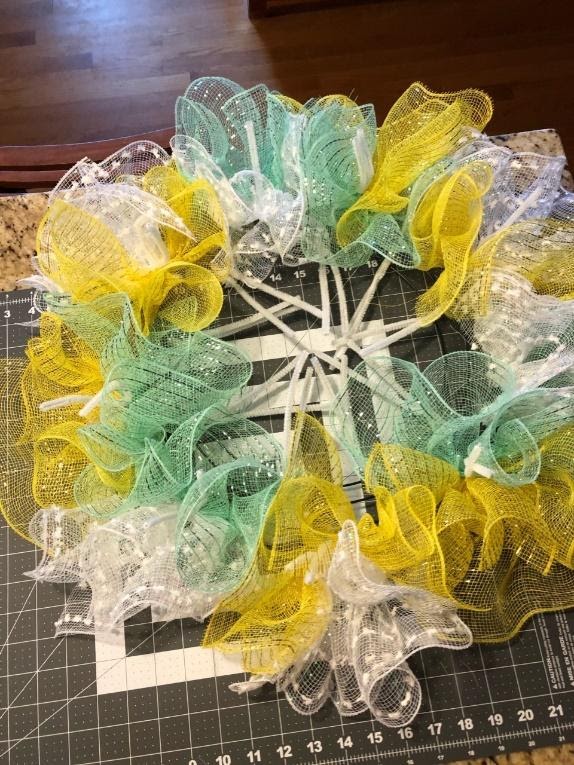
This is what your completed frame should look like…
STEP 2
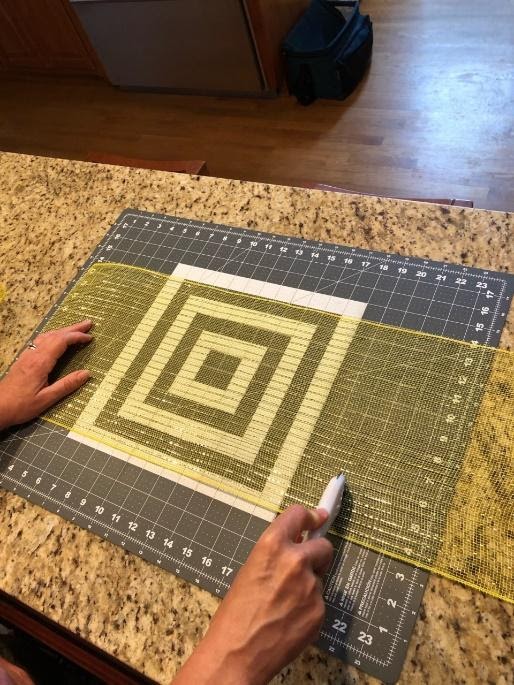
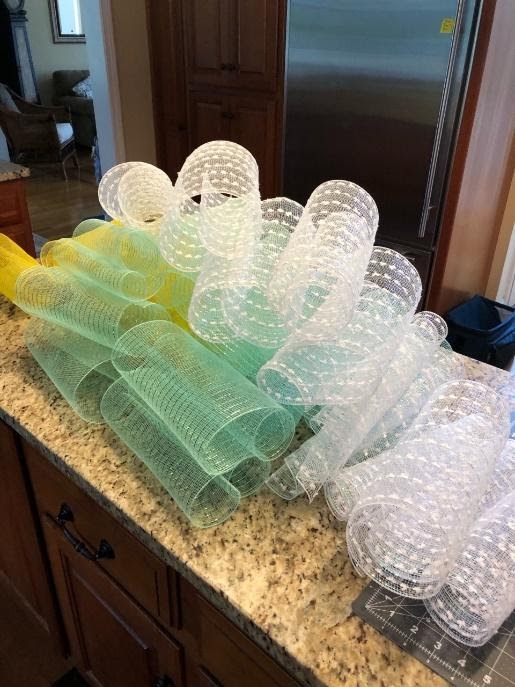
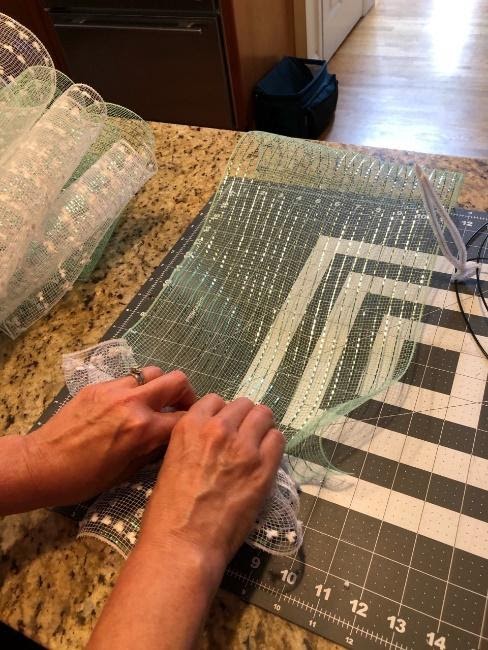
Cut your deco mesh into 20 inch strips using your rotary cutter. You will have a total of 36 pieces when you are done. Again, you can use all of the same color mesh or mix up the colors to match your sign and ribbon. As long as you have 38 pieces in total.
STEP 3
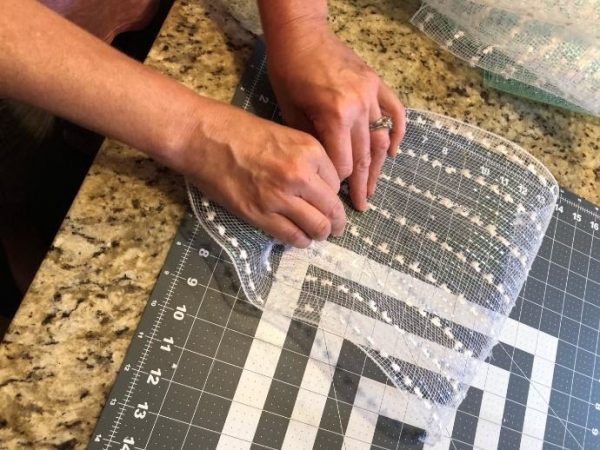
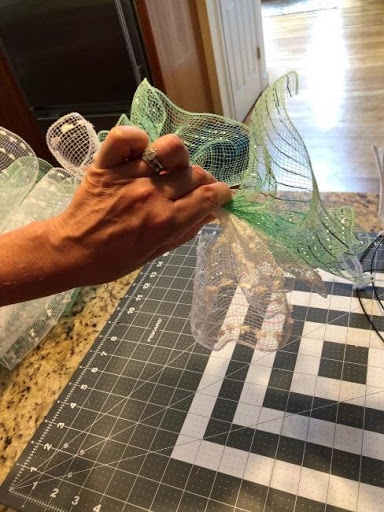
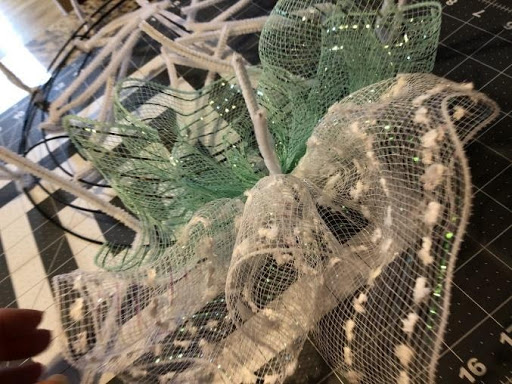
Take one piece of the deco mesh and hold it down on your work surface using both of your thumbs. Now using the rest of your fingers, reach up and start pulling the rest of the mesh down towards your thumbs. Reach and pull, reach and pull, reach again and pull again until all of the mesh has gathered at the bottom near your thumbs and you have something that resembles and bowtie or a butterfly. There’s your first ruffle!
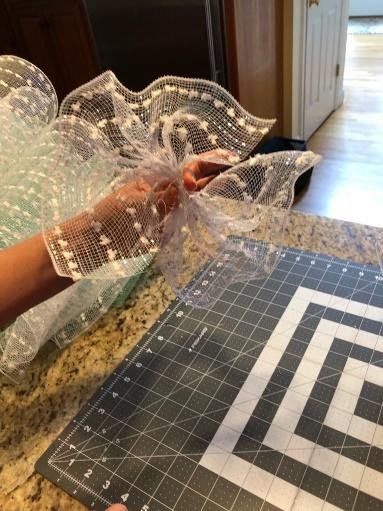
STEP 4
With your thumbs, hold that ruffle down in place on your work surface and grab a second piece of mesh. Do the same technique with the second piece of mesh, reaching and pulling it towards the first ruffle that you are holding onto. Now you should have a double ruffle! (They do not get stacked on top of each other, they should be side by side)
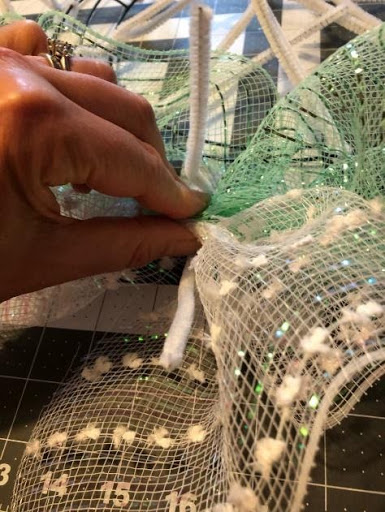
STEP 5
Keep that double ruffle in one hand and with your other hand spread the two ends of a pipe cleaner open, lie the ruffle into the open pipe cleaner and use your free hand to twist the pipe cleaner closed 2 times to hold the ruffle onto the frame.
STEP 6
Continue this method until all of your pipe cleaners are filled with a double ruffle. Don’t get discouraged at this point because it will look like a hot mess and you’ll probably be second guessing yourself! But have faith…in the end it all comes together and you will be amazed.
STEP 7
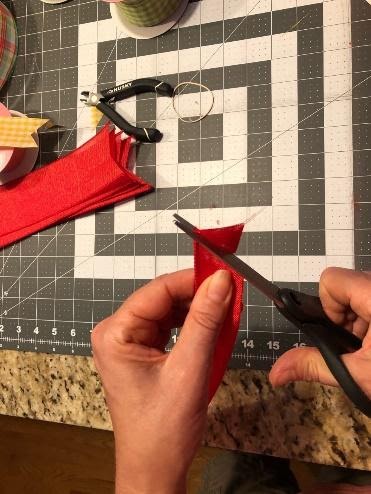
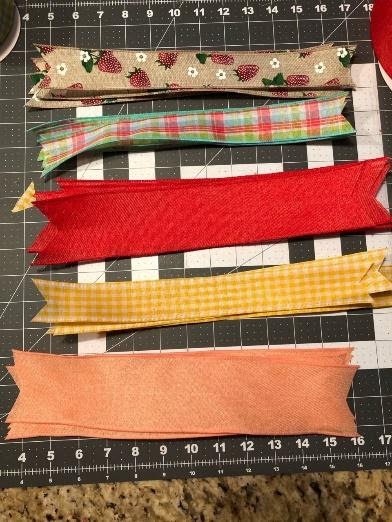
Cut your ribbons into 12 inch strips. Cut 9 pieces from each of your 2 ½ inch rolls and 9 pieces from each of your 1 ½ inch rolls. You should have a total of 36 pieces of ribbon.
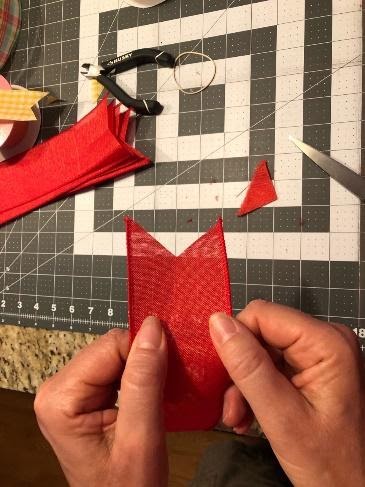
Now dovetail the tops and bottoms of each of your ribbons. Fold each piece of ribbon lengthwise and snip at an upwards angle starting from the folded side and cutting up toward the open side. When you open your ribbon you will now have a notched “V” on both ends.
STEP 8
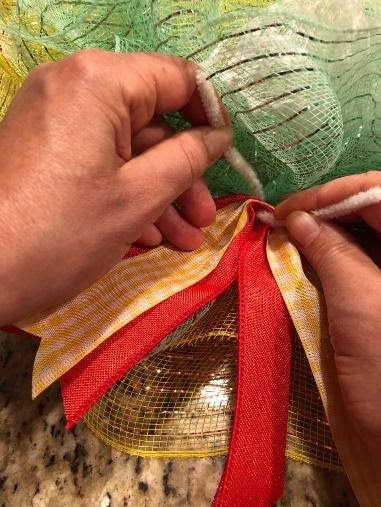
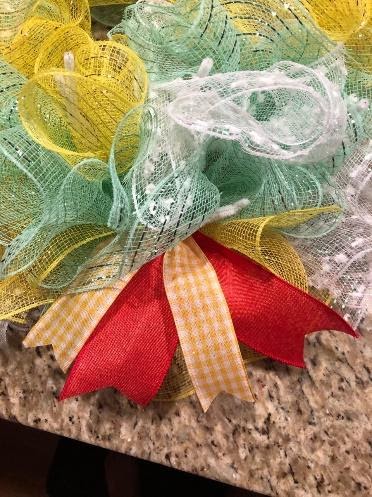
Attach your ribbons to the wreath. Stack a 1 ½ inch ribbon on top of a 2 ½ inch ribbon, pinch them in the middle and place them inside one of the pipecleaners. Be sure to put the ribbons in nice and deep so they don’t come loose. Now twist into place using 3 good twists of your wrist. Continue this all the way around your wreath until all 18 pipe cleaners have a ribbon bundle. Now you can go ahead and tug on your ribbons to spread them apart so you are able to see all of the patterns and colors.
STEP 9
Not all wreaths need bows and not everyone likes them, but if you know how to make a bow, feel free to do so and attach it at this point. Use the floral wire on the back of your bow to attach it to the frame. Just poke it through the mesh, pull it out the back side and twist it onto the metal frame.
STEP 10
Attach pipe cleaners to the back of your sign using a staple gun if your sign is made of wood. If your sign is made of tin, I suggest drilling tiny holes in a few places around the edges and attach the pipe cleaners that way. You want to make sure to attach enough pipe cleaners so your sign will really stay secure to the frame.
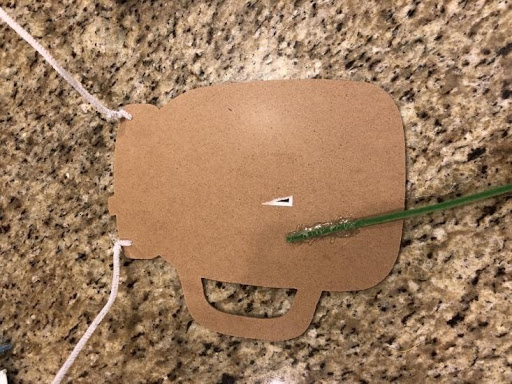
STEP 11
Attach your sign. For me, this is the hardest part where patience and persistence are your best friends! Position your sign where you like it on the front of the wreath and feed the pipe cleaners through the mesh and out the back side of the frame. Twist them securely onto the wire frame to hold your sign in place. Chances are your sign will droop on your first try but you’ve come this far…don’t give up! Keep playing around and repositioning your pipe cleaners onto the frame until your sign stays in place.
STEP 12
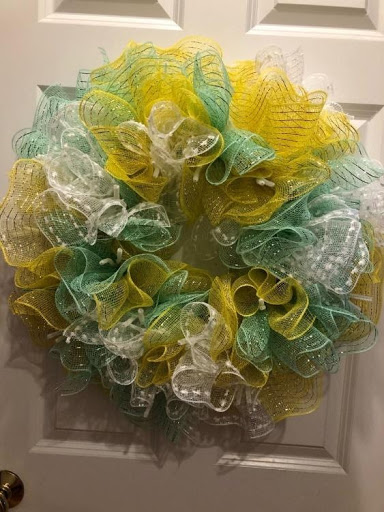
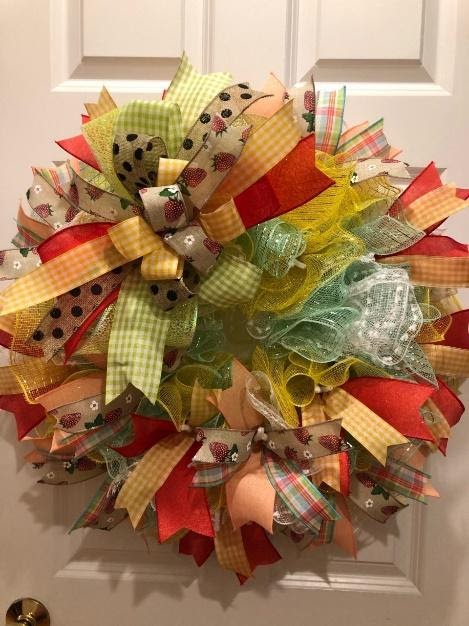
Give yourself a huge pat on the back! This is a time consuming project but goes much faster as you make more and more. Now grab a wreath hanger and hang your beauty! This is a good time to fuss with your ribbons to spread them open and position them the way you’d like them to lie.
I really hope you try making a wreath for yourself! They are so fun to make, the possibilities are endless and they make great gifts! If you need inspiration or would like me to create a custom ordered design for you, please visit my online shop on Facebook…Get Crafty With Lisa.
I promise you, once you get the hang of it, you too will be OBSESSED!!


I loved the detail of instructions and the up close views of each of the steps! Thank you Lisa!