
Get more details about this project
What you need
Materials:
• Yarn
• Crochet hook
• Scissors
• Craft wire
• Craft pliers
Instructions
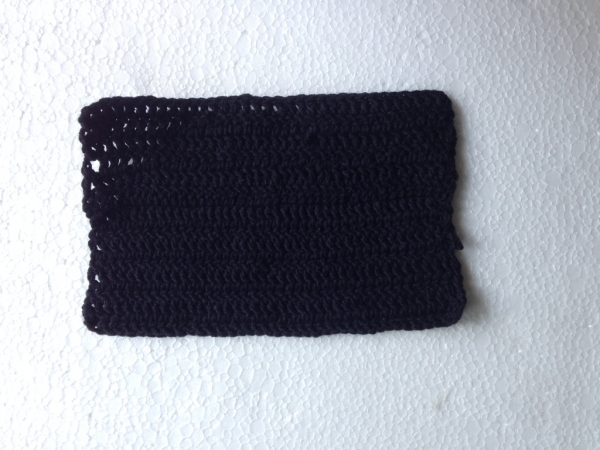
Step-1: Start with a long number of chains. Chain stitch until it reaches the desired width for the hanger. Once it reaches the desired width you can stop chain stitching and work dc along the chains. Work dc for each row and keep going until it reaches the desired height. End the crochet with a slip stitch once the base is complete. The size of the base would depend on the size of the pockets and the number of pockets required.
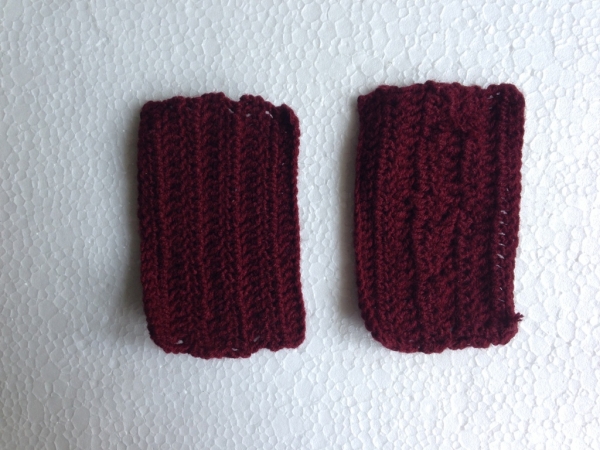
Step-2: Time to crochet the pockets. Measure the base size and decide the size and number of pockets. Crochet the pockets similarly working with only dc for each row.
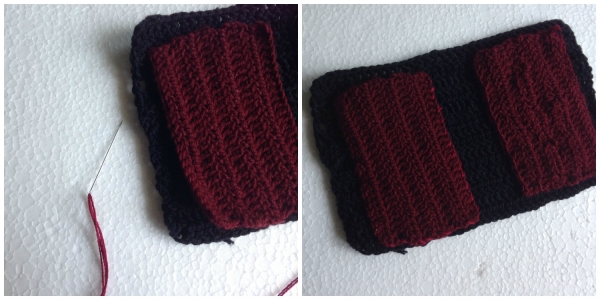
Step-3: You can either crochet the pockets with the base or stitch them, I used a matching thread and stitched the pockets with the base with running stitch. You can also use hotglue to attach the pockets with the base.
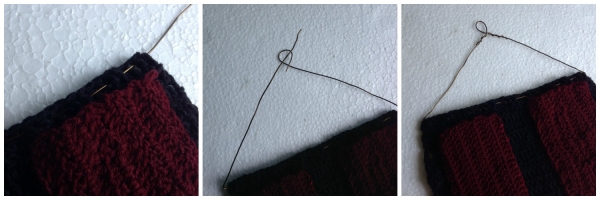
Step-4: Take a long piece of craft wire and attach it with the base along its top edge, you can simply draw the wire over and under the chain stitches. Bring the wire to the middle and fold the sides aligned to the sides of the base. Create a small loop on any one end of the wire. Now bring the other end of the wire and coil it around the wire below the loop. Also coil the end of the loop with the other side of the wire.
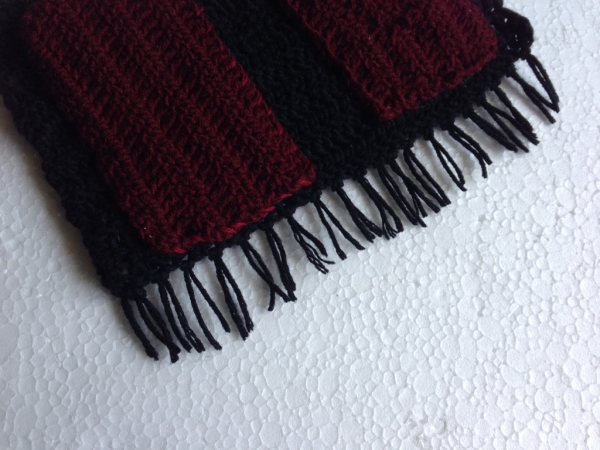
Step-5: This is optional but you can try adding some tassels at the bottom, looks nice!
Now hang it near your workspace to keep you stationary near hand or hang it where ever you need to!
Enjoy!


What do you think of this project? Let us know!