
What you need
Assorted beads, this design used 54
7 safety pins: 1 Large, 2 medium, 2 small, 2 extra small
Stretch cord
Instructions
Arrange the beads as you would like on safety pins.
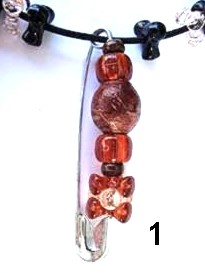
Start with the largest safety pin, and place as many beads as possible on it, using up your largest beads. (This will be your focal segment). See photo 1.
Arrange your safety pins on your work surface as you proceed. See photo 2.

Place beads on the two safety pins next in size. Make two identical pieces, and place them beside the focal piece. See photo 2.
Continue to make two identical co-ordinating pieces with each of the remaining safety pins.
Lay them out on the work surface the way they will be placed on the stretch cord.
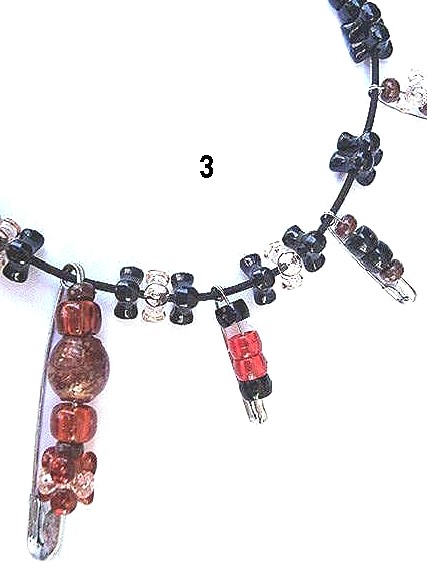
Separate the safety pins with beads, this design used 3 beads between each safety pin.
Pass the stretch cord through the holes on the ends of the safety pin, see photo 3.
Tie a knot in the stretch cord, and your necklace is finished.


I like this. I’ve made bracelets with safety pins and beads. This will complement them well!
very good
gud idea…
Great idea!
job well done. i would have used different colours though. im twelve, so black and burgundy dont really mix for me. luv the idea though.