
What you need
Recycled Folder or Ring Binder folder
Scrapbooking papers
Stamps
Ribbons
Craft Glue
Letter Stickers
Instructions
Write everyone’s birthday dates into the corresponding months and slip a card into place.
Original Folder
Start by covering the folder with the scrapbooking paper. Glue into place and trim any edges with a sharp blade.
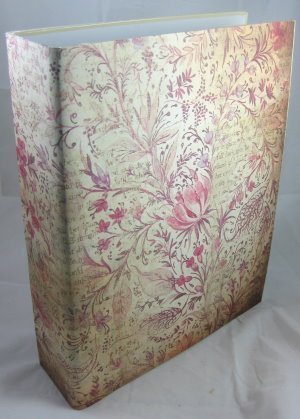
Folder Covered
If the inside of your folder has writing on it, re-cover the inside too.
Cover the joints with a satin ribbon as shown.
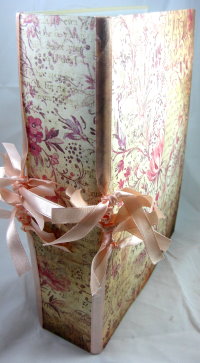
Adding the ribbon
Create a title block for the front, this one was torn paper and scrapbooking sticker letters which were used to create the title.
The title block was embellished with a butterfly stamp.
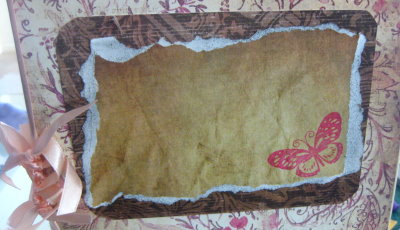
Title Block
You can decorate your folder to suit your own style using materials you have.
The spine of the folder was finished off with knots of ribbon by cutting 20 small lengths of ribbon and knotting them around the ribbon as shown in the photo.
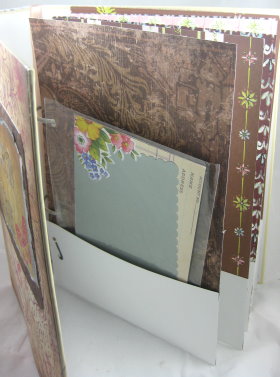
To create the inside files cut heavyweight scrapbooking paper or cardstock down to the same size as your folder, but allow a 3 1/2 inches in the length.
Folder Open
Fold the 3 1/2 inched up to create the pocket for your cards as shown in the picture.
You can vary the size of your pockets depending on the file you as using.
All done!


love the idea.it looks very creative,and its very inspirational.LOVE IT!
Great idea! I love it!
gREAT!!!!!!
Have been searching and seaching for something similar to buy – have now decided to make my own out of one of the several old folders I have lying about! Wich me luck!!
good idea for recycling a file holder – looks good, but I’m not a fan of floppy ribbon trims!
Could use the idea for general scrapbooking, too, with a deeper flap, or a plastic wallet attached to each “page”
or for keeping those lovely handmade greetings/Christmas cards we’re sent – loads of uses:)
what a great idea!!!! Something to do with beautiful papers that you don’t want to hide.
Love this! This is a great project for the holidays!
it so interesting….! i love it!
Very neat idea. I’m all for the altering of unused items too.
What a great idea. Definitely will be trying it with double sided paper.
A really good idea – nice to have an adult practical project.
I will make this – love the idea always looking for storage organizer ideas.
Love it and easy to do
I haven’t tried this yet, but I wll make one for my self. I make my own card, so this will help me get ahead of the game.
Would look even better with double sided paper.
lovely bit of re-cycling