
Get more details about this project
What you need
Old Jumper/pullover/ sweat shirt
4 Large Buttons for joints
2 teddy bear eyes or embroidery thread
scissors
needle and thread of sewing machine
toy filling/wadding
Size 14 inch when complete
Instructions
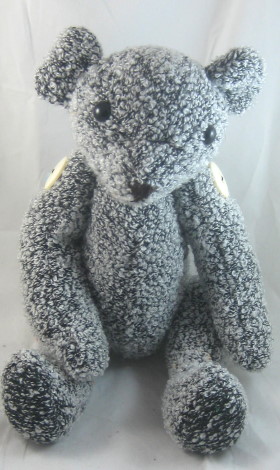
There is something extra special about turning an old piece of clothing into a handmade teddy bear. This recycled pullover teddy bear sewing pattern shows you how to transform an old sweater, jumper, sweatshirt, or cozy pullover into a soft keepsake bear with real sentimental value.
This is a lovely project for using clothing your children have outgrown, a favorite sweater that has seen better days, or a piece of fabric that reminds you of someone special. Instead of letting that pullover sit at the back of the cupboard, you can turn it into a memory bear that can be displayed, gifted, or treasured for years.
The finished teddy bear measures approximately 14 inches tall and is made using simple sewing techniques, basic stuffing, and button-style joints for the arms and legs. The texture of a recycled sweater gives the bear a soft, cozy, handmade look, making every bear completely unique.
This project is best suited to confident beginners or intermediate sewers, especially if you are new to sewing soft toys. Take your time with the head gusset, pin your pieces carefully, and use strong thread when attaching the arms and legs.
Safety note: If this teddy bear is being made for a baby or young child, avoid buttons and plastic safety eyes. Instead, embroider the eyes and stitch the limbs securely in place without removable parts.
Optional FAQ Section to Add
Can I use any old sweater for this teddy bear?
Yes, you can use an old sweater, pullover, jumper, or sweatshirt. Medium-weight fabric is easiest to sew. Very stretchy or loosely knitted fabrics may need extra care, and you may want to stabilize them with lightweight interfacing before cutting.
Is this a memory bear pattern?
Yes, this project works beautifully as a simple memory bear pattern. You can use outgrown children’s clothing, a sentimental sweatshirt, or a loved one’s pullover to create a keepsake teddy bear.
Are buttons safe for a child’s teddy bear?
Buttons are not recommended for babies or very young children, as they can become a choking hazard. For a child-safe version, embroider the facial features and sew the arms and legs directly to the body using strong thread.
What size is the finished teddy bear?
The finished bear is approximately 14 inches tall when made from the printed A4 pattern pieces.
Do I need a sewing machine?
A sewing machine will make the project faster and stronger, but some parts, such as closing openings, attaching ears, and securing limbs, can be finished by hand.
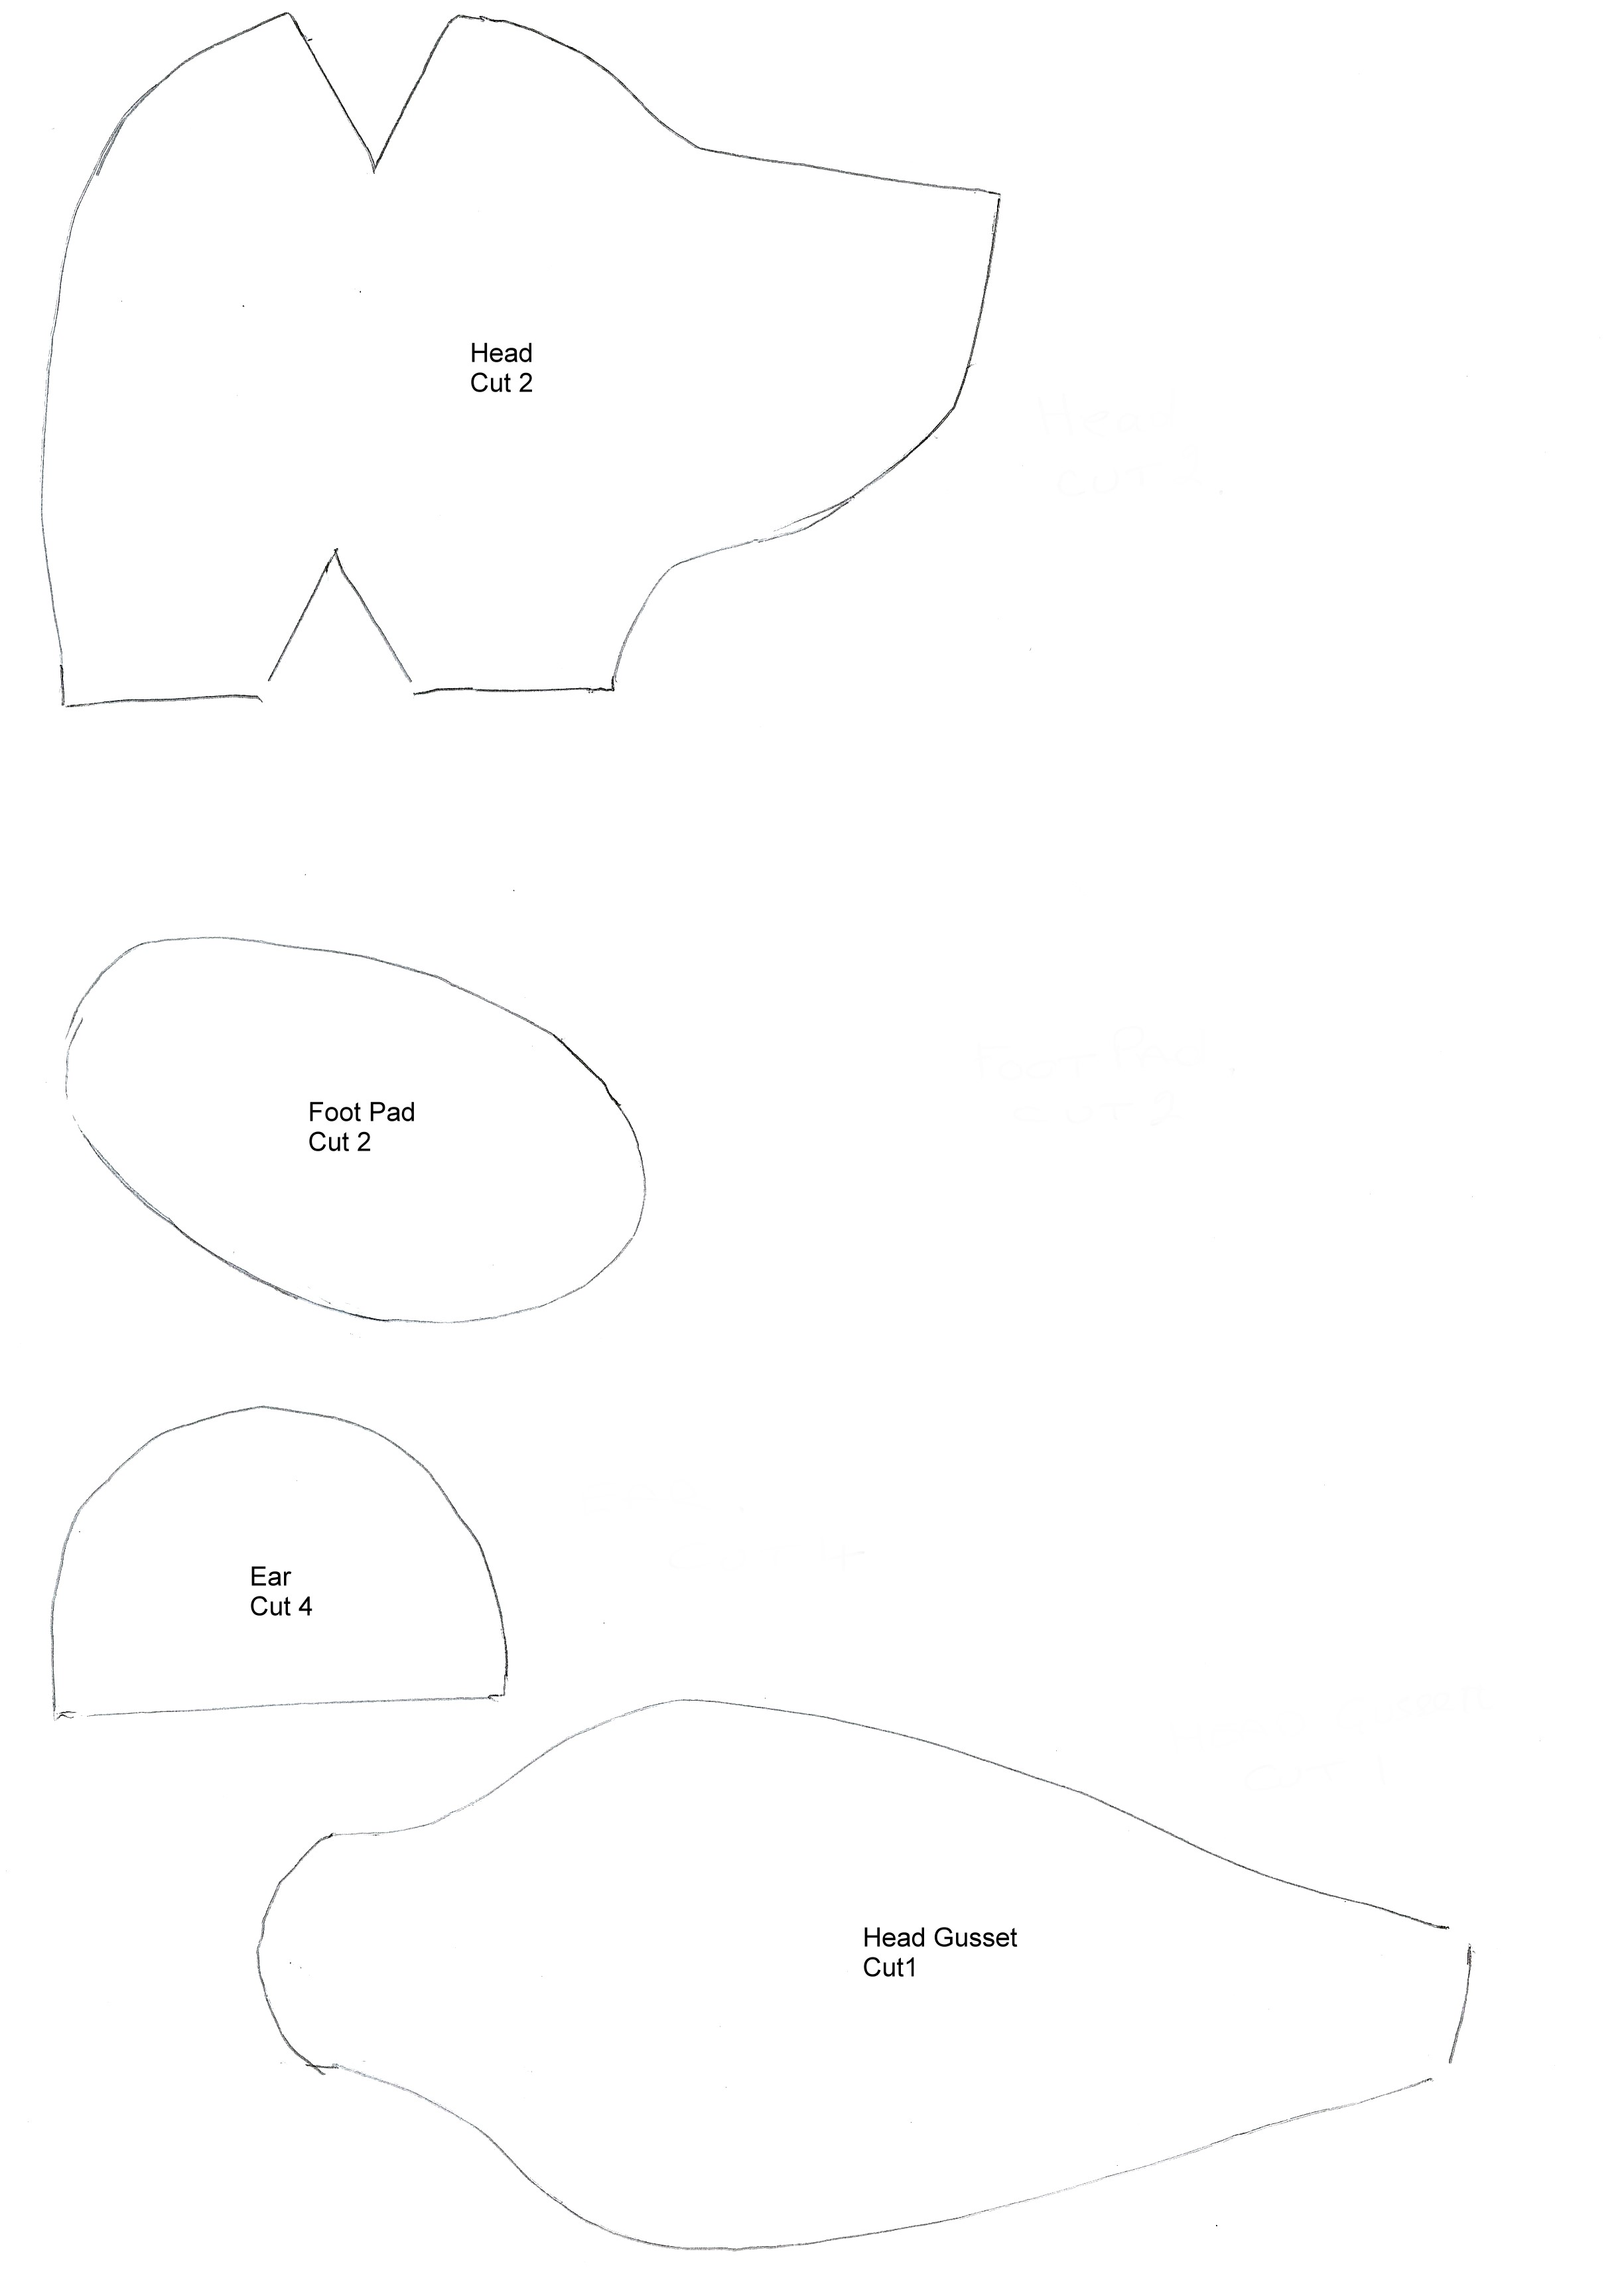
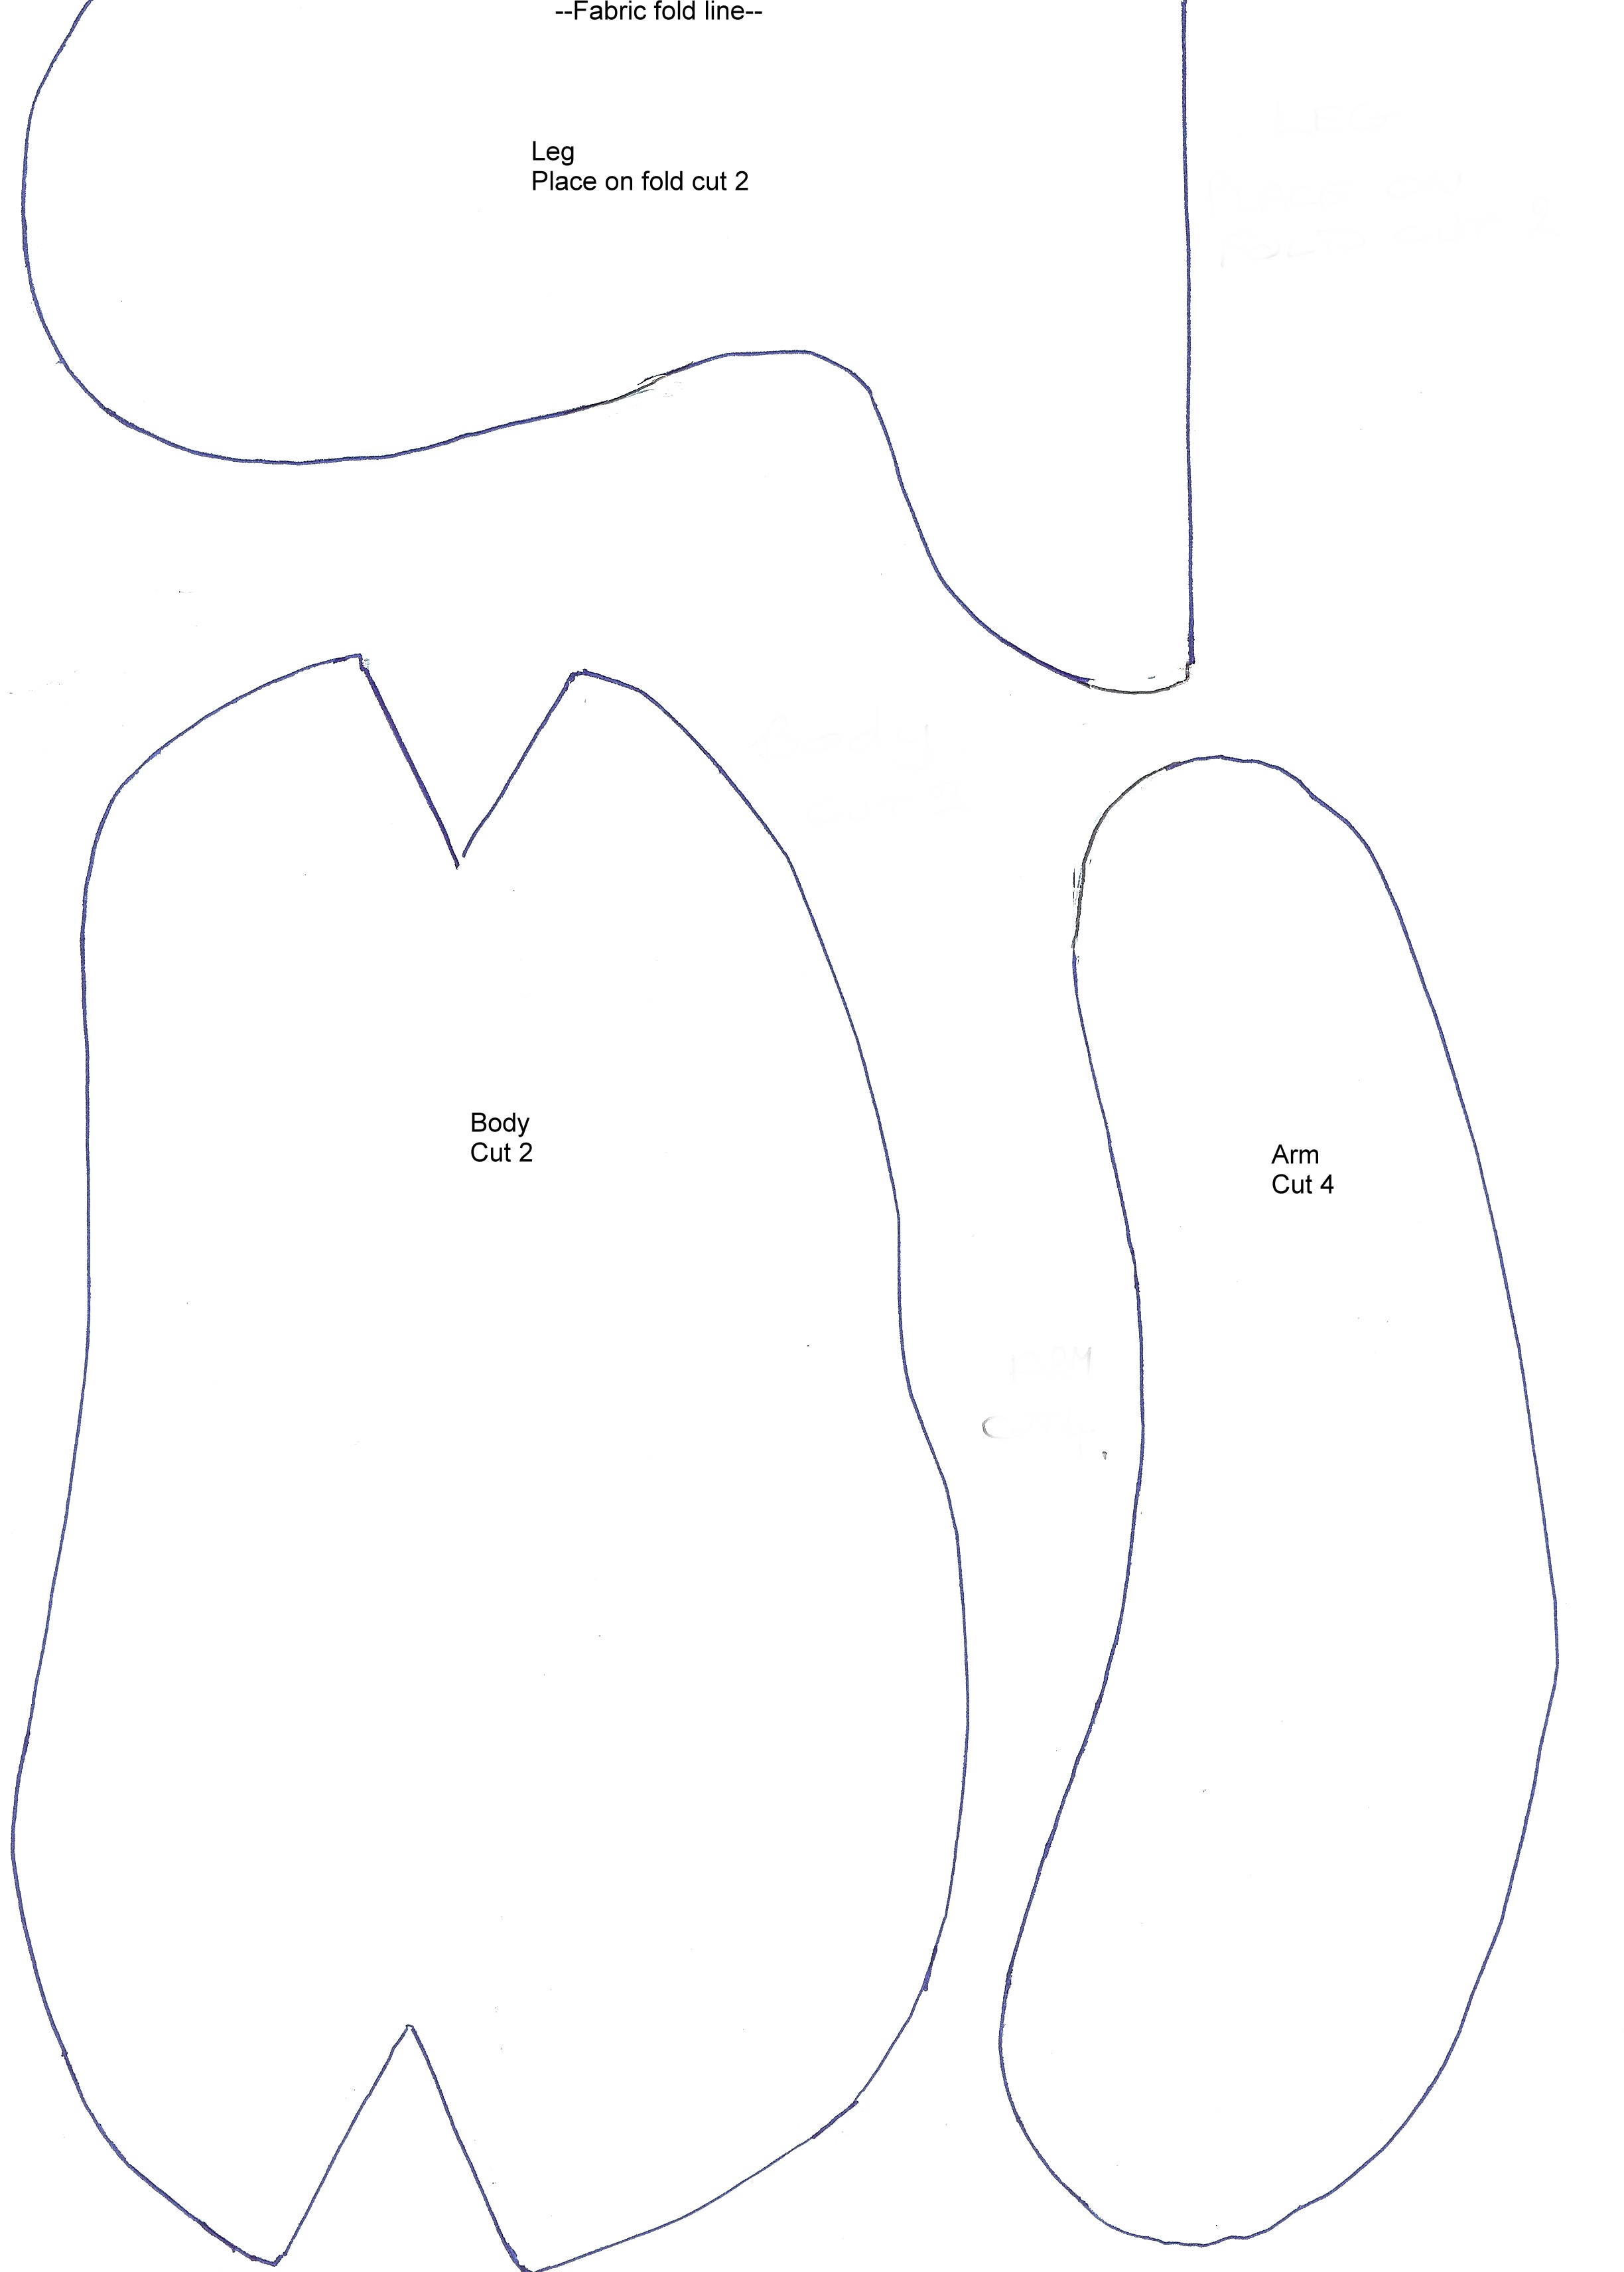
Start by printing out the patterns onto A4 sized paper.
Small Recycled Teddy Bear Pattern 1
Small Recycled Teddy Bear Pattern 2
Prepare your sweater by cutting the seams to create a single layer of fabric.
Cut out each pattern piece and lay it down onto your sweater. Cut out each piece.
Sew the body first. Sew the bottom darts on both sides then sew the two pieces together. Leave an opening at the top for filling the body.
Legs
Sew two pieces together and leave an opening at the top above the fold , for filling, sew the foot pad into place.
Arms
Sew the two pieces together, leave an opening at the top back edge for filling.
Ears
Sew the two pieces together and leave an opening at the bottom, turn them and sew the bottom by hand.
Head
Sew Gusset to one side of the head, the rounded end goes to the nose. It may be easier if you pin this in place so you get both sides the same.
Before you fill the head, clip 2 teddy bear safety eyes into place. They should be positioned at the beginning of the snout.
Fill and place ears into position, attach to the head with a blanket stitch, making sure they are secure.
Fill all remaining parts, sew up openings and attach to the body each part with strong cotton and a button for a joint effect.
All done!




Do the pattern pieces include a seam allowance?
how on earth do you print it without all the ads etc. Tried highlighting the bits Instructions but it wont print. tried the free download for pdf ( my security says no). Managed to change margins and print the patterns but could you please make it simple im not a dummy but have spent far too long for what should be a simple action. Thank you for the pattern but you do need to simplify.
Hey Hazel,
If you login, then you get to print without the ads!
Could you please explain how to make joints by attaching buttons? I’d like to make this adorable bear, but have no idea how to make those joints. Thanks!
I love this idea, even though i didn’t try it yet. The bear is very cute too! i would like to make the recycled sweater teddy bear as well but, the pattern seemed to have cut off when i printed it. I hope you can help me!
you did a good job of coming up with this bear.
OK, just finished my bear, TOO CUTE. It looks more difficult than it really is, hardest part was figuring out the head. I made mine for my little ones first birthday!
I increased the size of each pattern in print preview to 110%, which filled the A4 paper much better. Instructions could be much better though, especially for beginners.
Could you please explain how to attach the arms and legs with the buttons a little more? I understand this will make it more like a joint with the motion but I am wondering how you did it…
I loved this, yes it sounds a little daunting but take each step by step and hey presstoe you have a gorgeous bear, made mine from pretty rose material created a very shabby chic bear perfect for setting off a feature shelf or dressing table. go on try it.
The image should fit from edge to edge on an A4 sized paper.
i love it i made one for my little sis she loved it
Looks easy enough, but it would be nice to know how much we should expand the given pattern by. Any idea?
Jen So cute I want to do it but it so hard to do
so cute! but way too hard for me.
looks hard… but so cute
love it!