
Get more details about this project
What you need
Felt fabric
Needle and thread
Pencil or pen – for tracing the template
Scissors
Cotton
Instructions
Get ready to add some festive cheer to your holiday décor with this adorable Christmas Felt Gingerbread House Plushie! Perfect for both adults and children alike, this free sewing pattern is a fun and easy way to create your very own plushie that will add a touch of sweetness to any room in your home.
Whether you’re a seasoned pro or just starting out in the world of sewing, this pattern is a great way to flex your skills and create something truly special that you’ll cherish for years to come. So grab your felt and thread and let’s get started on this fun and festive project!
Step 1:
Print and cut out the template patterns. Gingerbread House Template
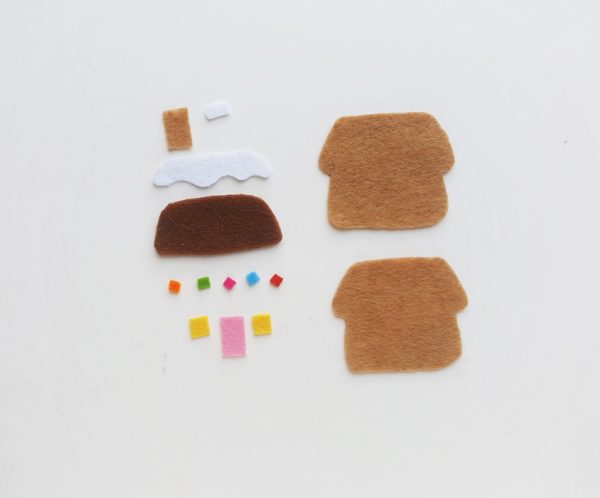
Select felt fabrics for the gingerbread house – looks cuter if you use light brown for the house. Trace the template patterns on the selected felt fabrics and cut them out using scissors. The template includes – 2 patterns for the house (including the roof part), 1 roof, 1 chimney, 2 squares of the same size (windows), 1 rectangle (door), 5 small squares of the same size (roof décor), 1 snow pattern for the roof and 1 snow pattern for the chimney.
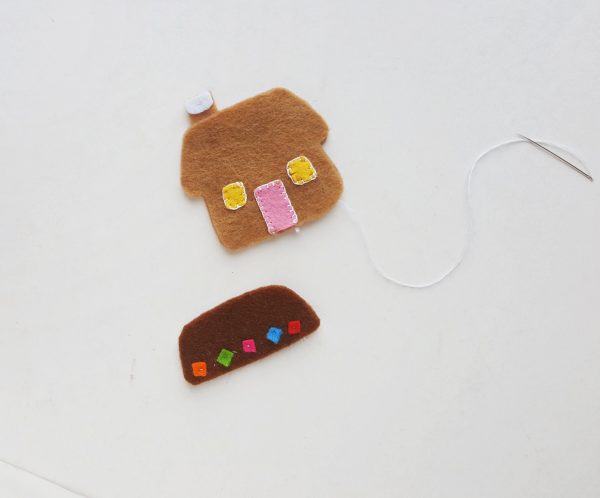
Step 2:
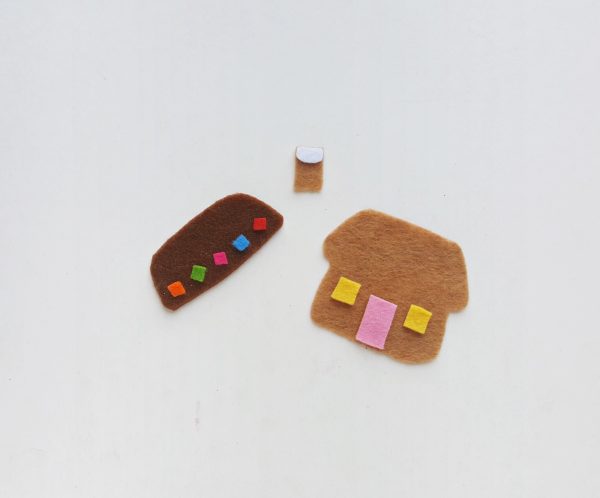
Take the rood cut out and place the small squares along the bottom side of it; arrange them however you like. Place the small snow pattern on the top end of the chimney. Take any one of the house patterns and place the windows and the door on it; arrange the door on the middle with the 2 windows on both sides of the door.
Step 3:
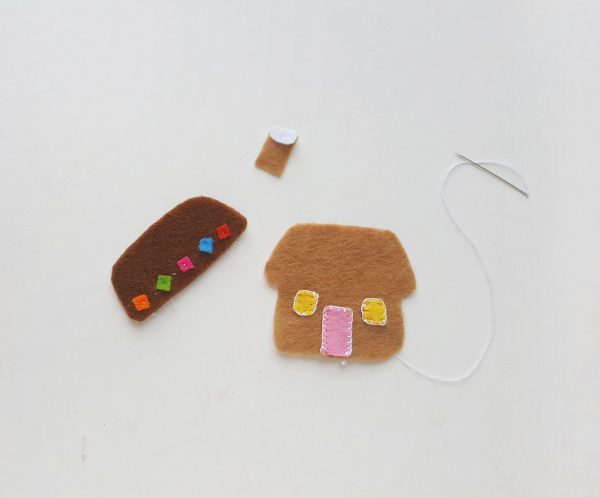
Prepare needle and thread and simply stitch all items places and arranged in previous step.
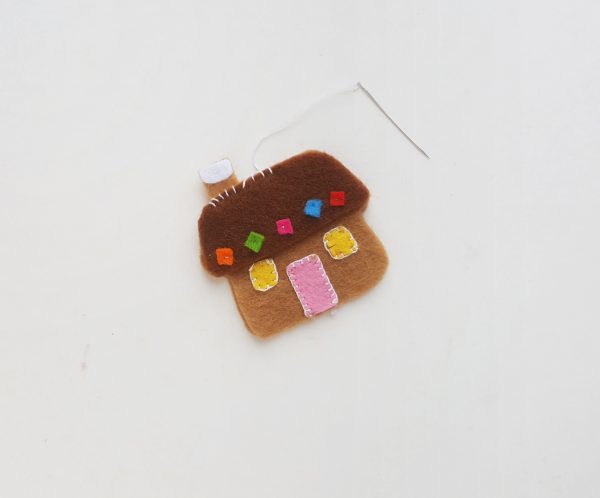
Step 4:
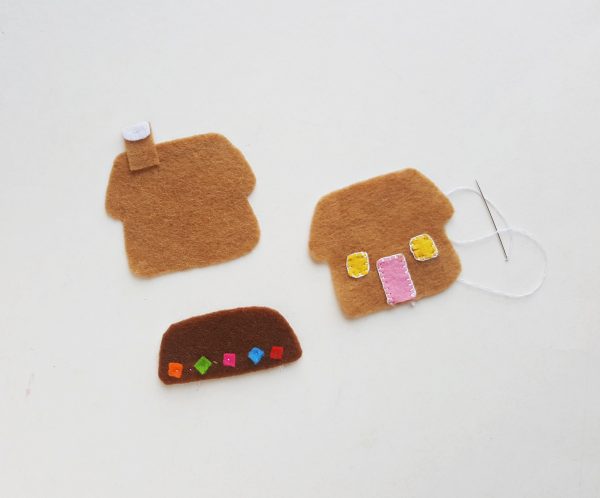
Done stitching? Now take the other house patterns and place it on a flat surface. Place the chimney on a side of the top end of the house pattern, keeping the snow part upwards and overlapping a bit of the chimney with the top end of the house.
Step 5:
Place the detailed house pattern on the top of the plain one, keeping the chimney between both house patterns.
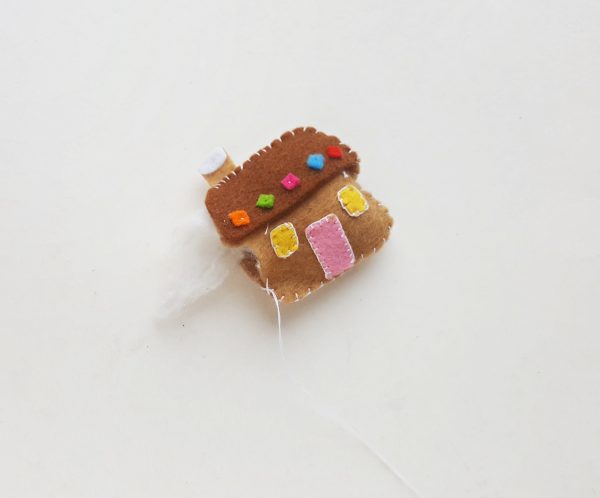
Step 6:
Now place the roof on its place (on the top of the stitched house pattern, making sure to match the sides nicely with the roof of the house. Prepare needle and thread and start to stitch all items together, starting your stitch from the chimney. While stitching keep in mind to stitch the chimney, roof and both house patterns together.
Step 7:
Keep small opening for stuffing the house. Use cotton to stuff the house through the small opening. Once the stuffing is done stitch the open end to secure the stuffing.
Step 8:
Now take the snow pattern of the roof and place it on the roof; matching the straight sides of the roof and snow pattern. Stitch the snow with the roof along the straight part. You can also stitch the wavy side but looks nice without stitch.
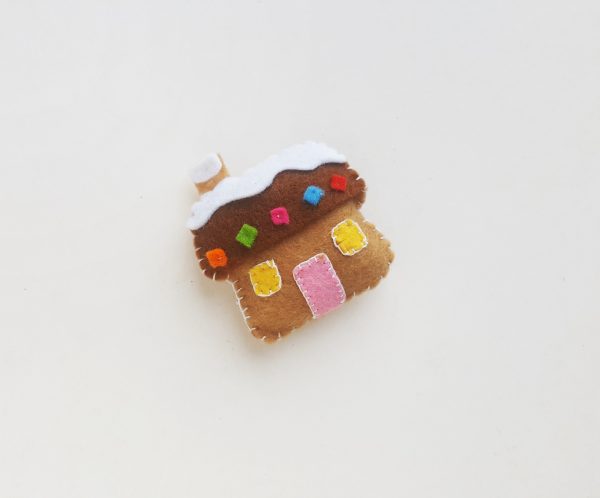
Want to add more details? Go ahead and have fun!


What do you think of this project? Let us know!