
Get more details about this project
What you need
Decorative Buttons
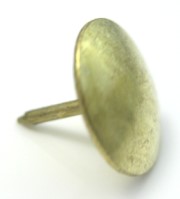
Metal push pins
Hot glue or craft glue
Looking for a tiny handmade gift that is easy, affordable, and actually useful? These DIY button push pins are one of those little craft projects that come together in minutes but still feel thoughtful and personal. They are perfect for teachers, Mother’s Day, Father’s Day, stocking stuffers, desk accessories, or just a sweet handmade surprise for someone who loves cute stationery.
What makes this project so appealing is how simple it is. You do not need fancy supplies, special tools, or a full afternoon set aside for crafting. All you need are a few decorative buttons, some plain push pins, and a strong glue. That is it. In just a short time, you can turn basic office supplies into colorful, quirky little gifts that are both practical and fun.
These button push pins are also a great way to use up odds and ends from your button stash. If you have novelty buttons tucked away in a jar, this is the perfect excuse to finally use them. Think flowers, hearts, stars, apples, animals, bright colors, or classic shapes. You can mix and match styles to suit the person you are making them for, which makes this project feel extra personal without adding any extra work.
How To Make Button Push Pins
To make these cute little push pins, simply glue a decorative button onto the flat top of a push pin and allow it to dry completely. It really is as simple as that.
Make sure you use a strong adhesive that bonds well to both metal and plastic. Once the glue has set, your push pins are ready to use on corkboards, memo boards, study nooks, or office walls.
If your buttons have shanks on the back, you may need to remove them first or choose flatter styles that sit neatly on the push pin. The flatter the button, the easier it will be to glue and the better it will sit once dry.
A Cute Gift Idea For Teachers, Parents, and Friends
These button push pins make lovely little gifts because they are cheerful, handmade, and useful. Teachers can use them on classroom boards, parents can use them in home offices, and kids can help choose button styles to personalize each set.
For Teacher Appreciation gifts, try using apple-shaped buttons or bright school-themed colors. For Mother’s Day, floral buttons or heart shapes work beautifully. For Father’s Day, you could go with simple classic buttons in navy, green, brown, or black for a more understated look.
Because they are so small, they are also ideal when you want to give a handmade gift without spending a lot of money. A tiny set of decorated push pins feels thoughtful and creative, especially when packaged nicely.
How To Package Them As Gifts
Once you have made a few button push pins, pop them into a small tin, recycled matchbox, mini jar, or even a folded paper gift box. This instantly makes them feel more special and gift-ready.
A recycled matchbox is especially cute for this project and gives it that handmade, crafty charm. You can cover the outside with scrapbook paper, washi tape, or a handwritten label to finish it off. A small mint tin also works well and keeps the push pins safe and tidy.
If you are making these for a market stall, school fundraiser, or party favor, packaging them in little sets of four or six makes them easy to display and even easier to gift.
Why This Is Such A Great Little Craft
This is the kind of craft project that works for almost any age. Adults will love how quick and useful it is, and older kids can easily help make them too. It is a nice beginner-friendly craft because there is no sewing, no painting, and no complicated steps.
It is also one of those projects that feels satisfying because the transformation is instant. A plain push pin becomes something bright, fun, and giftable with almost no effort. Those are the best kinds of crafts when you are short on time but still want to make something by hand.
Instructions
Looking for a tiny handmade gift that is easy, affordable, and actually useful? These DIY button push pins are one of those little craft projects that come together in minutes but still feel thoughtful and personal. They are perfect for teachers, Mother’s Day, Father’s Day, stocking stuffers, desk accessories, or just a sweet handmade surprise for someone who loves cute stationery.
What makes this project so appealing is how simple it is. You do not need fancy supplies, special tools, or a full afternoon set aside for crafting. All you need are a few decorative buttons, some plain push pins, and a strong glue. That is it. In just a short time, you can turn basic office supplies into colorful, quirky little gifts that are both practical and fun.
These button push pins are also a great way to use up odds and ends from your button stash. If you have novelty buttons tucked away in a jar, this is the perfect excuse to finally use them. Think flowers, hearts, stars, apples, animals, bright colors, or classic shapes. You can mix and match styles to suit the person you are making them for, which makes this project feel extra personal without adding any extra work.
How To Make Button Push Pins
To make these cute little push pins, simply glue a decorative button onto the flat top of a push pin and allow it to dry completely. It really is as simple as that.
Make sure you use a strong adhesive that bonds well to both metal and plastic. Once the glue has set, your push pins are ready to use on corkboards, memo boards, study nooks, or office walls.
If your buttons have shanks on the back, you may need to remove them first or choose flatter styles that sit neatly on the push pin. The flatter the button, the easier it will be to glue and the better it will sit once dry.
A Cute Gift Idea For Teachers, Parents, and Friends
These button push pins make lovely little gifts because they are cheerful, handmade, and useful. Teachers can use them on classroom boards, parents can use them in home offices, and kids can help choose button styles to personalize each set.
For Teacher Appreciation gifts, try using apple-shaped buttons or bright school-themed colors. For Mother’s Day, floral buttons or heart shapes work beautifully. For Father’s Day, you could go with simple classic buttons in navy, green, brown, or black for a more understated look.
Because they are so small, they are also ideal when you want to give a handmade gift without spending a lot of money. A tiny set of decorated push pins feels thoughtful and creative, especially when packaged nicely.
How To Package Them As Gifts
Once you have made a few button push pins, pop them into a small tin, recycled matchbox, mini jar, or even a folded paper gift box. This instantly makes them feel more special and gift-ready.
A recycled matchbox is especially cute for this project and gives it that handmade, crafty charm. You can cover the outside with scrapbook paper, washi tape, or a handwritten label to finish it off. A small mint tin also works well and keeps the push pins safe and tidy.
If you are making these for a market stall, school fundraiser, or party favor, packaging them in little sets of four or six makes them easy to display and even easier to gift.
Why This Is Such A Great Little Craft
This is the kind of craft project that works for almost any age. Adults will love how quick and useful it is, and older kids can easily help make them too. It is a nice beginner-friendly craft because there is no sewing, no painting, and no complicated steps.
It is also one of those projects that feels satisfying because the transformation is instant. A plain push pin becomes something bright, fun, and giftable with almost no effort. Those are the best kinds of crafts when you are short on time but still want to make something by hand.


we have made these to use with fabric covered memo boards- either push pins or thumbtacks are cute
hi
this is simple yet great idea .
thanks
Ananya