
What you need
6 pieces of paper
scissors
tape/staples
pencil
ruler
Instructions
This is an addition to a post I viewed on this website. The comments stated requests for pictures and instructions so hopefully this helps.
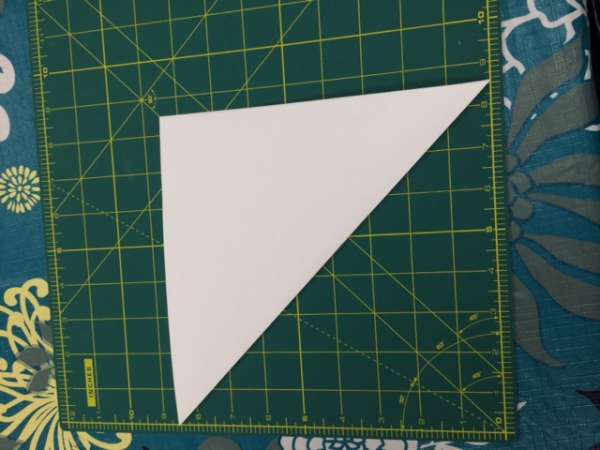
Start with a square piece of paper (I used regular printer paper that starts off 8.5 x 11 inches, and trim the long side down to 8.5” so I end up with a 8.5” square).
Fold the square in half making the paper into a triangle
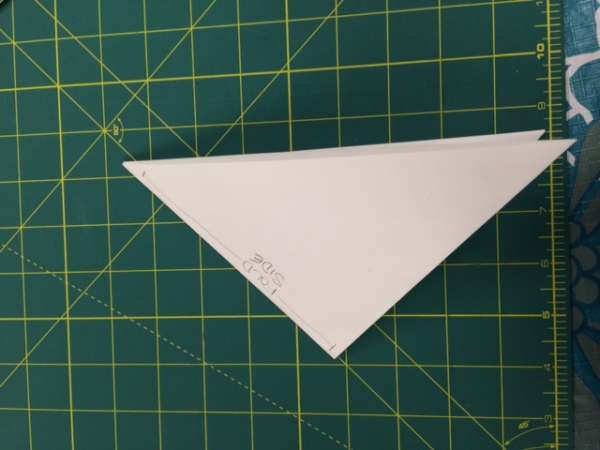
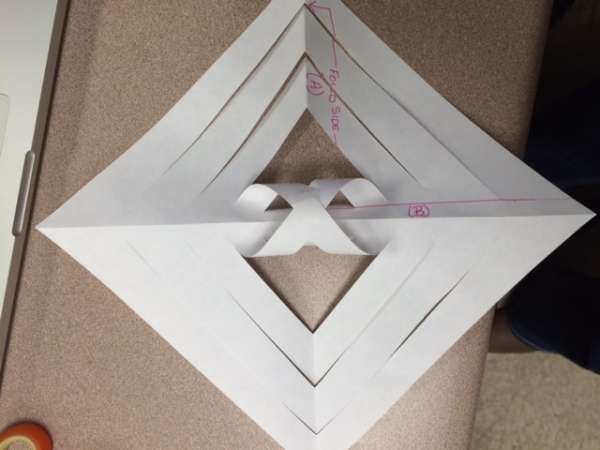
Position the main fold (crease) closest to your stomach. This will leave side “B” on your right (it will have two folds (one on each “flap”). Now, on the right side (side “B”) make a line (in pencil so you can erase it after you make your cuts) that is 1 cm from the right side (Side “B”)
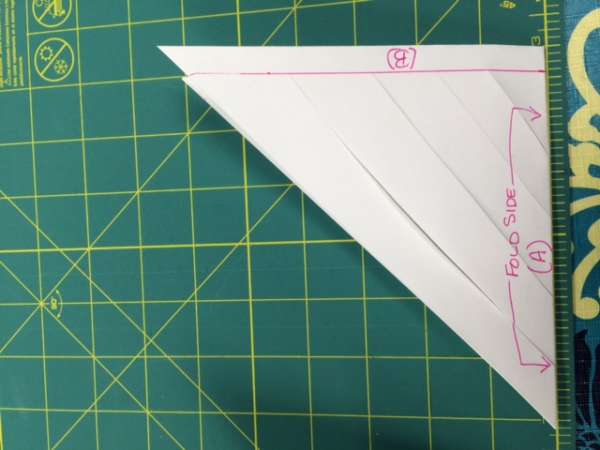
Make 4 diagonal cuts. Each starts at the Bottom (Line “A”/ “Fold side) and goes to the line you drew on side “B” (my pictures got turned, so they aren’t consistent with the directions). Completely unfold the paper:

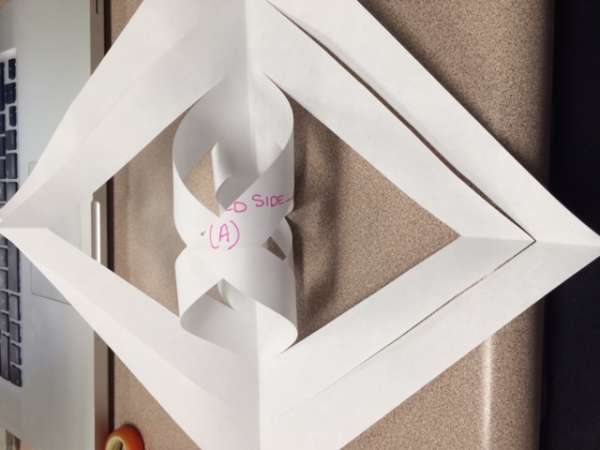
Take the outer points of the 2 innermost triangles (smallest). When they make a small tunnel, tape/glue/staple them together.
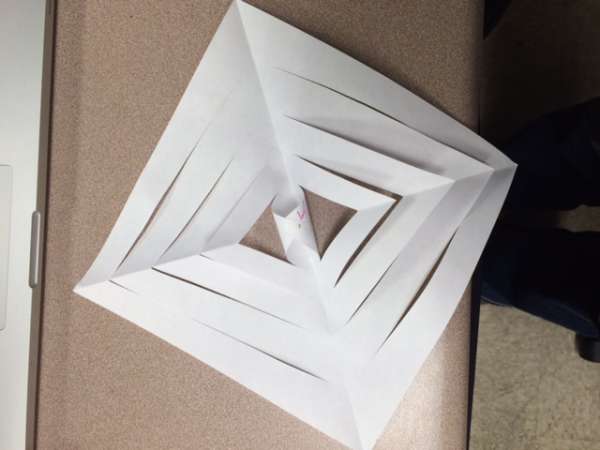
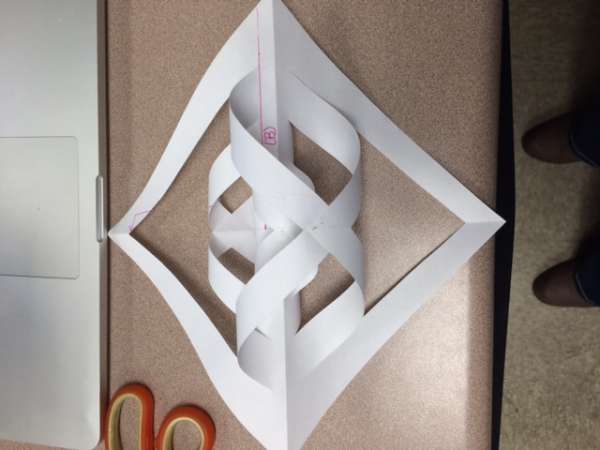
*Turn the paper over, take the next two triangles and repeat the same process as you did the first 2 triangles. * (Continue the process that is between the 2 *’s until all triangles are taped.
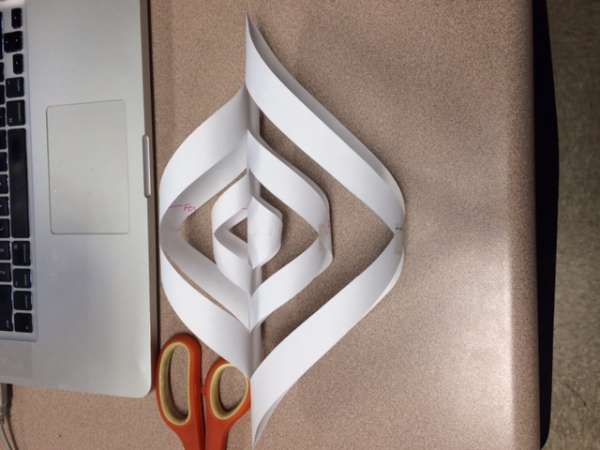
Now do the same process with the other five pieces of paper. This will give you a total of 6.

Make sure the center “tunnels” are facing the same direction and staple them together. I’m not sure if it matter which end you staple together, but be consistent with all of the following additions after this one. I used staples to put the 6 spirals together, but tape could be used.

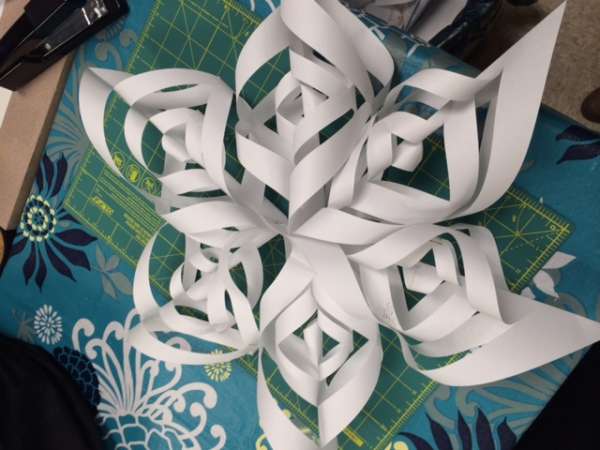

All done. How did your’s turn out?


Just a suggestion–I’ve made these from old sheet music I found at a second hand store. They are so Christmas-y looking! Try it!
The steps that were left out left me very confused. I’ll check back later and see if the missing instructions have been inserted.
I love this! I was thinking of making these with different sized squares. I think they would be just a pretty!
Well I’ve made 4 so far, it’s addicting. Love this idea, please keep them coming. Any more ideas similar to this one ?
Finally figured it out, came out lovely. Larger than I thought, but very nice. Will be making several to use like a banner effect for next Christmas. Mahalo for sharing.
It looks like a lot of fun. Will do it soon Thank you
How do I get two folds “one on each of the flaps”? Only one crease or fold has been suggested.
I failed to say to fold the original square in 1/2 twice. Luckily els-ny let me know. I’m going to try to edit my post. Again, my apologies.
I just made one part of the flake with a piece of scrap paper – definitely worth trying! I think one step might have been left out – the original square needs to be folded in half twice. I also found that it would be easier to make the tunnels if I folded the opened paper back on itself so it would lie flat before I started making the tunnels.
Sorry I left that out, I’ll try to edit my post. Thanks for letting me know.
My grandson showed me how to make these for Christmas! We made bunches of them. I used hot glue and card stock in different colors. Gave them out at the office. Everyone loved them and thought I did something spectacular!
Like we haven’t got enough snow outside… But it looks easy. I’ll have to try it soon. 🙂
Fantastic – always wanted a way to make fancier snowflakes!
<3 it! Going to make some for my xmas tree in my bedroom which I keep up all year round. I just redid my bedroom with dark olive green and dark browns. Olive green snowflakes are going to look perfect on my tree. I also have red berries and pine cones on the tree. Thank you so much for the post.
That sounds beautiful! I hope the post makes it easy for you. Have fun!
Fantastic will have a go tomorrow for sure x