
What you need
To make this doll you’ll need:
1. Felt
2. Needle and thread
3. Template
4. Pen or chalk
5. Scissors
6. Confetti
7. Fabric glue
Instructions
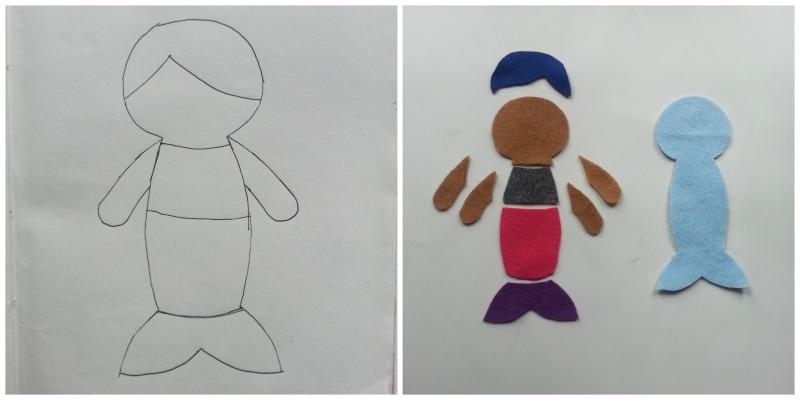
Step-1: Prepare a template for the mermaid doll. You can simply follow the one I drew, it’s really easy to trace. Gather your fabrics, you can also use felt. Use different colored fabrics for the tail, body and upper body parts to make the doll look colorful. You will have to cut separate pieces for the front side of the doll, these include- head (face), hair, hands, upper body part, lower body part and the tail. For the back side you can also use separate pieces or you can also use one piece to cover the entire back. 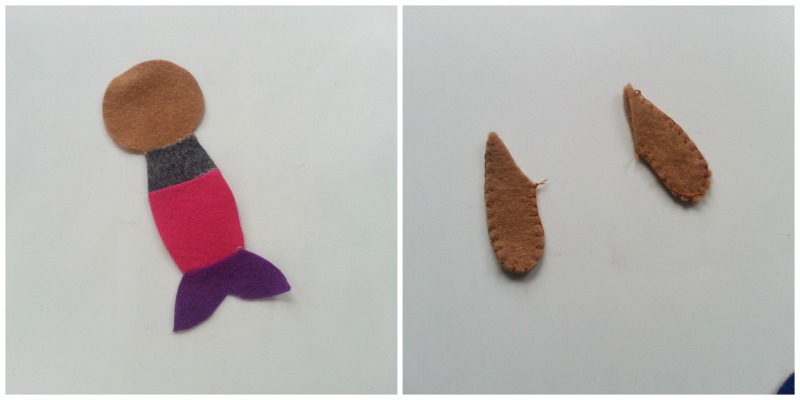
Step-2: Use hot glue to join all the pieces of the cut our felts for the front side. Join them nicely. Take the pieces for the hands and join 2 pieces together by keeping a small open area for filling.
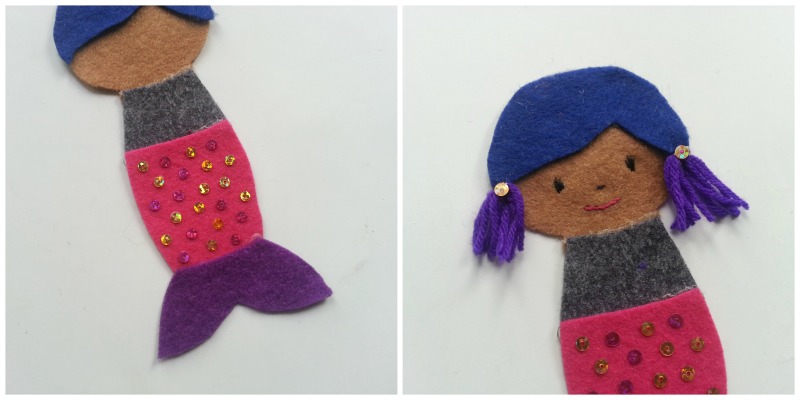
Step-3: You can use printed fabric or create your own pattern using confetti! These look great on mermaid dolls. I simply glued the confetties on the lower body part of the mermaid. Glue the hair part on the top end of the head (front side). Draw the face and then stitch the face pattern neatly. Use small amount of yarns to make tiny pony tails and stitch them on both sides of the head.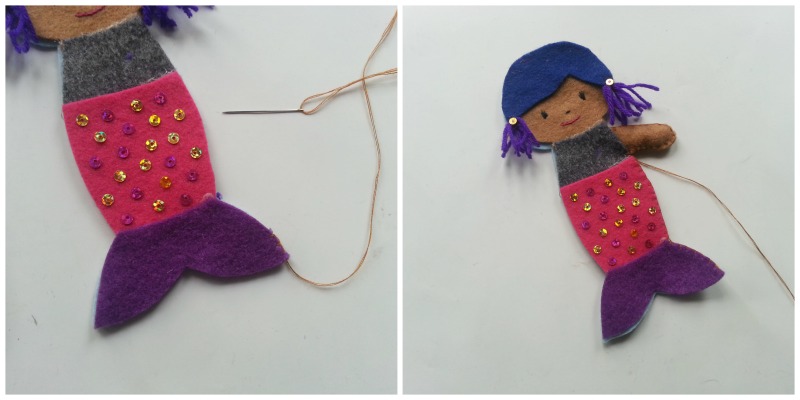
Step-4: Prepare needle and thread. Place the plain felt piece on a flat surface and then place the patterned piece on it. Start stitching both parts together from the bottom side to join them. Do flat blanket stitches. Once you reach the upper body part insert one of the stitched hands through both felt pieces and stitch the hand with the body pieces. Similarly stitch the other hand.
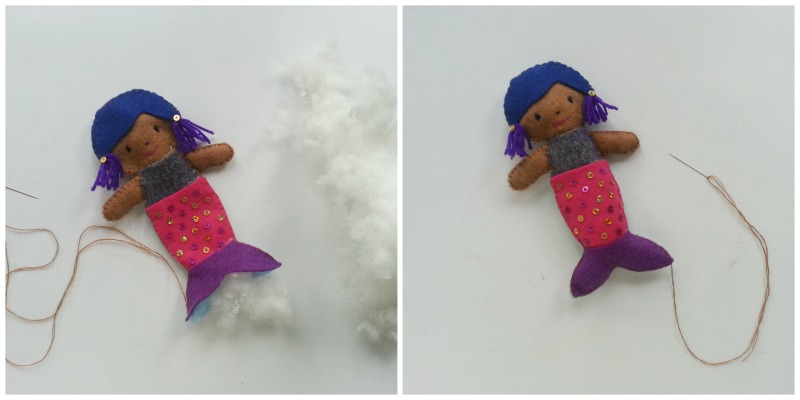
Step-5: Stitch all the way to the other side but keep a small open area for stuffing. Gather the stuffing and insert them into the doll through the open area. Do not stuff too much wool stop inserting once the doll looks nice and fluffy. Close the open area with flat blanket stitches once you’re done stuffing. Cut off extra thread and done!


My kids had a lot of fun trying to make it last weekend.
Very cute mermaid! Kids will love it!