
Follow the instructions given below and learn how to make pretty paper hyacinth flowers in 5 easy steps.
What you need
To make these flowers you’ll need: Colored paper, Scissors and Glue.
Instructions
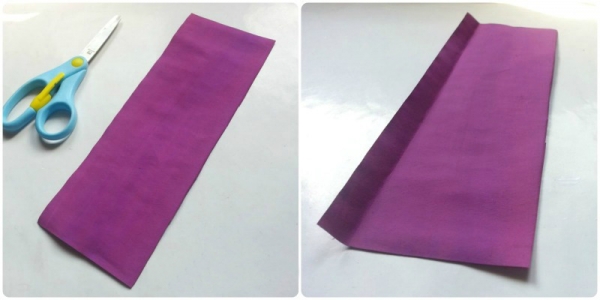
Step-: Cut a colored craft paper into a rectangular shape, of at least 2 inches width and length of your choice, I kept the paper 2 X 8 inches. Make a thin fold along any one of the vertical edges of the paper.
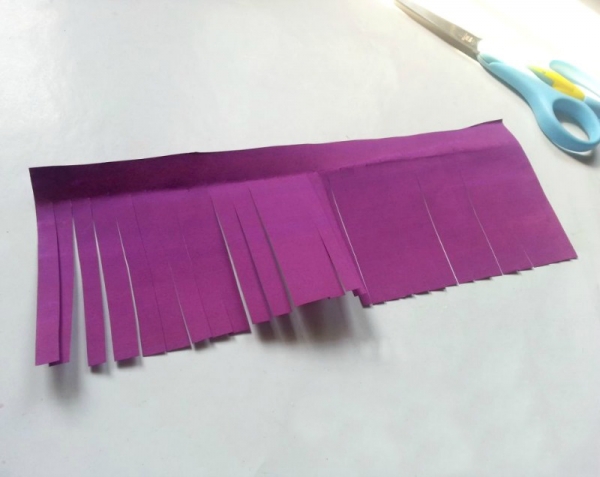
Step-2: You can fold the paper strip into half to save your time cutting fringes on it. Cut the paper strip horizontally, but not all the way through. Leave 1 cm of the strip along the vertical edges, or more clearly leave the thin folded area (the vertical fold made in step 1) intact. Try to cut all the fringes equally, no pressure, I’m sure you can do it.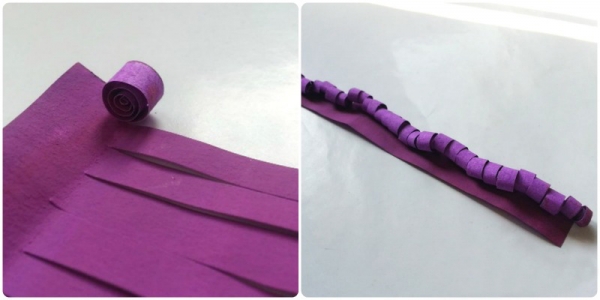
Step-3: Now that you’re done cutting fringes along the vertical edges it’s time to roll the fringes into swirly patterns. Start rolling each strip from its open end and roll it all the way through the closed end, which means use the whole strip (fringe) to make a swirly pattern. This is the only step which takes time but it’s the most important step. Roll each strip one by one and make sure the swirls turn out fine.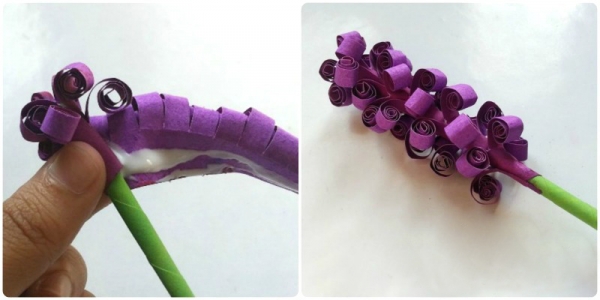
Step-4: Before making the flower you’ll have to make a stem for the flower. Use green paper for making the stem. Take the swirly-fringed paper and apply glue along the intact part of the swirly-fringed paper. Wrap the glued area of the swirly-fringed paper on the green rolled paper (stem). Start gluing it from the top of the stem carefully rolling it towards the bottom of the stem. Keep rolling (and gluing) until the swirly paper ends.
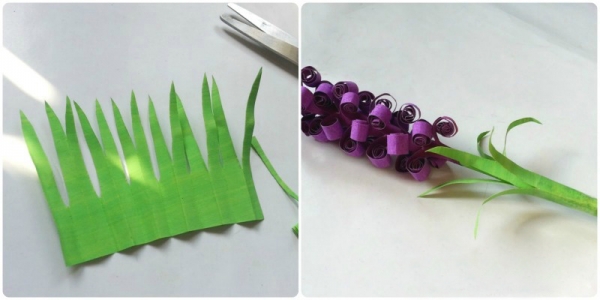
Step-5: Use green craft paper to make the leaves. Glue the leaves below the flower, around the stem. Done!
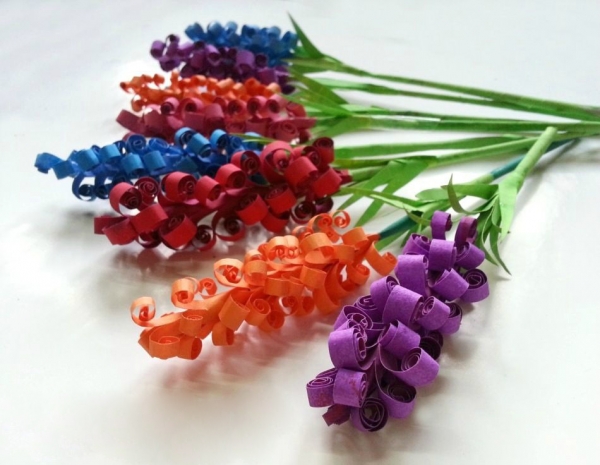
Don’t they look pretty! Enjoy making some!


Amazing !no words to say.