
What you need
Yarn
Crochet hook – 4 mm
Scissors
cardboard or broomstick crochet pin.
Instructions
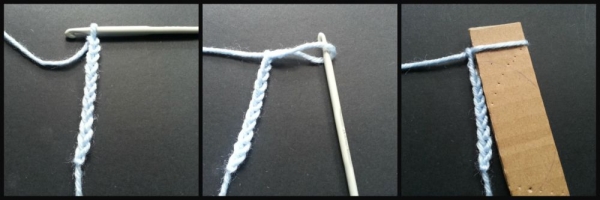
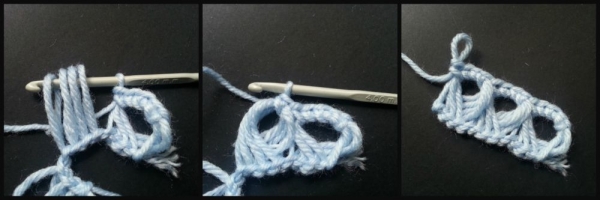
Step-1: Stitch 12 chains and this number should be fixed. No matter how many chains you make but you have to make sure that it is a multiple of a fixed number. I’m doing 12 chain stitches, a multiple of 4 and I’ll be doing 3 broomstick crochet on each row. Pull out the 13th chain stitch and draw it through a piece of card board (1 X 5 inches). Pull the loose end of the yarn to tighten the chain with the cardboard.
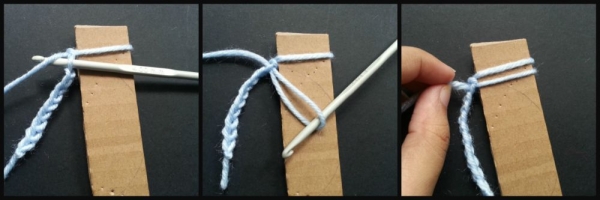
Step-2: Draw the hook through the next chain stitch and yarn through the chain. Pull the chain out, remove it from the hook and take it through the cardboard piece,
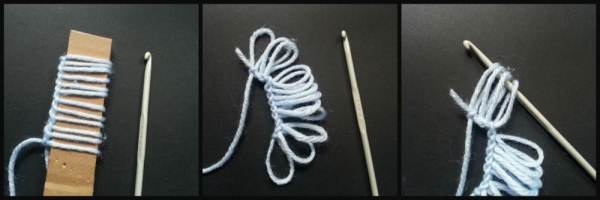
Step-3: After you are done making 12 chains on the cardboard carefully get them out. Consider 4 loops as a group. Draw your hook through any 4 loops from a side.
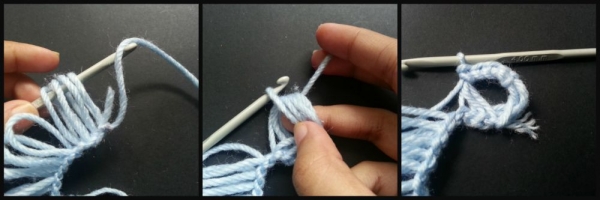
Step-4: Wrap the yarn over the hook and yarn through the group of 4 loops, again yarn over and chain 1 at the top. The 4 loops are now joined together with the first single crochet. Now, do 3 more single crochet and your first broomstick crochet is done! Don’t forget to keep the number 12 fixed.
Step-5: Without removing the hook from the yarn, go for the next 4 loops (consider them as the group-2). Similarly, wrap and yarn through the group-2 and do 4 single crochet around to join the loops together. Do the same for the next 4 loops.
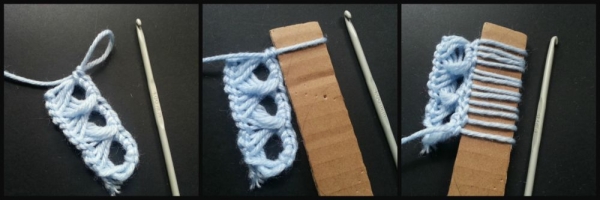
Step-6: Again pull out the last chain with the hook and get it through the cardboard piece. Draw the hook into the next chain stitch, yarn through the chain and fill the cardboard piece with loops like the previous one. Carefully pull the loops out of the cardboard after you are done.
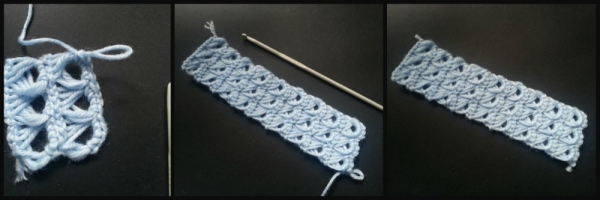
Step-7: Now do the second row of broomstick crochet and go on until it reaches its required length for the bracelet. After reaching the end make a slip stitch and cut off extra yarn.

Step-8: Attach 3 buttons on any one side of the crocheted bracelet since we have 3 broomstick crochet holes. Wrap it around your wrist and draw the buttons thorugh the broomstick crochet holes. Enjoy!


Been wanting to make one of these for a while and didn’t know how. Thanks for posting.
Should read 6 inch flexible ruler for uniform loops.
I have not done broomstick lace for years, but want to do some soon. I used to use a 6 inch flexible for uniform loops. It worked great. Thanks for all your helpful hints and patterns.