
Get more details about this project
What you need
Red/Green/White felt
Small scraps of felt in grey/red/black/yellow
Toy filling/wadding
Instructions
Sew your own sweet plushie Russian Matryoshka doll cushion with this charming handmade sewing project. Inspired by traditional nesting dolls, this soft fabric cushion is full of character and makes a lovely decorative accent for a child’s bedroom, nursery, reading nook, craft room, or handmade gift basket.
This DIY Matryoshka doll cushion is a fun project for using polar fleece, felt scraps, embroidery details, and toy filling to create a soft, cuddly doll-style pillow. The simple rounded shape makes it approachable for confident beginners, while the face, scarf, flowers, and decorative stitching give you plenty of room to personalize each doll with different colors and expressions.
Make one large cushion as a statement piece, or sew a small set in different sizes to create a plush nesting doll family. Whether you are making it for a child, a collector, or someone who loves folk-inspired crafts, this Russian doll cushion is a beautiful way to turn simple fabric into a keepsake-style handmade project.
Step 1: Download the patterns:
Russian Doll Pattern – Large (23 inch/52 cm)
Russian Doll Pattern – Small (6 inch/12 cm)
Step 2: Cut out all you pieces from the templates.
Step 3: Save all you scraps for appliqué on the apron.
Step 4: Begin with the apron. Appliqué your decoration on to the apron – this can be done either by hand sewing or machine.
Step 5: Sew the two scarf ties on in the position as directed.
Step 6: Stitch this on to the bottom half of the body, and set aside.
Step 7: Now sew the face on to your white circle.
Step 8: Pin your face into place on the top of the head and sew around.
Step 9: Sew the back head and body together . With right side facing inwards, sew both pieces together. Leave a gap for turning and filling with Toy Filling or Wadding .
Step 10: Once you have filled her nice and firm sew up the gap.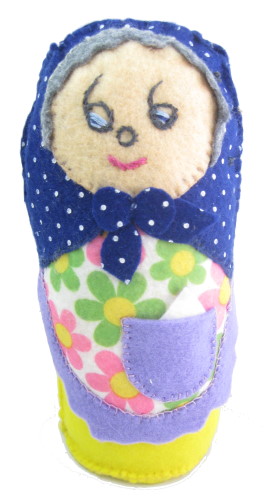


cute!!!