
Distressing the clay before baking adds a layer of age and texture. As a last step the colorful designs are drawn with felt markers to give the earrings visual punch that will get them noticed from across the room. They’re showy, unique and look somewhat like shards of pottery when finished.
Get more details about this project
What you need
Polymer clay
Wooden skewer
20-gauge jewelry wire, silver
Fine-grit sandpaper
Gray and tan acrylic paint
Assorted felt markers
Needle-nose pliers
Assorted beads (2 per earring)
Wire earring findings
Instructions
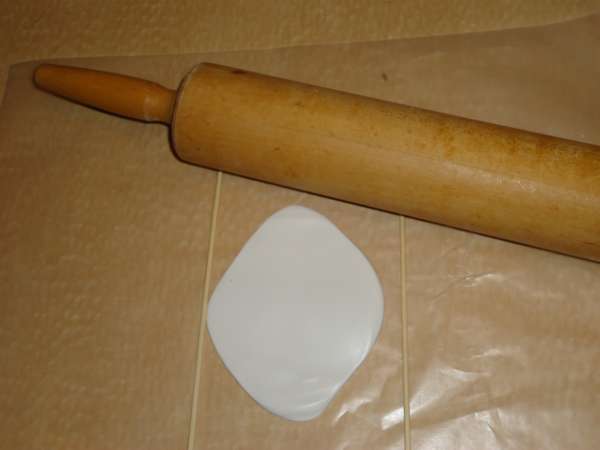
Wedge and roll out a small package or approximately 1/8-lb. clay to ¼-inch width. Place a ¼-inch dowel on either side of the clay and roll your rolling pin over it to ensure an even layer. Cut two circles of clay using the lid of a spice jar or similarly sized cookie cutter. Cut off a wedge from the circle that’s approximately one third of the overall size. Even though it’s a “half moon” the finished earring will be too skimpy if you use a true half-circle. Shape the clay into a crescent shape with your fingers. Don’t worry about making it perfect.
Use the tip of a wooden skewer to poke shallow holes in the clay and create slashes or lines.
Insert piece of wire vertically through the center of the crescent and remove. Bake the clay according to manufacturer’s directions. Allow the clay to cool completely and smooth rough edges with fine-grit sandpaper.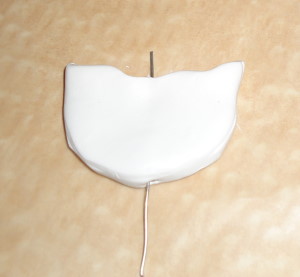
Paint the crescents with a light shade of tan, but do not give them a full layer of neat paint, the goal is to create an aged, multi-layered look. Brush on a medium shade of gray to “antique” the clay – wipe off excess paint with a paper towel. Paint, wipe and repaint until you have the desired look.
When the paint is completely dry use felt markers to complete the design. Use a dark gray or dark brown pen to color the indentations you made with the skewer and use colors of your choice to draw more lines, dashes or spirals on the clay. The colors used here are dark brown, olive green and dark pink.
Cut a 3-inch piece of wire and use the needle-nose pliers to create a small spiral at one end. Thread on the bead you’ve selected for the bottom of the earring and then place the earring on top of the bead. Top the earring with the second bead and twist the remaining wire into a spiral. Use the spiral like a jump ring to attach the earring to an earring finding.


What do you think of this project? Let us know!