
Get more details about this project
What you need
– plastic folder-$1
– placemat-$1
– ribbon-$1
– children’s activity book-$1
– dry erase markers-$1
– Exacto knife
– glue gun/sticks
– scissors
– 1/4″ elastic-2 pieces, cut into one 1-1/2″ piece and one 2″ piece
– paper clips
Instructions
Step 1. Open the plastic folder and separate the clear plastic from the folder pockets by using an Exacto knife to cut along the middle seam (Note: Don’t fret if the middle seam looks a little sloppy or uneven, as you will cover it up eventually!). Discard middle pockets.
Step 2. Lay the plastic sheet on top of the placemat and cut off edges of plastic to make the same size.
Step 3. Using paper clips, align and clip the plastic sheet and placemat together. Fold the pieces of elastic in half and paper clip one to each vertical side of the placemat between the two layers (use picture for reference).
Step 4. Sew layers together along the edge using a zigzag stitch 5. Using a low-temp hot glue gun, glue a piece of ribbon down the center of the plastic seam (Note: Hold the plastic layer away from the placemat so that the layers do not potentially stick together).
Insert a workbook, restaurant kid’s menu, or paper into the placemat and enjoy a relaxing and stress free night out to dinner!
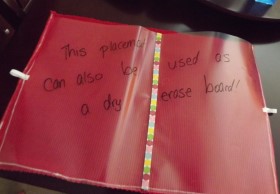


at craftmart store they carry dry erase sheets with sticky back that u just measure off the roll peel and stick sweet $5.00