
Get more details about this project
What you need
UV Resin
UV Lamp
Bookmark Mold
Silver Foil Flakes
Glitter
Resin Pigment
Small Cups


Instructions
For more detailed instructions with working with resin, I suggest reading our guide to basic resin casting.
Are you looking for a fun and creative way to add a personal touch to your reading experience? Look no further than this step-by-step tutorial on how to create your own UV resin bookmark with embedded designs.
Using a bookmark mold and a few other supplies, you’ll be able to make a one-of-a-kind bookmark that is not only functional but also visually stunning. This tutorial is perfect for crafters of all levels, whether you’re a seasoned resin artist or a beginner just starting out.
The tutorial will guide you through the process of preparing your mold, mixing the resin, and adding in any additional elements or embeds you’d like to include. You’ll also learn some helpful tips and tricks for working with UV resin, such as how to properly cure it using a UV light and how to achieve a smooth, bubble-free finish.
Once your bookmark is complete, you’ll be able to enjoy your favorite books with a beautiful and personalized marker that you created yourself. Plus, these bookmarks also make great gifts for the book lovers in your life!
So, gather your supplies and follow along with this free tutorial to create your own unique and beautiful resin bookmark. Get ready to elevate your reading experience with this fun and easy DIY project.
UV resin is a fun and versatile medium that can be used to create a wide range of projects, from jewelry to home decor. However, it’s important to take proper safety precautions when working with UV resin. Always wear a mask and gloves to protect yourself from any fumes or skin irritation that may occur during the process.
In order to cure the resin, you’ll need a UV lamp or nail lamp. It’s important to note that UV resin is best for smaller projects, as larger projects may require the use of epoxy resin instead. If you plan on adding mica powder, alcohol inks, or other colorants to your resin, you may need to cure it for longer than usual to ensure that it sets properly.
When using molds that are not clear, it can be difficult for the UV light to penetrate and cure the resin properly. As a result, it’s important to be mindful of the curing time and to check the project periodically to ensure that it is setting correctly.
To get rid of any bubbles in the resin before curing, you can use a lighter or heat gun to gently heat the surface of the resin. This will cause the bubbles to rise to the surface and pop, leaving you with a smooth and even surface. Be sure to run the heat source over the entire project before curing to ensure that all bubbles are eliminated.
By following these tips and taking proper safety precautions, you can create beautiful and unique projects with UV resin. Whether you’re a seasoned resin artist or just starting out, it’s important to always be mindful of safety and proper technique when working with any type of art medium.
When using UV Resin
- Always wear mask and gloves
- You need a nail lamp or UV lamp to cure the resin
- UV resin is good for small projects. For big products you need to use Epoxy.
- If you add mica powder, alcohol inks, etc. you will need to cure it longer. The same goes for molds that are not clear. It is hard for the UV light to penetrate.
- Use a lighter or heat gun to get rid of bubbles before curing. You should run the heat source over the project before curing.
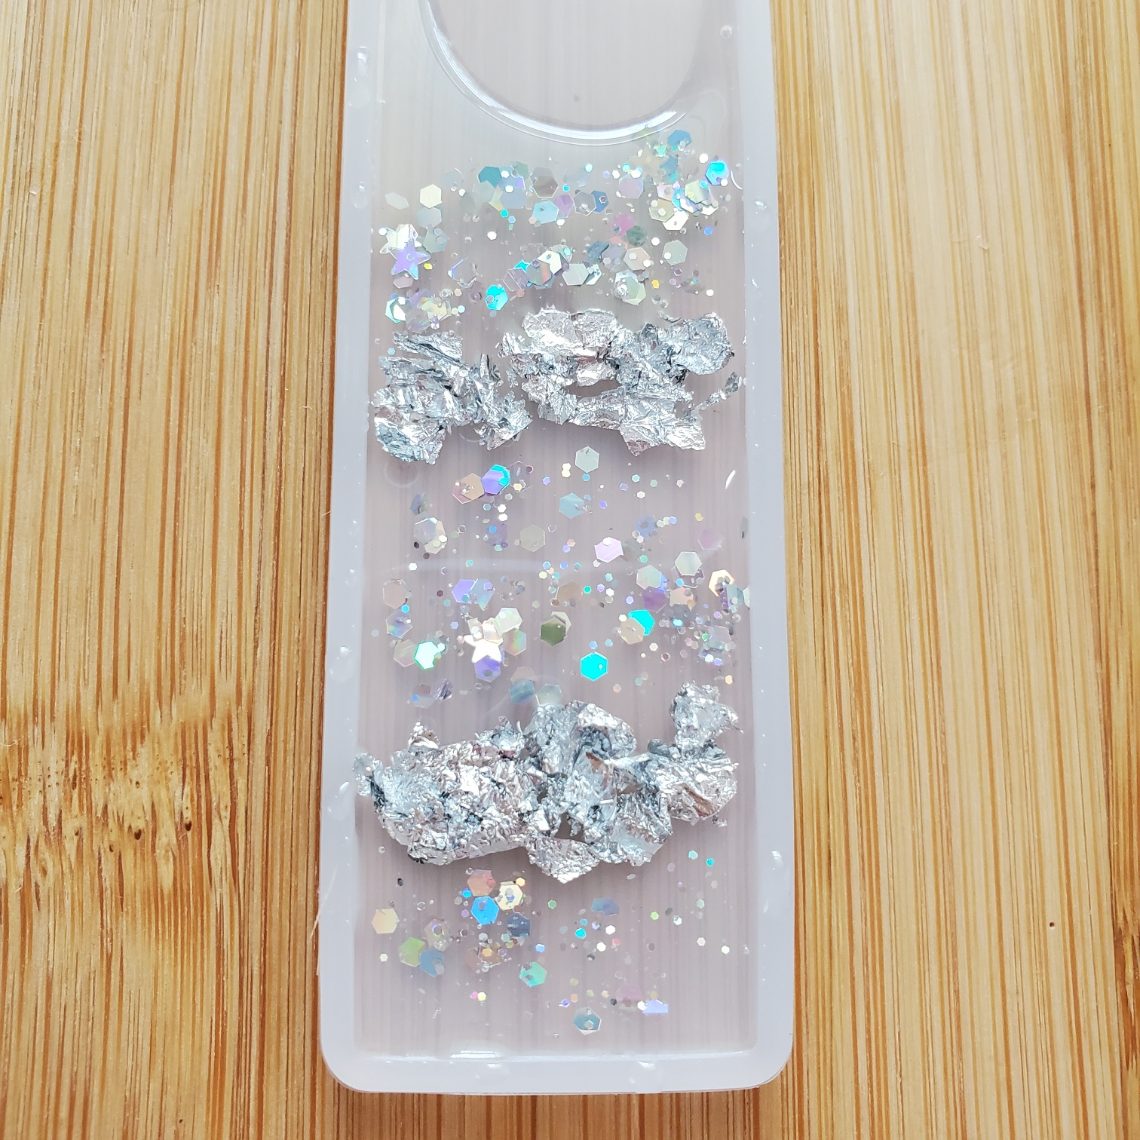
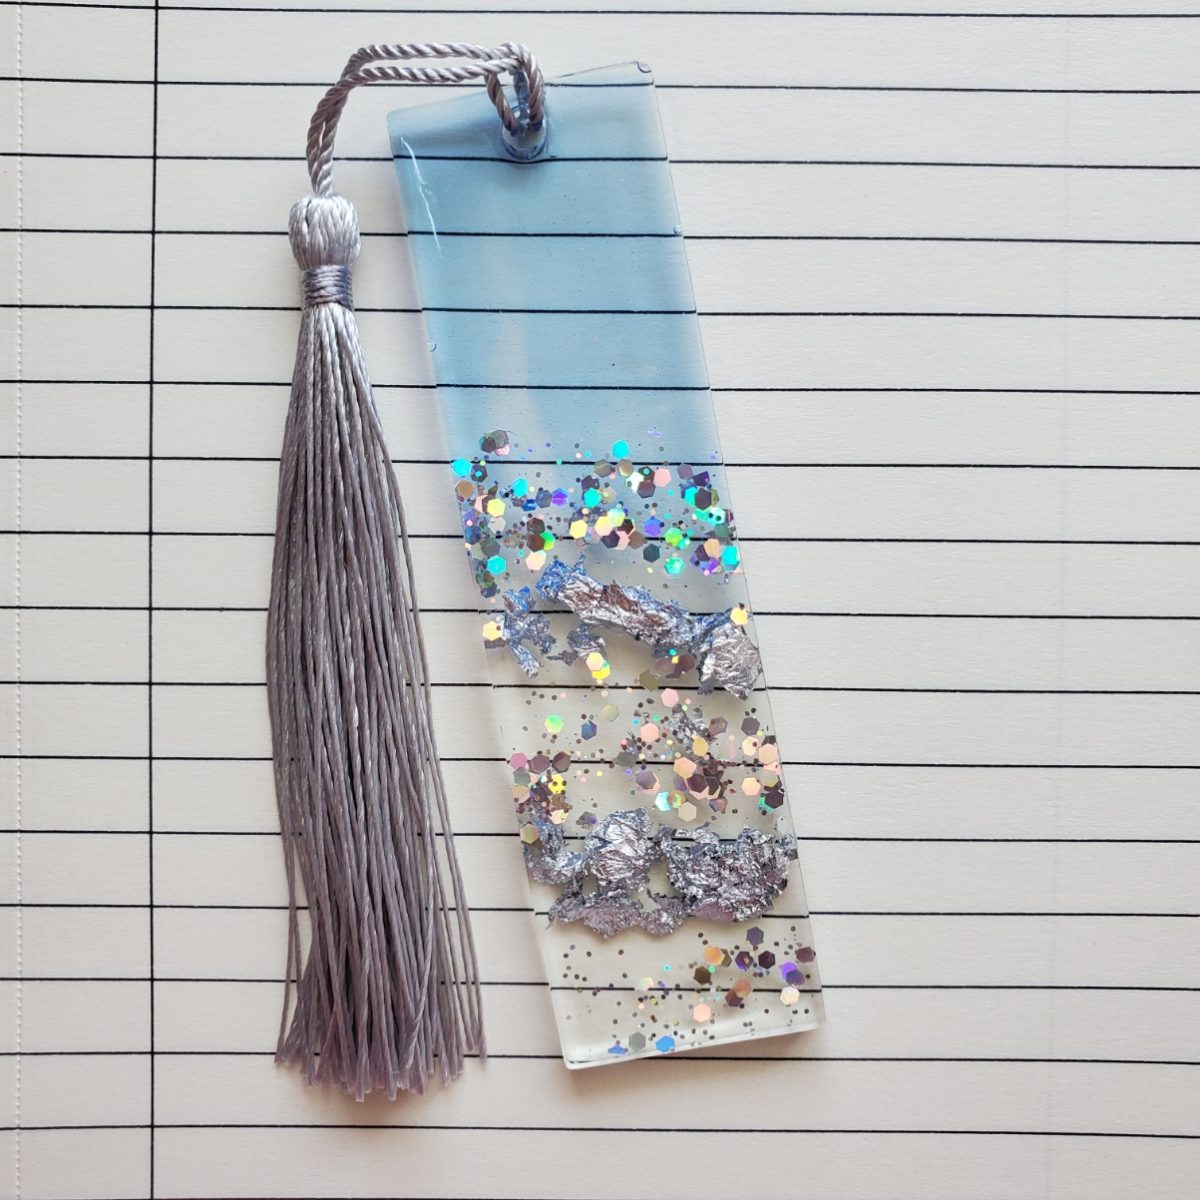
Start with a thin layer of resin where you want to place your flakes and glitter. Start adding your silver foil.
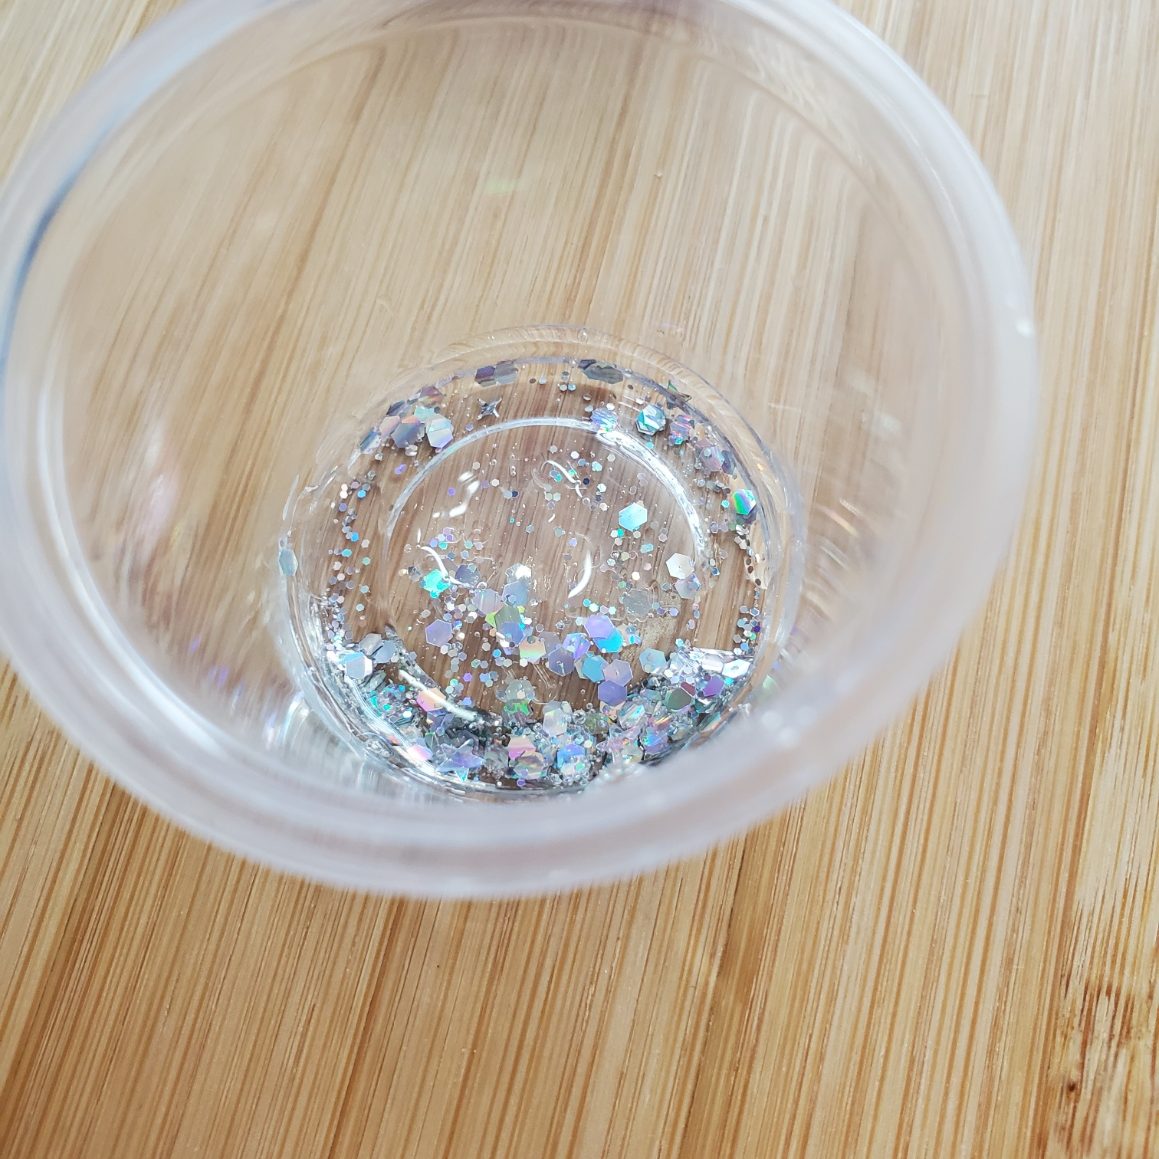
In a small cup add a small amount of resin and add in a tiny bit of your glitter
Using a toothpick or dotting tool add your glitter where you would like it. I did it in between the silver flakes
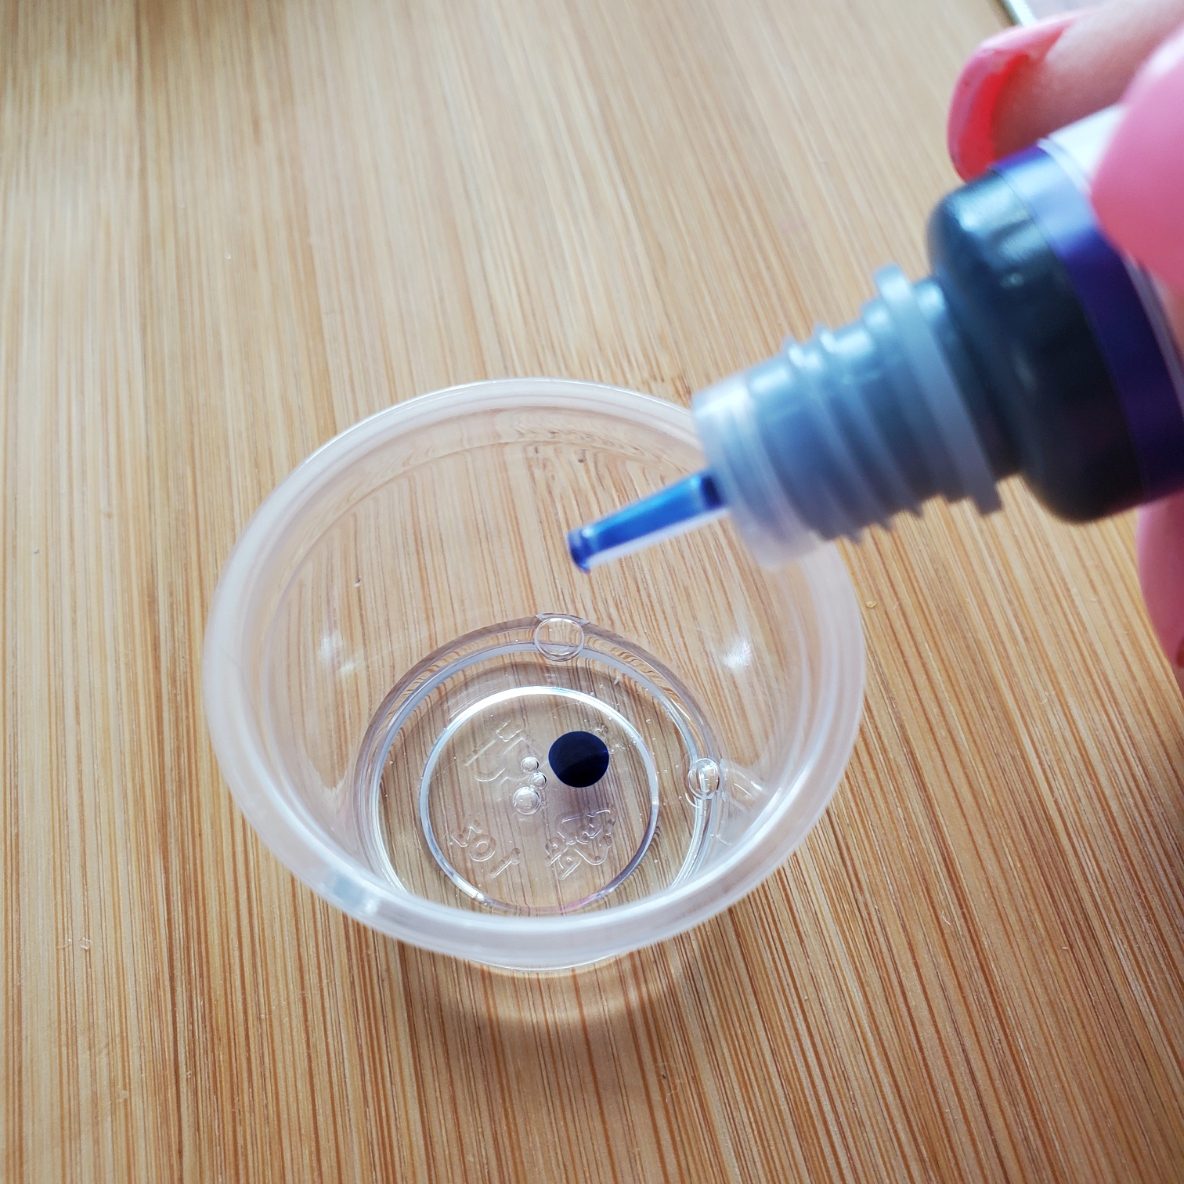
Now we want to color our resin. Add a small amount of resin to another small cup and add one drop of pigment. You can make it darker but the darker it is the longer it takes to cure.
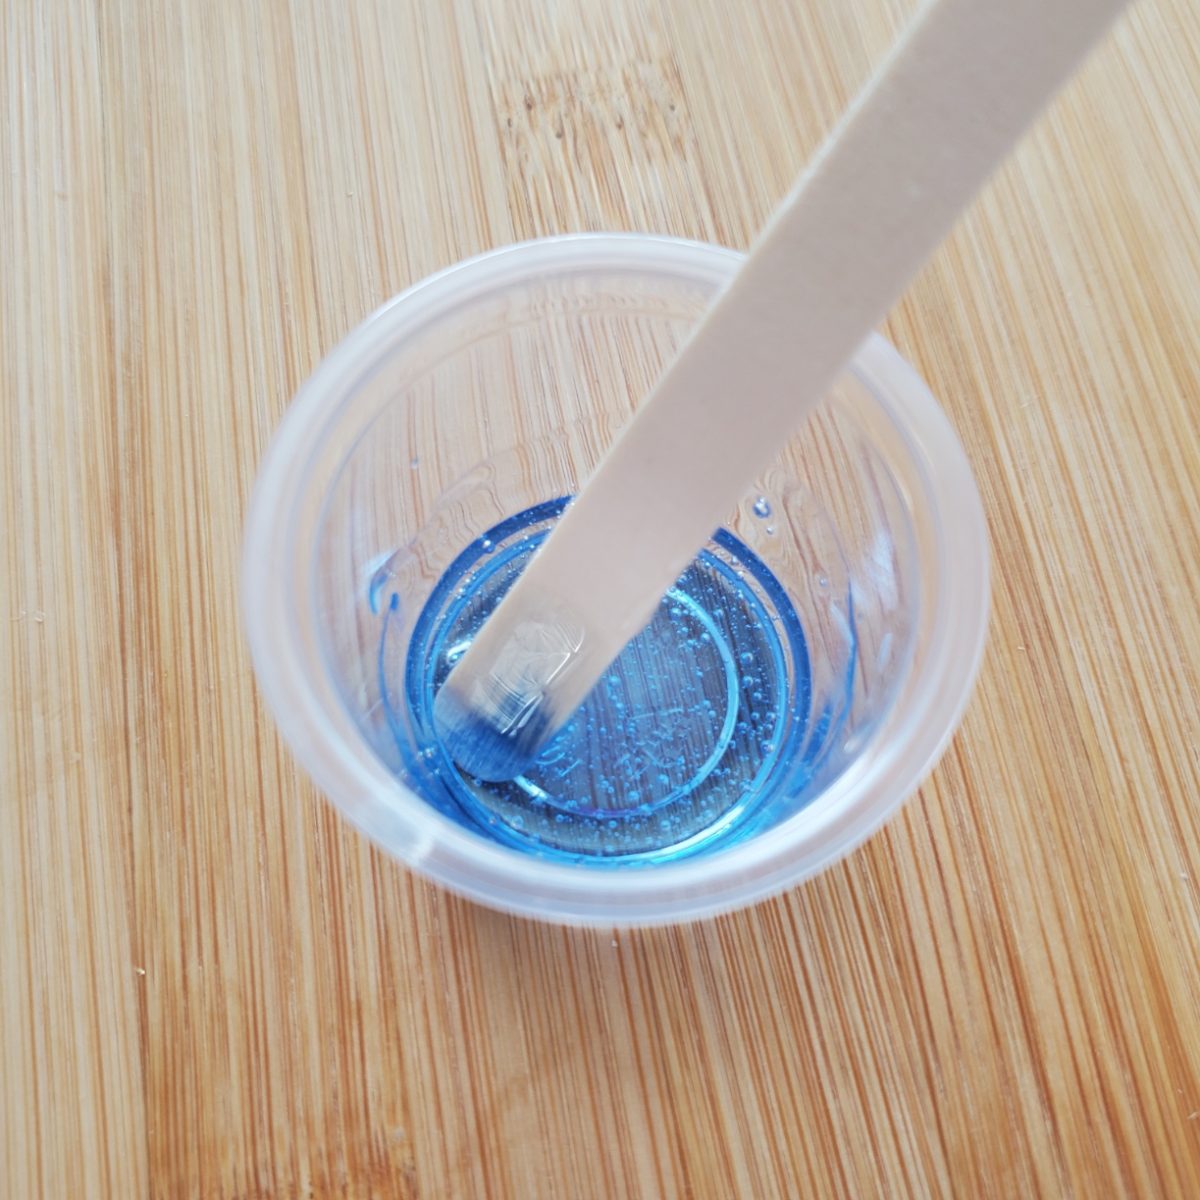
Mix thoroughly. You should have a light blue like this
You want to add that to the top of your mold like this
Add another thin layer of resin over the top to make sure everything is filled in and then let it cure for 4 minutes at 60 second intervals. When fully cured it will look like this


What do you think of this project? Let us know!