
Get more details about this project
What you need
Makes 4 brooches (1.5″ diameter)
-cardboard or thin plastic containers with a flat bottom, to use as molds
-sharp scissors or utility knife
-plastic wrap
-masking or painters’ tape
-bag of cement
-small plastic tubs and at least two plastic spoons
-wood stirring stick
-fine grit sandpaper (180 or finer)
-super glue or epoxy
-brooch pins
-paint, lace, stencils, or other objects to embellish the finished brooches
Instructions
1. First, ready your molds. I used cardboard tins of salt and pepper for mine because they were cheap, a decent size, and easy to cut (important for unmolding at the end). By cutting each tin in half, I was able to make two brooches per tin. In a completely unrelated note, is anyone in need of a lot of salt and pepper? 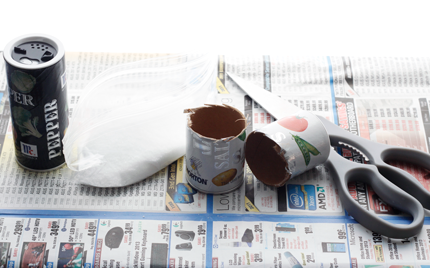
2. Set aside the two cardboard halves with tin on the bottom. Take the other two halves and pop the shaker tops out of the cardboard tubes. We will replace the dispenser pieces with a smooth surface, so that your finished brooch is not shaped like a salt and pepper shaker. To do this, wrap the exposed bottom in plastic wrap, pull it tight, and tape it to the tube. 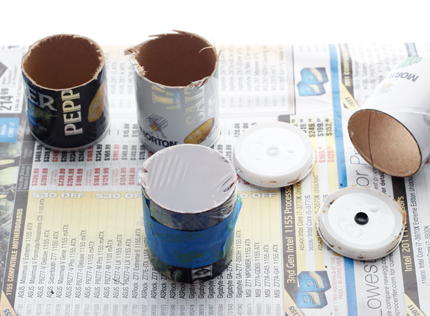
3. Seal up the bottom with masking or painters’ tape so that no cement leaks out. Now you have a flat bottom for the mold. 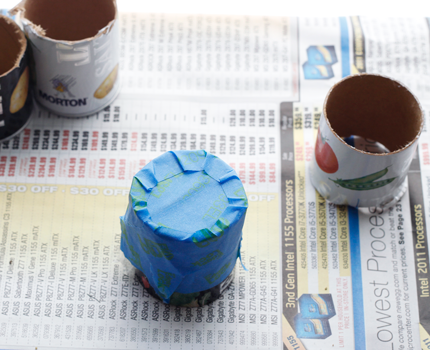
4. Now it’s time to set everything up to mix and pour the cement. I did not use quick-drying cement, but since the brooches are small they still firmed up within 15 minutes. You’ll want to get all the supplies ready to go BEFORE mixing the cement. 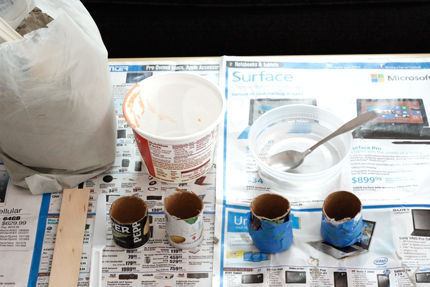 *Note: The chemicals in cement are activated by water, so in the next steps, use two separate spoons—a “wet” spoon and a “dry” spoon!
5. Use a plastic spoon to transfer roughly 1/2 cup of dry cement powder into a plastic tub (an empty margarine tub works well). 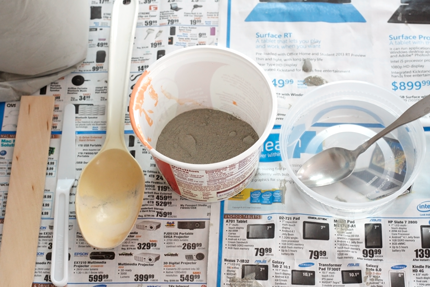
6. Use a second spoon to begin adding water to the tub of cement, one spoonful at a time. Stir well with a wooden stick. 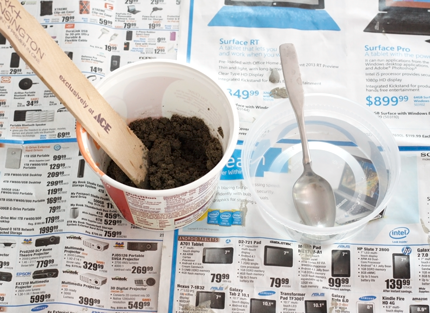
7. Continue to add more water, one spoonful at a time, and stir. The quantity of water needed will vary based on the cement you are using. You are looking for a consistency like a biscuit dough—it should be pasty and wet-looking, but shouldn’t drip off the stir stick when you hold it up. 
8. Once the cement is well-mixed and there is no dry powder visible, transfer a dollop into one of the molds. Gently tap the mold on the table and shake it from side to side a bit, in order to settle all the cement to the bottom and get out air bubbles. The cement should be roughly 1/8″ to 1/4″ deep, but no deeper—or else the brooch will end up too heavy. Repeat for each mold. 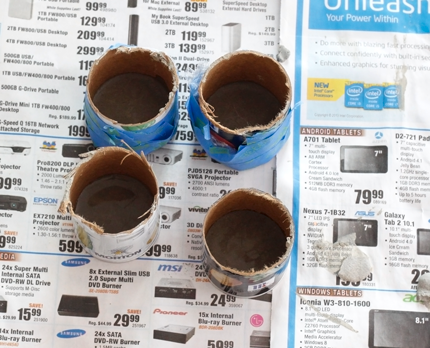
9. AND now we wait. Isn’t that always the hardest part of a DIY project? My brooches took two days to dry completely. You can peek before that if you want by cutting a mold open, but be careful not to break the cement disk!
10. When the cement has fully dried, cut away the cardboard tubes and unmold the brooches. Gently sand each brooch to smooth out any big uneven parts. Or leave as-is, if that’s your thing. 
11. Attach a brooch pin to the back of each piece using super glue or epoxy. 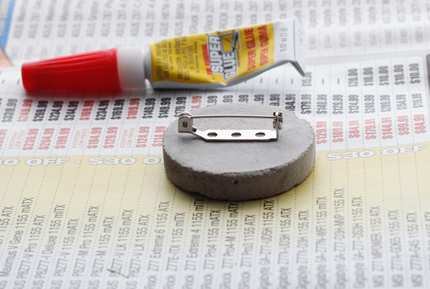
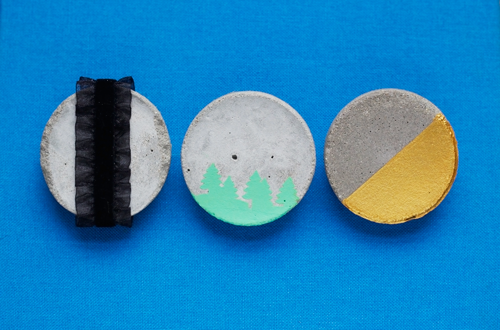
And there you have it! All that’s left is decorating. I used lace ribbon, a tree stencil and paint, and gold paint to transform my brooches. 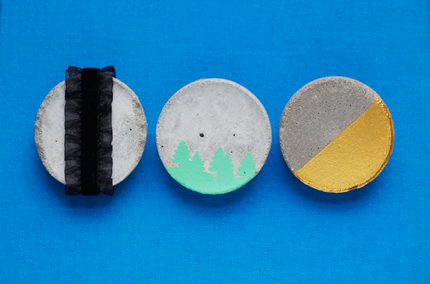
These DIY cement brooches make great accessories to pin onto your blouse or a handbag! 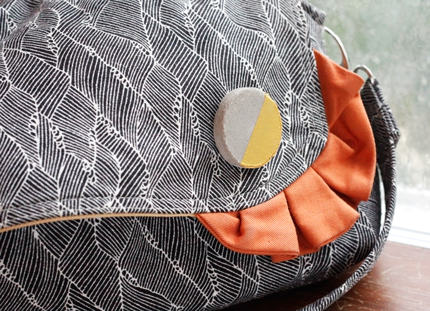
About Marlene: Marlene has come late to the world of making, but is hooked for life. After studying photography, she found her real passion in creating crafts, furniture, art, and whatever else she can get her hands on. When not in the hardware store dreaming up new projects, Marlene can be found baking, wandering, reading, playing with her cats, or redecorating her apartment for the thousandth time. And she still likes photography too.
Marlene blogs at JadeAndFern here.


Thank you for this. i think its great.i intend giving it a try.
I like this, cool and clever and smart idea, i was reading some of the comments and insteade of the toothpins you can use straws as well.
they are more easy to pick out. and before you can ad some butter or creme.
but i like the bold and the desing of it the most;-D
thank you for the sharing and the tute;-D
I like this a lot and wonder if there’d be a way to make a couple of holes in order to use them as buttons? I knit –make scarves and shawls and one large button sewn on through a couple of layers of shawl would look fantastic. If not, I’m thinking wrapping them in wire and then pinning them on might work equally as well. Love the idea. Definitely going to try it.
Elizabeth, you could try inserting toothpicks or wooden skewers into the cement before it dries. Push them down so that they’re touching the bottom of the mold. When the brooch has dried, you’ll have to poke through carefully to finish the hole. Let me know if that works, it’s a super idea!
Finally I have something to do with all of the brooch pins that were in a grab bag of craft supplies I bought and the extra bag of cement we have left over! I also appreciate that you didn’t decorate your examples so much that the actual project was hidden.
Cool. As far as decorations go, to each her/his own. If it is not your taste-make it your own or don’t do it. Constructive criticism is one thing meanness is another.
Seems like it would have been more cost effective (and not be stuck with so much salt and pepper) lol if you had used empty toilet paper or paper towel cardboard rolls. Then you would have had enough cardboard for several discs.
Haha, not sure why I didn’t think of that! Sometimes the most obvious ideas are the most elusive. Thank you for the suggestion!
I liked it may try it . It looks like something fun to do with kids because its easy and can be decorated the way you want to.
first off, they will be very heavy! Therefore, pins should be very close to top or the pin will sag when pinned on garment. Lets hope you can decorate in a more attractive way!
Marianne, thank you for commenting on this craft! If you read through the instructions you will notice that I explained that a brooch with a thickness of 1/4″ or less will in fact not be too heavy. I have worn them around and they don’t sag (though I wouldn’t wear it in a thin silk fabric, but I wouldn’t wear any pin in such fabric). Feel free to stop by my blog to check out my decorating skills!