
Get more details about this project
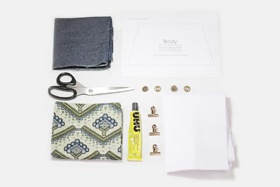
What you need
PDF Pattern (See below)
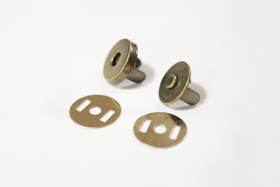
Magnetic snap button (see close up image below)
Heavyweight interfacing
Clips or pegs
All-purpose adhesive such as UHU or fabric glue
Main Fabric Recycled Jeans or denim fabric
Scissors
Lining fabric
Magnetic snaps
Instructions
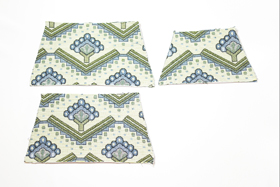
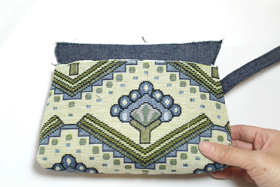
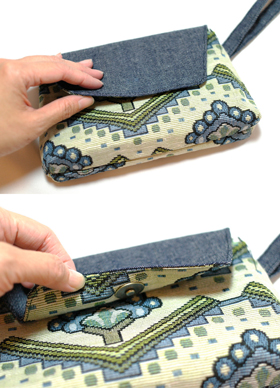
A small strap makes it practical as a wristlet (especially when you need both your hands at a shop), but can also be tucked into the purse when you want to carry it as a small clutch instead.
This purse can sure pack a punch, and the built-in pockets help keep your things organized. With a lipstick, cards, mascara, scarf, coin purse, phone, a passport and a pen in ours, this purse still manages to hold its structured shape thanks to the heavyweight interfacing all around.
Start making yours right away with your favourite fabric!
Notes:
1. The Clutch Purse PDF Pattern comes with 2 options for the top flap of the purse—Flap A (which is the one used in this tutorial) and Flap B, which is a circular flap. When printing, do not scale to fit page.
2. It’s advisable to choose at least moderately sturdy materials for both the main fabric and the lining fabric (as this helps maintain the structure and shape of the purse), keeping in mind that the combination of the fabrics and the heavyweight interfacing will be able to feed through your sewing machine.
3. To avoid needles breaking, use at least a size 14 or denim needle on your sewing machine. When sewing through thick layers, always go slow. It’s boring but it’s definitely safer 🙂
4. Some interfacings shrink and may cause your fabric to look wrinkly and bubbly later on. To avoid that, pre-wash your interfacing and steam it before adhering to the fabric.
5. For a softer, less structured purse, you may substitute the interfacing with felt.
Magnetic Snaps
Step 1: Cutting out the fabric pieces
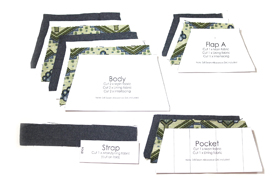
Cut out fabric and interfacing pieces according to instructions on the patterns. You should have the following:
Body
2 x Main fabric
2 x Lining fabric
2 x Interfacing
Strap
1 x Main fabric OR Lining fabric
(we are using lining fabric)
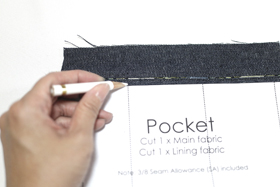
Pocket
1 x Main fabric
1 x Lining fabric
Flap A OR Flap B
1 x Main fabric
1 x Lining fabric
1 x Interfacing
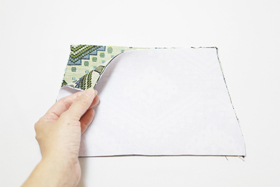
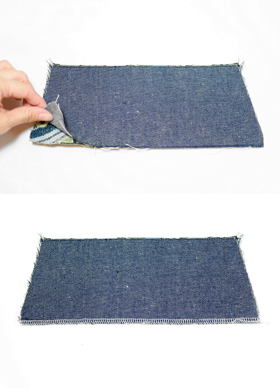
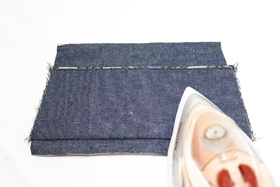
Step 2: Interfacing
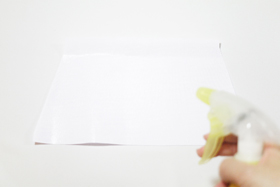
To affix the interfacing, spray some water onto the “glossy” side (the side with the glue on it).
Place the “glossy” side onto the wrong side of the main fabric, and iron down on high heat setting [see next image].

Press evenly and repeat with all interfacing pieces. Trim any excess away.
You should now have the following interfaced pieces:
Body: 2 x Main fabric
Flap: 1 x Main fabric
Step 3: Constructing the Strap
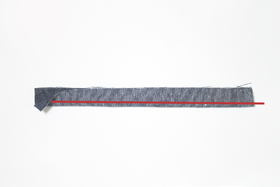
Fold the fabric lengthwise so the right sides meet. Machine stitch on the fold as marked by the red line (approximately 1/8 inches from the fold).
Fold fabric in the opposite direction of where you stitched so that now the right side of the fabric is facing outwards.
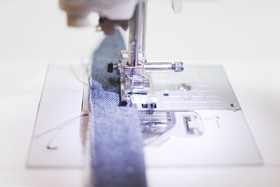
Top stitch approximately 1/8 inches from the fold.
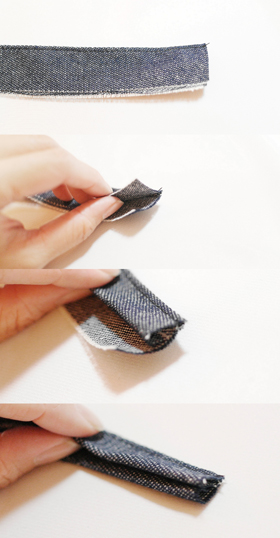
Fold in the flaps which are not stitched so they form a neat fold parallel to the previous machine stitch.
Clamp it down with clips to hold the fold in position. Top stitch to form the strap.
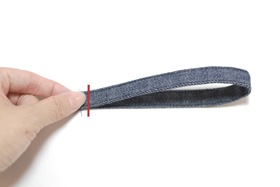
Fold the strap into half and stay stitch near the edges (as marked by the red line) so that the 2 ends are held together.
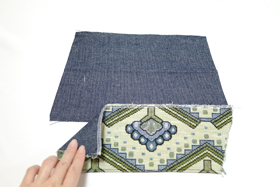
Step 4: Constructing the Body (Main fabric)
Place the interfaced main pieces together so the right sides meet.
On the right side, wedge the strap in between the body pieces, approximately 3/8 inches (SA) from the top.
Hold main pieces & strap together with the clips.
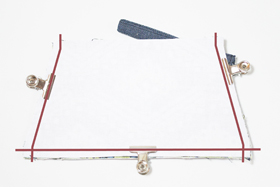
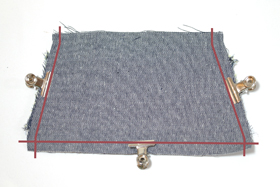
Machine stitch around as marked by the red lines above (3/8 SA), leaving the top opening unstitched.
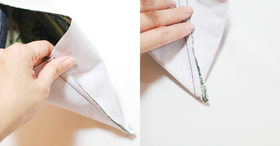
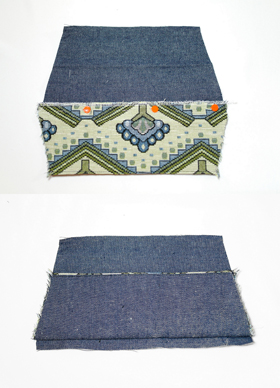
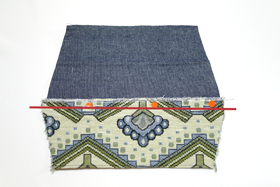
Place your hand into the opening on top and press down to form a triangle at the bottom corner.
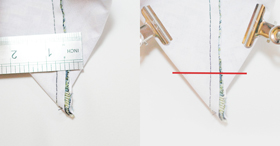
As indicated by the position of the ruler, measure 1.5 inches, square across and mark. Hold sides with clips and stitch on the line you marked.

Repeat on the other corner so you have both corners stitched down.
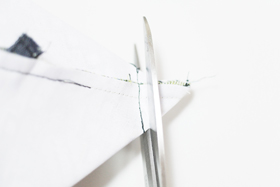
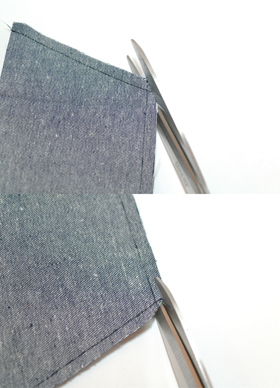
Trim access from both corners.

Turn it inside out and press to smoothen the surface.
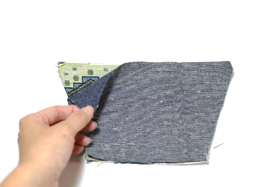
Step 5: Pockets & Constructing the Inner Body (Lining fabric)
Place main fabric and lining together so their right sides face each other.
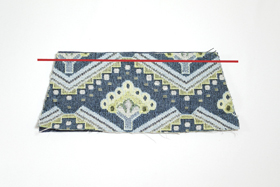
Stitch fabric together where the width is shorter as marked by the red line.
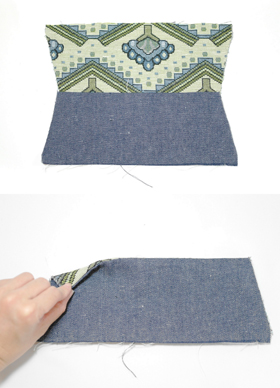
Open up and fold it again so that the wrong sides meet.
Top stitch (as marked by the red line).
Serge (or zig zag) both fabrics together at the bottom to keep the ends from fraying.
Place pocket piece onto 1 of the lining body pieces, right sides facing. The ends should overlap approximately 1 inch.
Pin in place and fold up the pocket piece so it meets the body piece. Check to see that the sides are lined up properly. Adjust if necessary.
Fold it open again and stitch the pocket to the body piece.
Press the fold to flatten any bulk.
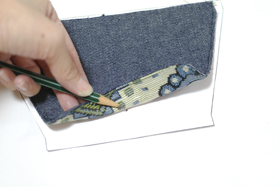
Using the pattern as a guide, mark the vertical lines of the pockets.
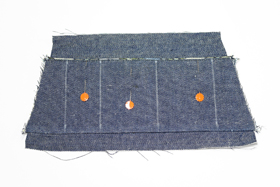
Pin down fabric together and top stitch on the four vertical lines you’ve marked.
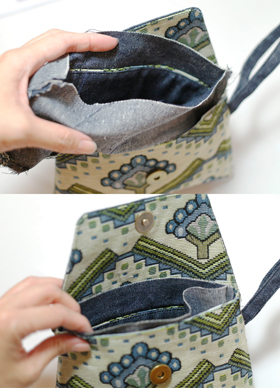
Note: For sizing reference, the left narrow pocket fits a regular lipstick and the 2 remaining pockets fit credit cards.
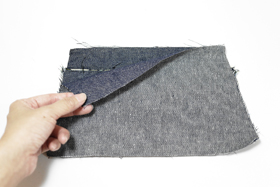
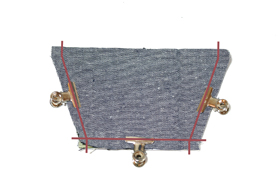
Place the other body piece on top of the current body piece so that the right sides meet.
Clip down and stitch as indicated by the red lines, leaving the top opened.
Fold and stitch down triangles on the 2 corners in the same way that you did it on the main body in Step 4.
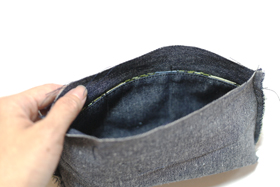
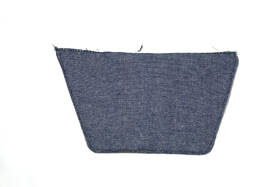
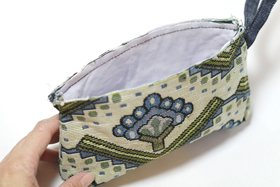
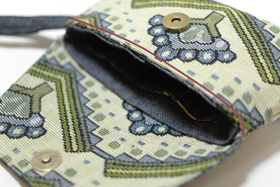
This is what you should have now. There is no need to turn the lining inside out as later on it will nest inside the main bag as is.
Step 6: Flap
Place main fabric and lining fabric pieces together so the right sides meet.
Stitch as indicated, leaving the longest width open.
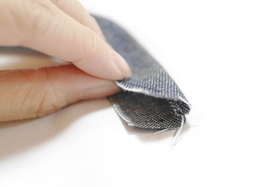
Cut away the corners and trim the edges to reduce bulk.
Carefully turn it inside out and you have your flap! Top stitch as close to the 3 edges as possible, still leaving the bottom opened.
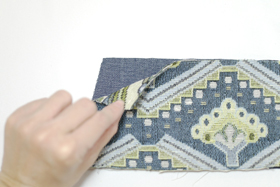
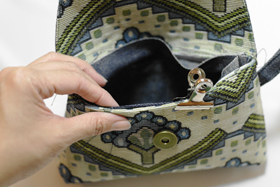
Place the flap onto the paper pattern piece so that the main fabric meets the paper pattern. Mark the spot where the main fabric meets the dot on the paper pattern. This is where the magnetic snap will sit.
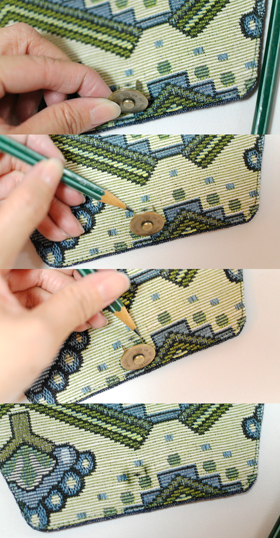
Place the magnetic snap with the “protruding button” onto the centre of the spot you marked. Carefully mark where the prongs meet the fabric.
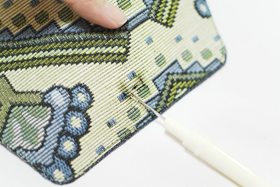
Use a seam ripper (or a blade) to carefully slice through the fabric on the 2 lines you’ve marked. Be careful not to cut through to the lining fabric.
Fit the prongs into the slits and push the magnetic snap down all the way.
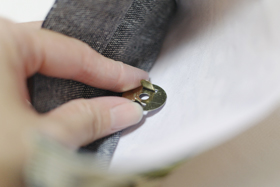
On the underside, place the plate so the prongs go through the rectangular slits on the plate. Bend prongs outwards and flatten firmly to secure it down. Use pliers if needed.
And the flap is done!
Step 7: Attaching the flap to the Body
Place the flap piece down, lining side up.
Place the main body on top of the flap.
Line up the pieces so the edges meet.
Clip to hold the pieces together, and stitch the flap to the body.
This is what you should have now.
Press to flatten out bulk.
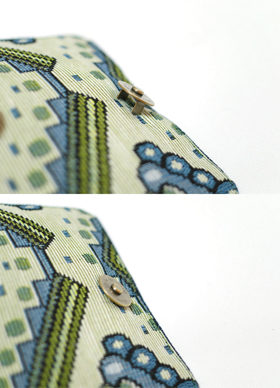
Fold the flap over and mark the spot where the magnetic snap meets the body piece.
Attach the other magnetic snap in the same way as you did earlier in Step 6.
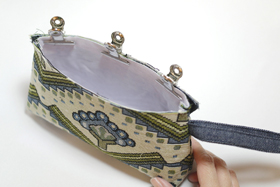
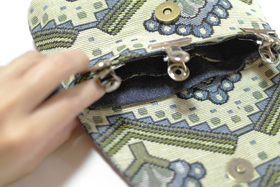
Step 8: Attaching the Inner Body
Fold down the edges on top so that the right sides meet. Remember to try and keep to the SA of 3/8 inches. Clip as you go along to hold the edges down.
For the lining edge that meets the flap, fold the lining slightly higher so that it covers the stitches on the flap. Also, make sure that there is enough of the lining fabric allocated to be caught by the stitches later when you top stitch from the outer side of the bag.
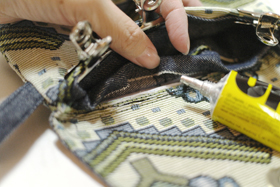
To achieve a neater finish and better control, dab some adhesive on the edges to glue down the lining to the main body.
Repeat all around the edges so you won’t need any clips to hold the edges together.
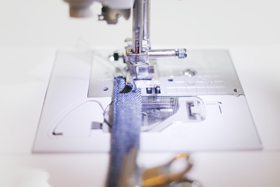
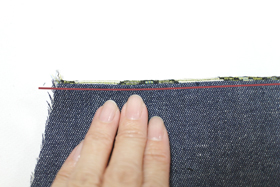
Once the glue has dried, carefully top stitch all around the edge, as marked by the red line as well as under the flap [see next image].
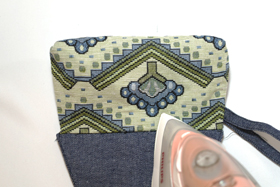
Step 9: Final press!
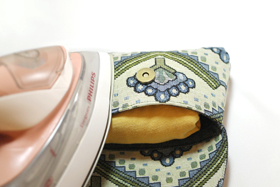
Roll up a t-shirt (or any fabric) and stuff it into the bag.
Press! The t-shirt fills up the space inside the bag and allows you to iron smoothly around the bag.
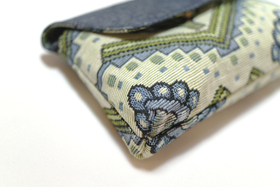
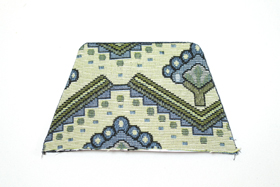
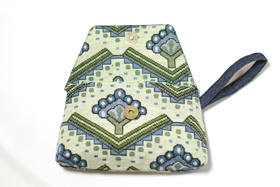
Finished Clutch
Congratulations! You’ve created your very own purse!


Thanks! I just adapted your rounded pattern for a jewelry clutch out of pieces we salvaged from my aunt’s 60 year old wedding dress. The final seams were a bit thick, but do-able. When I finally post it, I’ll link back to your page.
Cute purse!! It’s look very easy!!
Too difficult to do the top stitch at at the very end! Very frustrating as it doesn’t fit in the sewing machine