
Get more details about this project
What you need

Small glass bottle
Plastic milk carton or jug
Sharp Scissors or
Exacto knife

Instructions
This Cinderella’s Glass Shower Ring Pumpkin is a budget-friendly fall craft with a lovely fairytale twist. It is made using clear shower curtain rings, which are arranged around a centre base to create the look of a delicate glass pumpkin. It is perfect for autumn decorating, Halloween displays, a Cinderella-themed party, princess party decor, or even a pretty table centrepiece if you love a softer, more magical take on pumpkin crafts.
What I really like about this project is how inexpensive and adaptable it is. The clear rings give the pumpkin that glass slipper look, but you can easily change the style by adding pearl beads, glitter, ribbon, rhinestones, fairy lights, or even a little metallic paint. Leave it clear and simple for elegant fall decor, or dress it up for a party table. It is one of those crafts where the finished piece looks much fancier than the supplies suggest — always my favourite kind.
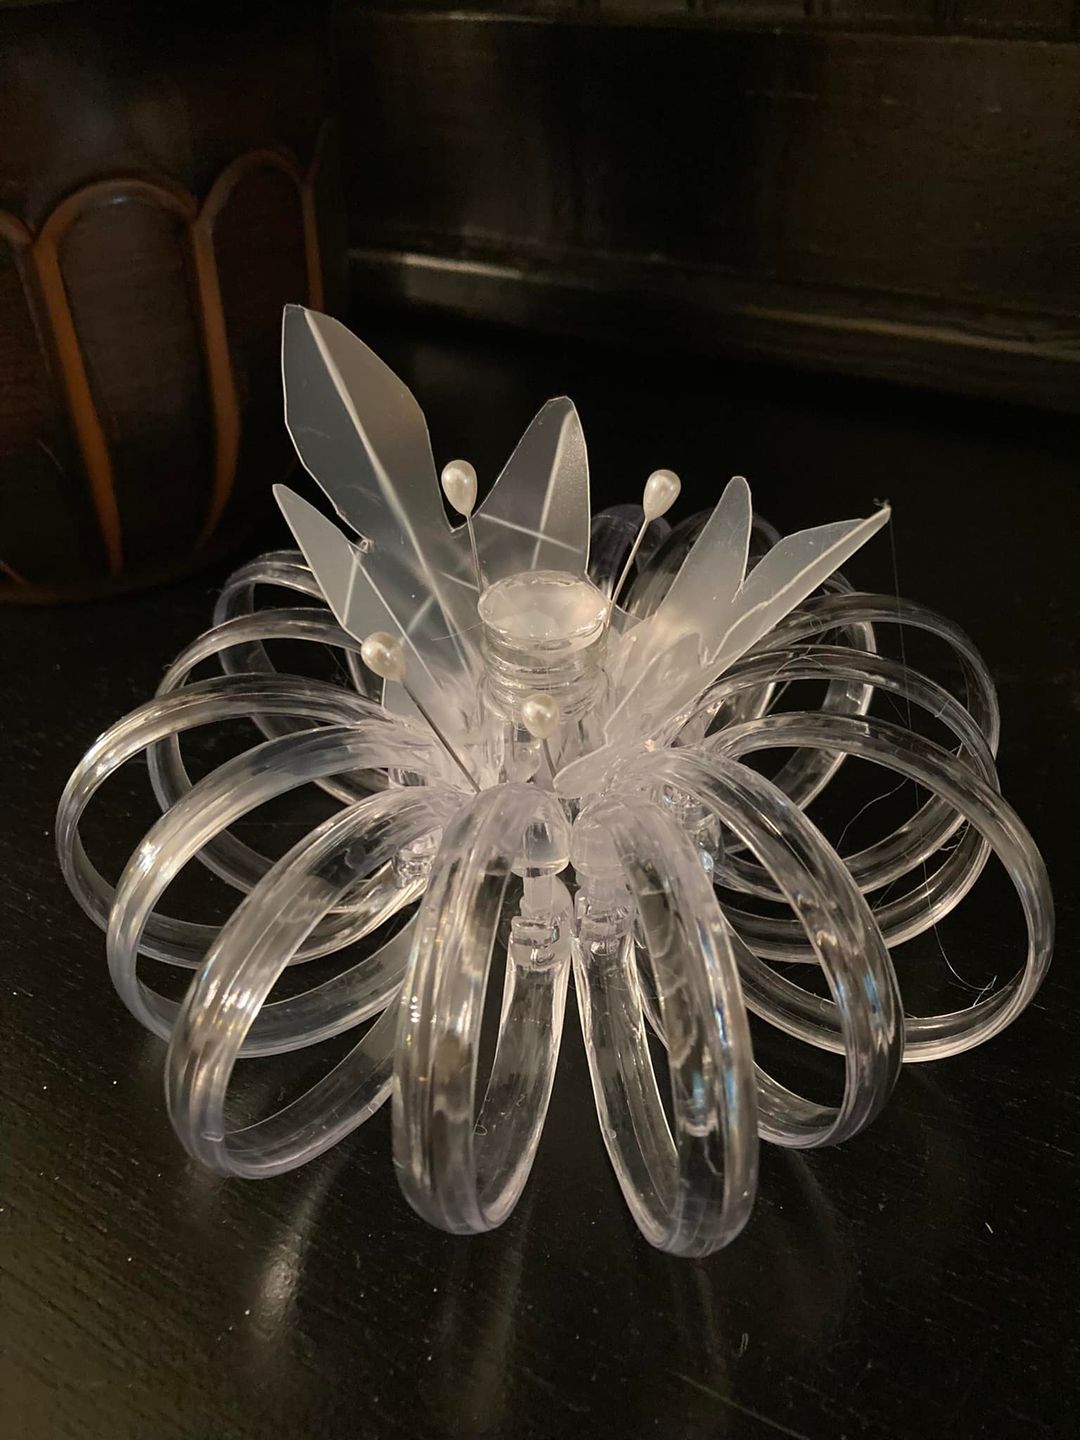
For this project, I recommend using a strong clear adhesive such as E6000, especially if you want the finished pumpkin to hold its shape well. A hot glue gun can also be used for a quick version, but E6000 will give a stronger hold on the smooth plastic shower rings.
You will also need a base or core for the centre of your glass-look pumpkin. In Sue’s version, she used a small glass bottle in the middle, which works beautifully. You could also use a plastic bottle, a small jar, or even a tealight holder if you would like to add a battery-operated candle inside.
To make the pumpkin, start by arranging the clear shower curtain rings around your centre base. Once you are happy with the shape, glue the rings into place one by one, keeping them evenly spaced so they form a rounded pumpkin shape.
For the pumpkin stem and leaves, cut shapes from a clean plastic bottle or milk jug, then glue them to the top of the pumpkin. You can leave the plastic clear for a glassy look or lightly paint it if you want more definition.
Allow everything to dry completely before moving or displaying your pumpkin. Once dry, you can add extra embellishments such as pearl pins, beads, glitter, ribbon, or a tiny crown-style topper for a proper Cinderella moment.



What do you think of this project? Let us know!