
The finished doll measures approximately 9 inches / 25 cm, making it a great size for gifting, nursery décor, craft markets, or adding to a handmade doll collection. Use bright felt colours, floral scraps, trims, and embroidery thread to customise your Matryoshka doll and give each one its own personality.
Get more details about this project
What you need
Various colours of felt
Toy filling or wadding
Embroidery thread
Needle
Scissors
Pins or fabric clips
Printed Russian doll pattern pieces
Optional lace, ribbon, buttons, or decorative trims
Finished size: approximately 9 inches / 25 cm
Instructions
This Russian Matryoshka Doll free sewing pattern is a sweet handmade felt plushie project that is simple, colourful, and full of charm. Made with felt, toy filling, embroidery thread, and pretty fabric-style details, this little nesting-doll-inspired plushie is a lovely project for anyone who enjoys hand sewing, softies, and decorative handmade dolls.
The finished doll measures approximately 9 inches / 25 cm, making it a cute size for gifting, nursery décor, craft stalls, or adding to a handmade doll collection. The design includes a stitched scarf, apron, pocket, embroidered face, and bow detail, giving you lots of room to play with colours, trims, and fabric scraps.
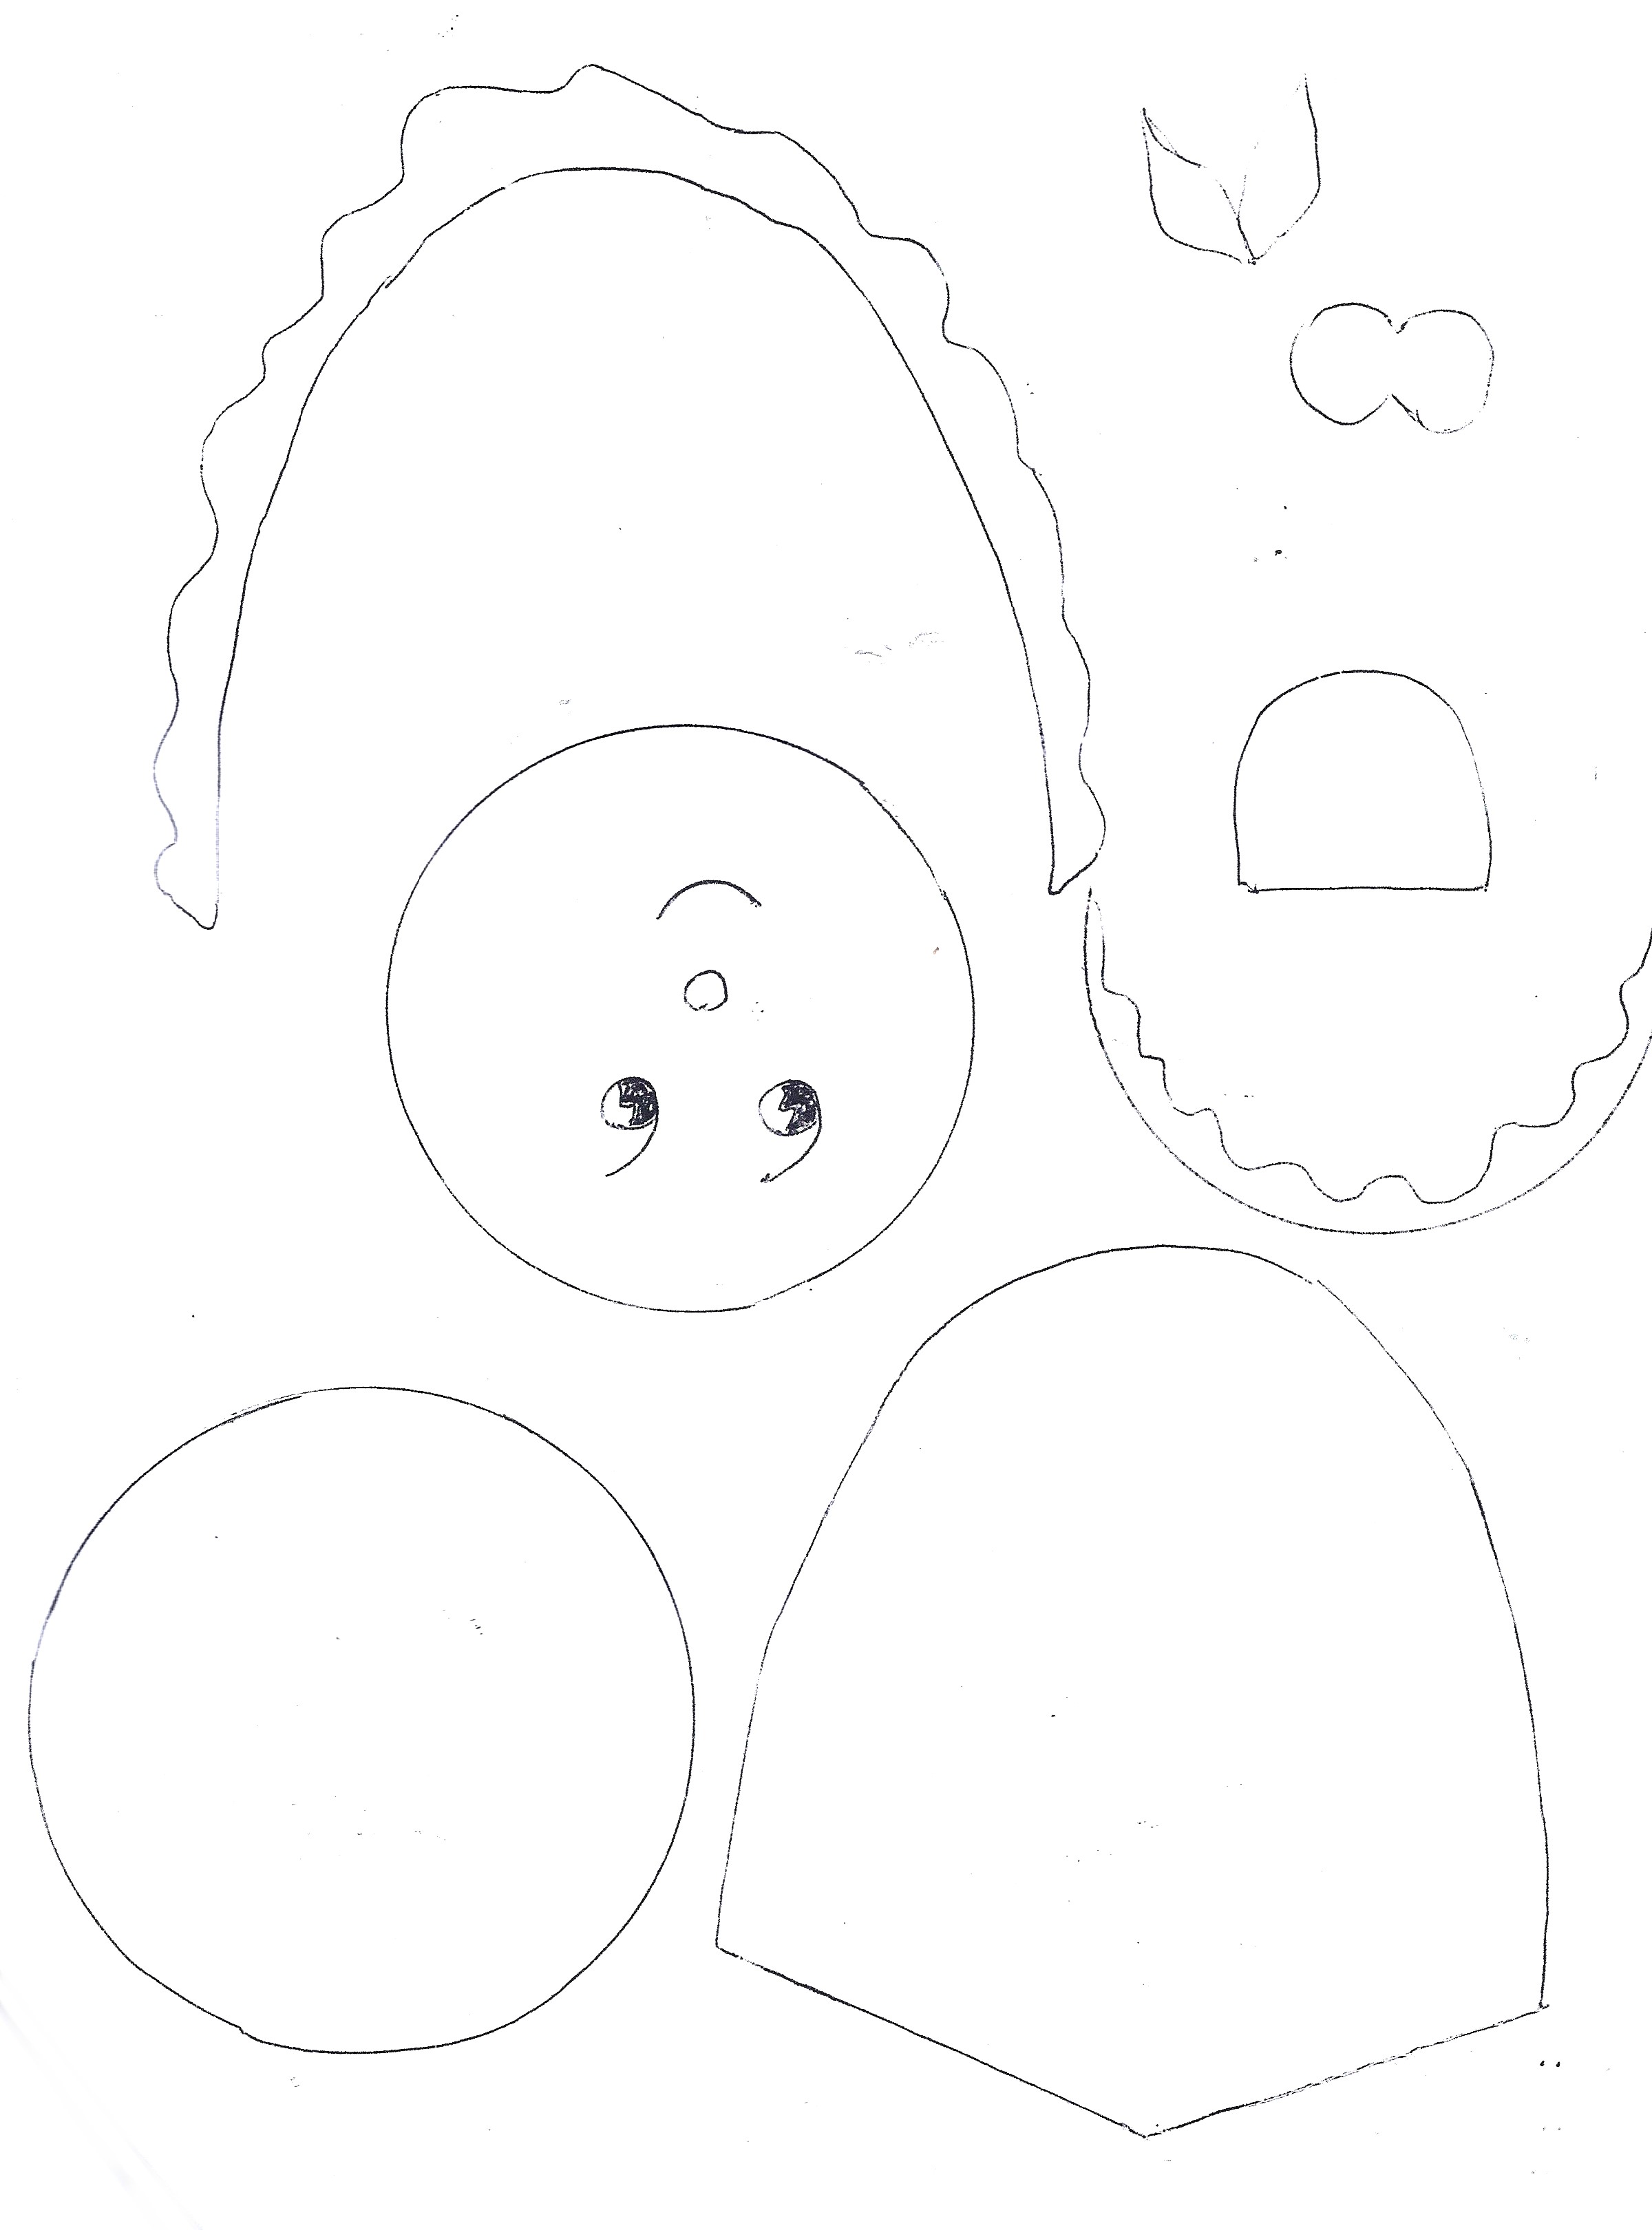
Step 1: Use the patterns below.
Print the pattern pieces at full size, then cut them out carefully. Lay each pattern piece over your chosen felt colours and pin or clip them into place.
You will need pieces for the main body, base, scarf, apron, face, hair, pocket, bow, and any decorative trim pieces. Choose colours that work nicely together. Traditional Matryoshka dolls are often bright and floral, but you can make yours in pastels, folk-art colours, Christmas colours, or even modern prints.
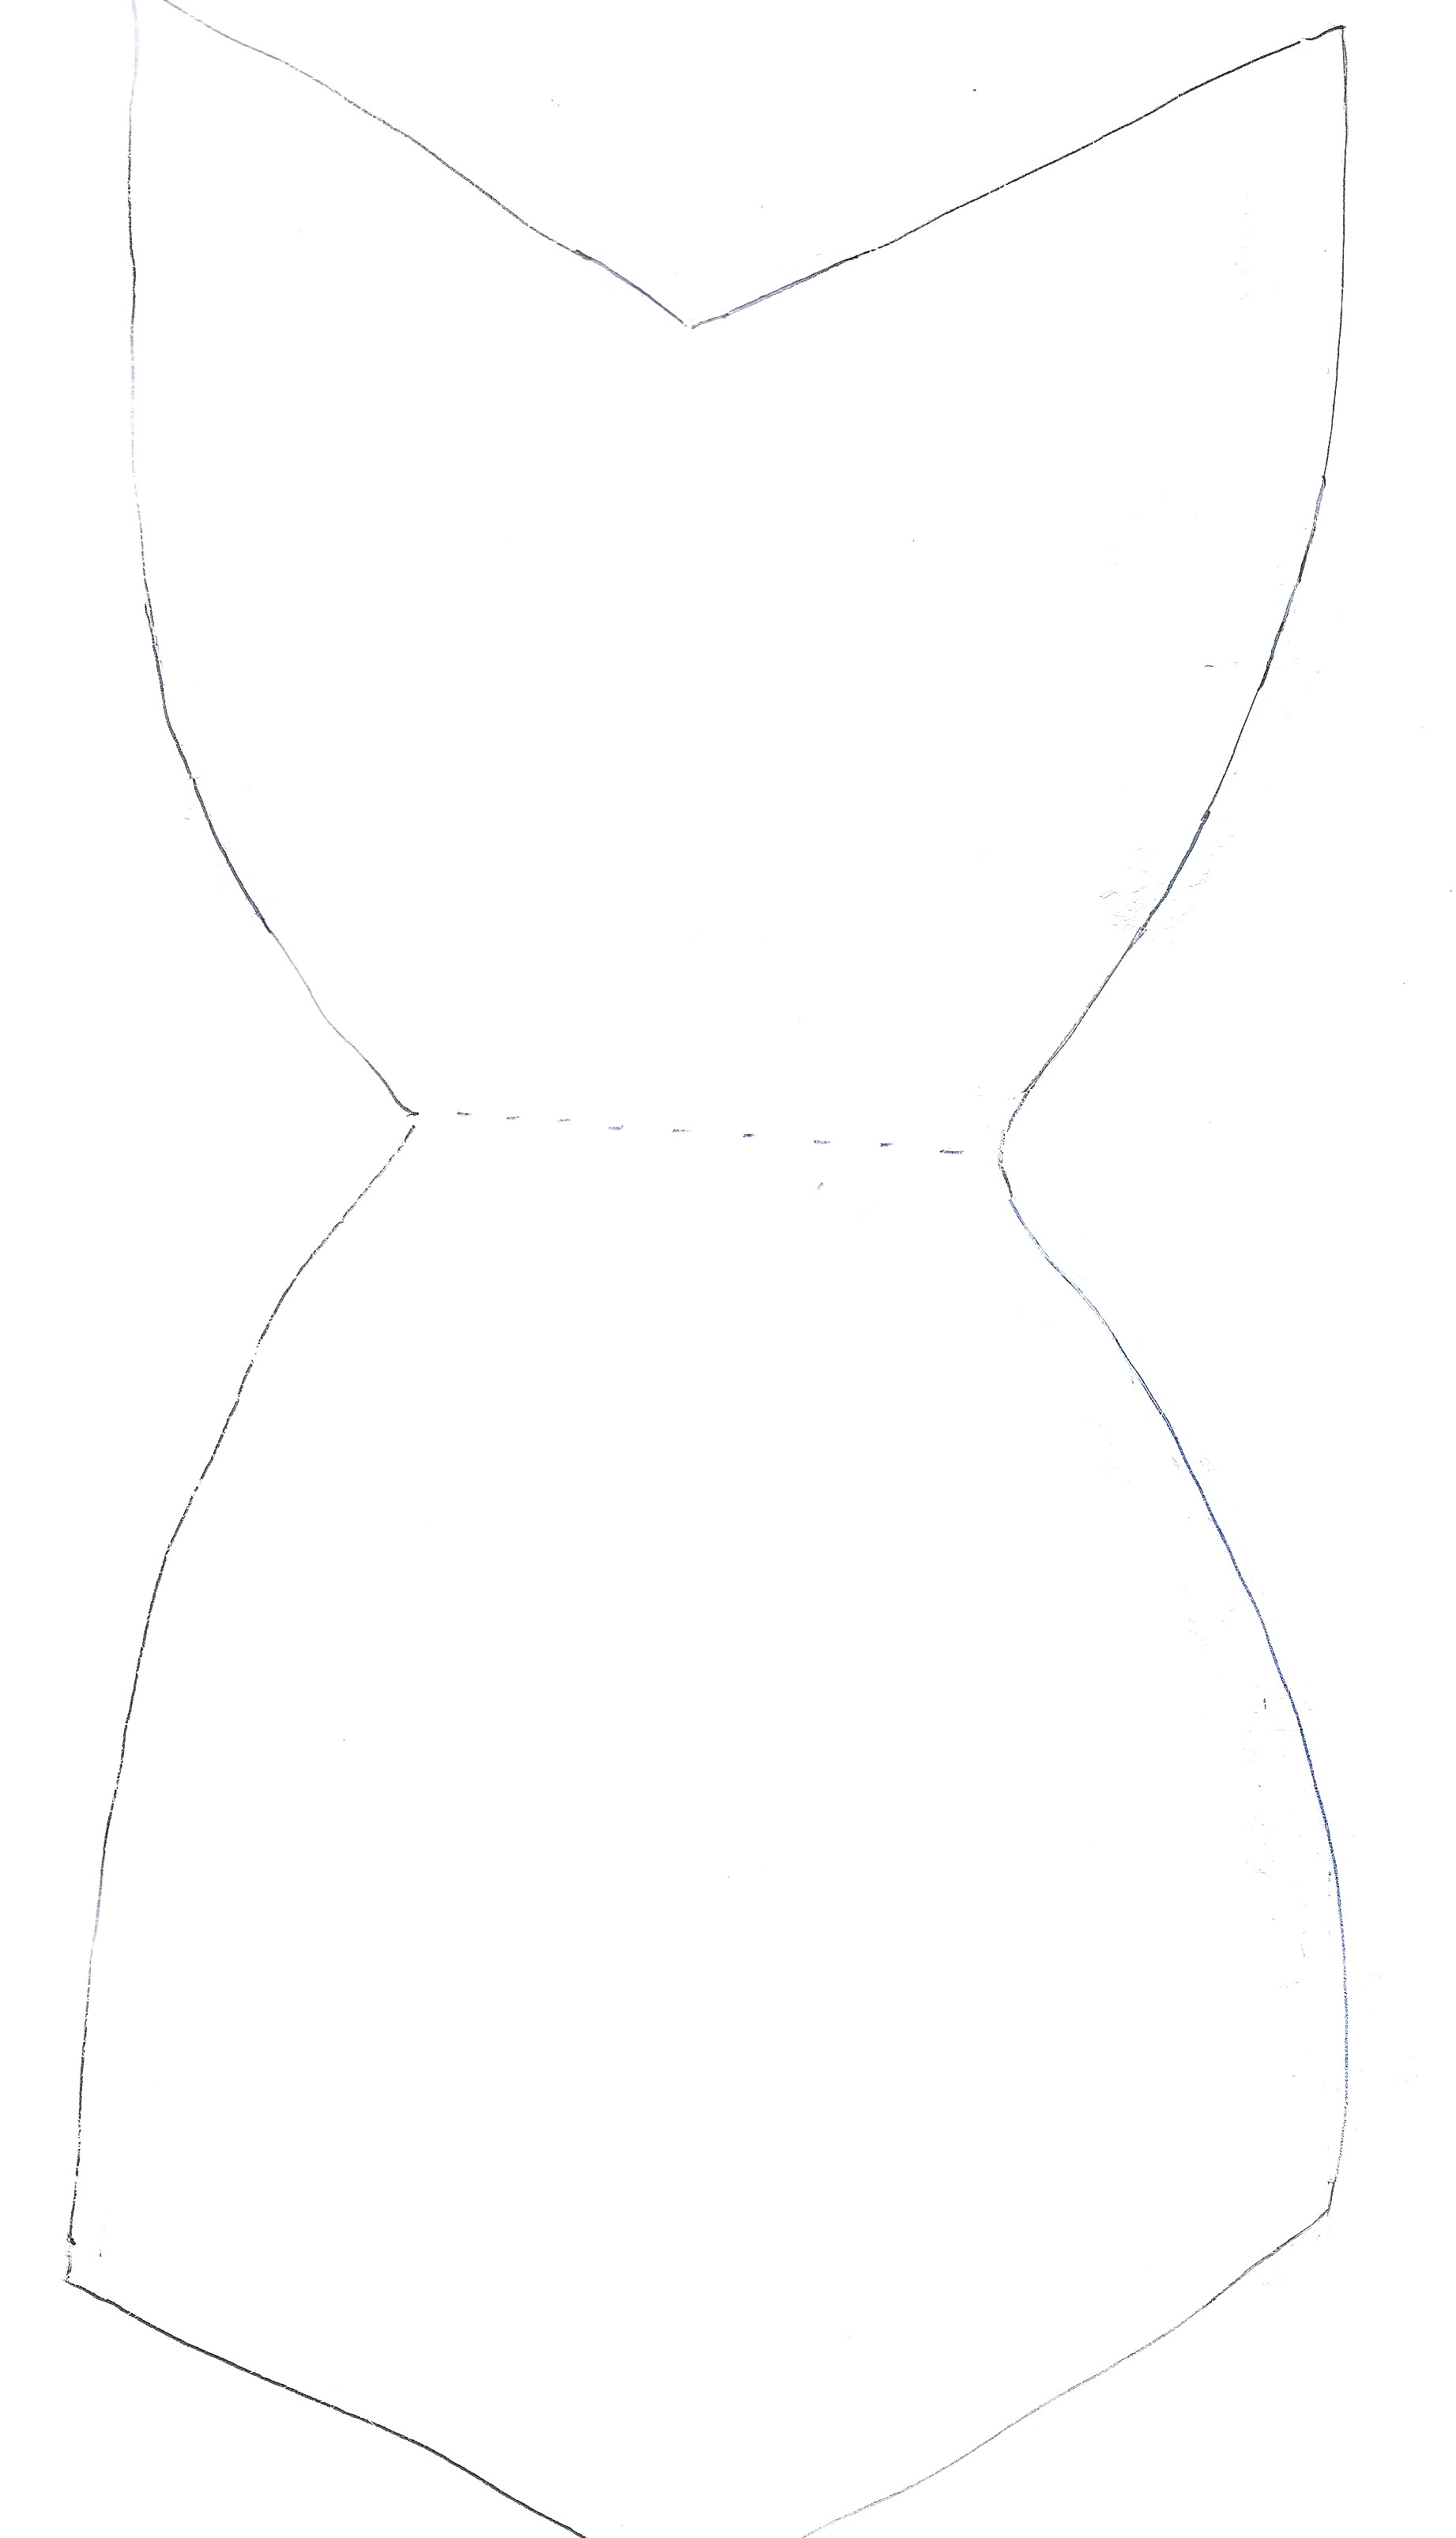
Step 2: Cut And Sew The Main Body
Cut two full body pieces from your selected felt colour. The original doll uses yellow for the body, but you can use any colour you like.
Place the two body pieces together with the edges matching. Stitch around the outside edge using blanket stitch, whip stitch, or a small running stitch. Leave an opening at the bottom or side so you can add the filling.
Lightly stuff the body with toy filling or wadding. Do not overfill it, as the doll should remain soft and easy to shape. Once the body is filled, stitch the opening closed.
Next, attach the base piece to the bottom of the doll. This helps the doll keep its rounded Matryoshka shape and gives the bottom a neat finish.
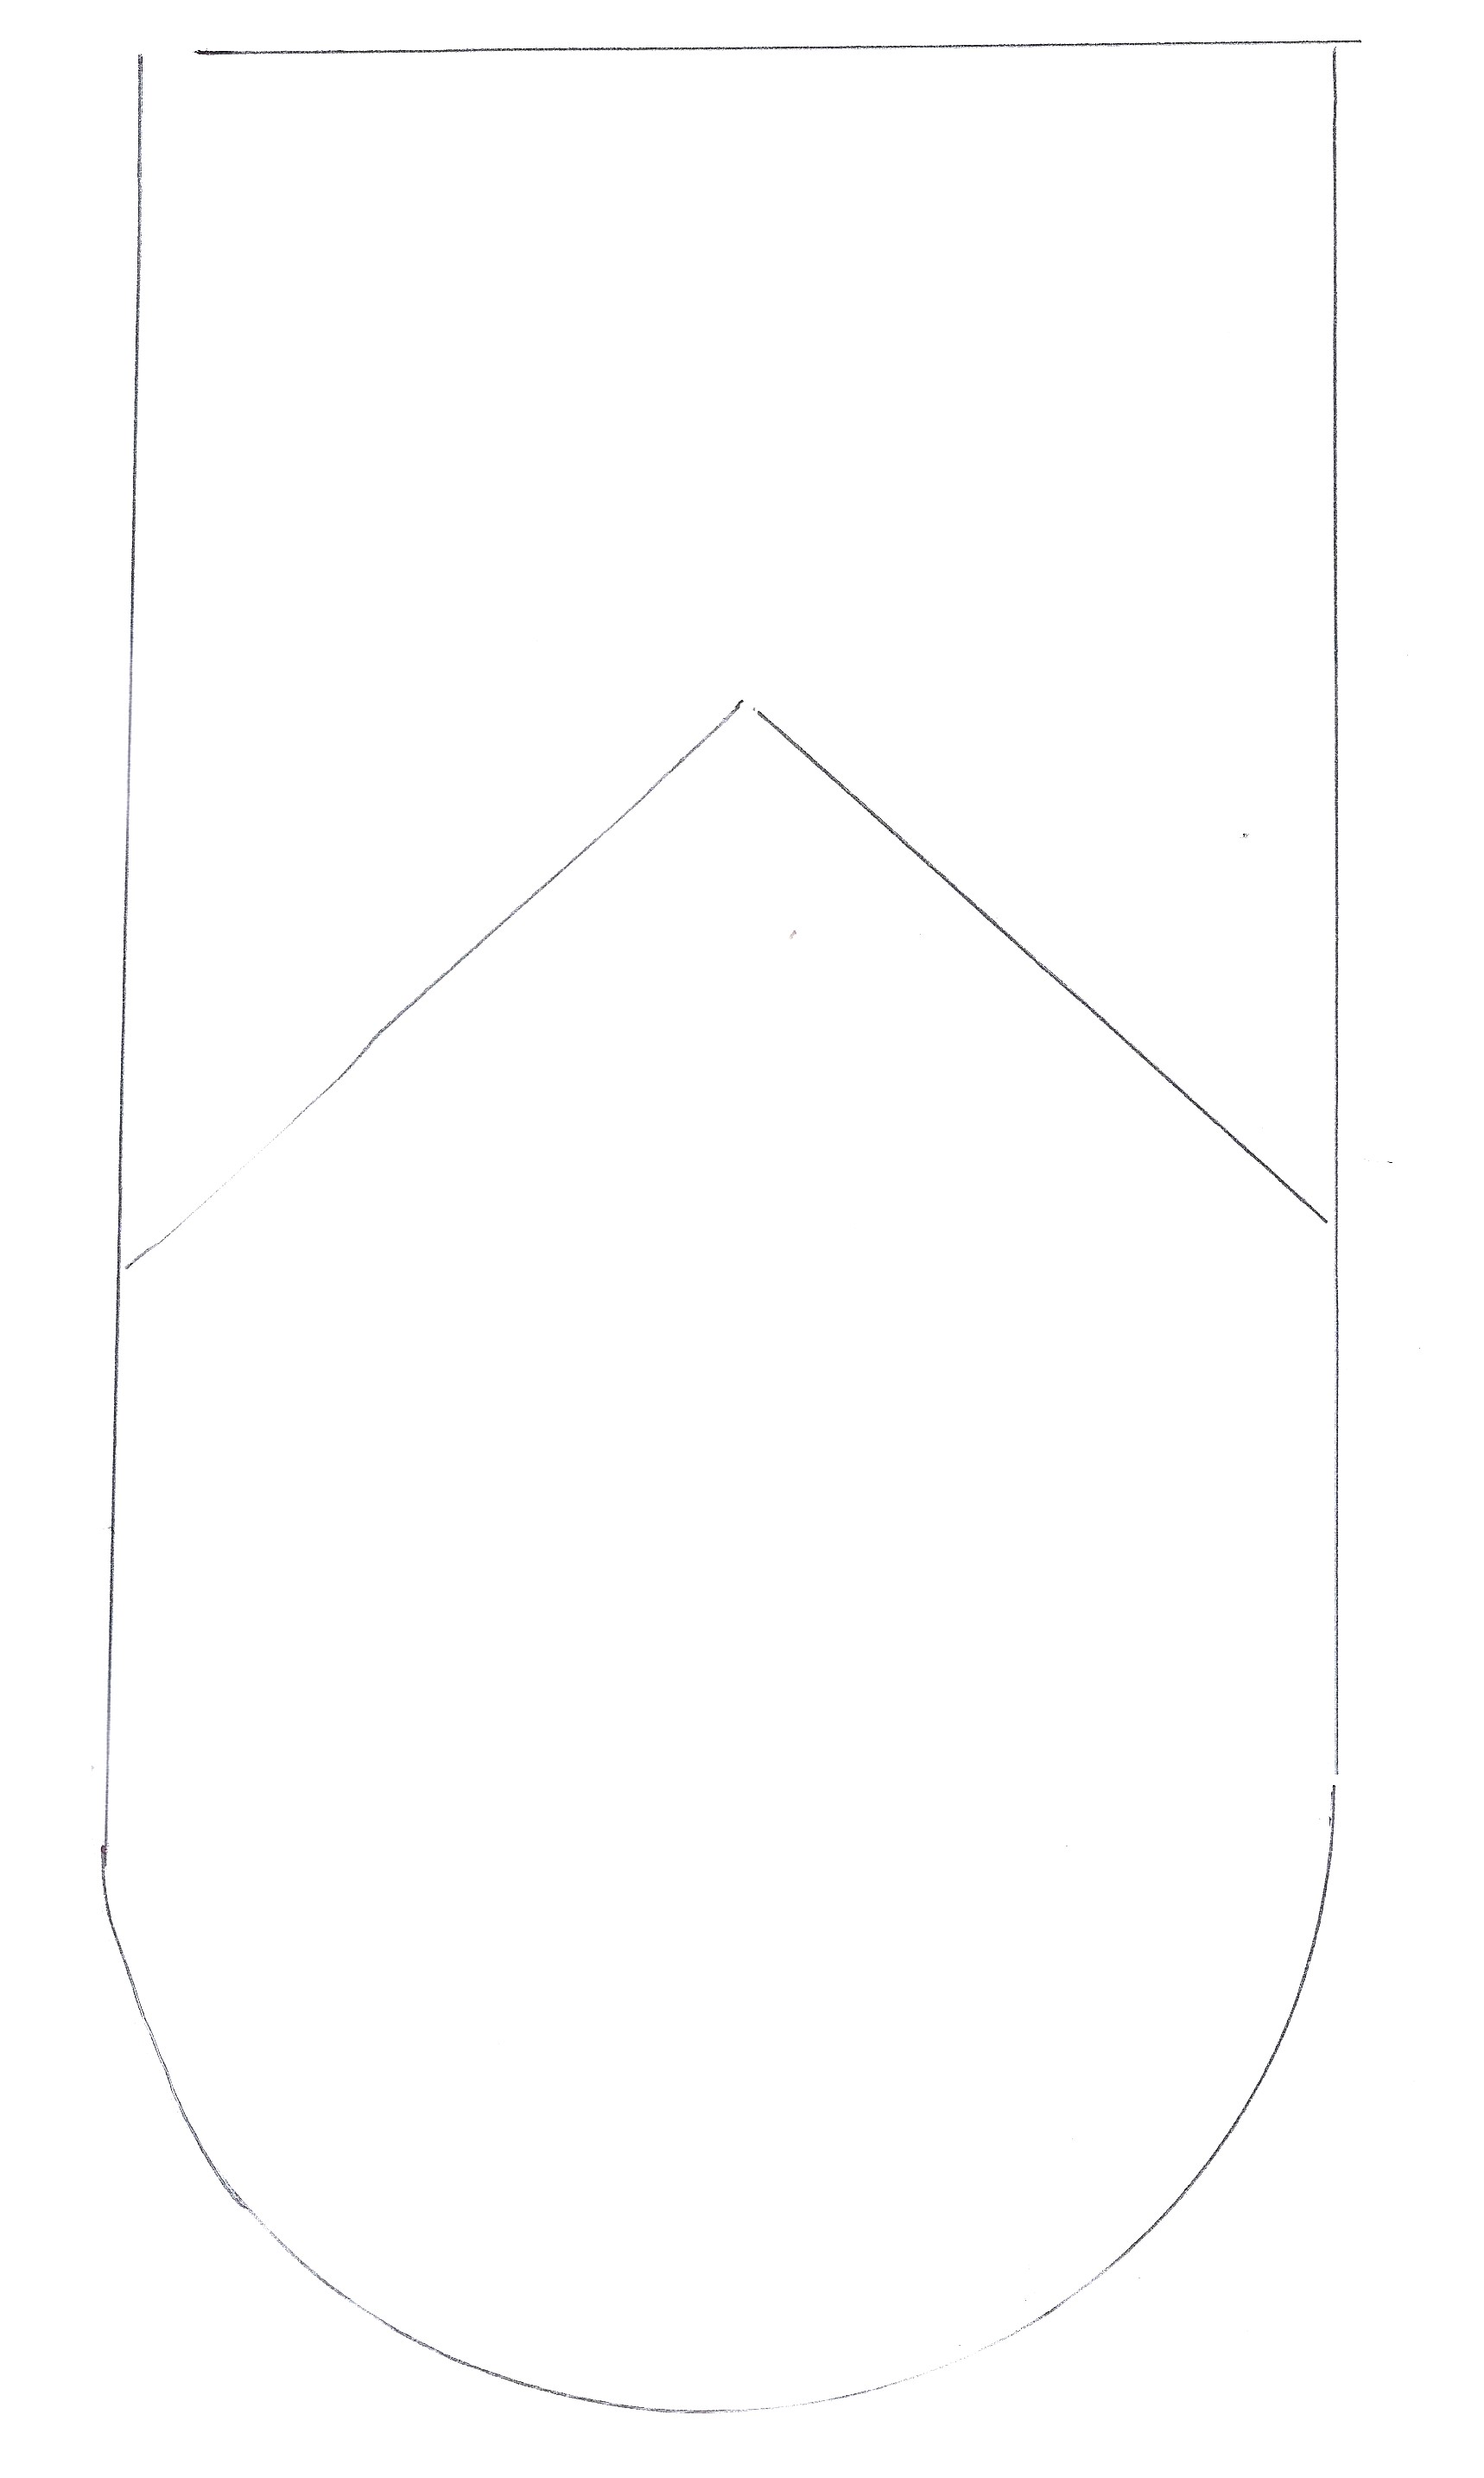
Step 3: Add The Scarf Piece
Position the scarf piece over the top of the doll. The dotted line on the pattern should sit at the top of the head.
Pin the scarf in place before stitching so you can check that it sits evenly around the face area. Begin stitching around the outside edges of the scarf, but leave the front V-shaped section open for now. This opening is where the apron will tuck underneath in the next step.
Use small neat stitches so the scarf sits flat against the body. A contrasting embroidery thread can look decorative, or you can use a matching thread for a softer finish.
Step 4: Stitch The Apron Into Place
Place the apron piece onto the front of the doll. Tuck the top edge of the apron underneath the open V section of the scarf. This gives the doll a layered look and helps the apron sit naturally under the scarf.
Once you are happy with the placement, pin or hold the apron in position. Stitch around the apron edges, making sure it is secure but still neat. You can use blanket stitch, running stitch, or decorative embroidery stitches.
This is a great place to use patterned felt, floral fabric, or a pretty contrast colour.
Step 5: Secure The Scarf And Apron Together
Now that the apron is tucked under the scarf, stitch the front scarf section down so it holds both the scarf and apron neatly in place.
Work slowly around the V-shaped scarf opening, making sure the apron does not shift as you sew. This step helps create the classic Matryoshka doll layered clothing look.
Check that all edges are secure before moving on to the decorative details.
Step 6: Add The Lilac Lace Edging
Next, stitch the lilac lace edging or decorative trim onto the apron. Place it along the lower edge of the apron, or wherever it looks best on your doll.
Use small stitches to hold the trim in place. If you are using felt instead of lace, you can cut a scalloped strip or narrow band and sew it across the apron as decoration.
This little trim detail adds texture and gives the doll a more finished handmade look.
Step 7: Stitch On The Pocket
Place the pocket piece onto the front of the apron. Position it slightly to one side or in the centre, depending on the look you prefer.
Stitch around the sides and bottom of the pocket, leaving the top edge open if you want it to look like a real pocket. For a purely decorative pocket, you can stitch all the way around.
You can add a tiny flower, button, heart, or embroidered detail to the pocket if you want to personalise the doll.
Step 8: Add The Face And Embroider The Features
Position the face piece inside the scarf opening. Make sure it is centred and sits neatly under the scarf edge.
Stitch the face piece into place using small neat stitches. Once it is secure, embroider the facial features. Use embroidery thread to add the eyes, nose, mouth, cheeks, and any small details you like.
For a simple face, stitch two small eyes, a tiny nose, and a curved smile. For a more detailed look, add eyelashes, rosy cheeks, or little highlights in the eyes.
Take your time with this step, as the face gives the doll most of its personality.
Step 9: Add The Hair And Scarf Bow
Stitch the hair piece onto the head, positioning it neatly around the face and under the scarf. You can use brown, black, blonde, grey, or any fun colour you like.
To finish the doll, sew the scarf bow into position under the chin. This gives the doll a sweet traditional look and helps complete the layered scarf design.
Check over the whole doll and secure any loose edges or threads. Trim away any excess thread, fluff the body gently into shape, and your felt Russian Matryoshka doll is finished.
Finishing Ideas
You can customise your doll by using floral fabric for the apron, adding embroidery around the scarf, stitching tiny flowers onto the body, or making several dolls in different colours. These look especially cute as handmade gifts, nursery decorations, ornaments, or craft fair items.
For a keepsake version, embroider a name or date on the back of the doll before stuffing it.


OMG SOOOOOOOOOOOOOOOOOO CUTE!!!!!!!!!!!!!!!!!!!!!!!!!!1im going 2 make 1 right now!!!!!!!!!!!!!!!!!!!!