
Small paper rectangles are folded into pages and clamped together to form one page block. The cover is made from two cardboard rectangles and a separate spine, joined with tape so it can open and close.
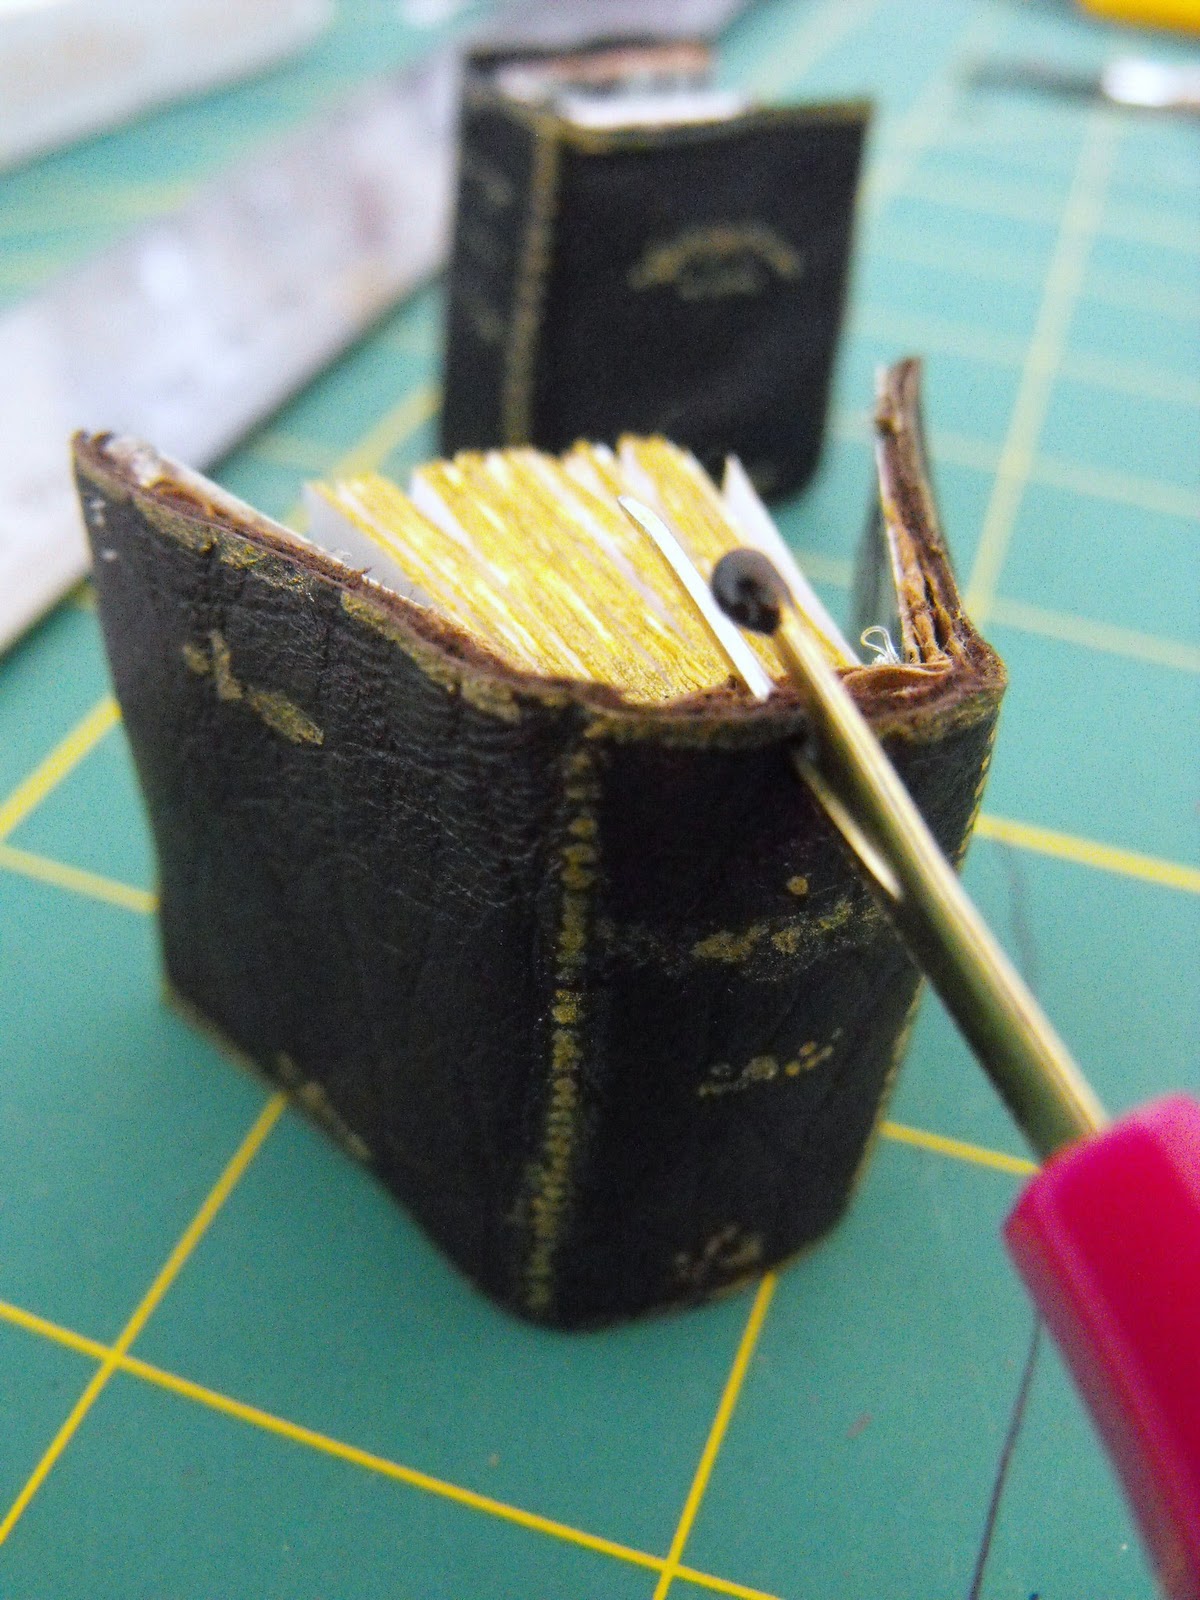
Scrap leather gives the cover its aged appearance, while a gold marker adds worn edging and tiny decorative details.
Get more details about this project
What you need
1 sheet of white printer paper
Small piece of thin cardboard, such as the back of a notebook
Small scrap of decorative paper
Small piece of thin scrap leather
Painter’s tape or strong paper tape
Double-sided tape
Hot glue gun and glue sticks
Gold permanent marker with a fine tip
1 small jump ring
Jewellery chain or cord
Binder clip, bulldog clip or strong bag clip
Ruler
Pencil
Paper scissors
Leather scissors or sharp craft scissors
Large needle or fine awl for making the hole
Cork mat or several layers of corrugated cardboard for protecting the work surface
Small jewellery pliers
Optional bone folder or blunt creasing tool
Instructions
Tiny handmade books are perfect for jewellery, dollhouse displays, Halloween costumes and magical-library decorations.
Although this miniature book looks detailed, it is made from basic materials. Printer paper forms the pages, notebook cardboard provides the structure and a scrap of wrinkled leather gives the cover an appropriately ancient appearance.
Because the book is so small, slightly uneven edges and smudged gold details add character rather than looking like mistakes.
Instructions
Step 1: Cut the paper strips
Place the printer paper on your work surface.
Measure and cut several strips approximately 1 inch or 25 mm wide.
Cut across each strip to create a large stack of rectangles measuring approximately 1 × 1 3/4 inches or 25 × 44 mm.
The number of rectangles determines the thickness of the book. Begin with approximately 20–30 pieces and add more if you would like a thicker page block.
Keep the rectangles as consistent as possible so the pages align neatly.
Step 2: Fold the pages
Fold every paper rectangle in half across its longer measurement.
Crease each fold firmly with your thumbnail, a bone folder or another blunt tool.
Each folded rectangle should now measure approximately 1 × 7/8 inches or 25 × 22 mm.
Stack all the folded pieces together with their folded edges facing the same direction.
The aligned folds will become the miniature book’s spine.
Step 3: Clamp the page block
Tap the folded edges against the work surface to align them.
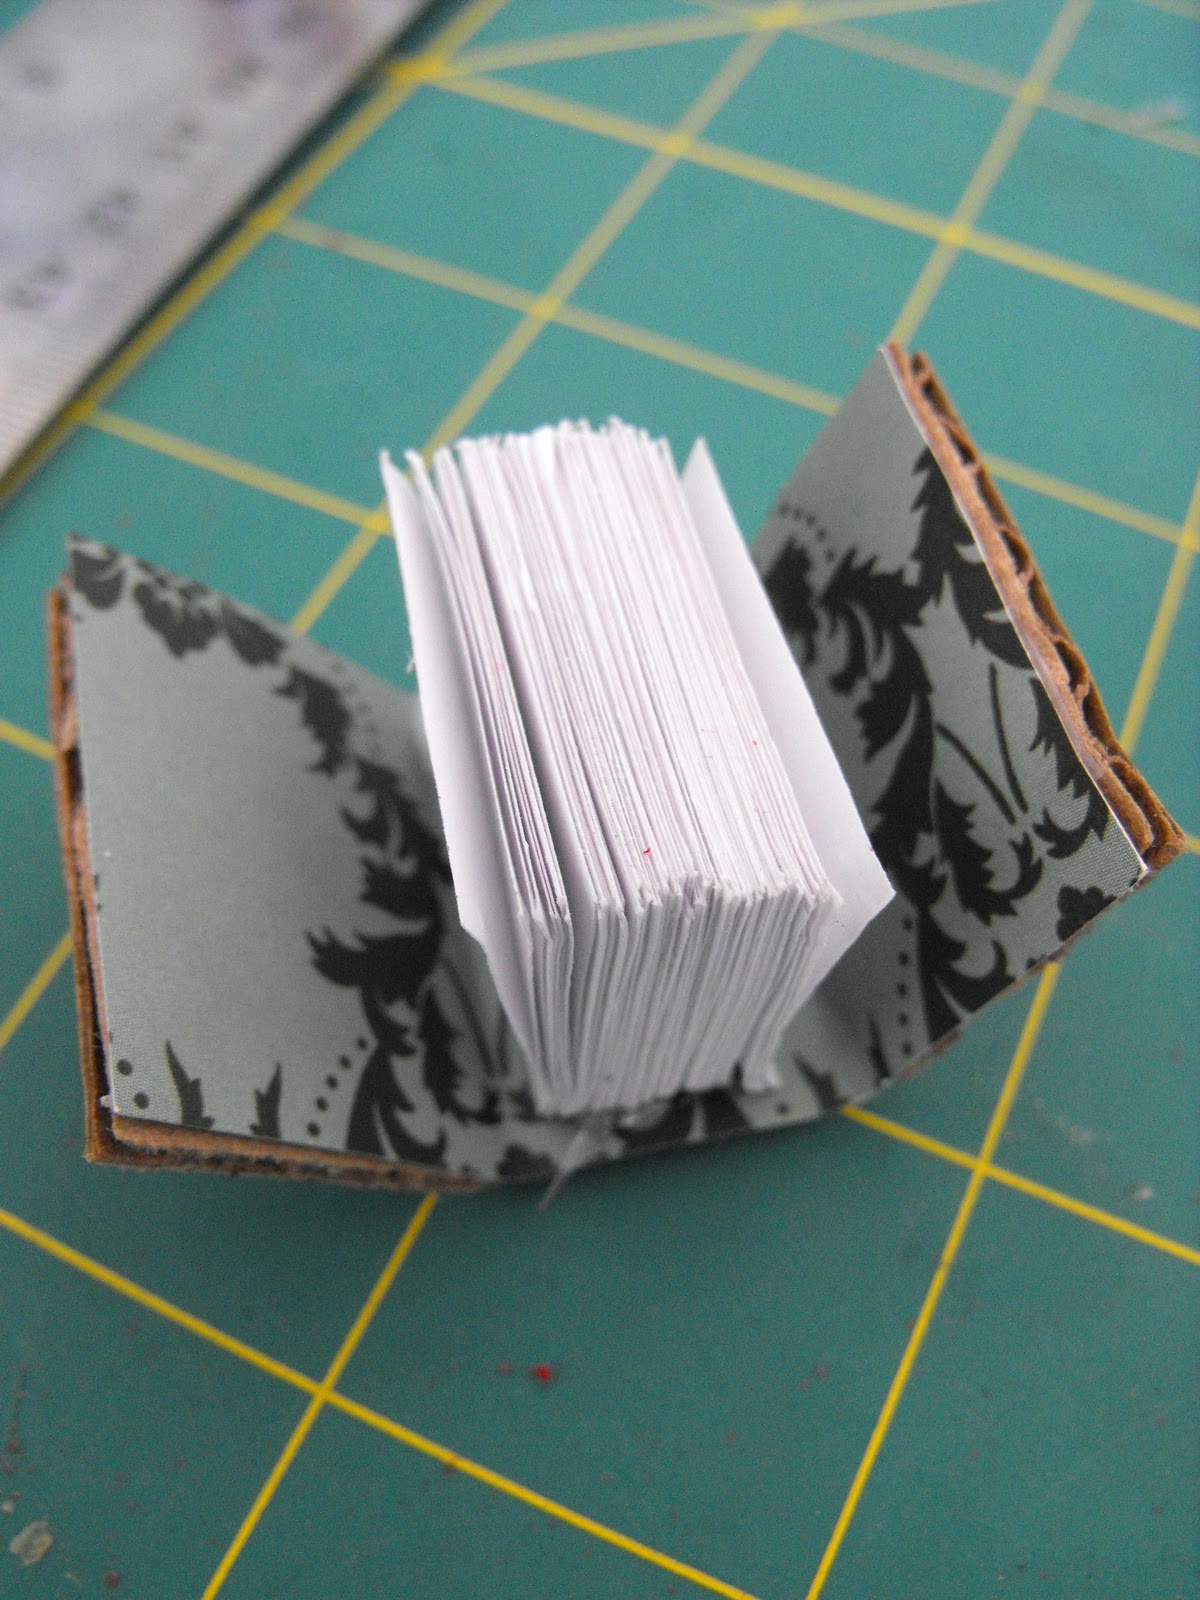
Place the loose outer edges inside a binder or bulldog clip, leaving the folded spine edges exposed.
The clip should hold the pages firmly together without creasing them excessively.
Check that all folded spines remain on the same side before continuing.
Step 4: Make the cardboard cover pieces
Cut two cardboard rectangles measuring approximately 7/8 × 1 1/4 inches or 22 × 32 mm. These form the front and back covers.
Cut one spine rectangle approximately 5/8 × 1 1/4 inches or 16 × 32 mm.
Place the three pieces in a straight row:
Back cover
Spine
Front cover
Leave a hairline gap of approximately 1 mm between the spine and each cover. These gaps allow the book to open and close.
Step 5: Join the cover
Apply a strip of painter’s tape across the back of all three cardboard pieces.
Press the tape down firmly without closing the tiny gaps.
Trim the tape around the outer edges.
Gently fold the front and back covers around the spine to test the hinges. If the pieces cannot move, carefully widen the gaps before proceeding.
Do not repeatedly force the cardboard, as the small hinges can weaken.
Step 6: Add the decorative paper lining
Lay the hinged cardboard cover flat on the wrong side of the decorative paper.
Trace around the entire cover, including the spine and hinge gaps.
Cut out the paper shape.
Apply double-sided tape to the inside of the cardboard cover, then position the decorative paper over it. Smooth the paper down carefully, working it into the hinge gaps.
Fold the cover several times to help the lining settle into the book shape.
Step 7: Test the page block
Remove the folded pages from the clip and place them inside the cardboard cover.
The folded spine should sit against the cardboard spine, with the loose page edges facing outward.
Close the cover gently.
If the pages extend too far beyond the cover, trim a very small amount from their open edges. Keep the folded edges intact.
Replace the page block in the clip after testing.
Step 8: Glue the pages into the cover
Open the cardboard cover flat with the decorative lining facing upward.
Apply a generous, controlled line of hot glue along the inside of the cardboard spine.
Remove the page block from the clip and press its folded edges directly into the hot glue.
Keep the page block centred between the front and back covers.
Press gently with a blunt tool until the glue begins to set. Do not touch hot glue with your fingers.
Allow it to cool completely before opening the book.
Step 9: Shape the book
Gently open and close the covers.
If you want the pendant to sit mostly closed, place it beneath a light weight or clamp it loosely for a few minutes.
For an open-book pendant, shape the covers at the preferred angle while the hinges are still flexible.
Do not force the pages flat against one another. They should remain able to separate and fan slightly when the book opens.
Step 10: Add the leather outer cover
Place the book cover-side down on the wrong side of the scrap leather.
Open the cardboard cover flat and trace around it.
Cut the leather slightly larger than the cardboard. A narrow irregular margin will create an aged, handmade edge.
Apply hot glue to the outside of the cardboard cover in small sections. Press it onto the wrong side of the leather.
Smooth the leather over the front, spine and back while preserving the hinge movement.
Trim the leather as required, but do not worry about making every edge perfectly straight.
Step 11: Add gold edging
Run the fine-tip gold marker lightly around the leather cover edges.
Smudge selected areas gently with a fingertip or scrap cloth before the ink dries. This softens the metallic colour and creates a worn appearance.
Add a rough gold line along the spine.
Create tiny dots and short uneven marks where a title or decorative border might appear. At this scale, abstract marks are more effective than trying to write small, legible words.
Avoid covering the entire book in metallic ink. A few worn accents will look more convincing.
Step 12: Age the page edges
Close the miniature book firmly.
Lightly brush the gold marker across the exposed paper edges.
Use the side of the marker rather than pressing the tip between the pages.
Allow the colour to dry, then open the book and separate any page edges that have stuck together.
For a subtler effect, apply the gold only to the corners and outermost page edges.
Step 13: Reinforce the hanging corner
Choose an upper corner of the back or front cover for the jump ring.
The hole must pass through the leather and cardboard, not through the loose pages alone.
If the corner feels thin, add a tiny extra piece of cardboard or leather inside the cover before making the hole.
Allow any reinforcement glue to set completely.
Step 14: Make the attachment hole
Place the book on a cork mat or several layers of corrugated cardboard.
Keep your fingers well away from the chosen corner.
Use a large needle or fine awl to make a small hole through the leather and cardboard. Twist gently rather than forcing the tool suddenly through the cover.
An adult should complete this step when children are involved.
Do not make the hole too close to the edge, as the corner may tear.
Step 15: Add the jump ring and chain
Open the jump ring sideways with jewellery pliers.
Pass it through the reinforced hole, then add the necklace chain or cord.
Close the ring securely by bringing its ends back together. Do not pull the ring open outward, as this can distort its circular shape.
Check that the ring cannot slip through the hole and that the cover remains able to open.
Optional Variations
Use burgundy, forest green or brown leather instead of black.
Line the inside cover with marbled or celestial paper.
Add tiny handwritten notes or symbols to selected pages before assembling the book.
Make several miniature books and hang them together as a cluster pendant.
Attach the book to a key ring, bag charm or dollhouse library display.
Use silver edging for a moonlit or winter version.
Safety and Wearability
Hot glue and sharp piercing tools require adult supervision.
The pendant contains small parts and is not suitable for young children.
Keep the chain length appropriate for the wearer. Necklaces can present an entanglement hazard, particularly for children.
This pendant is a delicate paper craft. Remove it before bathing, swimming, exercising or sleeping.
Keep it away from rain and moisture. Store it in a small box so the pages and cover are not crushed.
Check the jump ring regularly and tighten it if it begins to open.



Easy peasy tutorial, I made loads at the same time