
Get more details about this project
What you need
Scissors
Red Felt
Cord or edging (optional)
Craft Glue
Heavy Cardstock
Instructions
There’s something lovely about Christmas decorations that have a job to do as well as looking festive. This DIY felt Santa sleigh is a cheerful little place to gather Christmas cards, tuck in folded napkins or arrange a few wrapped treats. With its red felt sides and decorative edging, it brings a touch of old-fashioned Christmas charm to a table or sideboard.
I especially like this as a Christmas card holder. Cards have a habit of taking over every available surface in December, and one enthusiastic breeze can send the whole display tumbling. Gathering a few favourites in a handmade sleigh makes them feel like part of the decorating.
This project uses heavy cardstock sandwiched between layers of felt, giving the sleigh its shape without needing a wooden frame. A simple blanket stitch holds the pieces together and adds a lovely handmade finish. Keep the decorations understated with cord around the edges, or rummage through your Christmas craft stash for beads, ribbon, tiny bells and festive embellishments.
You can also adjust the pattern to suit your plans. Make a smaller sleigh for a few special treats or a larger version to use as a gift basket. Filled with wrapped chocolates, little soaps or a thoughtful selection of goodies, it becomes part of the present—something the recipient can bring out again next Christmas.
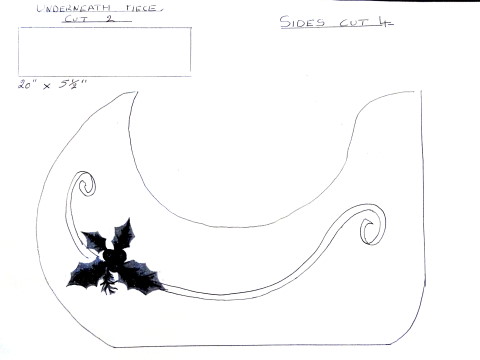
Use the Santa Sleigh Felt Pattern to cut out your pieces.
Using felt – Cut 4 side pieces 2 underneath pieces.

Using card – Cut 2 side pieces 1 underneath piece.
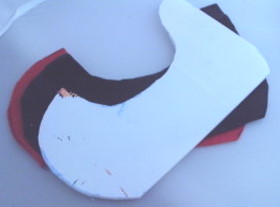
Stitch the card pieces inside the felt pieces, using a blanket stitch. Then stitch the underneath section to the sides again with a blanket stitch.
Put your own artistic touch to it by decorating it with novelties , beads or fabric paint.
It makes a nice table decoration – to display nuts, serviette holder, or fill with chocolates, perfume, or soaps to give as a gift.
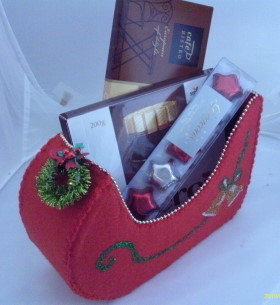
To make the serviette holder you can make the underneath section narrower, to keep them together.



What do you think of this project? Let us know!