
Get more details about this project
What you need
Felt
Embroidery Thread
Colored felt for shapes
Needle
Toy Filling/Wadding
Instructions
This Felt Baby Cube tutorial is a simple and versatile sewing project that can be made as a soft baby toy, sensory cube, pincushion, or beginner felt craft. Made from six felt squares, embroidery thread, toy filling, and colourful felt shapes, it is an easy project that uses basic blanket stitch to join the sides together.
The finished cube can be customised in so many ways. Add hearts, stars, letters, numbers, animal shapes, pockets, ribbons, or textured scraps to create a baby sensory cube, or fill it more firmly with foam to use as a handmade pincushion. You can also make smaller versions for cat toys or larger versions for toddler play, and even add a bell inside for a gentle rattle effect.
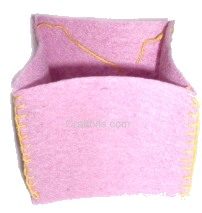
Step 1: Start by cutting out 6 squares 8 inch (20 cm) in size.

Step 2: Using a blanket stitch join all the edges together to form a flat shaped cube leaving the top square off. This will allow you to sew on the shapes and to fill it with Toy Filling or Wadding .
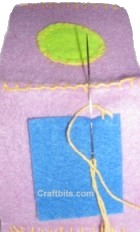
Step 3: We used hand shaped pieces that were sewn onto the side, but you can find adhesive felt shapes in your craft store which are much faster and add more detail.
Step 4: Soft filling works best for toys, but if you intend to use it as a needle holder try using something a little firmer like toy foam or a foam cube.
Step 5: Sew the top on using the blanket stitch.

Optional: Make smaller ones for cat toys or larger ones for kids toys. Drop a bell in for a rattle effect.


this is sooo cute!
i made one
and added pockets and ribbon looks great
This looks so cute. If you made a GIANT one, oyu could make a footstool!
what’s the point though?
I made these the size of coins , decorated it like dice and attached a keychain ring to it. Looks good!
damn damn cute… my 2 year old neice loves it.. and its a joy to see her like that.. thanks
cute idea. maybe for a kids cube you could cut out shapes, letters, or numbers. i like it! thanx for the easy to follow instructions to