
Get more details about this project
What you need
Craft Glue, Hot glue or E6000 glue

Orange or white chalk paint

Small twig for the pumpkin stem
Instructions
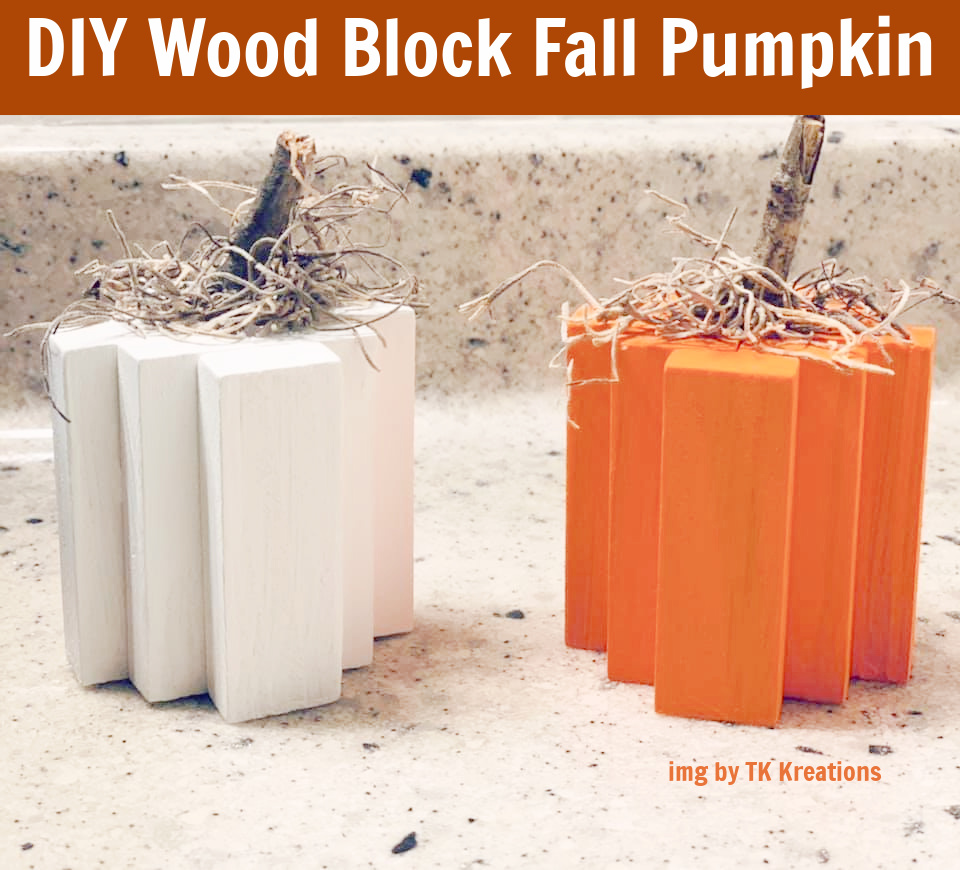
This craft tutorial shows you how to make pumpkin centerpieces or Mantel decorations using basic supplies from the Dollar Tree store. You can substitute the supplies for items from your own local discount store to get the same effect.
This fun project was contributed by Tara from TK Kreations. Thanks for sharing Tara we love your little Fall pumpkins and can’t wait to make some of our own.
If you are making these Fall pumpkins with small children, you may wish to leave them natural plain wood, which also looks adorable or spray them in advance using spray paint, then the children only have to put them together and decorate them.
You will need 9 blocks for each pumpkin. start with the middle 3 then glue, 2, then 1. Flip your wooden pumpkin over and do the same the other way, adding 2 blocks then 1. It is that simple!
Once your glue has dried on your pumpkins, you can paint them if you have not already done so. Once dried finish off your pumpkin by gluing a small twig for the stem and adding some dried moss to the top. If you do not have moss you can use raffia for a nice rustic finish also.


What do you think of this project? Let us know!