
Get more details about this project
What you need
Yarns – 4 different color
Crochet hook – 4 mm
Scissors
Cardboard piece or broomstick crochet pin.
Instructions
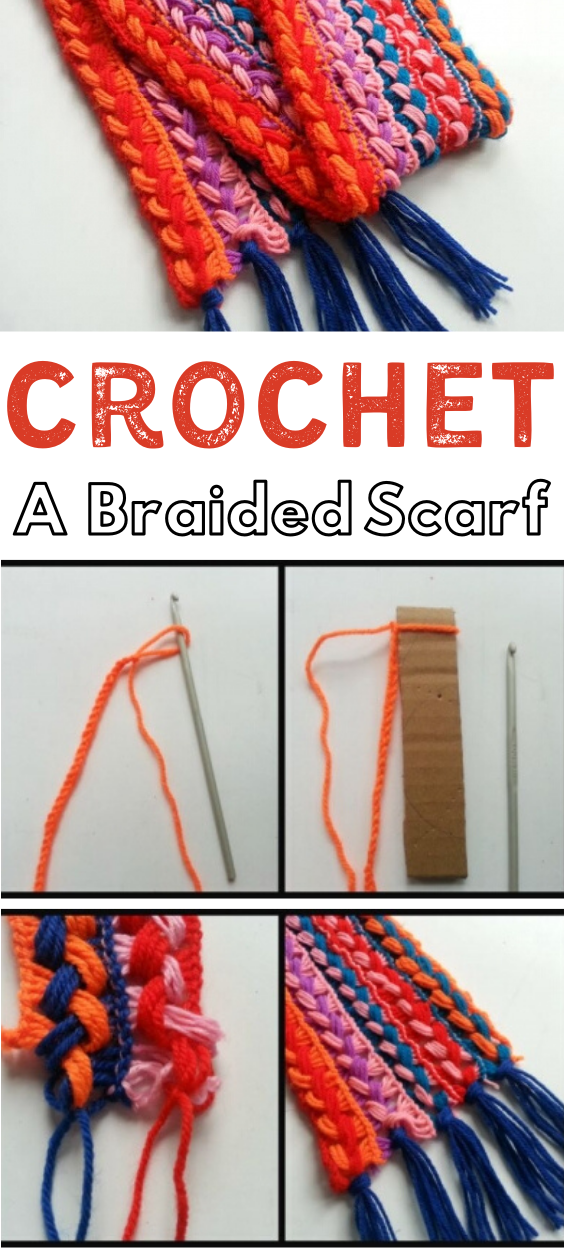
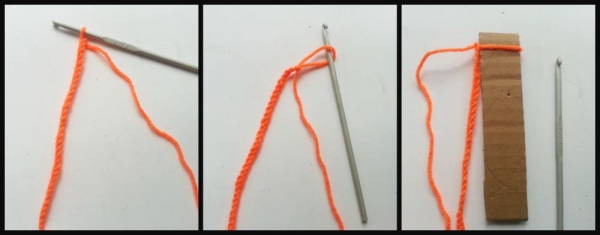 Step-1: Start with a slip knot and chain stitches. make as many chains as you need to reach the required length of the scarf. After reaching the required length pull out the last chain stitch and draw it through the cardboard piece. Carefully pull the loose end of the yarn to tighten the chain with the cardboard.

Step-2: Draw the hook into the next chain stitch and yarn through the chain. Pull the chain out carefully, remove it from the hook and take it through the cardboard piece. Tighten the chain with the cardboard by pulling the loose end of the yarn.
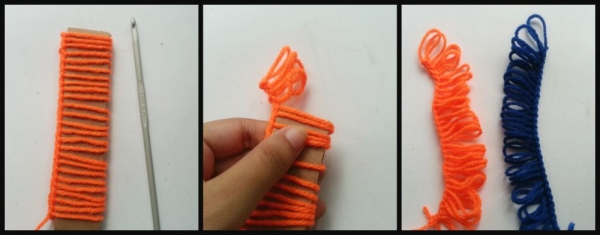
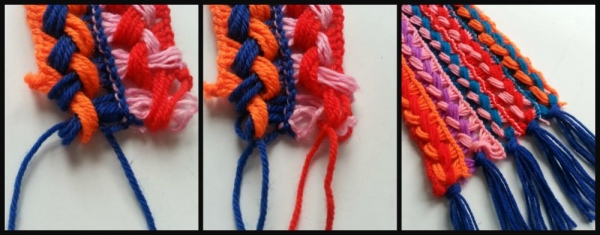
Step-3: After the cardboard piece is filled with loops carefully get them out of the cardboard piece. Keep doing the same until you reach the other end of the chain stitch. You will need to make another looped lace to proceed to the next step.
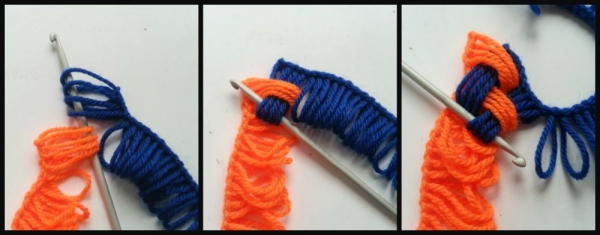
Step-4: Place the 2 laces with their loops facing towards each other. Draw the hook into 4 loops of any one lace, from one side. Again draw the hook into 4 loops of the other lace and draw them through the first 4 loops. Then again draw the hook through the next 4 loops of the other lace and draw them through the loops on the hook. Keep drawing loops of 1 lace into the loops of the other lace until you reach the other en. This will create a braided pattern.
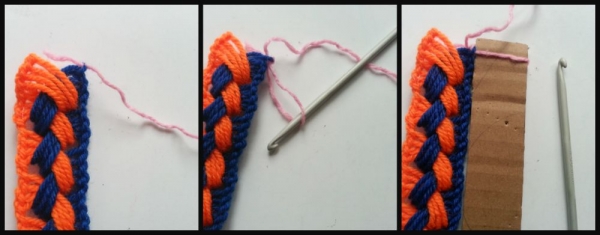
Step-5: You will be needing the cardboard piece again. Draw the hook into the first or last chain of the braided lace. Take a new yarn, attach it with the first chain stitch and yarn over the chain. Pull the chain on the hook out, remove it from the hook and get it through the cardboard piece like we’ve done for the previous ones. Keep doing the same until reaching the other end.

Step-6: Make another lace like the orange and blue one and attach it with the 3rd row of loops to create the braided pattern. Keep repeating step 4 and 5 to increase the width of the scarf. I attached 10 laces.
Step-7: Take a small piece of yarn, draw it through the last 4 loops and any chain stitch near it and then tie a knot. This will keep the crocheted braid secure. Don’t worry about these small yarns and knots, the tassels will cover them. Attach tassels on both sides of the scarf. Enjoy your new warm and colorful scarf!


Nice projects!
Looks like a great way to use leftover yarn, or even get some bits at a thrift store. Thank you!
It’s a neat project I may try if.
Hello,
Am I right in thinking. Would it be easier to do in two sections of two? Join. Then add the end pieces?
Three sections of two would work as well. Then all you would have to do is the joining?
Is that right?
Really love these scarves they are so cute. So many possibilities!
I am replying to myself now… Oops. If done in three sections of three end pieces would still need to be added. Needed to think that one over.
i wish I had a brain that could follow this but I cannot sequence or follow lists of instructions to save my life, probably the worst thing about having Aspergers is the severe difficulty I have in sequencing and following instructuions I simply can’t do it.
Looks like an interesting project. I can’t wait to try it!
I hope I’ll suggest someone to see this tutorial who love to make crochet.
good know we can make our own scarfs any tine