
I have been sewing since I was a child. I grew up among women who honed this craft using both hand stitching and machine sewing. It has always been second nature for me to want to make something with my hands using fabric scraps and bits of sewing notions. As a child, I would tear up old T-shirts to make teddy bears and sew circle skirts from old bedsheets.
I will share with you the hand sewing and embroidery stitches that I like to use most in my felt creations. My hope is that you will find these stitches helpful in everyday life, in creative projects, or just to sew back on that old button that keeps falling off.
Get more details about this project
What you need
See below
Instructions
The Basics: Threading a Needle & Knotting Your Thread
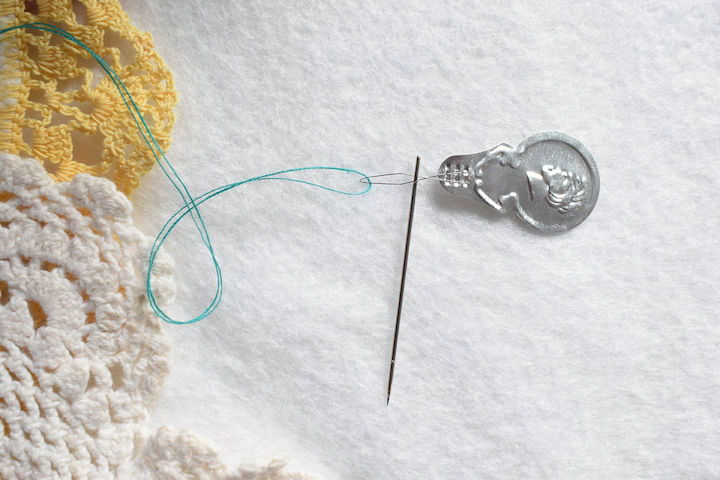
Every hand-sewing project begins with threading a needle. I’m a simple gal, so I almost always use the good ol’ method of wetting the end of the thread and threading the needle by eye. However, there are a couple tricks for those of you frustrated by this method.
For one, there is the needle threader. It’s inexpensive and easily found in stores. To use it, you simply insert the end of the threader through the eye of the needle. Insert the thread into the end of the tool, and simply pull through the eye of the needle, bringing the thread through. If you don’t have a needle threader on hand, another method is to vigorously rub the eye of the needle over the thread until it pops through.
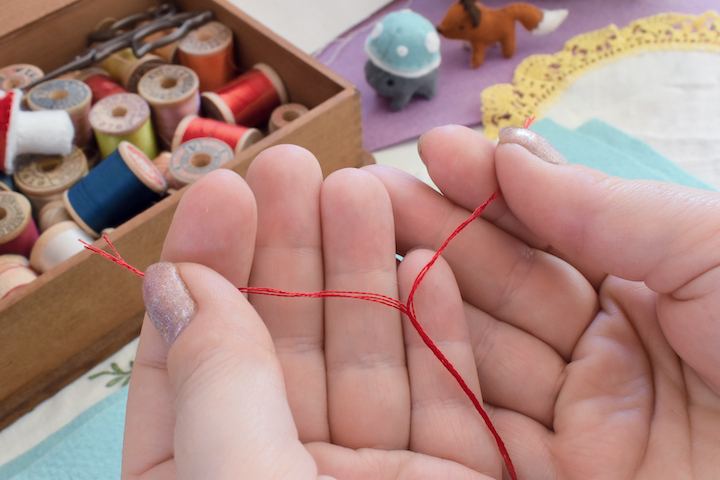
Once the thread is through the needle, the next step is to double up the thread by pulling the end all the way through so that both ends of the thread are together. Knot the thread together at the end.
One way to knot the thread is to wrap the thread around the needle several times, overlapping threads while you’re wrapping. Pull the needle through the layers of wrapped thread, and pull the thread through until a knot forms at the end of the length of thread. A simpler method is to simply make a doubled-up knot at the end of the thread.
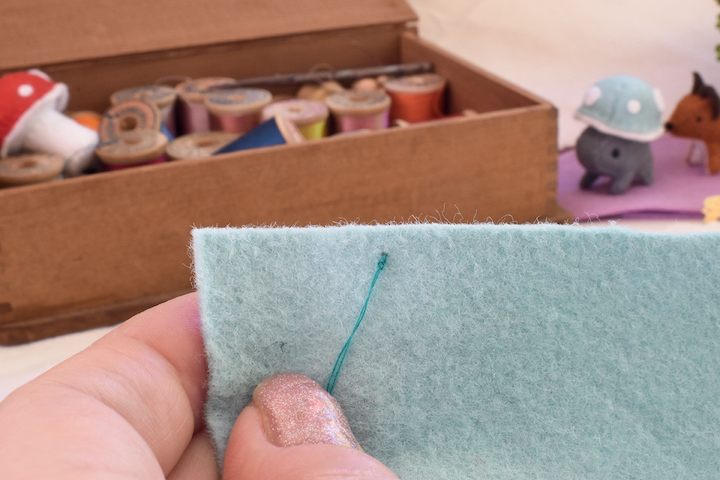
Starting Your Stitching
Step 1
I start my stitching by inserting the needle through one felt pattern piece, placing the knot on the inside of the project. Always try to hide your beginning and end stitches! The knot will be hidden between the two pieces of felt for a seamless start and end to your stitching.
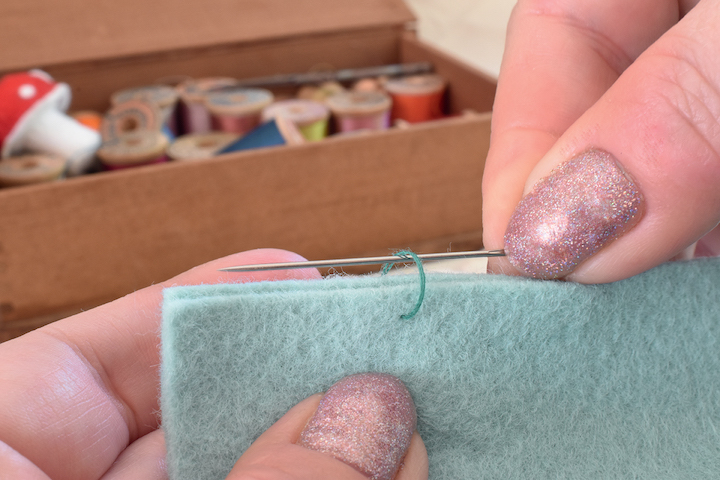
Step 2
The next step is to make your first stitch into a knot. Send the needle through the felt layers on the opposite side of the project, creating one stitch loop through two layers of felt.
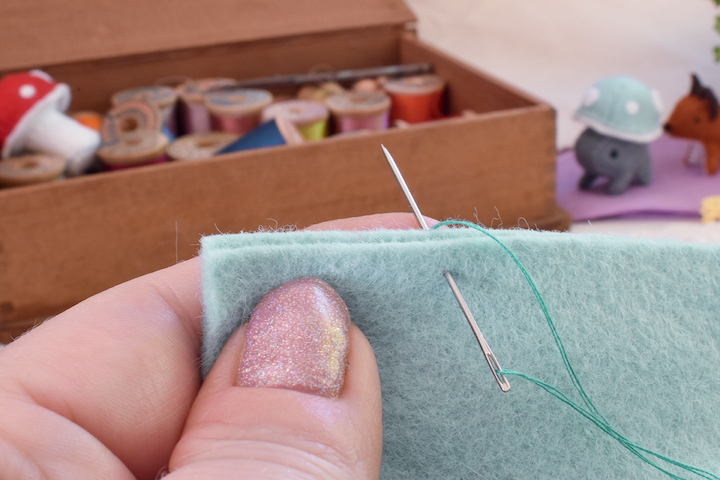
Step 3
Send the needle through the loop and pull tight. You’ve just secured your stitching with a knot holding the layers in place. Time to begin stitching!
Hand Stitches
Blanket Stitch
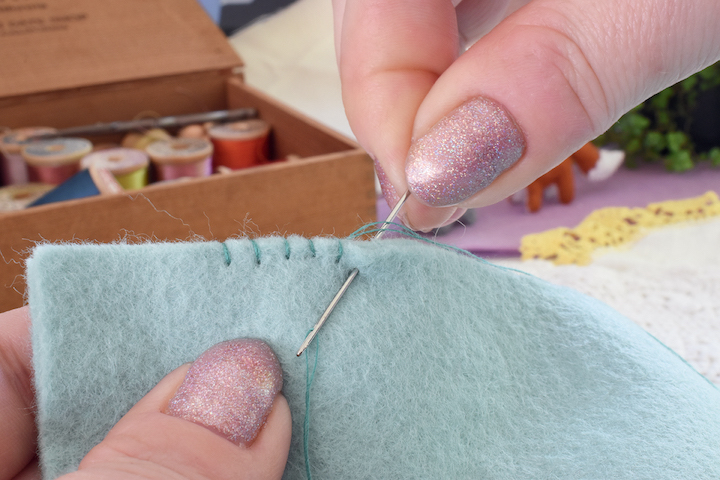
My absolute favorite stitch to use in hand-sewing projects, the blanket stitch is incredibly durable and creates a nice, clean edge. The blanket stitch is a popular stitch often seen around the edges of fleece blankets, designed to hold the edges from curling or fraying. Think of the blanket stitch as making your first knotted stitch in a project—creating this stitch over and over all along the seam edges of your project.
![]()
Begin by knotting the thread and sending it through the felt near the edge, as described in “Starting Your Stitching”. Once your felt pattern pieces have been layered together and you’ve made your first knotted stitch, you are then ready to blanket stitch. Send the needle through the felt just next to your first stitch. Pull the thread through the back until you have just a small loop above the raw edge. Insert the needle through the loop and pull tight to hold the layers but not so tight that the fabric buckles. Continue stitching this way all along the edge to create a blanket stitch.
Whipstitch
The whipstitch is very easy to learn and great for quickly stitching projects. Sewing a whipstitch is simple. Start by knotting the thread and sending it through the felt near the seam edge. Creating this stitch is done just as it sounds! Insert the needle through the layers of felt, and then “whip” the needle around to the front of the project again for your next stitch. Repeat. It’s as simple as that!
Running Stitch
Running stitch is the most basic stitch of all. It just means stitching in a dashed line formation. I like to use this to topstitch layers of felt together.
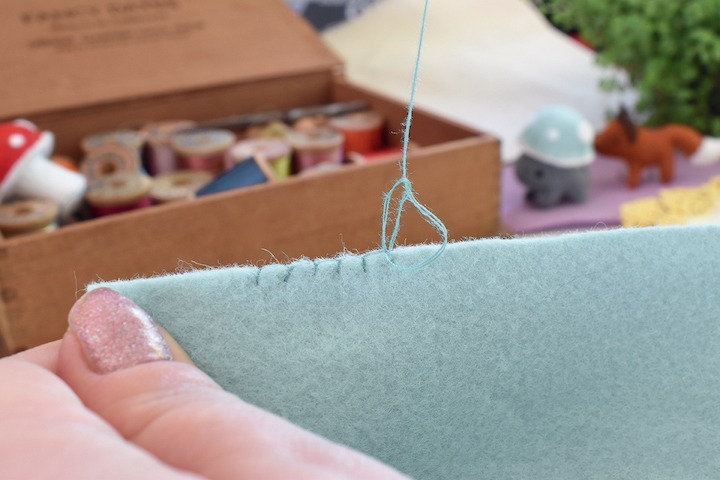
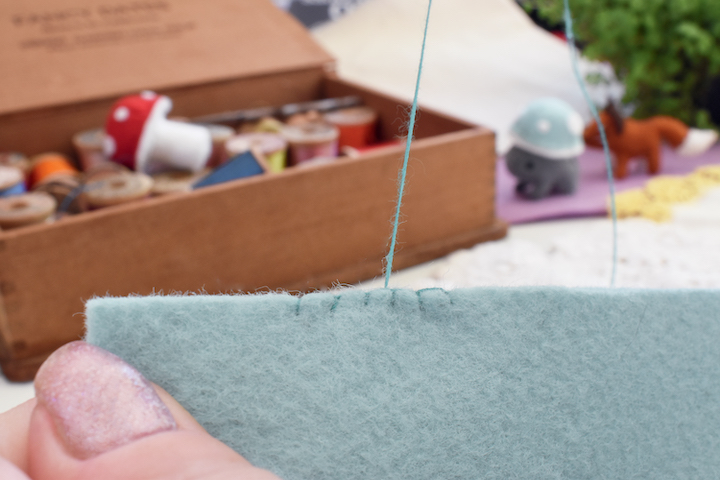
Ending & Tying Off Stitches
Just like when I’m starting a stitch, I prefer to hide my knots and loose ends when ending my stitching. It’s incredibly easy to do with felt because it’s such a forgiving material to work with. There are two ways that I like to hide my end stitches and loose ends of thread. One method is to hide it among the stitching. The other is to send the thread out of the opposite side of the work, leaving a long tail end on the inside of the piece.
Step 1
Begin by making a knot at the end of your work, same as with your beginning stitch.
Step 2
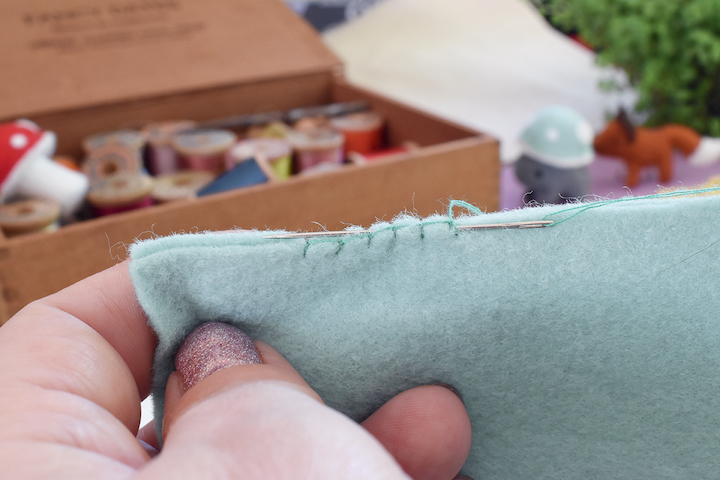
Next, insert your needle into the felt along the row of stitching.
Step 3
Pull the needle out along the row of stitching, about ½ to 1 inch (11/3 to 21/2 cm) from your ending knot. Pull the thread tight and snip close to the edge. Be very careful not to accidentally cut your stitches.
If you’re wary of accidentally cutting your stitching, you can go a step further and insert the needle back into the stitching and out the bottom or back of the piece you are sewing. Pull it tightly and snip as close to the felt as possible.
If the end of the thread shows, simply rub the felt a bit and it will get pushed back inside your creation.
Basting Stitch
The basting stitch is used to create gathers for a ruffled appearance. A very easy stitch to achieve, the basting stitch is essentially a loose running stitch with the ends left rather loose so you can pull the threads to create a gather. The most important element of creating this stitch is trying to keep the stitches uniform for a consistent ruffled appearance, where each pleat is approximately the same size. The basting stitch is designed to be snipped and pulled out after you’ve completed your project.
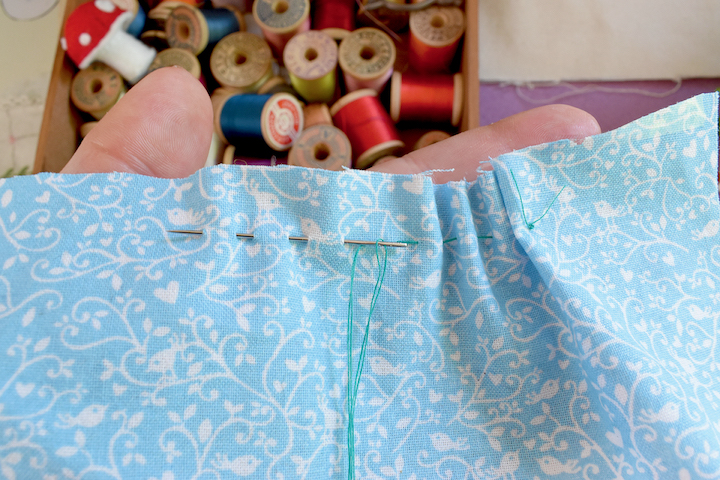
To create a basting stitch, begin by knotting your thread to one end. Create a long and loose running stitch along the top of your fabric or felt. Create the stitch across the top edge of your piece, running from one end to the other. Leave your threads dangling, and then hold the thread while you push
the fabric along the stitch to create the gathered ruffle.
Usually, you will then iron the top of the ruffle and stitch it into place with a running or whip stitch. Once the ruffle holds in place correctly, you can snip the basting stitch and pull it out. I usually use this stitch with cotton fabric for doll clothes, but it can also be used in certain felt projects, such as flowers or the
underside of a mushroom.
Embroidery Stitches
Embroidery stitches can be used to add decorative detail to your felt creations—either through pretty, embroidered flowers and decoration, or simply to add eyes and facial features.
Backstitch
This is one of my favorite embroidery stitches. I use backstitch in line work, to create flower stems, and more. To create a backstitch, begin by making a single small stitch as with a running stitch. Insert the threaded needle as if you are about to create the next stitch in a running stitch. However, instead
of stitching forward, move backward, inserting the needle at the end of the first stitch.
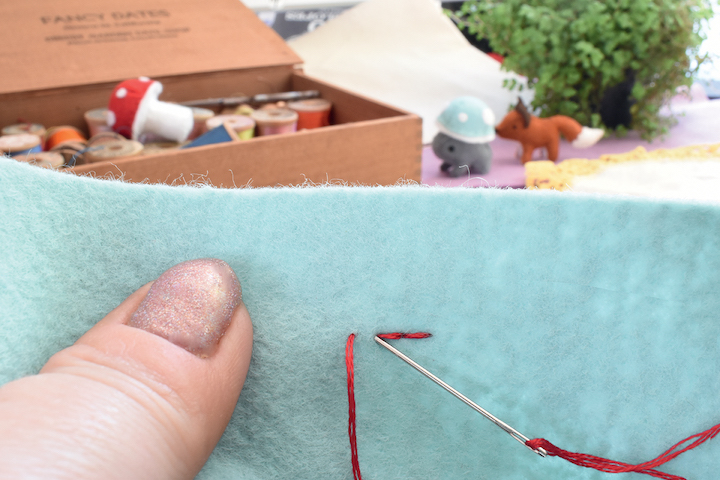
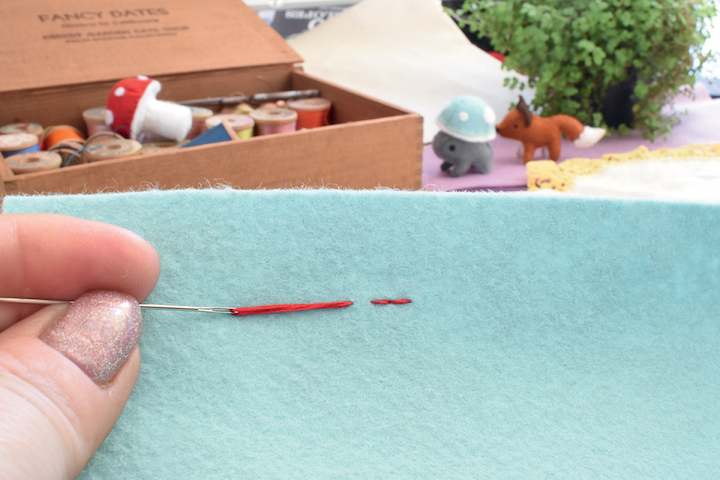
>>> SPLITTING THREAD <<<
One important step when creating tiny embroidery for miniatures is splitting your embroidery thread. This will make it smaller and facilitate more delicate detail. Standard embroidery thread comes with six strands twisted together. Each project in this book may call for splitting into different sizes, such as two
or three strands.
To split the thread, all you need to do is twist the end of the embroidery thread in your fingers until it unravels just a bit.
Split one side of the thread into however many strands you need for the project, and then gently pull apart. After splitting the thread, you may want to gently roll the thread in your fingers again to wind it back together.
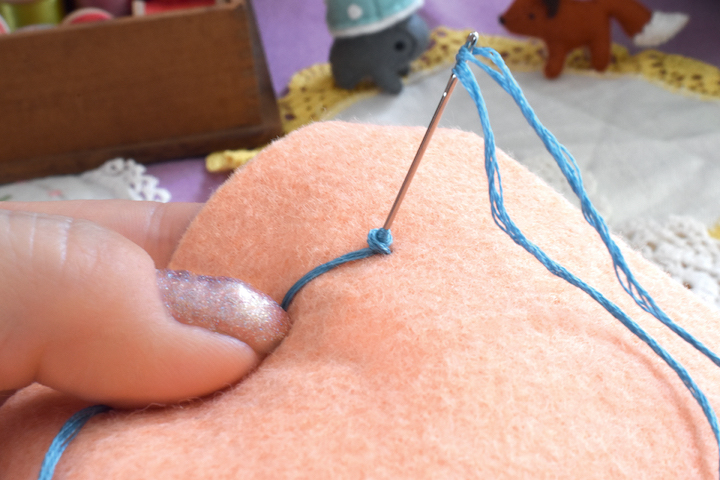
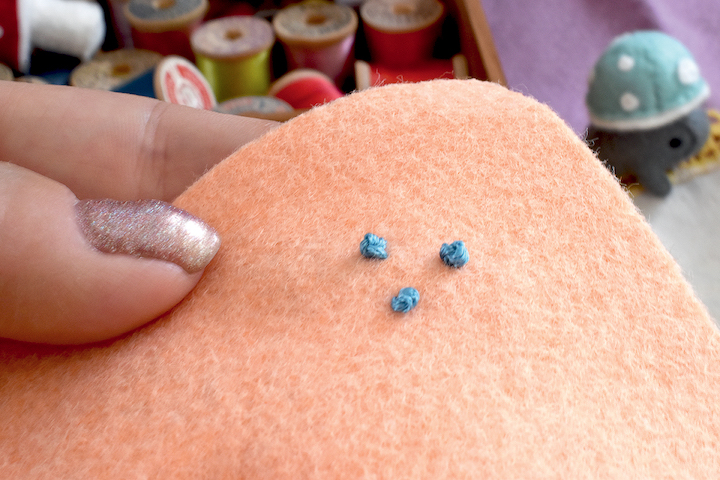
French Knot
I love to use a French knot to add decorative details to a project. French knots can be used to make rosebuds, moss, and even doll eyes. Knot your thread and insert it into the felt, leaving the knot at the back. Wrap the thread around the needle three times, keeping the needle close to the top of the project.
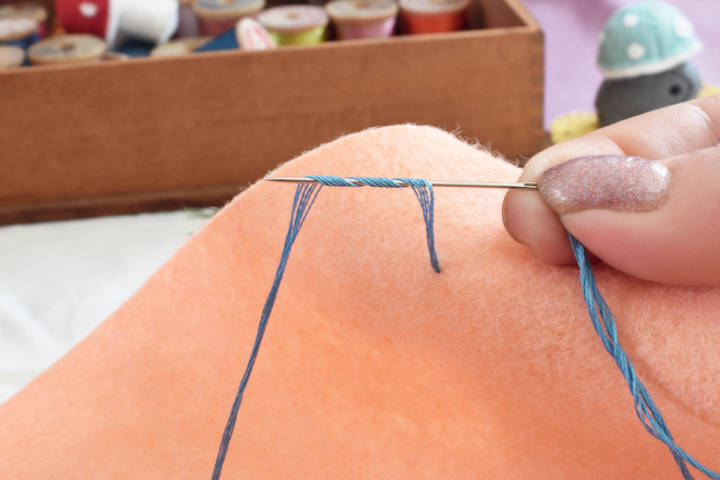
Insert the needle into the felt again, very close to the first stitch, making sure to keep the thread wrapped on the needle and holding the loose end of thread down with your thumb. Continuing to hold the end of thread under your thumb, pull the needle through the felt until it holds the wrapped “knot” in place.
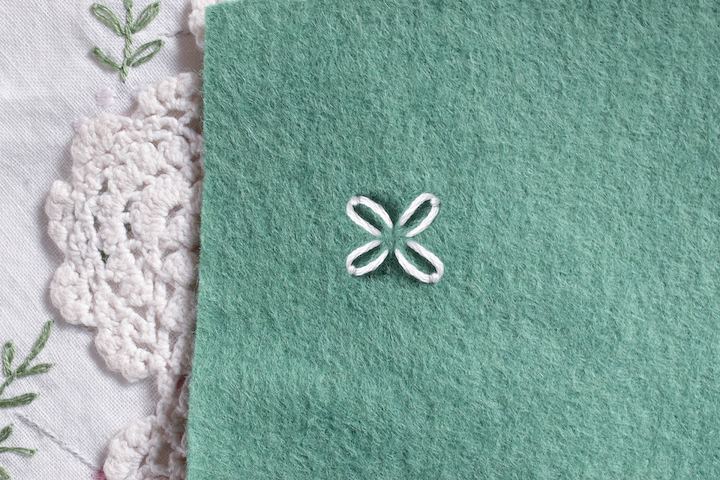
Lazy Daisy Stitch
The lazy daisy is another great stitch that can be used to create a variety of decorative details. My favorite way to use this stitch is to create flower petals or even leaves.
Begin by knotting the thread and inserting it into the felt, leaving the knot at the back or inside of the project. Insert the needle into the felt again, just next to the first thread.

Pull the thread through the felt until you have a small loop at the top of the felt.
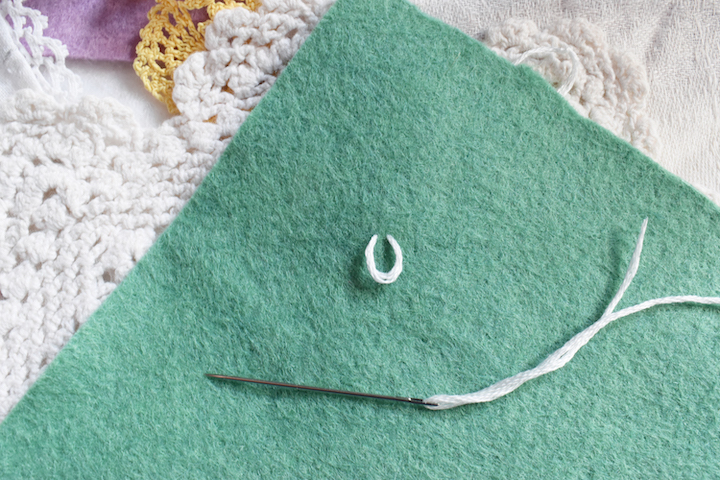
Insert the needle from the back, bringing the thread through at the inside end of the loop. Next, insert it on the opposite side of the end of the loop, holding the thread in place on the surface of the felt.
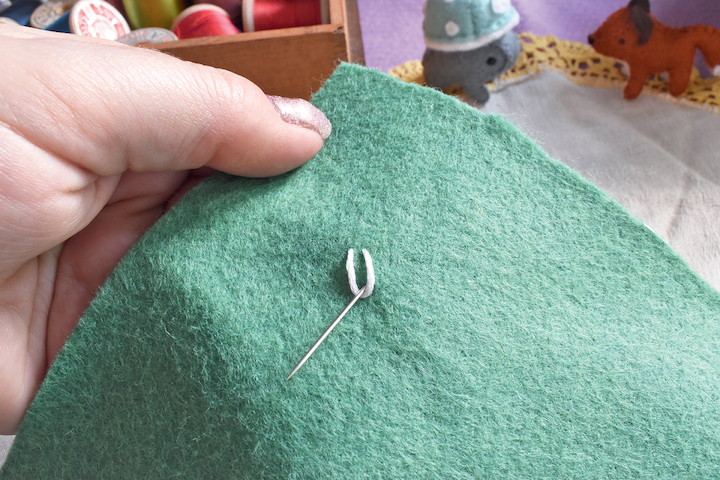
Repeating this stitch in a formation will create a small daisy flower!
Delilah Iris is a self-taught felt and fiber artist with an extensive background in graphic design and print, media, and content creation. Her works include a line of felt sewing patterns and DIY craft kits found in craft stores across the United States and Canada. She is a constant creative dabbling in mixed-media art and even ceramic pottery from her studio in Maine. Follow Delilah’s work and find more craft project tutorials on Instagram @delilahiris and her website, Delilahiris.com.
Excerpted with permission from Tiny Felt Cuties & Creatures (Walter Foster Publishing, an imprint of The Quarto Group, 2023) by Delilah Iris. Tiny Felt Cuties & Creatures is available wherever fine books are sold. Learn more at quarto.com.


What do you think of this project? Let us know!