
Get more details about this project
What you need
Pre-made satin binding (2’¾”/7 cm thick) – 98 inches/2’½ m long
Fleece square 23 x 23 inches/ 60 x 60cm.
Contrasting fabric square 23 x 23 inches/ 60 x 60 cm.
Beige Fleece material – 56 cm x 41 cm / 22 x 16 inch.
7 mm safety eyes.
Embroidery thread for sewing nose and mouth.
General sewing supplies (matching thread, pins, needles, scissors)
Craft glue & firm card for templates.
Fine tipped permanent marker pen.
Synthetic toy stuffing.
Instructions
Follow the picture instructions – you can’t go wrong! To start, print the pattern sheets. You can stitch by machine or hand, whichever you prefer. Always use a 5 mm /1/4 inch seam and sew right sides together unless directions state otherwise.
GENERAL PREPARATION
General Preparation
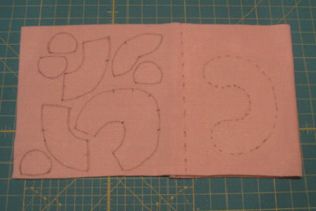
For the bear, glue the pattern pages onto card or thick paper and cut out the pattern pieces to make your templates. Lay the fleece right side down with the grain/pile running down towards you. (Most stretch – sideways.) Place your templates onto the wrong side of the fabric making sure the arrows point towards you. Trace the templates with a permanent marker and cut out your pieces. (Be careful not to press too hard or the ink will smudge and may even show through your white material on the right side.)
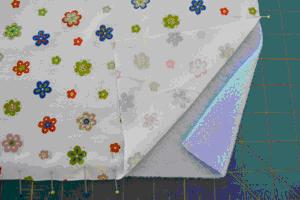
For the blankie, cut a square of fleece and a square of a contrasting fabric (cotton, velour or fleece.) Both should be 23″ square (60cm square).
SEWING YOUR BLANKIE
Sew the blanket squares together with the RIGHT SIDES OUT. This feels strange but your binding will cover the edges. I like to use the longest stitch on my sewing machine because a zigzag or a tight stitch will cause the blanket edge to curl/pucker.
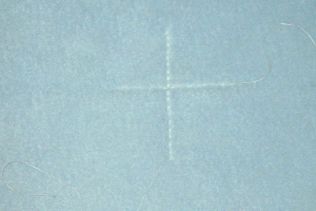
Sew a cross
I also sew a cross at the center of the blanket to hold the 2 layers together until I sew the Bear in place.
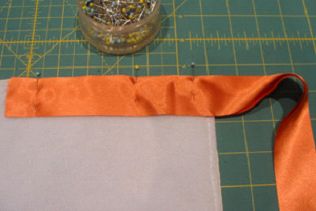
Do the Edging
Using pre-made satin binding, edge your baby blankie. Use the picture guide provided with this pattern.
SEWING YOUR BEAR
Cut the arms
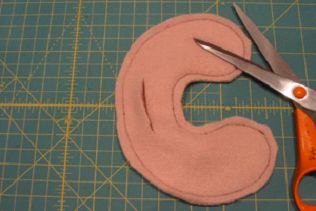
Place your fleece for the arms right sides together then sew right around the arm shape on the sewing line. Cut the arms out with a 5mm/1/4inch seam allowance. Cut the hole for stuffing the arms, on ONE side only.
Make a hole for stuffing
Turn the arms right sides out through this hole and stuff them with synthetic toy stuffing.
You may need this Ladder Stitch Diagram
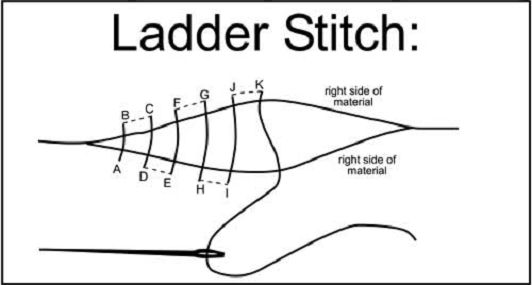
Ladder stitch diagram
. Sew the hole closed with a ladder stitch.
Sew closed with ladder stitch
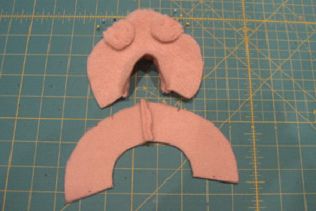
Sew the back head pieces together from C – D.
And the back pieces
Sew the snout piece to the front head piece from A – B.
Snout to head
Sew the ear pieces together and turn right side out.
Sew the ear pieces
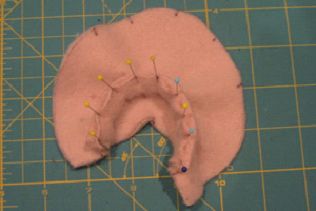
Place the ears in position and sew the back head pieces to the front head piece at the side seam, sew from E – D and then down the other side of the head – E.
Multiple sews
Fold the snout at F so you can sew the snout, front head pieces and back head pieces closed from F- (via A/B) – E – G.
Fold and sew snout
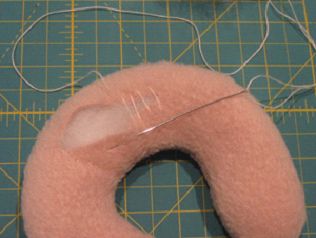
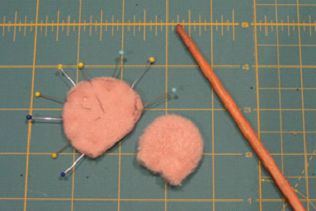
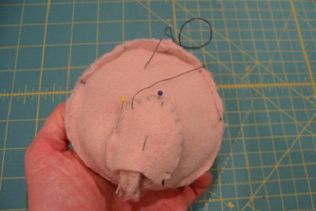
Now for a secret trick! Take the piece of fleece that you saved when you cut out the head, and with the head still inside out, sew this by hand over the opening to the snout (very roughly – no need to be neat) Leave just a small opening for you to push the synthetic stuffing into the snout area. This is such a clever trick because it holds the stuffing inside the snout so you can make it nice and firm. Stitch the opening closed when you have finished stuffing the snout really well.
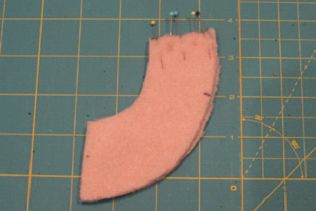
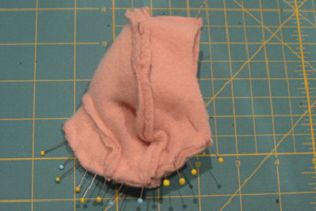
With the head still inside out, pin and sew the neck piece in place, remember to leave an opening for stuffing the head.
ASSEMBLING YOUR BEAR
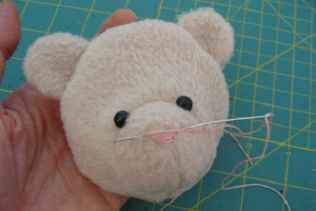
Insert Safety Eyes
Insert your safety eyes. You may need to use a pair of fine scissors to cut a small hole to push the eyes through into the head. If you can’t find safety eyes you can embroider eyes with black embroidery thread. Stuff the head well with synthetic toy stuffing, then sew the opening closed at the neck piece with a ladder stitch. Using the photo as a guide, sew the nose with pink embroidery thread.
ASSEMBLING YOUR BLANKET
Pace the arms in the center of the blanket with the head on top. When you are happy that your bear looks cute, pin the blanket to the head just in front of and just behind the arms. I also like to pin the blanket to the top of the arms so it holds the Bear more securely.
Check that the blanket will look good when you hold the bear up by the ears, then use a strong thread, (the same colour as the underside of the blanket, if you can) to sew the bear to the blanket.
Your little baby bear blankie is ready to cuddly!
Pattern Pieces as PDF Baby Bear Blankie Binding Instructions
This project was contributed by Pauline McArthur of www.funkyfriendsfactory.com
The Funky Friends patterns, concepts and logo are protected by copyright protection: Copyright (C) 2001 Funky Friends Factory. (C)(R) 070630 Copyright Protection Services International.


This is an adorable pattern! Thanks so much for sharing.
I can see that I need to add the .25 inch seam allowance when cutting out the arms, but other pieces (neck, ears, one side of the snout) look like it might be included. Can you please clarify?
What a great idea! This has really helped me out, thankyou!
lovely project. I am however stuck on attaching the neck piece? do I leave the bottom open at G or the top? on the back head pattern piece it says D-C then leave open but you do not mention this in your instructions. I’m so nearly finished completing this project if i can just get past this bit im stuck on, help!?
I have just spent about four hours online trying to buy a pattern for this particular item, when I stumbled upon this one. Thank you very much for sharing it – I will now try and make one.
Seen these in the store and think there just adorable! I’m so glad I found this site with the instructions and pattern for free, It so helps when your on a shoostring bugget!Thanks! I can’t wait to make it!
can you just take a premade bear and cut it in half and go from there?
it is sooooooooooooo cute! i love this sort of stuff and am making it right away! the only thing that i dont understand was attaching the head pieces together. but still is very cute and love to see more!!!
I made this today using an existing teddy bear, but following the instructions here for the blanket. Turned out pretty good: Check it out here:
http://dreamingofbeaches.blogspot.com/2009/09/he-had-his-head-decap-ditated.html
Very cute. I would like to see photos of where the bear is attached to the blanket!
A little bit confusing, but a great project! Thanks for sharing!
love it!
Great tut! Thanks for step-by-steps and photos – and for sharing.