
What you need
T-shirt, any size, any color
Coat hanger
Glue gun and glue sticks
1 package of raffia
torn strips of fabric, approx. 2 inches by 30 inches, any color or print
2 black buttons for eyes
9 various odd buttons for embellishment
1 inch piece of pipe cleaner for the nose, or use a button
Black permanent marker, medium point, for facial features
Large safety pin
Pink blush for the cheeks, (or use a pink crayon)
Small bunch of twigs
12 inch square of burlap for the bag, and a small light color fabric, 3†by 6â€, for the bag sign
Scraps of fabric and orange felt for the bows in the hair, and at the chin
1 plastic container lid, approx. 5 inches diameter
1 piece of pink fabric large enough to wrap around the lid
a small bunch of fiberfill, (or you could use dryer lint)
white paint or correction fluid (optional)
Instructions
Step 1.
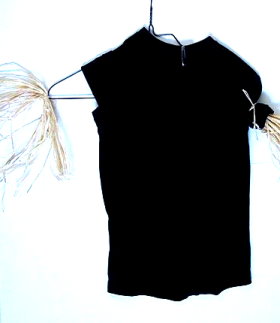
Place the t-shirt on a hanger, fold up the neck to gather it up smaller around the coat hanger, and pin with a large safety pin, securing both the front and back at the same time.
Push the sleeves up to expose the ends of the coat hanger. Tie a bundle of raffia on each end of the coat hanger, then move the sleeves back down to cover up the coat hanger, and tie a piece of raffia around the ends of the sleeves.
Step 2.
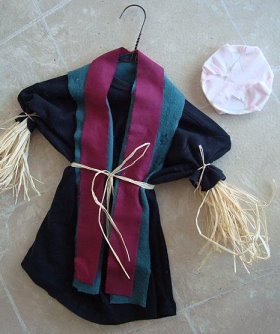
Wrap two strips of fabric around the neck, tie a piece of raffia around for the waist. Cover the plastic lid with the fabric, placing the fiberfill in the center, and hot glue the fabric to the back.
Step 3.
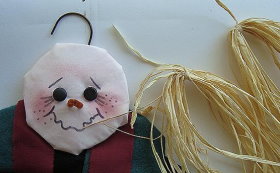
Make the facial features by gluing on two buttons for eyes. Fold a 1 inch piece of pipe cleaner in half, and glue on for a nose. With a permanent marker, add eyebrows, eyelashes, a mouth, and Freckles. Brush some blush onto the cheeks.
Make two bundles of raffia for her hair.
Step 4.
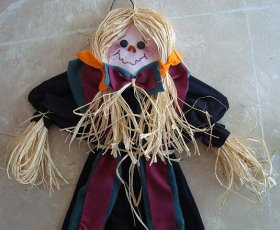
Hot glue the head to the front of the t-shirt.
Hot glue the two bundles of raffia on the head, meeting the bundles in the center to make the part.
Tie small strips of fabric or felt to make pigtails.
Layer two strips of fabric, one smaller than the other, and tie in the center to form a bow. Hot glue to the chin of the witch.
Step 5. Finish Up.
Make two bows for the side of the head, by tying a small strip of fabric in the center of another strip of fabric. Hot glue to each side of the head, and hot glue a button on each bow.
Make a burlap bag, by folding a 12 inch piece and hot gluing to form a bag. (You could also use felt for this.)
Hot glue a smaller piece of fabric or felt in the center. Hot glue a button on each corner of this fabric. Print the words “Trick or Treat” with a permanent marker. Make stitch lines around the edges of the fabric. Hot glue the bag on one side of the witch.
Hot glue three buttons at the bottom of the dress.
Tie a small bundle of twigs together, and hot glue to the end of one arm.
HANG USING THE HOOK OF THE COAT HANGER, OR MAKE A SEPARATE HANGER BY HOT GLUING A PIECE OF JUTE, OR STRING TO THE BACK OF THE FIGURE, AS SHOWN IN THIS ILLUSTRATION.
Tie a bundle of raffia to the top of the jute or string.
If desired, dot on white paint in the centers of the button eyes, on the cheeks, and add polka dots to the fabric strips if they are a solid color.


How cleaver & cute. I have made 3 of them. Happed to find t-shirts on clearance. I used sizes 18 mos., 3T, & 5T. Think the 3 & 5 worked the best. Plan to make more.
This is one of the cutest and easiest projects I have seen on here. Adorable!
What size t shirt works best?
brilliant
This is so cute and simple to make. Now to the thrift store for a black t-shirt.
Really beautiful! I loved it!