
What you need
PDF pattern (download below)
(5 pages across, 4 pages down)
Cut according to pattern:
Main fabric (we recommend upholstery weight)
Lining fabric
A zipper that’s at least 55cm long
3meters of Piping in matching color
Grosgrain ribbon
Multipurpose adhesive

Tip: To give the bag more structure, use interfacing on all the main fabric pieces.
Instructions
Download weekender bag PDF pattern here.
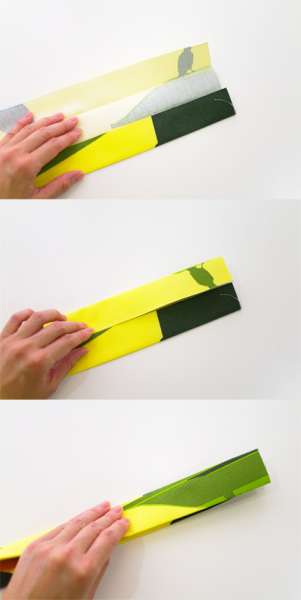
Step 1: Let’s start by making the straps. Cut 2 long pieces of the main fabric measuring 14cm x 68cm. Take 1 Strap piece, press it down the centre vertically. Fold in the sides to meet at the centre line, then press. Then fold it into half and press
2. Next, fold the strap the other way so that the raw edges show on the outside (see pic above). Stitch down, 1cm from the edge. Repeat on the other end of the strap.

3. Trim the edges and turn the strap inside out. The trimming reduces the bulk inside the strap.
4. Pin and top stitch the strap all around.
Repeat steps 1 to 4 with the other strap.
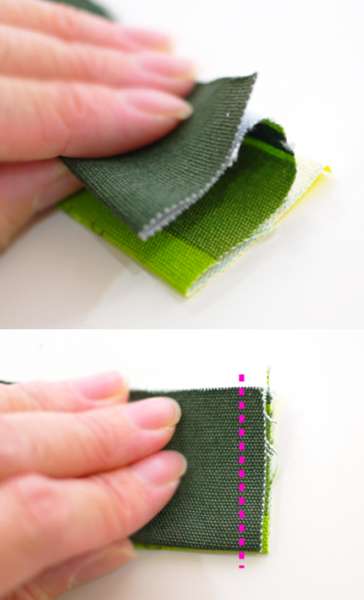
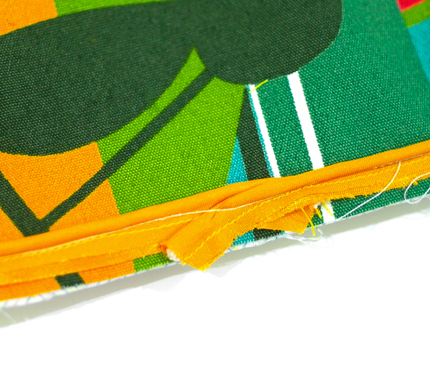
5. Now for the Pocket. Line up the piping at the top of the main fabric– the chord part of the piping has to be positioned so that it falls after 1cm from the top edge of the fabric.
Stitch down with a zipper foot.
Tip: Dot some adhesive to tack down the piping onto the fabric. Be careful not to use too much adhesive!

6. Place the lining piece on top of the main fabric, right sides facing. Stitch at the top, 1cm from the edge– sandwiching the piping in between.
7. Turn it inside out and you will have this.

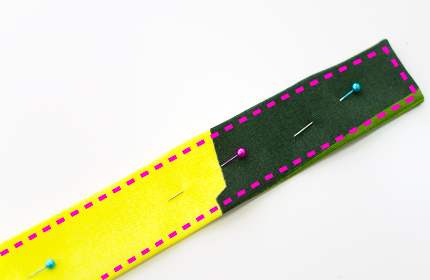
8. Place it on one of the Body (main fabric) pieces, aligning it to the bottom edge. Baste around the right, bottom and left sides of the pocket to keep it in place.

9. Now to sew on the straps onto the Body pieces. Mark the positions of the straps according to the PDF pattern. Position the straps so that they sit 6cm from the top edge of the bag. Stitch an X-ed square at the 3cm mark to sew the straps down. Repeat for the 3 remaining strap points.
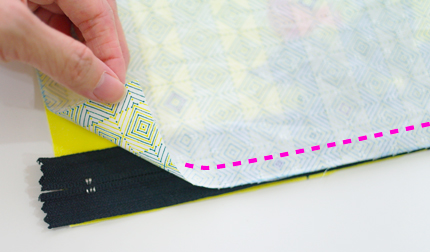
10. Now for the Zipper Gusset. Stack the following pieces accordingly:
– Main piece, right side up
– Zipper, right side down
– Lining, right side down
Align the long edges. Pin and stitch down 1cm from the edge with a zipper foot.
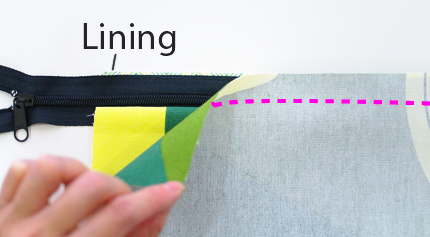
11. On the other side of the zipper, stack the remaining Zipper Gusset pieces in the following order:
– Lining, right side up
– Unsewn side of zipper, right side up
– Main fabric, right side down
Align the long edges. Pin and stitch down 1cm from the edge with a zipper foot.
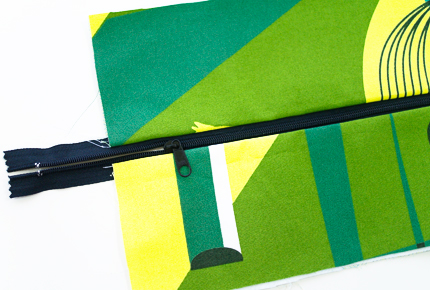
12. Press the seams.
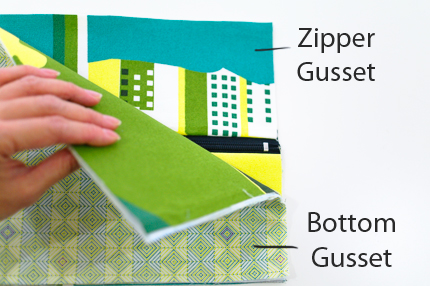
13. Now we’ll assemble the gusset pieces.
Baste or dot some adhesive to hold the main fabric and lining of the Bottom Gusset, wrong sides facing.
Stack the Zipper Gusset and Bottom Gusset, right sides facing. Line up the edges (see pic above).
14. Stitch the pieces together, 1cm from the edge.
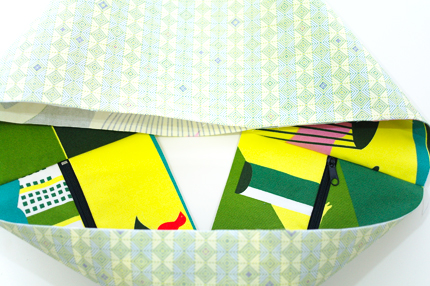
15. Repeat on the other side of the gusset pieces, and you’ll have a sort of donut piece 🙂 Press the seams flat.
Optional: Wrap the inner seamed edges with grosgrain ribbon or serge to hide the raw edges.
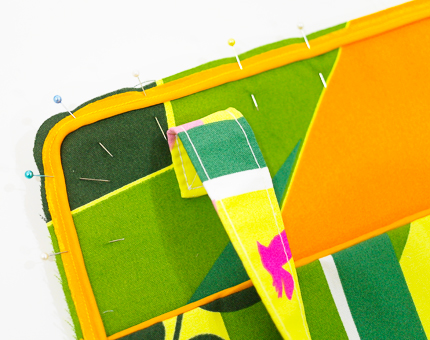
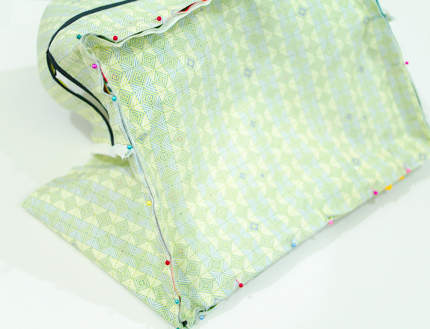
16. Baste or dot some adhesive to hold the main fabric and lining of the Body pieces together.
Using the same measuring technique in step 5, pin the piping all around each Body piece, starting from the bottom of the bag.
17. When your piping ends back at the bottom of the bag where you started, overlap the ends of the piping where they meet. Stitch the piping down with a zipper foot.

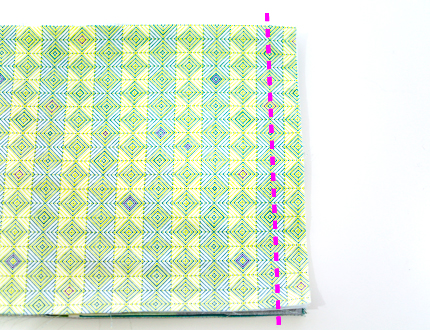
18. Using the marking on the PDF pattern, mark the 2 horizontal lines on the left and right of the Body pieces. This is the point where the Bottom Gusset seam starts.
19. Using those horizontal marks as a guide, pin the gusset all around one of the Body piece, distributing the edges so that they all lay flat.
Stitch all around, 1cm from the edge.
Repeat for the remaining Body piece.

20. Optional: Wrap the edges with grosgrain ribbon or serge to hide the raw edges.
And you’re done!
What do you think?


be nice if you listed how many yards and whats needed.
where is the pattern have tried to get pattern only front page of instrutions, need full dimenions
just finished printing out this pattern do anyone have a diagram of how to put this together? there are so many pieces without numbers or letters to join
Just printed the PDF pattern pieces.
How many pattern pieces there are supposed to be?
Having trouble with the layout for the Bottom Gusset pattern. Anyone have a picture to show what each pattern piece looks like?
Or if someone can just give me the measurements for the bottom gusset that would probably work too.
Thanks for sharing the pattern. Instructions were very easy to understand and I love the bag!!
I have completed the bag. Sewing the zipper panel was difficult me but I do got it done. It turned well for a novice and my daughter loves it! Thank you for sharing.
Hey thanks for the pattern, but can I ask what seam allowance is included please?
How much material will I need to make this bag?
I haven’t made the bag, but based on the pattern after printing it out you’ll need roughly 3 ft by 4 ft of main fabric plus about 2.5 ft by 2.5 ft of lining fabric. I printed on 8.5″ by 11″ paper with normal margins, no scaling.
Thank you!
Just finished this. Took ages as I quilted bag pieces to make sturdy. Effect is nice but I’ll make a basic one next time. Thanks for the pattern.
very nice and very easy to sew
Is the pattern printed including seam allowance? If so, what is it? Or do I have to add it before cutting out.
Love it! Can you tell me how much fabric Ill need? Excited to get started.
I’ve made a start on this bag pattern printed and pieces cut out wish me luck!
What are the dimensions of this bag?
Sorry everyone. We have now fixed the project with the correct pattern.
I’d love to be able to make it, but there is no link to the pattern!!!!
I might have missed this, but where is the PDF pattern? I can’t find a link anywhere.
where do i link for the pdf pattern file there is no link when i tried to click on it or do i have to purchase my own or make one, is there instructions for that? help!
Is there a link to the PDF pattern?
Thanks for fixing the link
Where is the pattern?