
Get more details about this project
What you need
PDF pattern
Cut according to pattern:
Plain cotton canvas fabric
Printed fabric
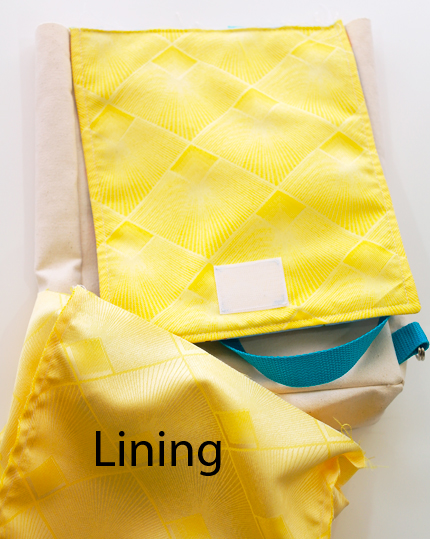
Lining fabric

2 meters x Nylon webbing straps
4 pcs x 2.5cm D-rings
Velcro


Tip: Add a layer of batting to the cover flap if the fabric is not sturdy enough.
Instructions
Download the pattern for this kids backpack.
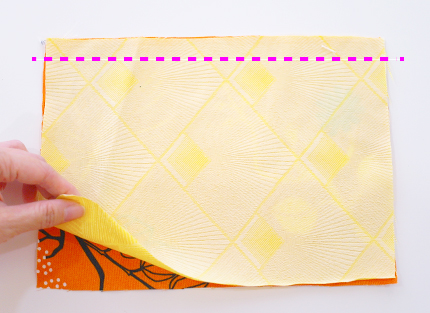
1. Stack the main fabric and lining piece of Body Pocket together, right sides facing.
Stitch across at the top, 1cm away from the edge.
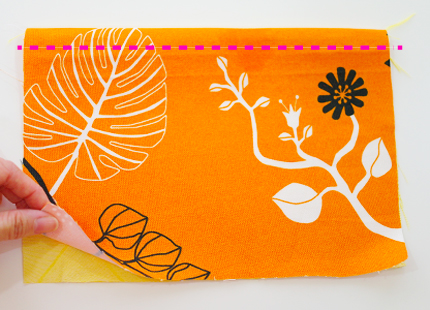
2. Fold over and press at the seams, so that the wrong sides of the fabric are facing each other.
Top stitch at the top, 1cm away from the fold.
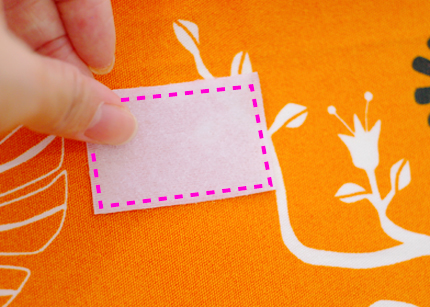
3. Attach one side of the Velcro to the main fabric according to the position marked on the PDF pattern. Sew all around.
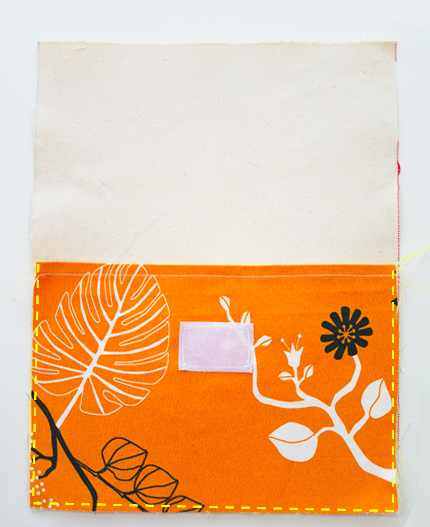
4. Place the pocket piece on top of one of the Body piece. Baste around the edges to tack the pocket down, about 0.5cm away from the edge.
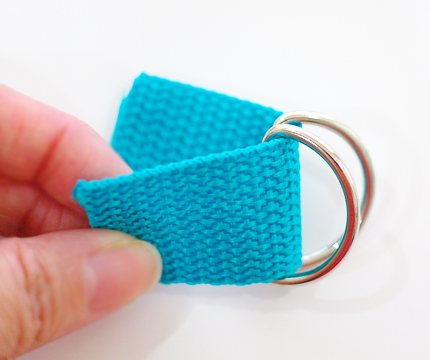
5. Cut 2 strips of nylon webbing measuring 7.5cm each. Thread 2 D-rings into each strip.

6. Now we will assemble the backpack’s straps onto the 2nd Body Piece. Mark the placement of the straps according to the PDF pattern for the following straps:
2 D-ring straps, placed on the bottom and angled upwards
2 shoulder straps @ 75cm each (or according to your preferred length)
1 top handle strap @ 27cm, placed between the shoulder straps
Baste straps to the Body Piece, 0.5cm from the edges.
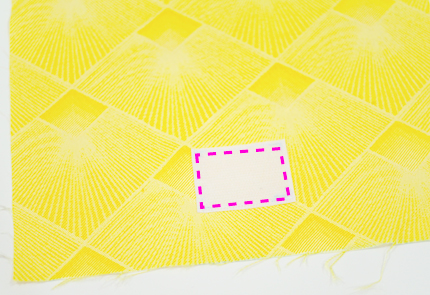
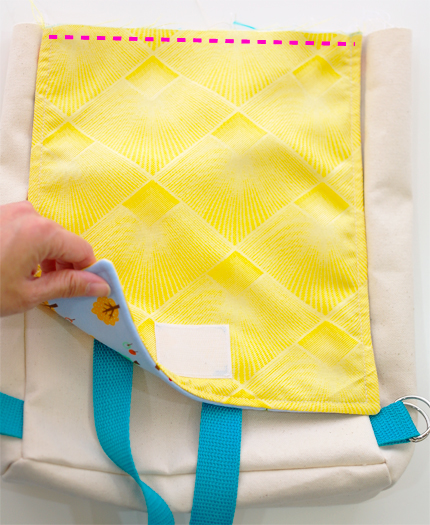
7. Now for the Cover Flap. Mark and place the other piece of Velcro onto the lining piece. Stitch around.
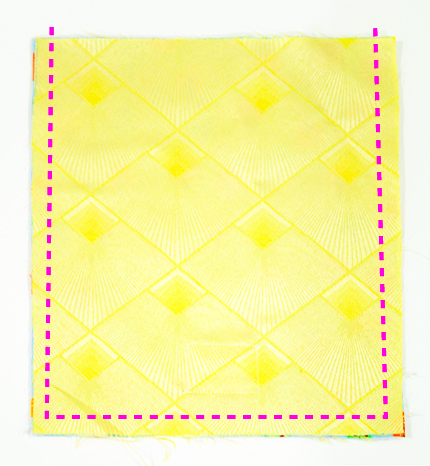
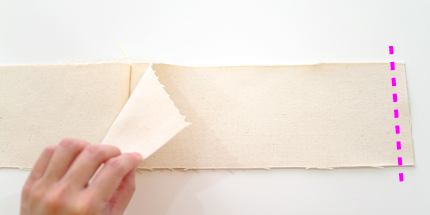
8. Stack the main fabric and lining pieces of Cover Flap together, right sides facing.
Sew around the right, bottom and left sides, 1cm from the edge. Leave the top edge unsewn.

9. Turn the pieces inside out through the top’s opening.
10. Press, and top stitch the right, bottom and left sides 1cm from the edge.

11. Now we’ll be assembling the outer bag together. Stack the Bottom Gusset and one of the Side Gusset pieces (canvas pieces) together, right sides facing. Line up the edges like the photo above, and stitch 1cm from the edge.
12. Now stack the other Side Gusset piece on top of the Bottom Gusset, line up the edges and sew 1cm from the edge.
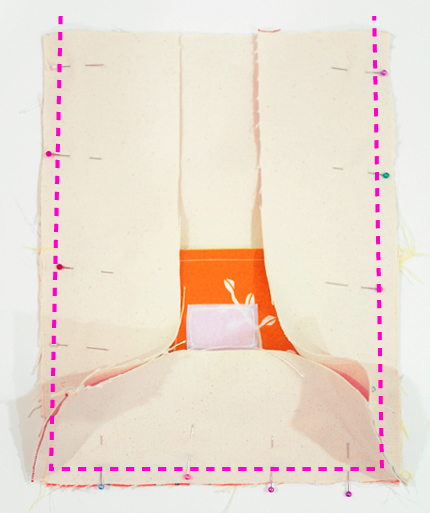
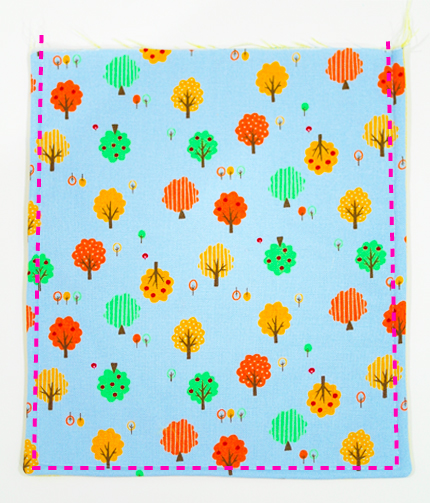
13. Pin the gusset pieces onto the Body Piece, and carefully sew around the right, bottom and left sides, 1cm from the edge.
14. Next, pin the remaining Body Piece onto the other sides of the gusset pieces. Again, carefully sew around the right, bottom and left edges, 1cm from the edge.
15. Turn the bag inside out.

16. Repeat steps 11 to 14 with the lining pieces, but leave an opening of about 15cm unsewn to turn the bag later on. Do not turn the lining inside out.
17. Place the Cover Flap right side down onto the back of the bag (where the straps are). Line up the edges at the top and baste the Cover Flap onto the bag 0.5cm from the edge to keep it in place.
18. Slide the bag into the lining bag, so that their right sides are facing.
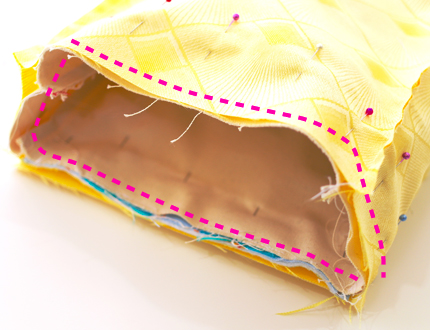
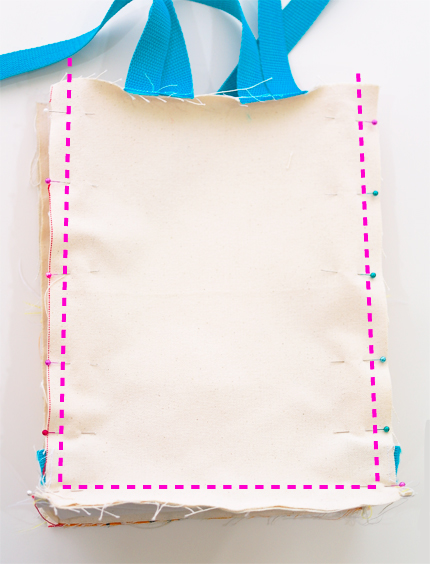
19. Match up the seams on the opening. Pin and carefully stitch all around, 1cm from the edge.

20. Now the turn the bag inside out through the opening in the lining.

21. Pin the opening in the lining close, and stitch the layers close, 0.5cm from the edge.
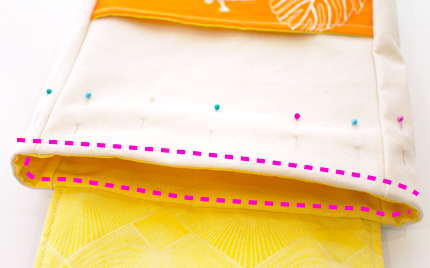
22. Pin all around the opening of the bag and top stitch all around, 1cm from the edge. If you find this tricky, you may just press down the edges instead so that they’re crisp.

23. To adjust the length of the straps, pull each strap through the 2 D-rings, and…
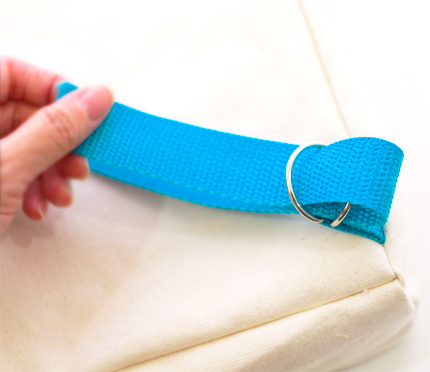
… then pull it back through the D-rings by going over 1 D-ring, and into the next D-ring.
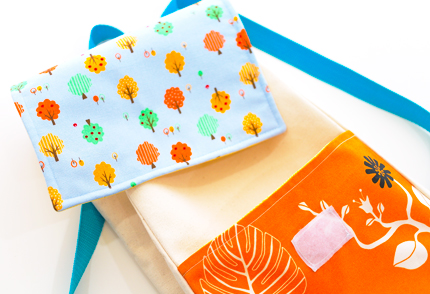
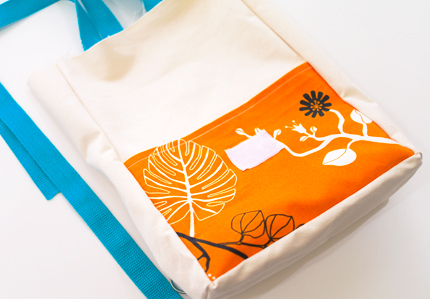
And you’re done!


about 3/4 yard of each.
3 1/2′ x 12 1/4′ for side gussett. 2 of main 2 of lining. 3 1/2′ x 9 3/4′ for bottom gussett 1 of main 1 of lining.
12 1/4″ x 9 1/4″ for body 2 of main, 2 of lining. mark 3/4″ up from bottom on each side for straps and 2″ over from each side at the top for strap placement (edge of strap, not center)
9′ x 6 1/2″ for body pocket. 2 of main 2 of lining, Mark kfor velcro 1 3/4 inches down from top, Center.
10 1/2″ x 9″ for cover flap. 1 of main 1 of lining. Center velcro placement at 1 inch up from bottom of flap.
Hope that helps. I printed the pattern off, taped together and measured each piece. I laid it out on fabric and it needs about 3/4 yard each of main fabric and lining.
Love to make this project. Can you give us the cutting dimensions of each piece instead? It would save so much time instead of print, paste and cut? Thanks so much!
This backpack is adorable! I’m planing on making some for my kids to use for their library book bags, they will love them! I am wondering what the final size of the backpack is… would it be good for 4 year old or an older kid or both? Thanks
Thanks for sharing this cute pattern and the fantastic and professional tutorial. I’m going to make a backpack for mit little granddaughter.
I made a couple of these for gifts, and learned the hard way that to reinforce the straps you can’t just sew over and over the strap in a straight line! It cut the strap in two! I’ve had to reconfigure my pattern to loop the strap over the top/back of the bag and do a box stitch through all three layers (strap, fabric, strap). I also put a totally unreasonable amount of Fray Check over the stitching because I’m paranoid the strap will rip again.
But boy, oh boy do I get compliments on these backpacks! Strangers are now asking me to make them! I love the different combinations of colors and printed fabrics look with each bag I make!
How much do you need of each fabric? I didn’t see it listed in the directions, thanks.
i AM GOING TO MAKE MY LITTLE PEANUT ONE, OUT OF TRACTOR MATERIAL, AND ONE OUT OF TRAINS TO STORE HIS TREASURES IN. wISH ME LUCK!!
this is fantastic!! I have several small grand and great grand children that have birthdays coming up and this would be a great inexpensive present for them!! Thanks.