
This is a budget-friendly, beginner-friendly craft you can do with the grandkids on a weekend afternoon, or just as happily with a cuppa at your craft table.
Get more details about this project
What you need
- Smooth, flat stones or pebbles (washed and dried)
- Acrylic paints in various colours
- Fine detail paintbrushes
- White gel pen or paint pen (optional, for crisp outlines)
- Water pot & paper towel
- Clear acrylic sealer (spray or brush-on) to protect your artwork
Tip: The smoother the stone, the easier it will be to paint fine details. Beach and river stones work beautifully.
Instructions
Step-by-Step Instructions
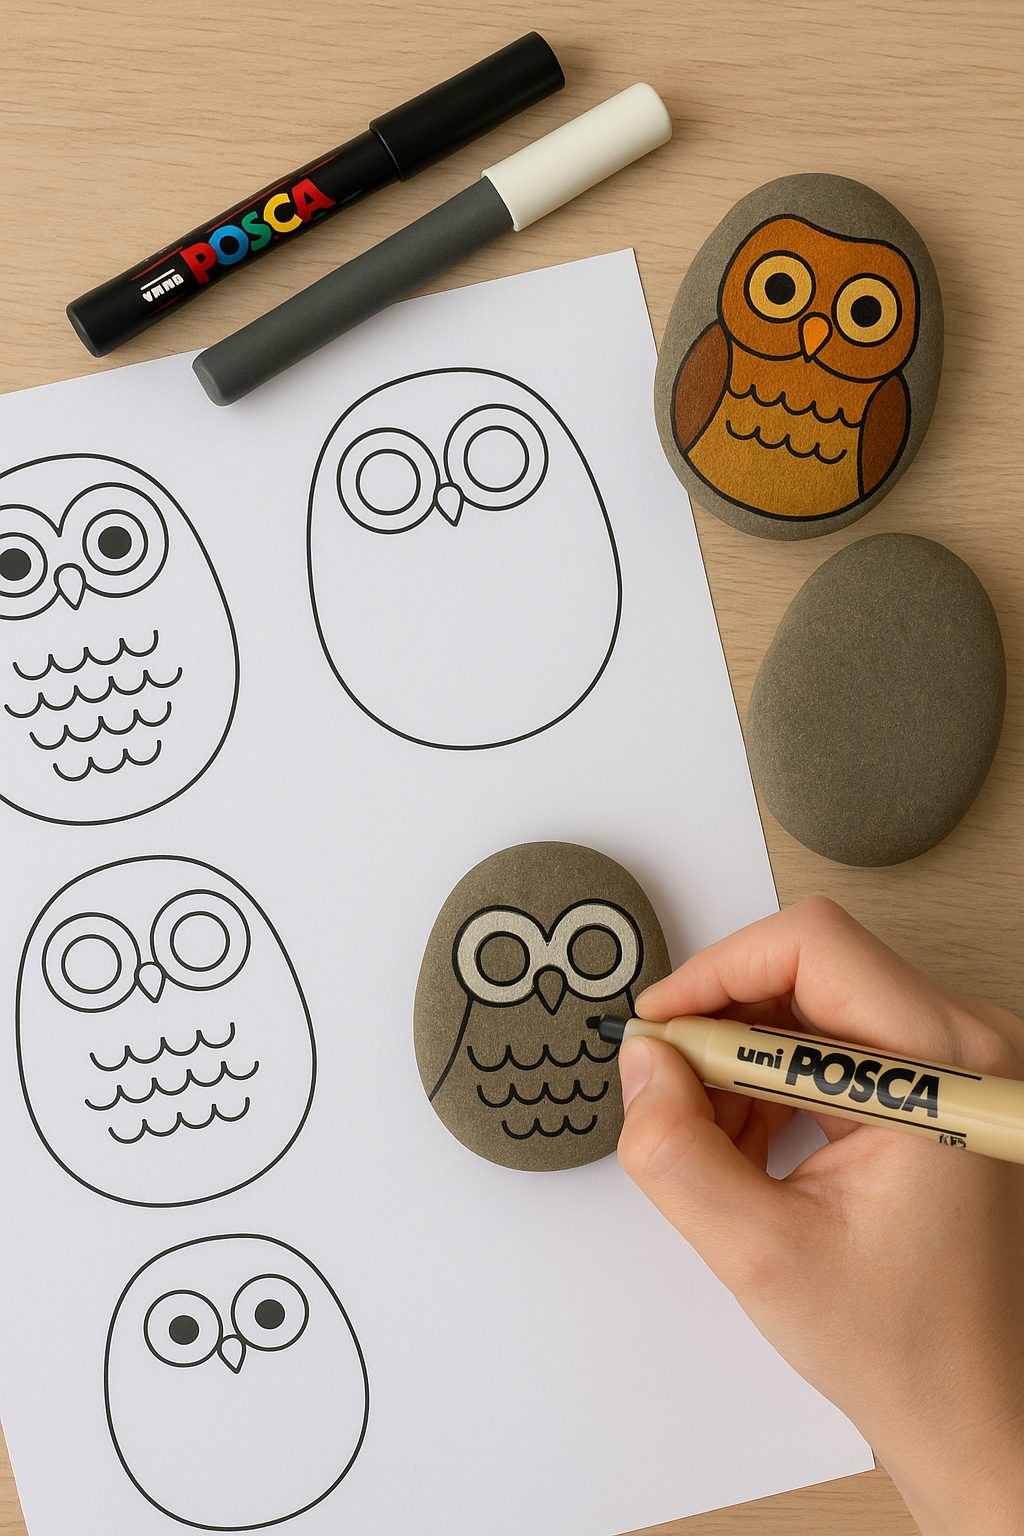
1. Prepare Your Stones
Give your stones a good wash with warm soapy water to remove dirt and oils. Let them dry completely — paint won’t adhere to damp rock.
2. Base Coat
Paint your chosen background colour over the whole stone. White, grey, or light tan makes a great neutral start, but you can go bold with turquoise, mustard yellow, or even metallics. Allow to dry fully.
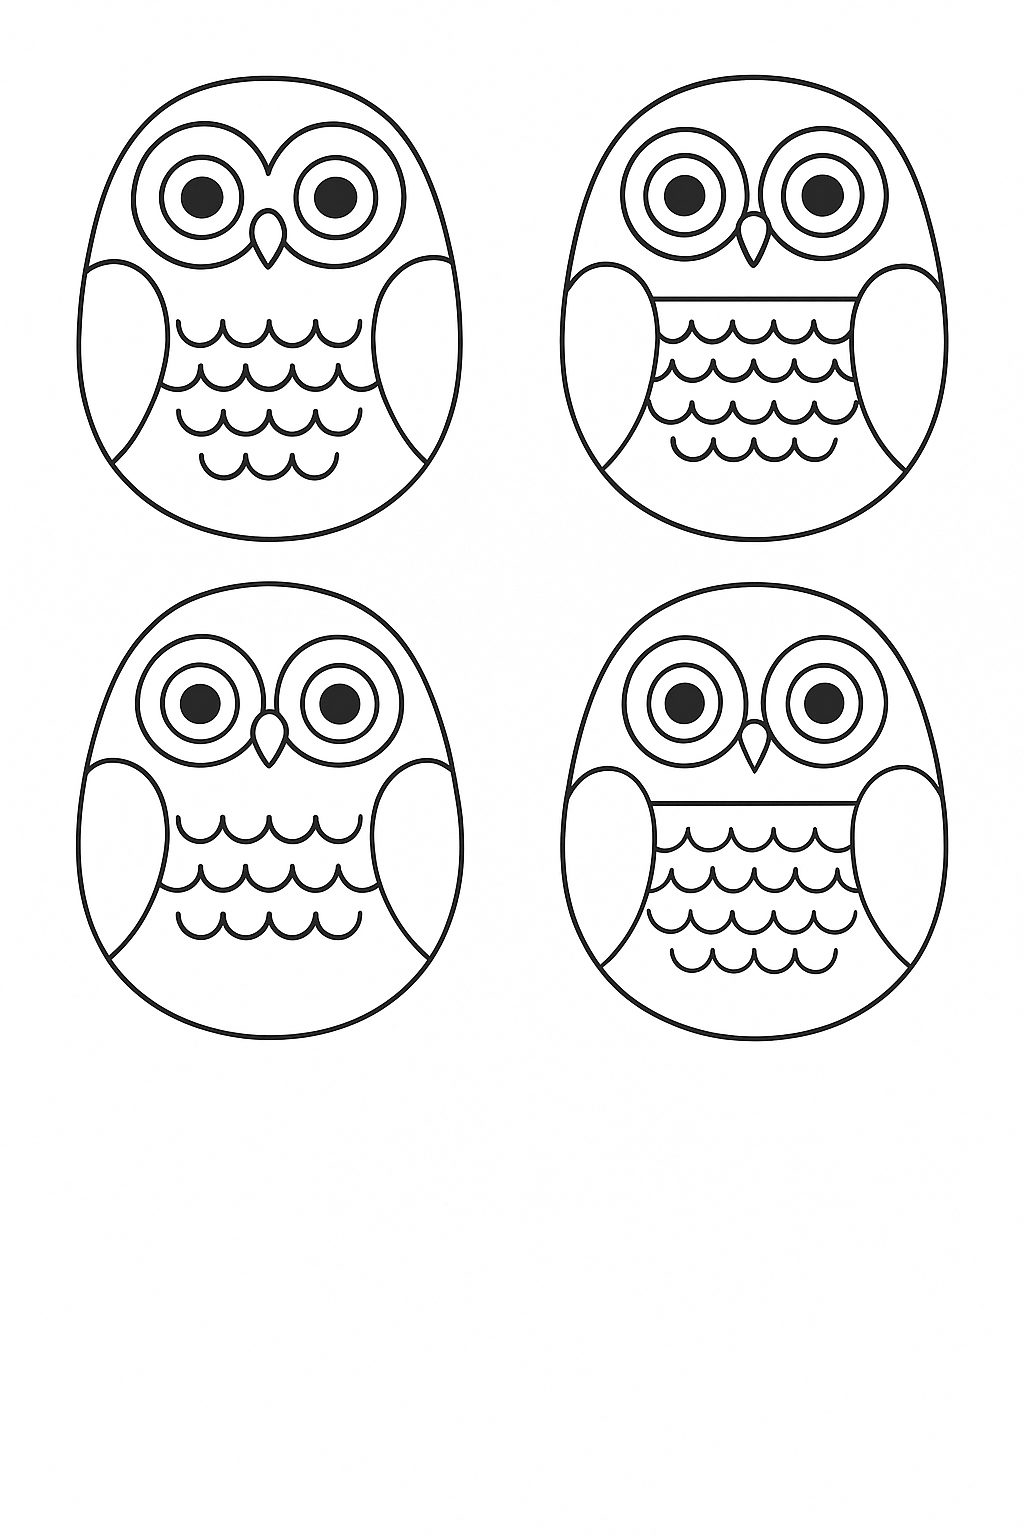
3. Sketch Your Owl
Lightly pencil in a rounded body shape, two big circular eyes, and a small beak in the centre. You can make them squat and round or tall and slim for different personalities. Alternatively you could use graphite paper to transfer the design.
4. Add the Eyes
Using a fine brush, paint two large white circles for the eyes. Once dry, add coloured irises (gold, green, blue, or amber) and a black pupil in each. For extra sparkle, leave a tiny white dot unpainted in each pupil to mimic a light reflection.
5. Paint Feathers & Details
Layer small brush strokes or scallop shapes to suggest feathers. You can keep it whimsical with rainbow plumage or stick to realistic owl patterns like barn owl cream and brown speckles.
6. Outline & Embellish
Once dry, use a fine paint pen or gel pen to outline the eyes, wings, and body. Add tiny dots, swirls, or leaf motifs around the owl for a folk-art feel.
7. Seal for Protection
Brush or spray on a clear acrylic sealer to make your stone owls weather-resistant — perfect if they’ll be living outdoors.
Creative Variations
- Seasonal Owls – Paint Santa hats for Christmas, pastel owls for Easter, or autumn-toned owls for fall décor.
- Garden Markers – Add the name of a herb or plant on the owl’s belly.
- Family Set – Create a whole parliament of owls, each with unique colours and patterns.
- Glow-in-the-Dark Owls – Use glow acrylics so they shine at night.


What do you think of this project? Let us know!