
What you need
2 half yard pieces of co-ordinating fabrics
2 big buttons
Instructions
Cut:
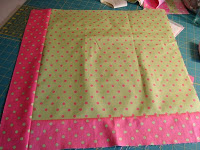
1 square 16X16 inches. This is going to be the center of the apron.
2 strips: 1 is going to be 3 X 16 and the other is 3 X 18 1/2 inches.
1 big square 18 1/2 X 18 1/2 square for the back.neck strap:
2 strips 1 and 1/2 inch X 18 long.pocket:
2 6 inch squares. one front and one back fabric.
tie strips: 4 strips 3 X 18 inches
Step 1:
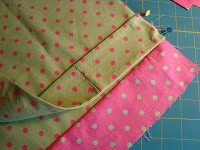
Sew the 3 X 16 inch strip to one side of the center square. Iron. Sew the other 3 X 18 1/2 inch strip to the corner. The 2 strips will be touching at the end. Like this:
Step 2:
Cut 4 strips –3 X 18 (you could make this longer if you would like). Layer 2 of the strips right sides together. At the end of the strap fold over one corner to meet the side.
Press this to get a crease line. Then sew down each side and at the end stitch on the pressed line. This will give you a cute pointed end on the strap.
Trim the corner and extra fabric. Turn right sides out and press flat.
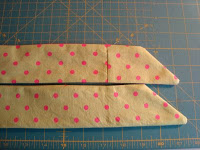
yay- cute straps!!!
Step 3:
Pin straps to the top of the sewed on strip. I used 2 pins so they wouldn’t shift. Repeat for other strap.
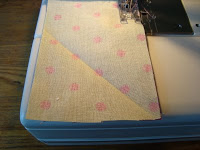
Layer the big 18 1/2 Square back fabric right sides together with the front.
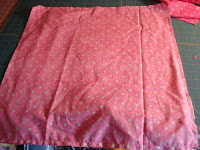
Sew all the way around leaving a gap to turn. Make sure you don’t sew those strap ends into the edge!! Trim the points, and turn it. Poke the points out and iron it. Make sure you iron the turning hole also. This will get sewn closed in the next step.
Step 4:
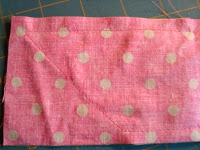
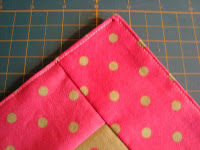
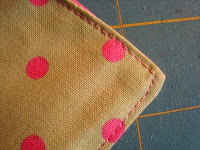
Sew all the way around the apron 1/8 of an inch from the edge. This will keep the apron straight when you wash it plus it will close the turning hole. If you would like you can do an second stitch 1/4 inch inside of that one for a double stitch. Cute.
Step 5:
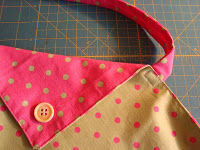
Take the corner opposite of the pieced corner and fold it down 6 inches. Measure on the edge when turning. You will be folding the back of the apron to the front.
Pin in place so it doesn’t move.
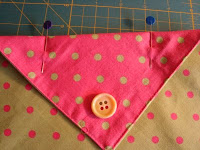
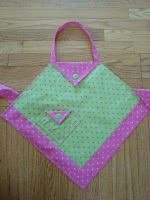
Take one button and place in the corner. Then stitch in place.
Step 6:
The neck strap. Take your 2 strips for the neck- lay right sides together and sew around both edges and one end. Trim your corners and turn right sides out. Iron it flat. Tuck the one unfinished edge inside the strap and iron down. Then sew across the opening.
The strap ends are then pinned to the top of the apron, just below the flap. Sew a little rectangle to get that strength at the ends. Repeat for the other side, making sure you don’t twist it!
Step 7:
Pocket. Layer the 2 squares right sides together. Sew all the way around leaving just a bit of space to turn it right sides out.
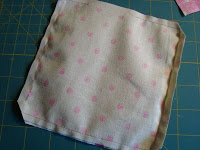
Trim the corners and turn it right sides out. Iron flat and stitch again all the way around 1/8″ for a nice finished edge.
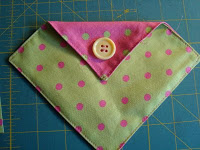
Take one corner and pull the back to the front —just like the apron body—. You may choose to match the apron body fabric or to make it the contrasting back.
Pin in place and pick a spot for the button. Sew in place.
Step 8:
Pin the pocket just above the bottom sash. Sew all the way around the pocket leaving just the top flap open for little hands to get in.
You are finished. Wasn’t that easy?


I think a video tutorial would help
This a areal cute and novel way of making an apron. However, one can use cute material and make a much simpler one and make 4 in an hour.
Nice gift for a little one.
For my first sewing adventure I liked this project, it is easy, but in the instructions on leaving a gap, you forgot to mention the leave the gap up top for the neck strap, I left my gap down on the bottom, but I improvised :), still turned out super cute, and I was happy with the finished apron!! I plan on making a few more 🙂 Thanks!
Looking forward to making this for 2 of my Grandaughters