
Get more details about this project
What you need
Plaster of Paris *
Powdered tempera paints
Water
Measuring cup
Container for mixing the chalk in such as a large yogurt container (you can line this with a plastic bag for ease of clean up **)
Paint stir stick, wooden dowel, or something else for stirring
Molds
Instructions
Making sidewalk chalk is simple and fun. It is a great activity for small children to complete with the help of older children or adults while older kids can do it on their own. Depending upon the molds and colors used the sky is the limit.
This is a wonderful craft to make as a gift.
Here are some mold suggestions.
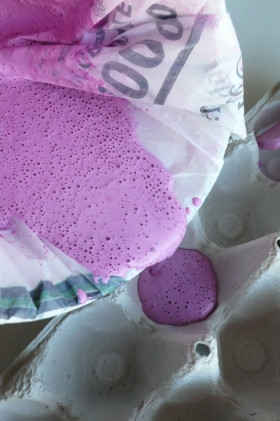
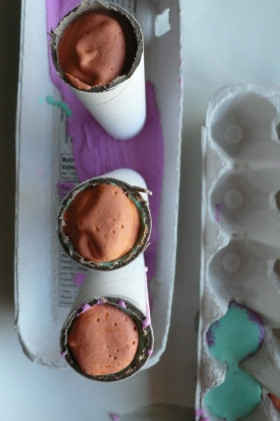
Silicone muffin pans and ice cube trays are ideal (it is best not to use them for food again). You can also use one time cardboard molds like tubes from toilet paper, paper towels, and plastic wrap, as well as paper or Styrofoam egg cartons and cups. Use your imagination. If you are using toilet paper tubes and you would like them to be thinner, cut a seam, roll it to a smaller size, and tape it together. The extra heavy duty rolls in some plastic wraps or aluminum foils are ideal in size and stiffness. You can also use cookie cutters.

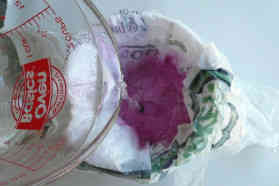
Mix 1 cup of plaster of paris, a scant 3/4 cup of cold water, and tempera powder in a container with your stirring tool. The amount of tempera powder you use depends upon how vivid you want the color to be. Start with one tablespoon and go from there. The more powder used, the better the chalk will show up when drawing on the sidewalk.

Different colors seem to react differently to the plaster of Paris and water, meaning some mixes are thinner and others seem to thicken faster, so there is some degree of experimentation but really no way to ruin the mix.
If a mix seems runny, just keep mixing until is starts to get thick. If a mix is thick soon after pouring, work quickly to pour it into your molds.
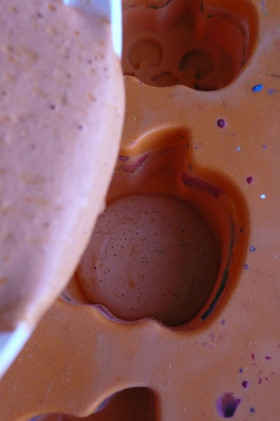
Silicone molds require no special handling, even very wet mix can be poured into them. Cardboard and paper molds work best when the mix is starting to thicken. The best way to keep the mix from spilling out from the bottom of cardboard tubes is to set them upright on a tray and to pour the mix in when it has already started to thicken.
If the mix is too runny it will seep out the bottom of the tube. If this happens, don’t worry, wait for the split mix to start to harden, then push your tubes into the split mix which will hold the tubes upright and keep the next batch of mix from leaking out.
Have no fear, split mix can be cleaned off of non porous surfaces easily, even once it has hardened.
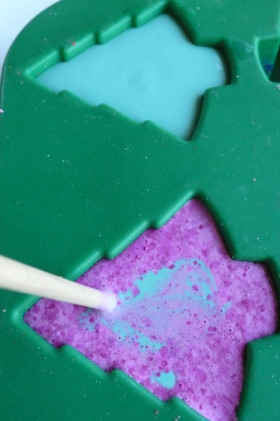
It is possible to mix colors in the same mold either by poring in one color and then another to layer or by poring in more than one color and swirling with a thin wooden dowel. There are many possibilities and as long as you pour each color before the other has dried they will bond together.
Drying time depends on the mold and the particular mix. The chalk will look dry when it is ready and will pop very easily out of the silicone molds. The paper and cardboard molds are easiest to remove when they have dried completely, but this can take more than a day.
You can remove these molds when they are still wet, as long as the chalk has hardened, but you will need to rub off any cardboard or paper that sticks to the chalk. It will come off completely.
Go and use your chalk!
* A note about Plaster of Paris. Read all the instructions and warnings on the package before you begin. Explain to children that they should never immerse their hands in this substance as it will harden very quickly and it heats up while hardening. When used properly it is safe for all ages. It is non-toxic but should never be ingested.
** Remember Plaster of Paris turns into chalk so you do not want to pour it down your drain. For ease of clean up you can line your mixing container with a plastic bag, if you want to use it again. When it is time to clean up, wash off the stir stick and dowel in the container, let it sit for awhile so the solids go to the bottom, then pour the water out, using the lid of the container like a strainer, and just throw the bag with the solids into the garbage. Or you can use a disposable mixing container.


After reading the project I’m already looking for the supplies. I make stepping stones, similar to this project except quikcrete is used and anything plastic can be used for the molds. This is going to be fun!! Only gave it a 4 star rating cuz I haven’t tried it yet. I really wanted to give it 4 1/2 stars!!!
Looks like a GREAT project to do with my little girls. It’s not the cost of project that matters it’s the fun family memories you make doing them together. Thanks! =)
Depending on how much the p of p costs, this will be a great idea for some one like me with 15 grandchildren!! Thanks so much, always nice to save.
You can buy these at the dollar store for $1 a tub, less costly than making your own, no mess & no time wasted.