
Get more details about this project
What you need
1 pair of clean stockings/tights
Soft jewelry wire or ready made head pins
Jewelry pliers
Beads of your choice
Instructions
Obviously your stockings should be clean before you start.
Lay your stockings down and cut off each leg. Cut each leg into 1 inch thick strips going across the leg. This will create little rings of stockings. Cut these rings into 1 long length by cutting it once (to open the ring).
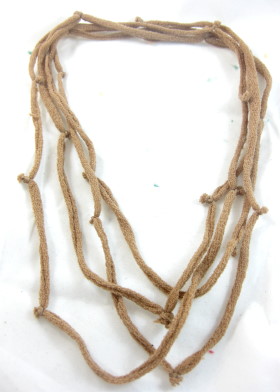
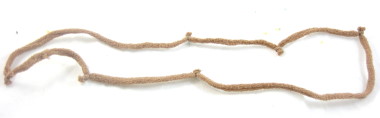
Gather around 10 of these strips to create a necklace piece. You do this by tying the lengths together with a tight knot. You can add more or less depending on the length you would like for your necklace.
Use this same method to create 3 or more necklaces. You can alter the length for a cascading effect and you can also gently pull them to lengthen them.
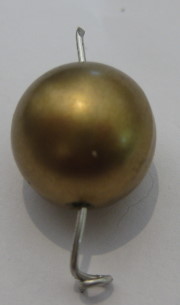
Once finished add your beads to your head pins and using the pliers curl them randomly around the necklace as shown.
Finish off by tying your necklaces together at the back with a small strand of left over stocking. This will keep the necklaces together to form 1 necklace.
Looking for more ways to make recycled jewellery?
Everyone knows that a spring clean once in a while is absolutely necessary in order to remove the months and months of accumulated clutter that has manifested itself around your house. But did you know that you can make funky, cute and elegant jewelry from some of the things that you would normally throw away?
Plastic bottle bracelet
Step 1: Cut a wide horizontal strip from the plastic bottle, the width you choose should depend on how wide you want the finished cuff to be. You may need to cut the plastic to a different length, depending on how wide/narrow your wrist is.
Step 2: Lay your fabric flat out on the table and lay the plastic on top of it, make sure it is as flat as it can get, mark the top and bottom corners, move the plastic so that the bottom corners are aligned with the top corner markings on the fabric, this will make sure the fabric covers the inside of the plastic. You will need to add at least an inch of fabric to the ends to make sure it covers the ends. Return the plastic to its original position so it does not lose its shape.
Step 3: Pierce a hole in each end of the plastic using the scissors, thread one piece of ribbon through each end and tie a knot behind the plastic to prevent it slipping through.
Step 4: Cut the fabric out, cover the inside of the plastic with glue and fold it over the plastic so that it covers it completely, don’t worry if you cover some of the ribbon, allow to dry. Place on the wrist and tie up using the ribbon, Voila! You have a cute fabric cuff, you can even add gems or sequins or even another thinner layer of fabric!
Coloured pencil necklace
You can make unique jewellery from so many different things, but a coloured pencil necklace or bracelet is guaranteed to liven up any outfit.
You will need:
Coloured pencils (the number of pencils will depend on the size necklace or bracelet you want)
Small drill
Elastic or string
Fastenings (for necklace)
Serrated knife or a small handsaw.
Jump rings
Pliers
Bracelet:
Step 1: Measure the pencil and cut into equal lengths.
Step 2: Carefully drill a hole in the centre of each section. Step 3: Thread your string or elastic through.
Step 4: Tie a knot to fasten the string or elastic. You may want to cover the knot with a small amount of glue or nail polish to stop it from slipping.
Repeat steps 1, 2 and 3.
Thread the elastic or thread through the fastening, tie a knot in the end and pull it down so that the knot is less visible.
Tie the other end of the thread or elastic to the jump ring and attach the ring to the clasp with the pliers.
Cardboard Earrings:
Step 1. Find some clean, thin cardboard, smooth cardboard works best, but you can use any type, draw the shapes you want on it.
Step 2. Cut the shapes out.
Step 3. Using a needle, pierce a hole where the ear wire will be.
Step 4. Paint the shapes using poster, acrylic or nail polish. Finish with a clear sealant to protect the colour. If you want to create a unique bubbled effect, simply out the earrings onto a baking tray covered with tin foil and put them into a preheated oven at around 200 degrees for about 5 minutes.
Step 5. Add the jump rings (if necessary) and ear wires.


Really clever idea, but simple to make! Looks like a masterpiece! Love, love, love.
I really like this!