
Get more details about this project
What you need
Pattern paper
Pattern weights
A long ruler
French curve
Pencil and pens
Pins
A tracing wheel
Scissors for paper
Instructions
Blouse Front and Back
1. Lay out a large piece of pattern paper on a flat surface.
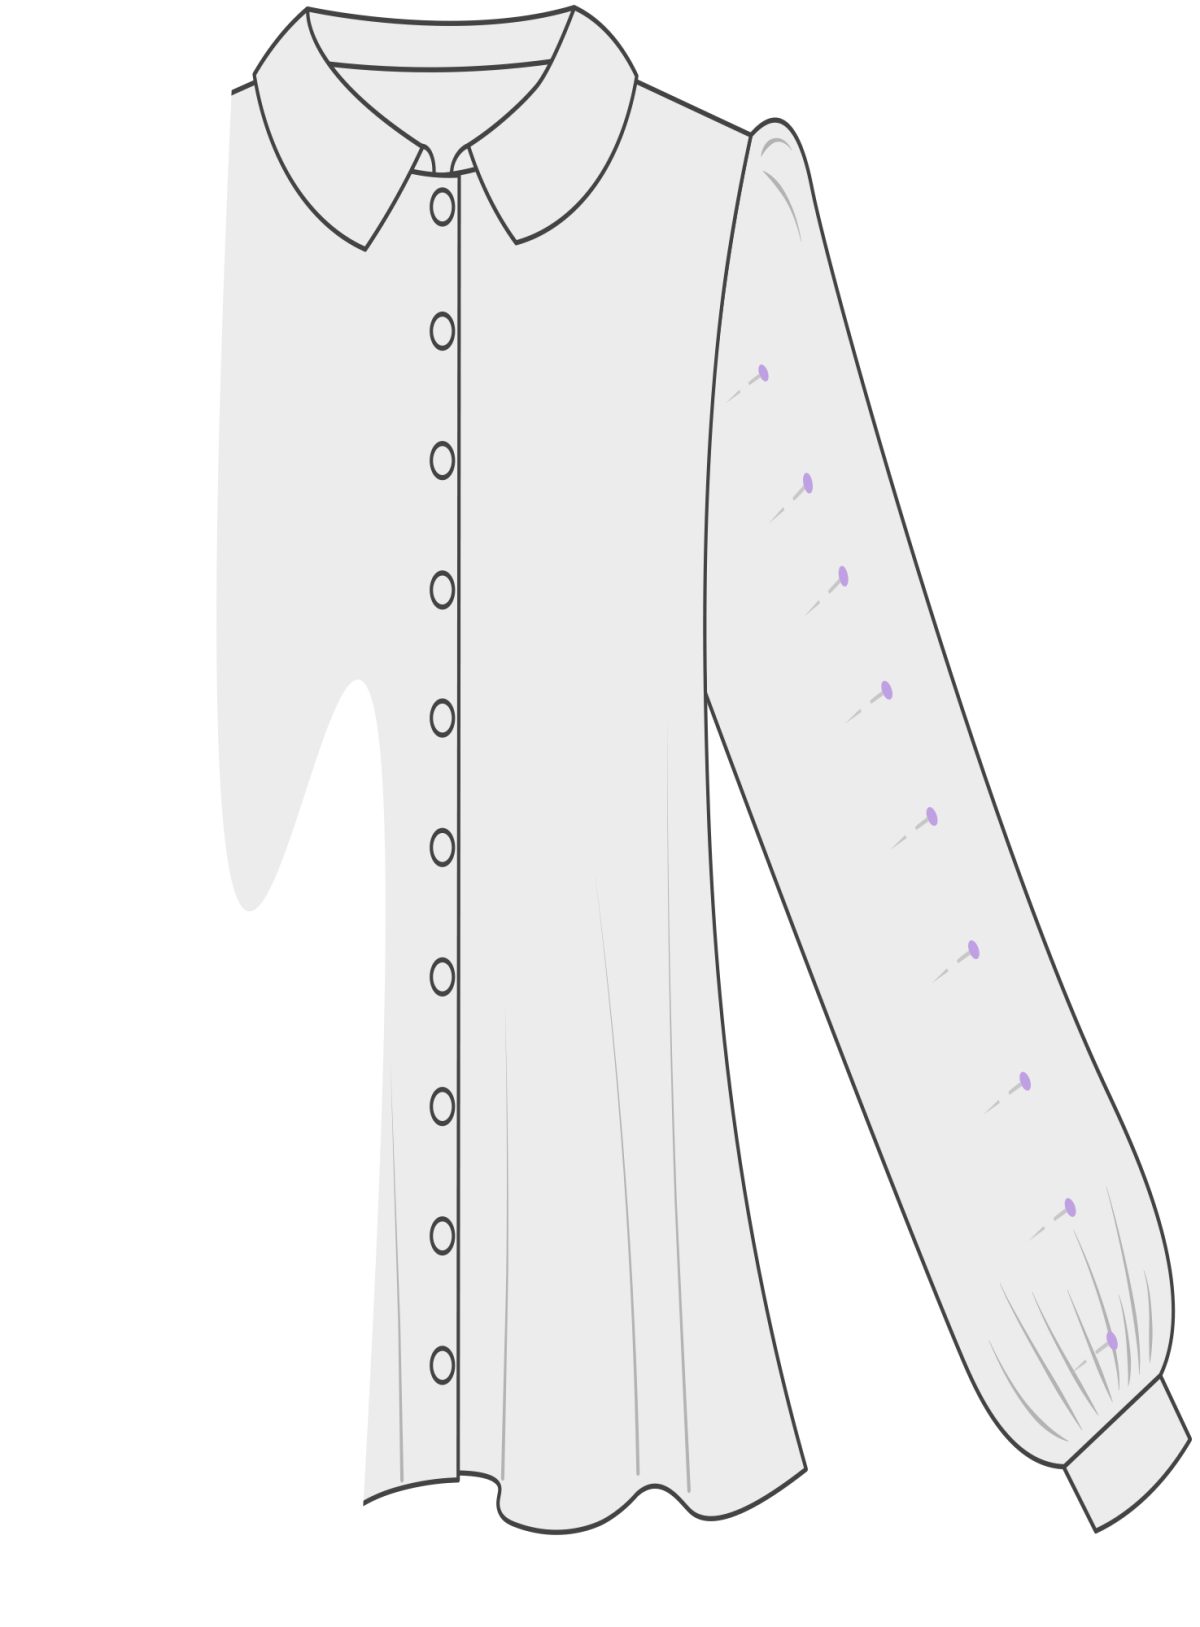
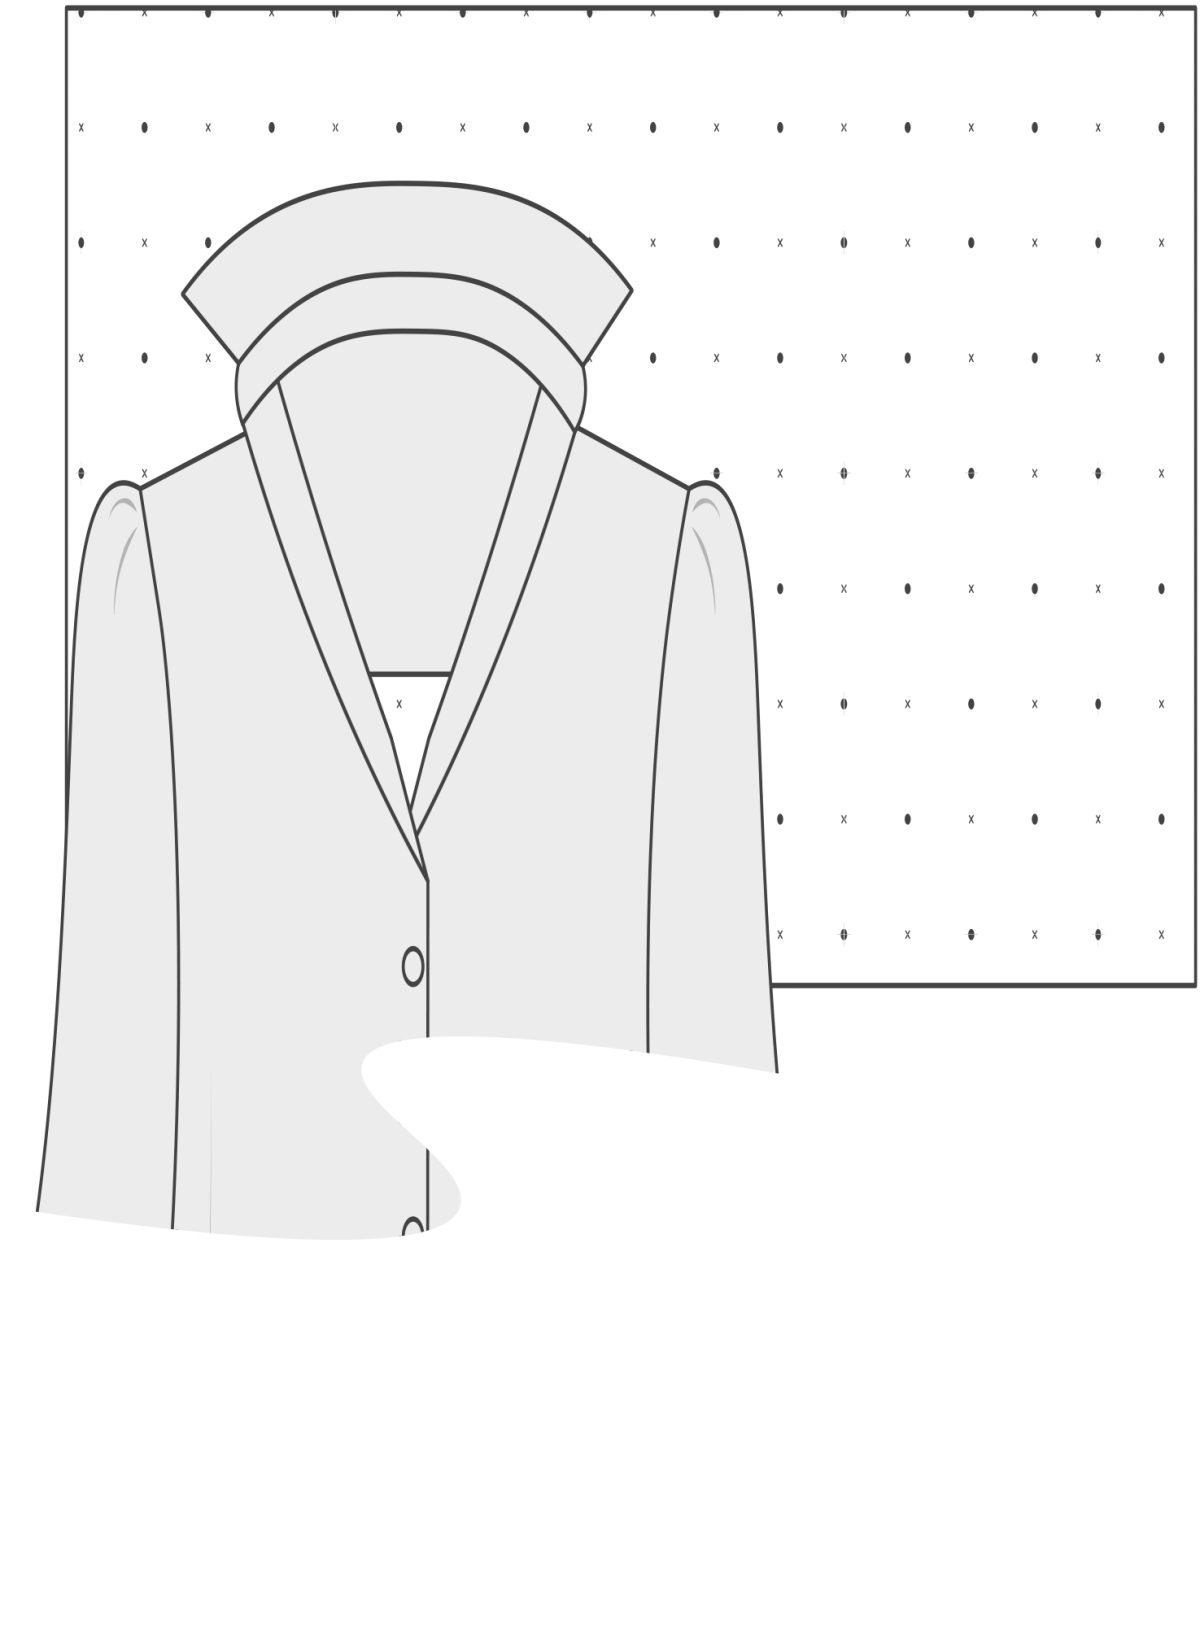
2. Take your garment and press it, then identify the grainline. It helps to thread a hand-sewing needle with a contrasting color thread and run a few basting stitches along the grainline so it’s easy to reference as you’re taking the pattern (Fig. A). You’ll need to do this to all major sections of the garment: blouse front, blouse back, sleeve. Don’t worry about the cuff or collar pieces.
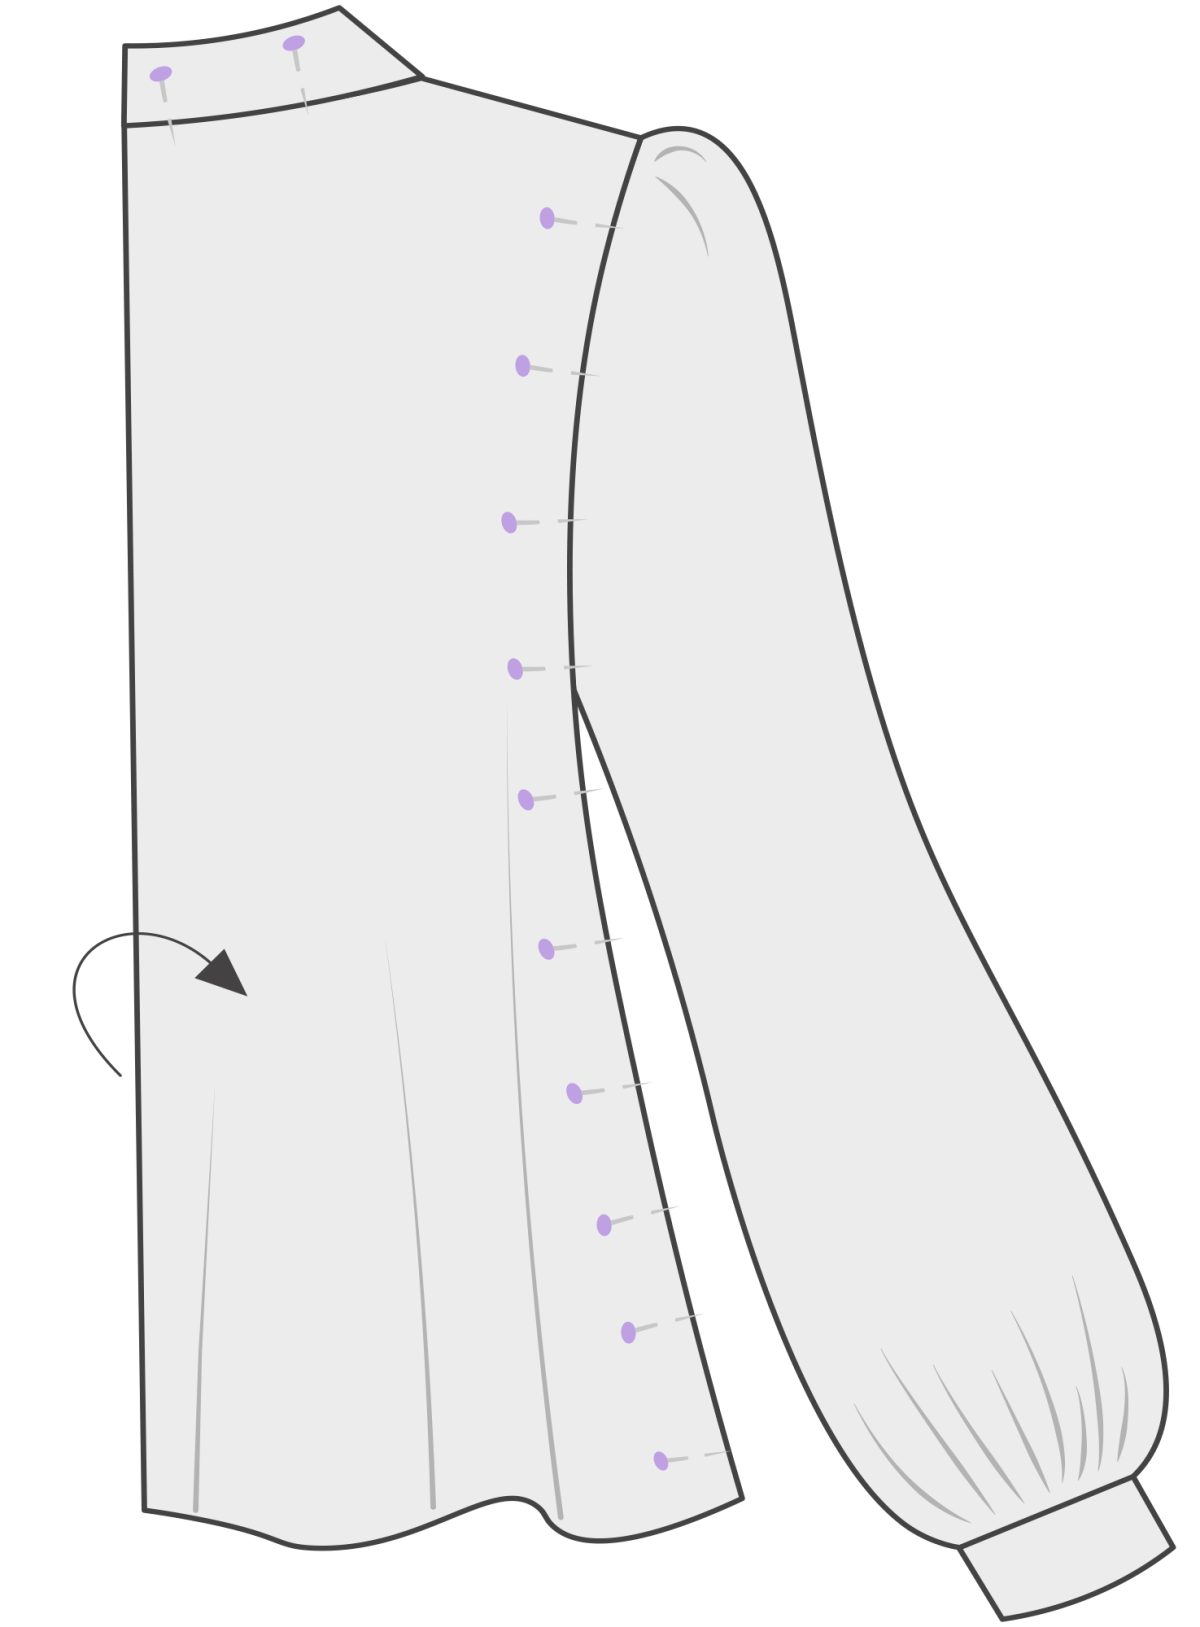
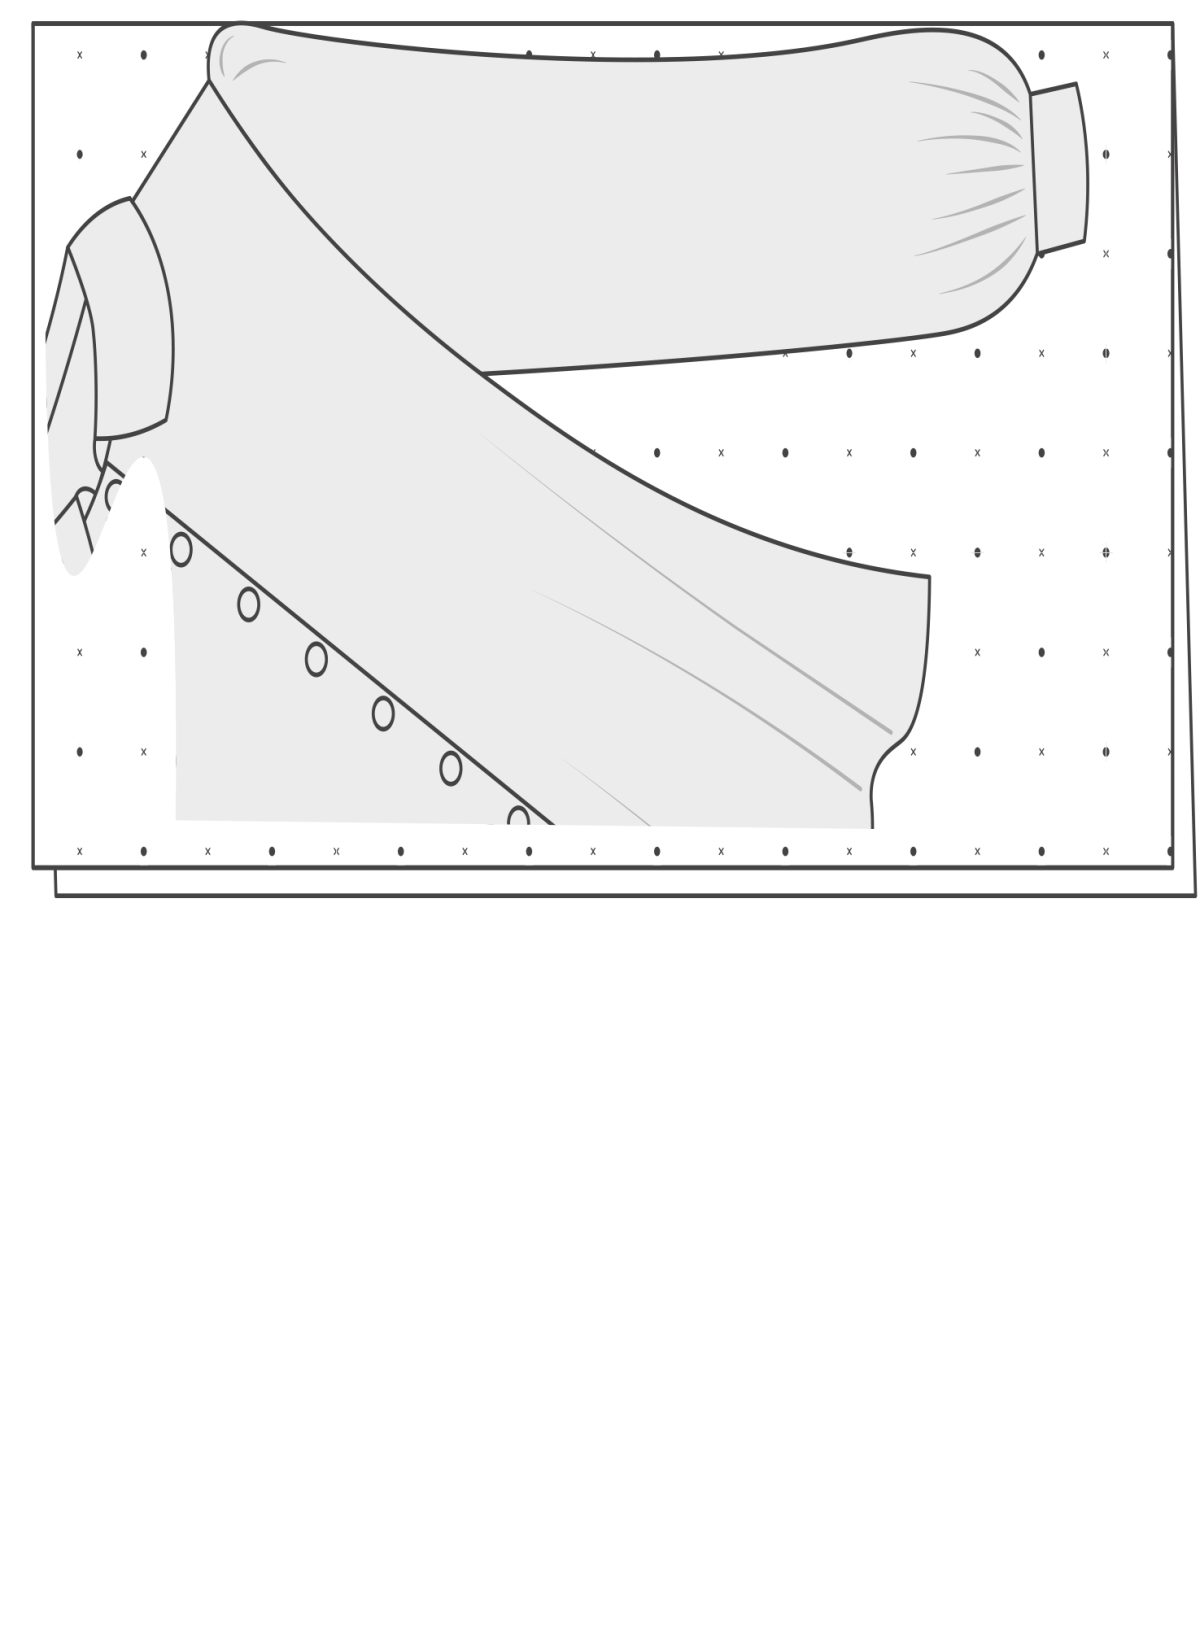
3. Starting with the back, fold it in half down the center and secure the two layers together at the neckline and side seams (Fig. B).
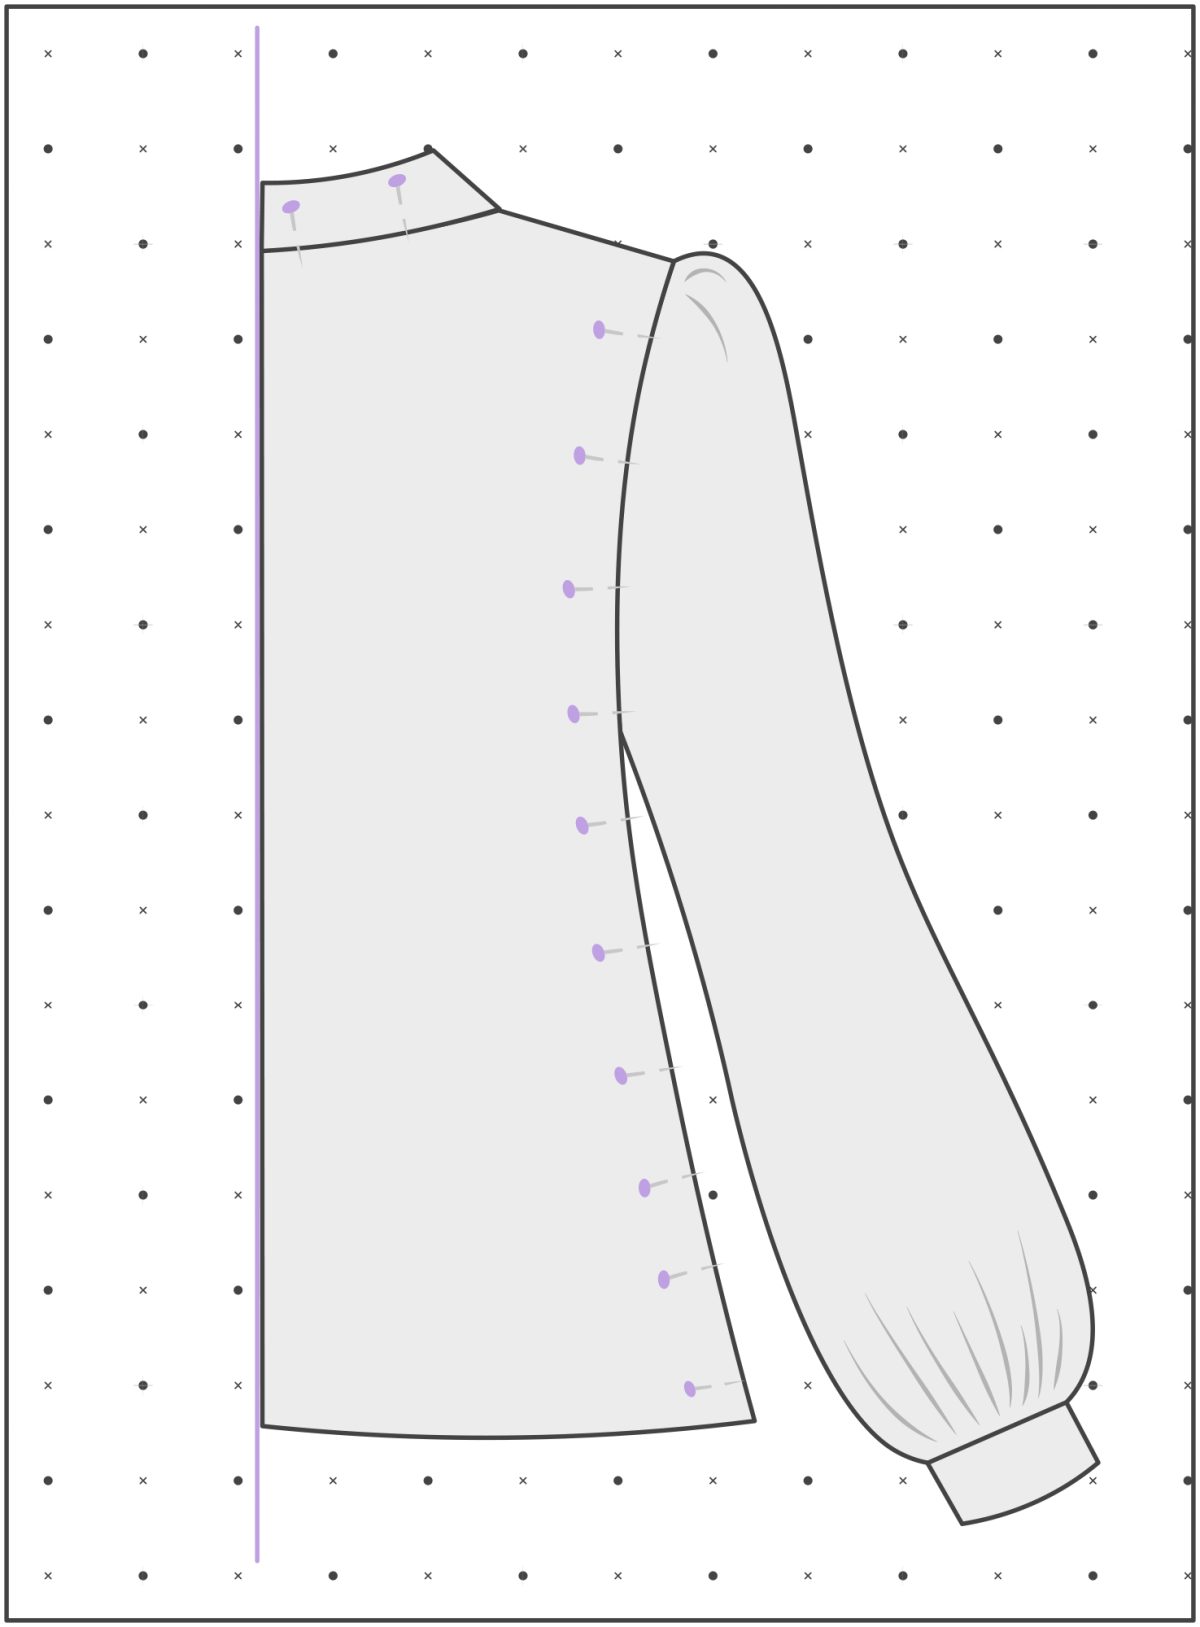
4. On your paper, draw a vertical line to represent the CB, and lay the fold of your blouse back alongside it (Fig. C). Smooth out the fabric so that the section you’re about to rub off is as flat as possible.
Use pattern weights to keep your blouse in place on the paper.
5.With a pin, stab carefully along all seams to create a dotted guideline on the paper—the neckline seam, the armhole, and the side seam. Draw in the shoulder seam and hemline with a pencil, as well as any other area where there is no seam (a collarless neckline, for example).
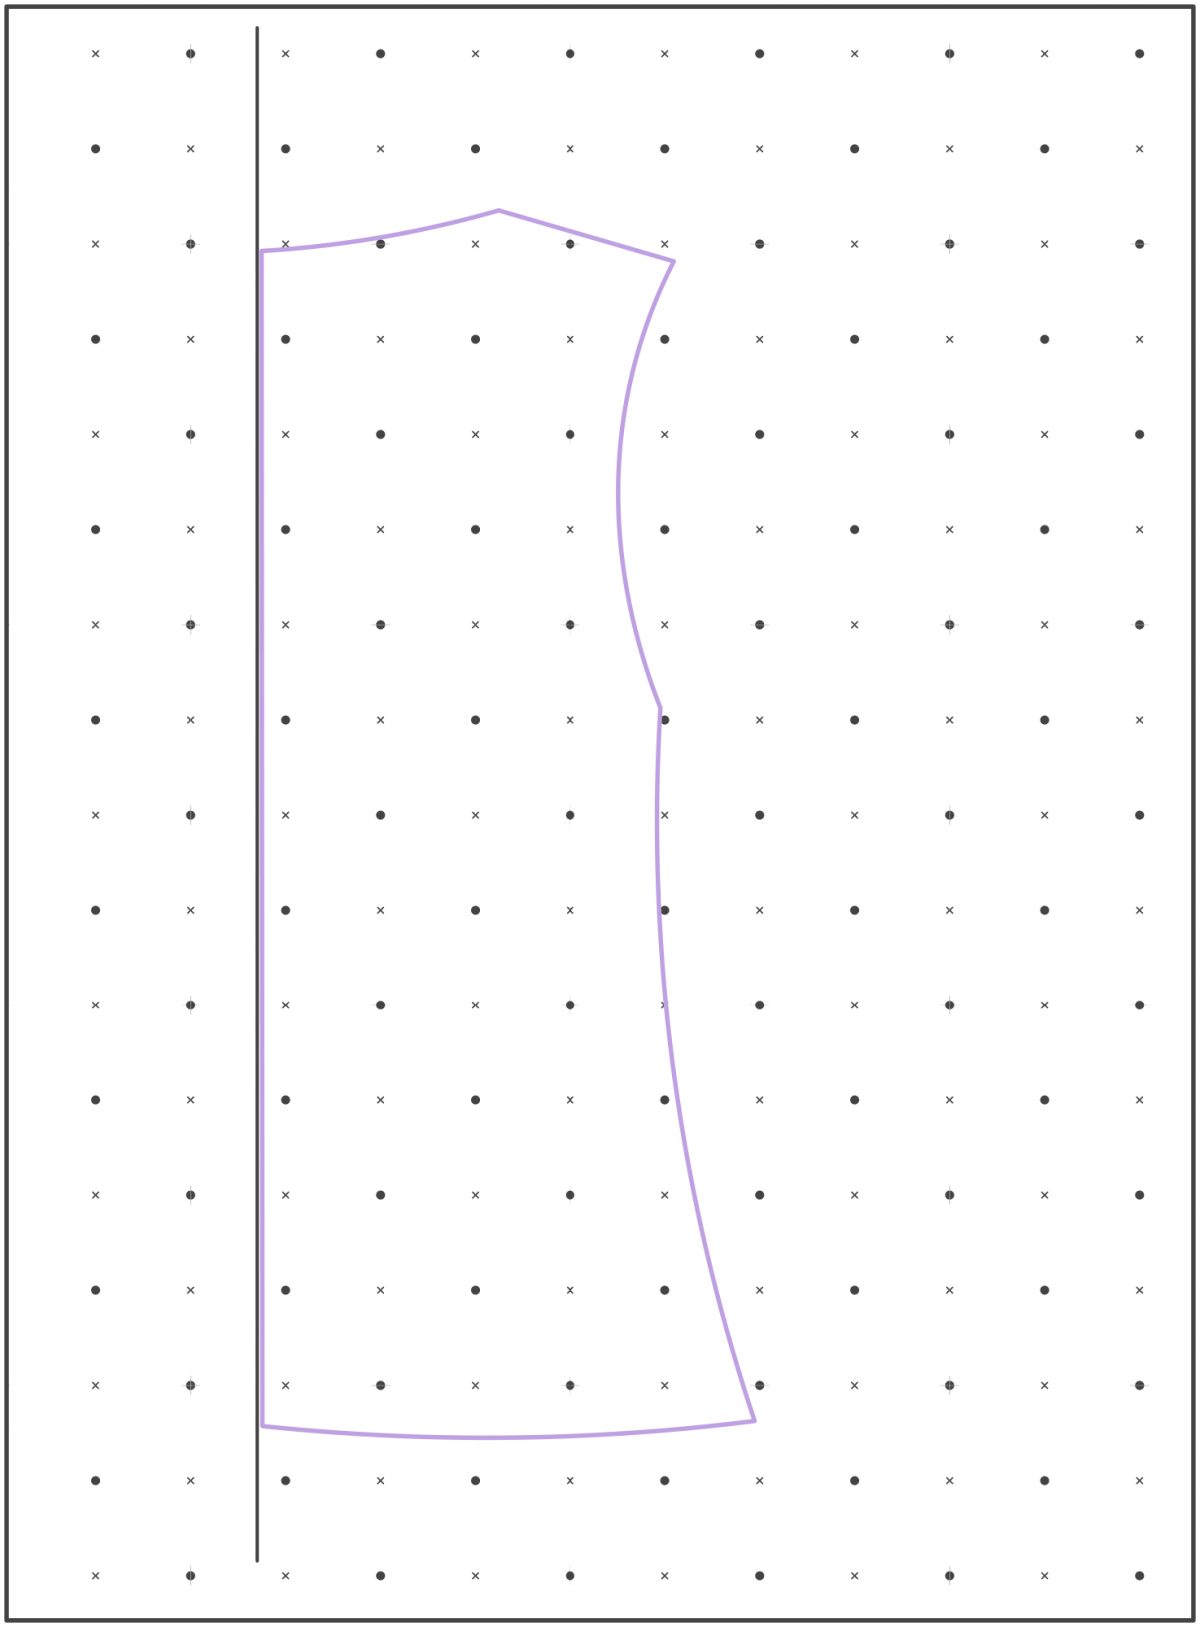
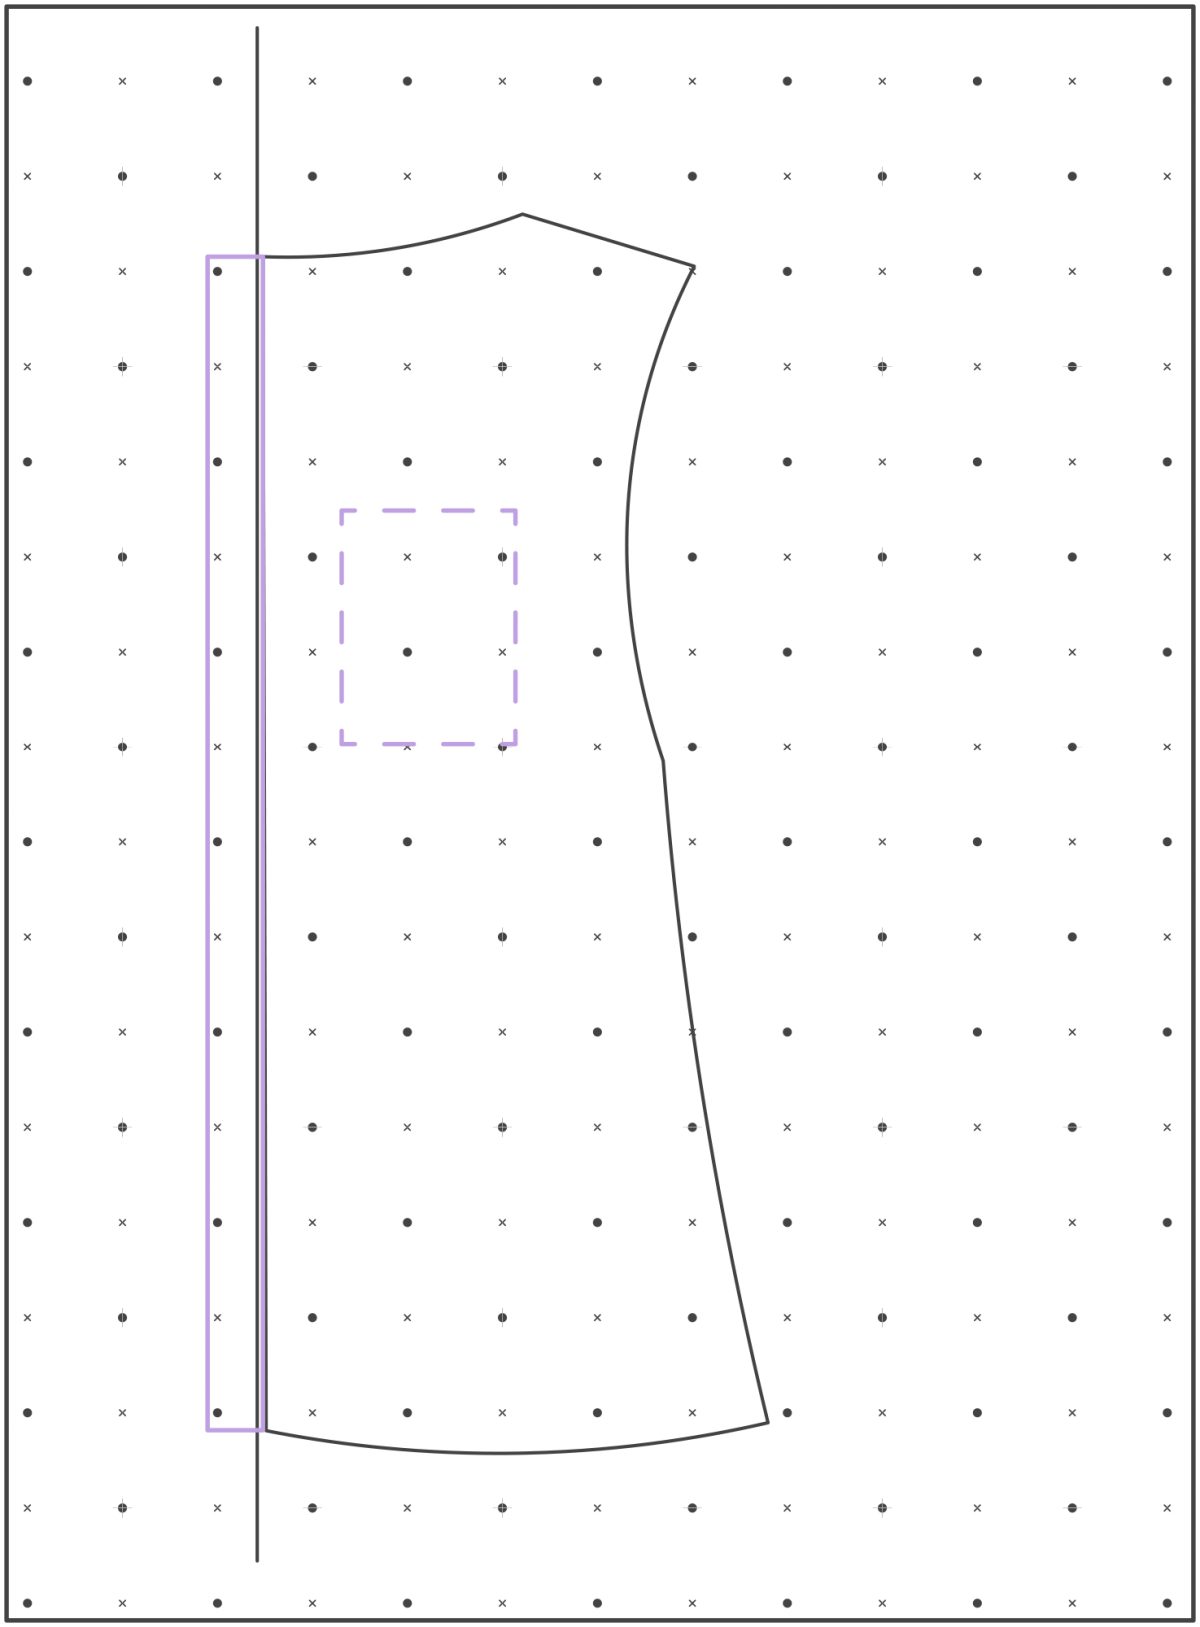
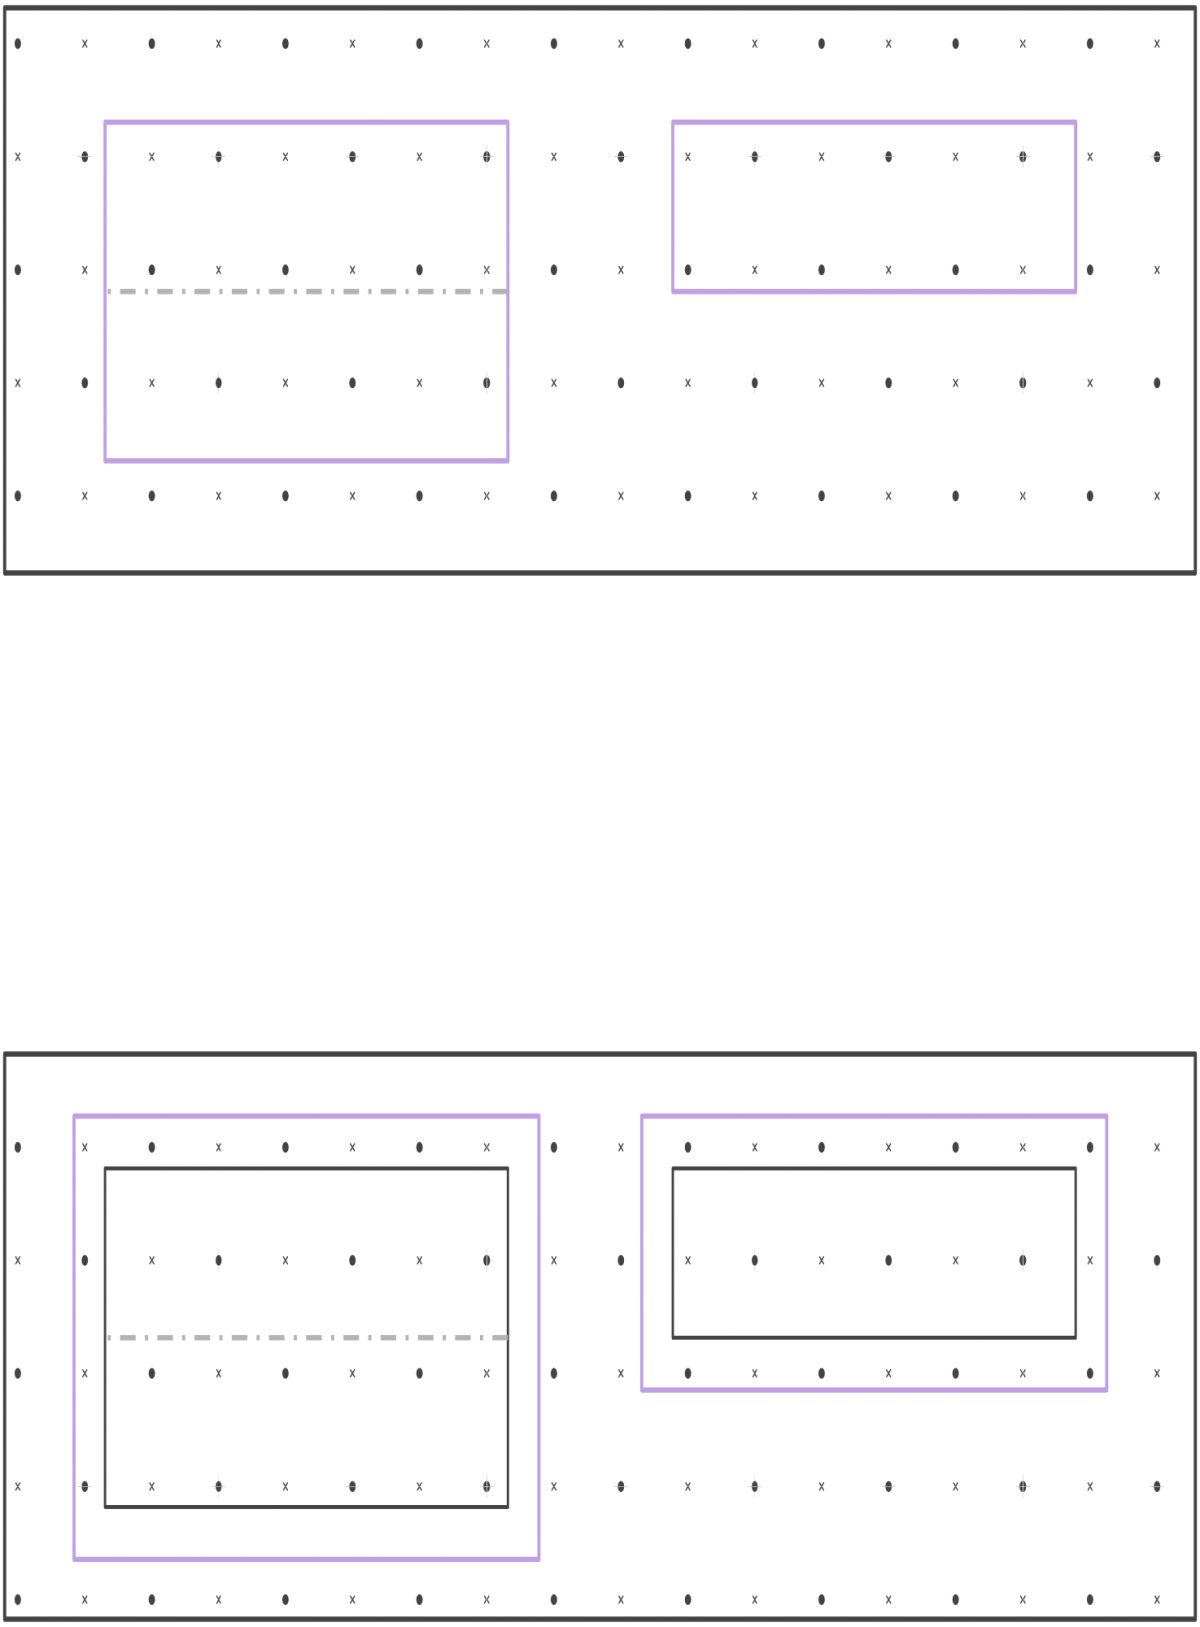
6. Remove the blouse from the paper and use your ruler and curves to draw the lines in using your pin marks as a guide (Fig. D).
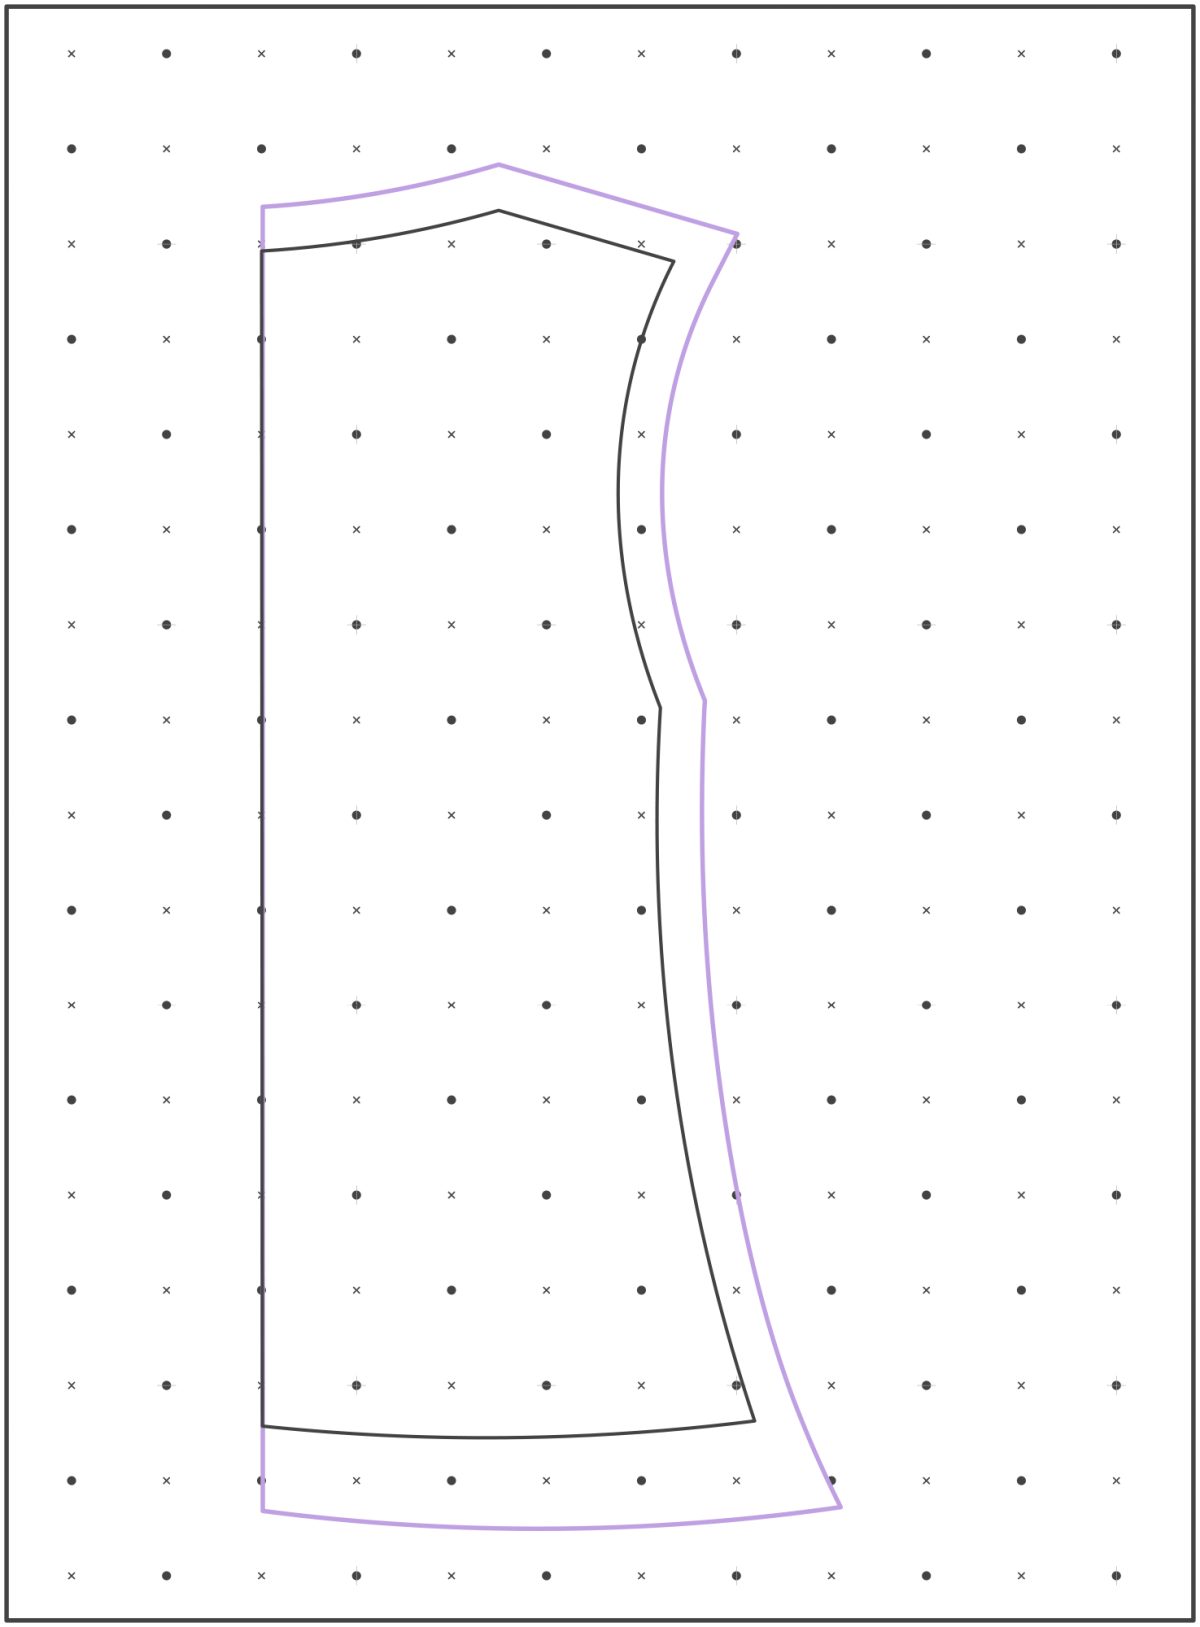
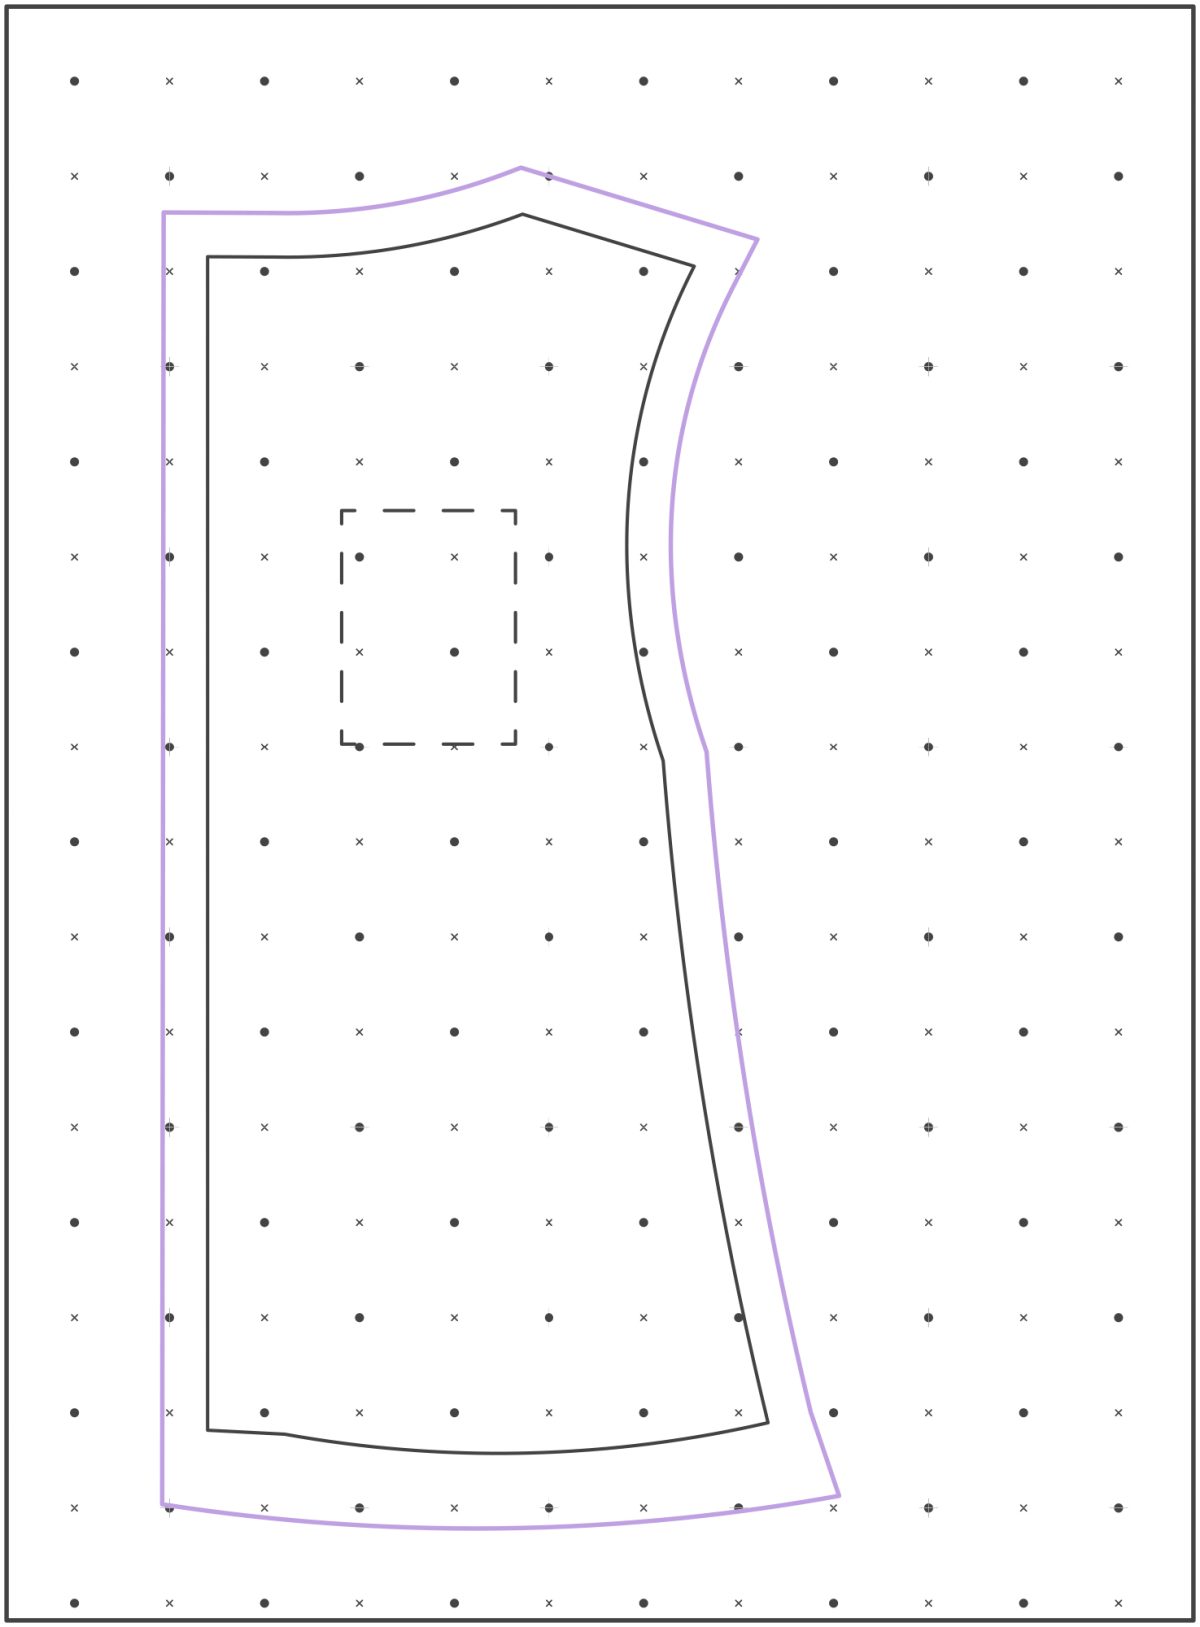
7. Add the relevant seam and hem allowances (Fig. E), and label your first pattern piece—blouse back, size, cut 1 on fold, etc.
8. Let’s move on to the blouse front. Lay out one side of the blouse front and trace it off in the same way.
9. This piece has extra details—a CF placket and a pocket. Measure the width of the placket and draw it by extending the center front line of the blouse front. Measure the pocket and draw it out separately, as well as in place on the blouse front so you know where to position it (Fig. F).
10. Add the relevant seam and hem allowances (Fig. G) and label your pattern piece.
Sleeve and Cuff
1. Fold the sleeve in half lengthwise, with the underarm seam at one side (Fig. A).
2. Take a piece of pattern paper and fold in half. Line up the shoulder hem fold of your sleeve with the fold of the paper (Fig. B) and the front of your sleeve facing up; this will make it easier to rub off both front and back of the sleeve head without having to flip the sleeve over. (The front of the sleeve head is usually narrower than the back, which is wider for more coverage at the back of the shoulder.)
3. Draw the underarm seam. Ignore the cuff for now, but if the bottom of the sleeve is gathered, just continue the underarm seam straight down, creating an A-line shape. This will be gathered later.
4. Use a pin to mark out the sleeve head front and back. Open the blouse to access the back sleeve seam or feel the seam through the fabric with your finger.
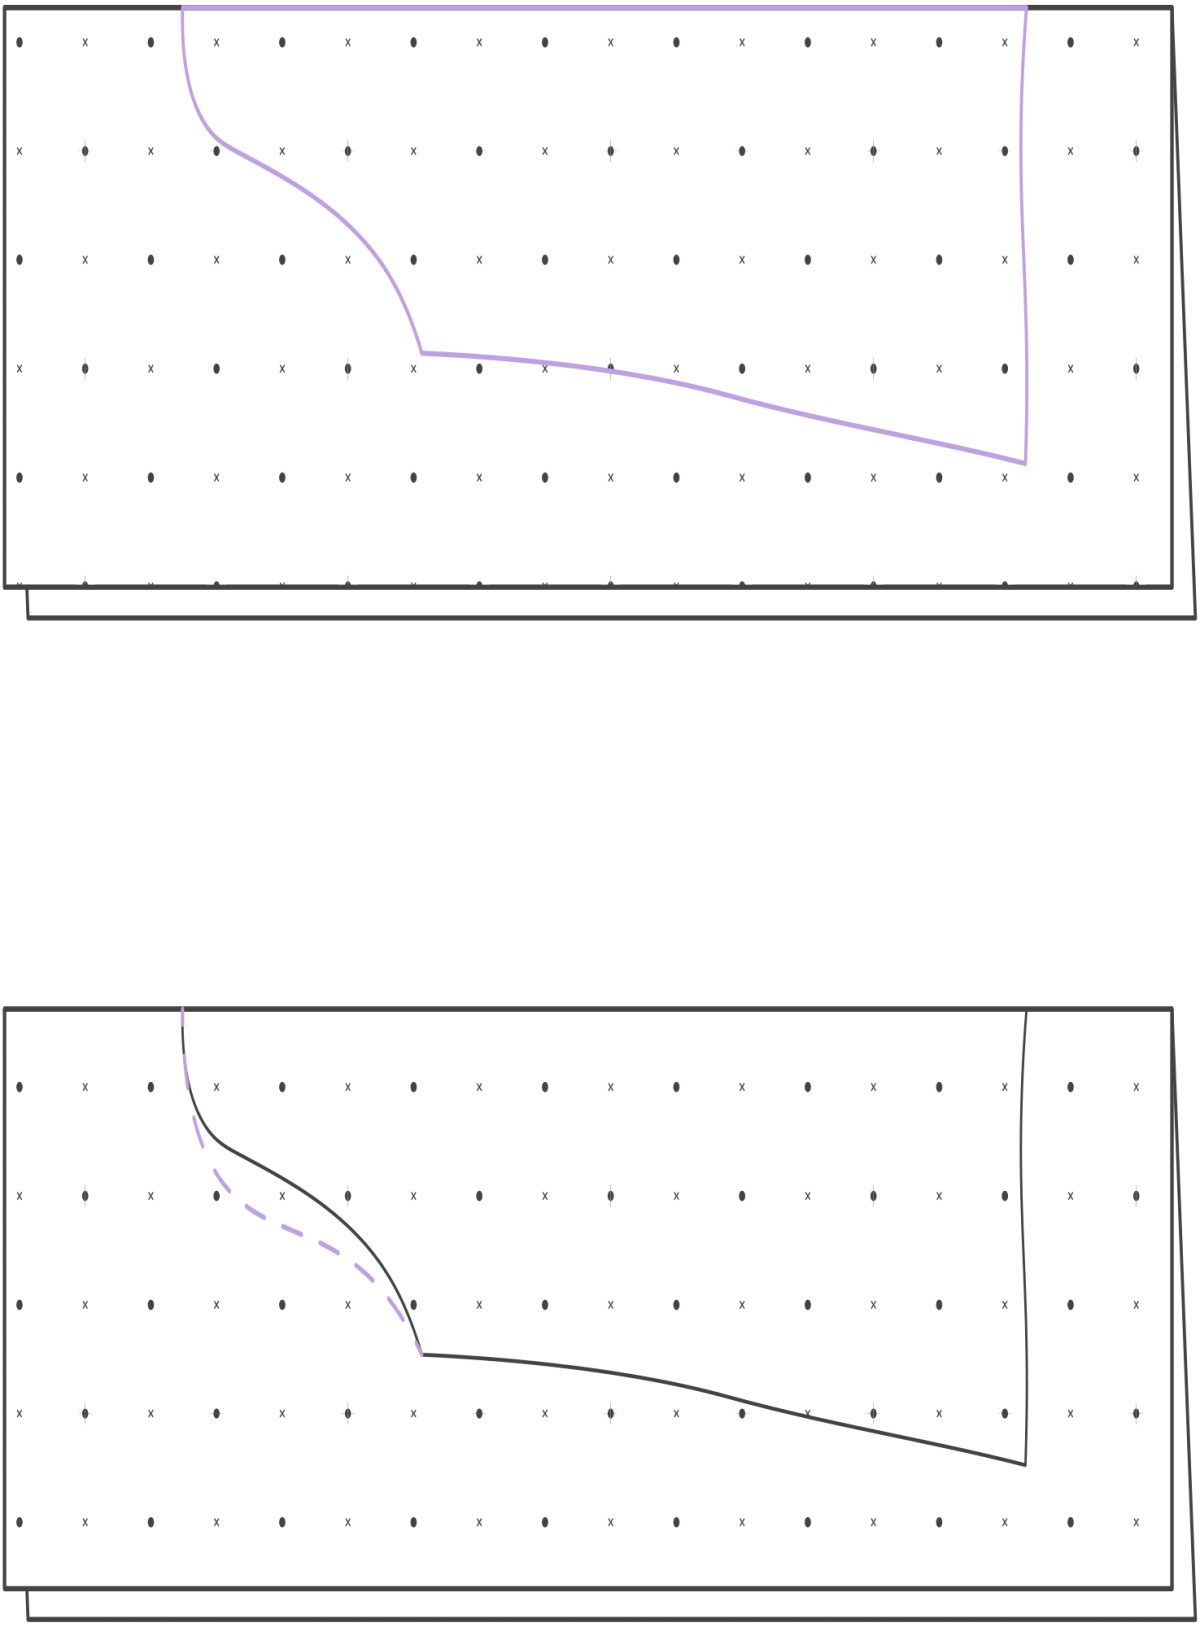
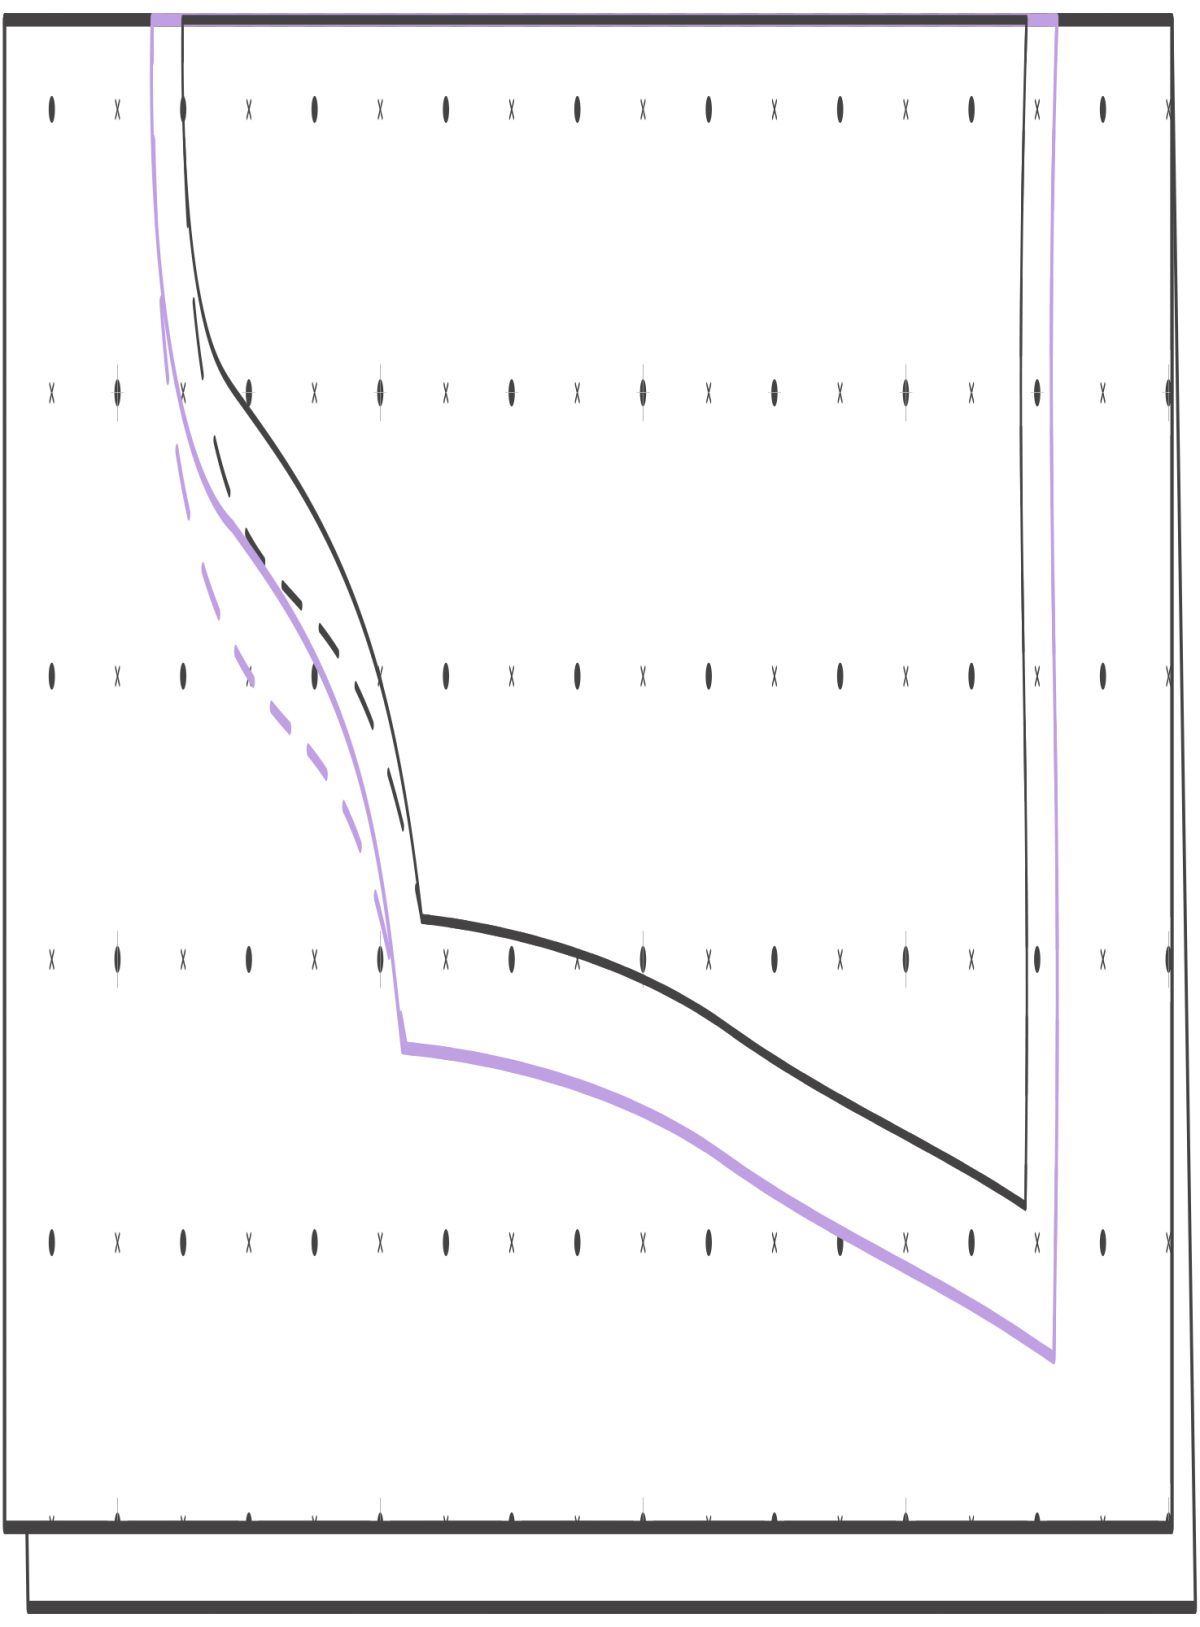
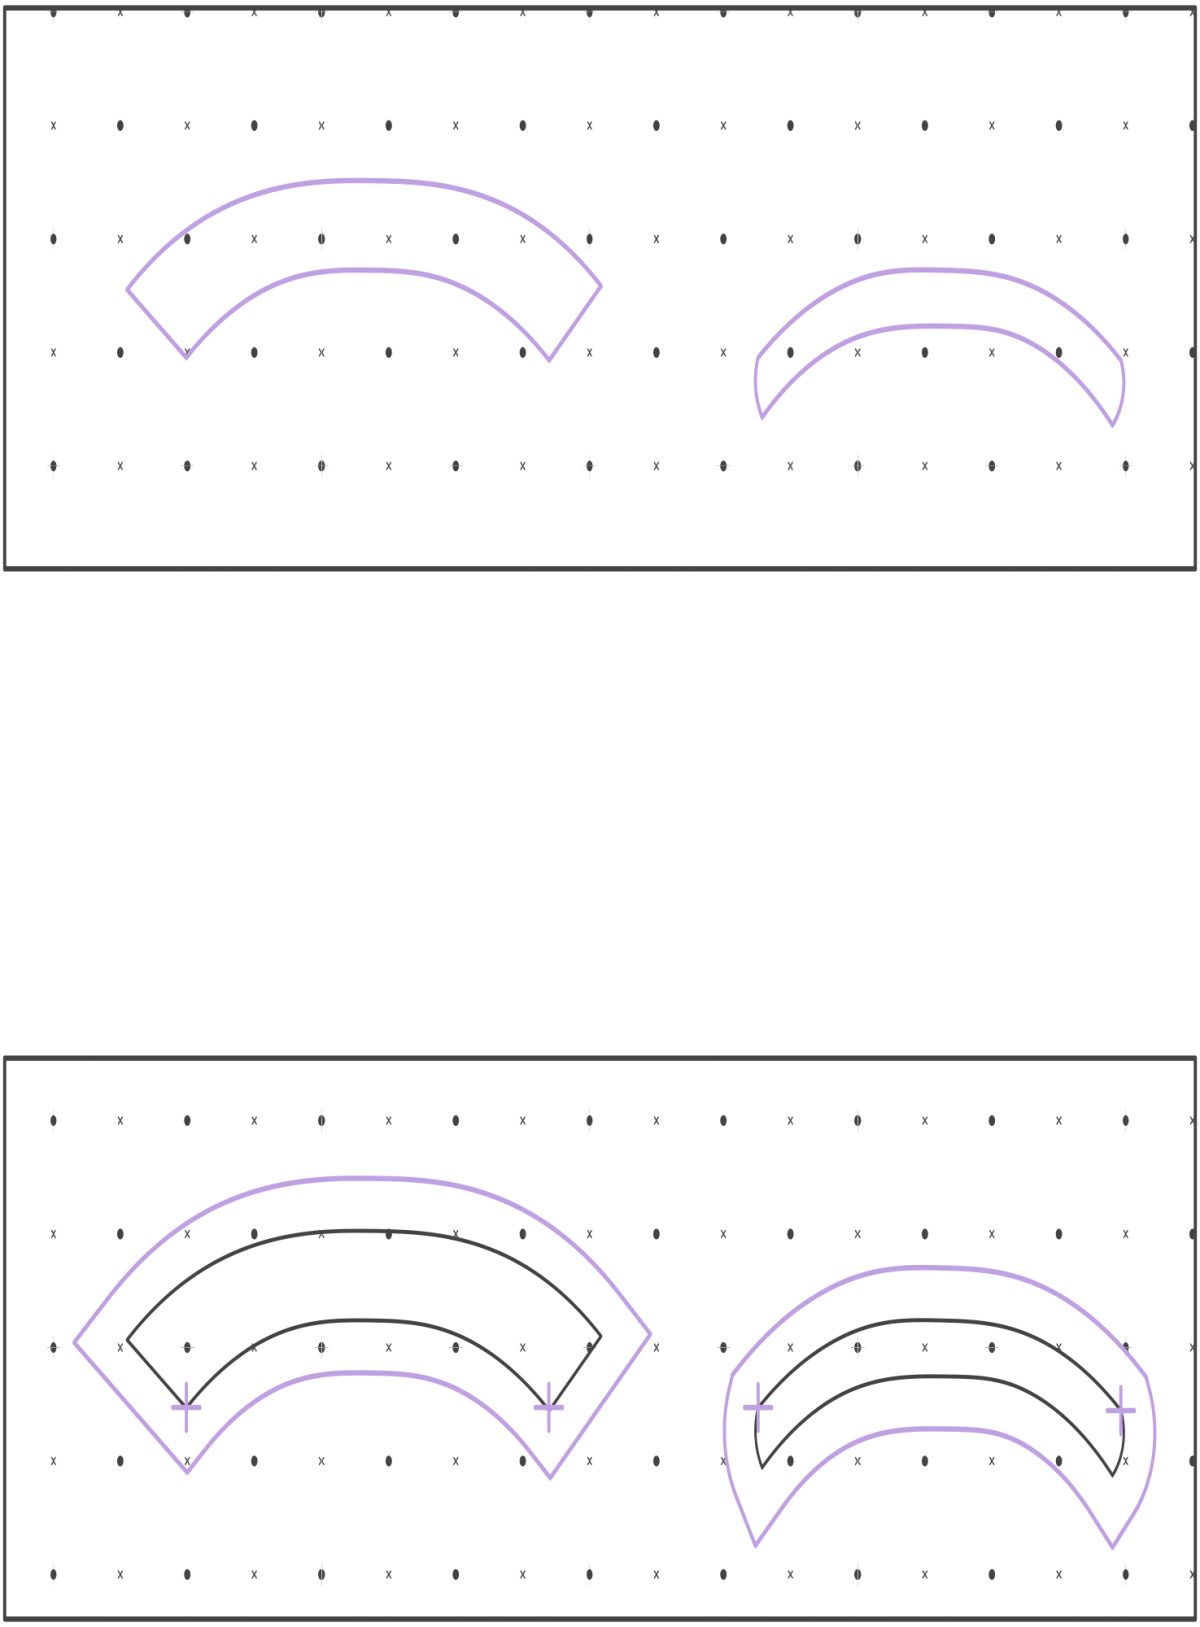
5.Remove the blouse and redraw your lines in with rulers and curves. Draw in both the back and front of the sleeve head (Fig. C).
6.Add seam allowances to the sleeve head, underarm, and cuff (Fig. D).
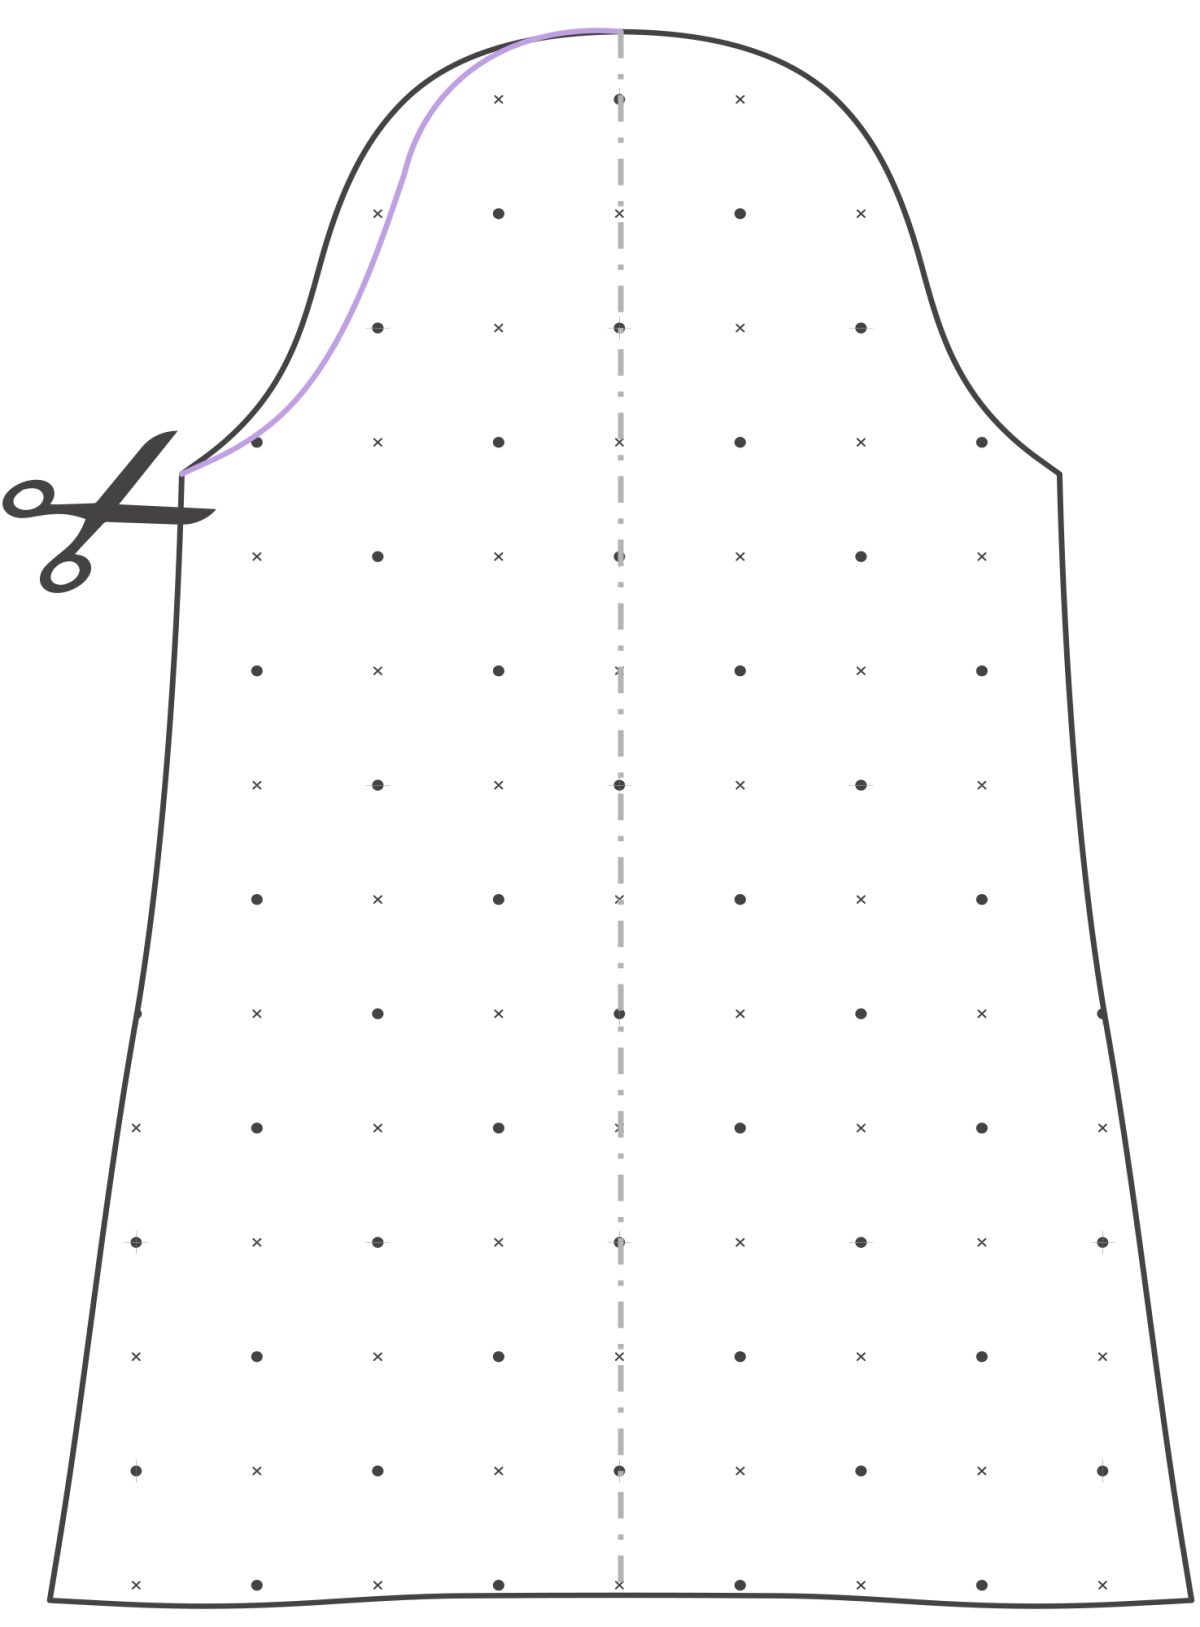
7. Cut out your sleeve. Your paper is still folded, so cut through both layers at once carefully and accurately; I like to do this with a rotary cutter. When you get to the sleeve head, cut around the wider sleeve back line.
8.Open out your sleeve and, on the side with drawing on it, cut along the sleeve front line—now you have a sleeve pattern piece with a distinct front and back sleeve head (Fig. E).
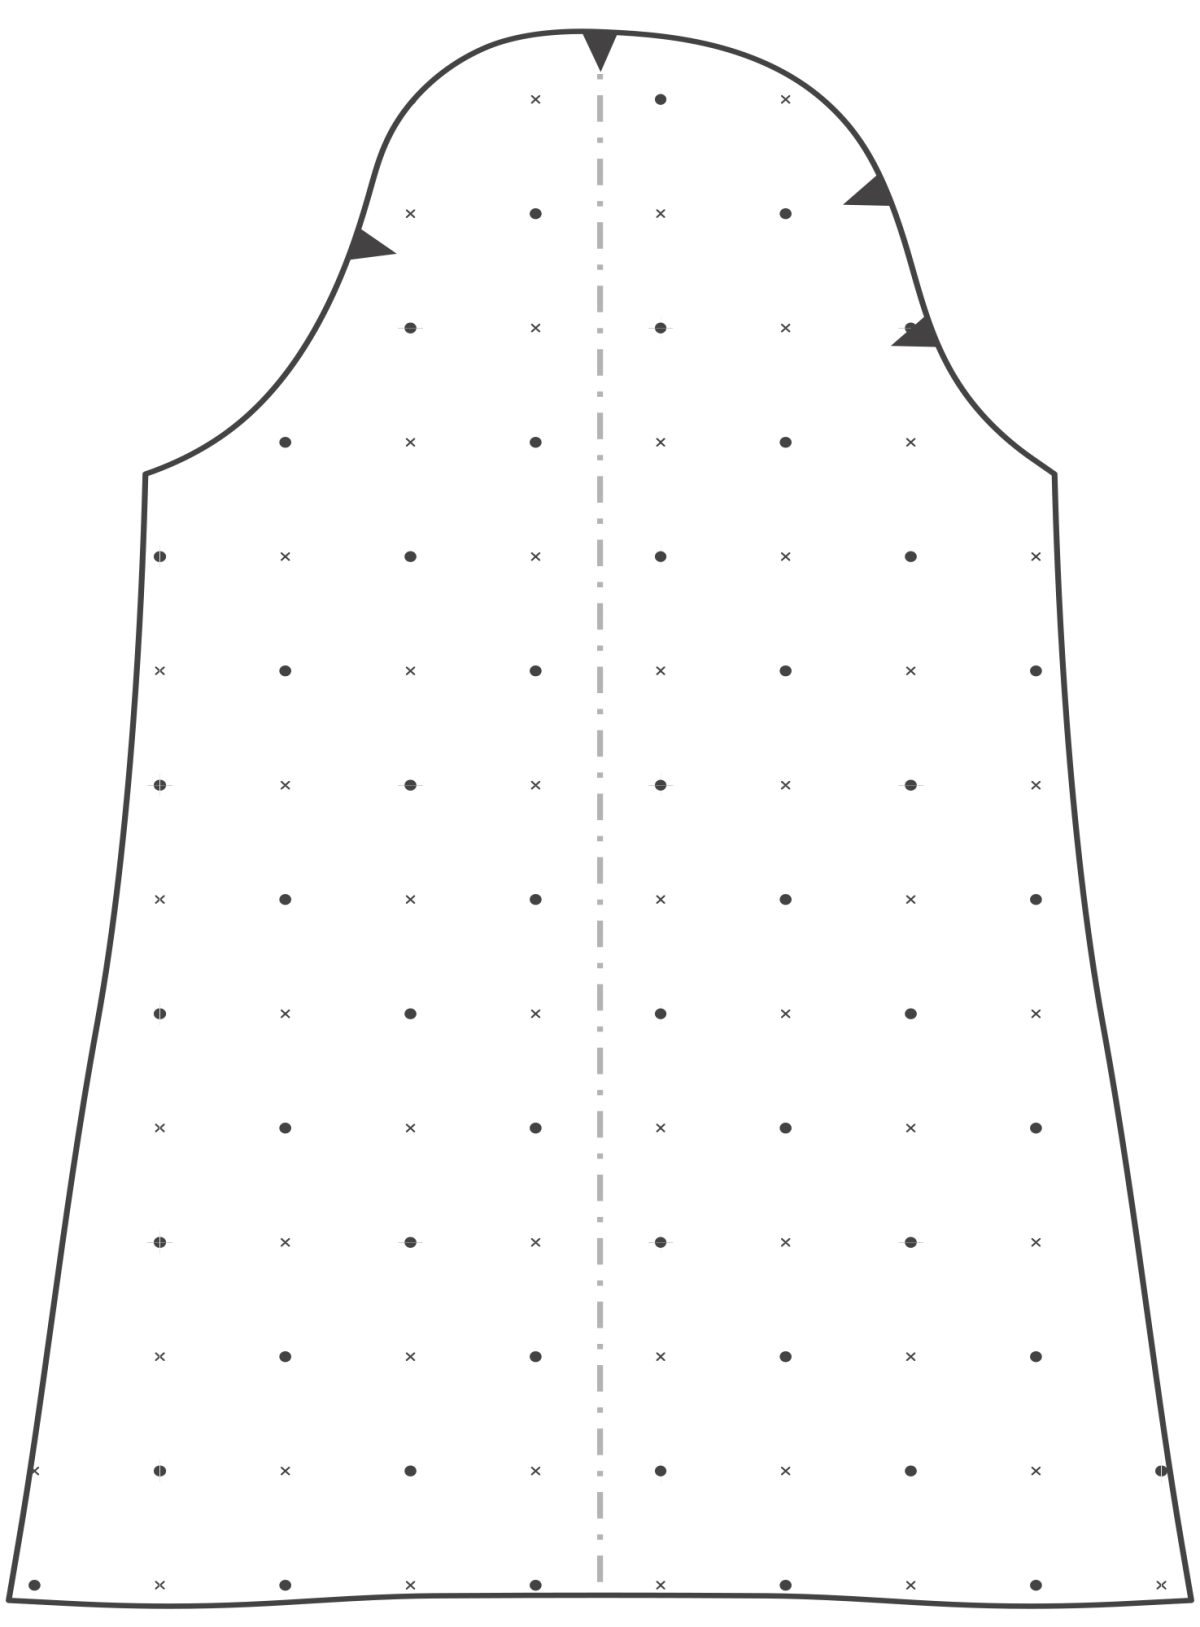
9. Add in a notch at the top of the fold that will match up with the shoulder seam (Fig. F). Label your pattern piece, especially the front and back of the sleeve.
10.For the cuff, just measure the length and width, noting if the fabric has been doubled up and folded at the edge of the cuff, or if it is two layers of fabric seamed together. Add seam allowance (Fig. G).
Collar and Stand
Rub off the collar and collar stand pieces in the same way as you’ve done for the previous pieces (Fig. A). I like to trace these pieces off whole as opposed to half on the fold (Fig. B).
Check it Out
Before you cut your fabric:
• Measure corresponding seams to make sure they’ll match.
• Label all your pattern pieces clearly, including seam allowances.
• Mark extras like pockets, buttons, and zippers.
• Include notches at tricky points like curved seams.
• Make a muslin!
Elisalex Jewell is the co-founder of the independent sewing pattern label and sewing education platform By Hand London. She went to the London College of Fashion, where she trained as a shoemaker, then worked in the fashion industry for four years. She founded By Hand London out of an interest in wanting to equip people with the skills and confidence needed to sew their own clothes. She also teaches sewing and handicrafts and contributes to various sewing and craft publications. She lives in London, United Kingdom. Find her online at byhandlondon.com.
Excerpted with permission from Made to Measure: An Easy Guide to Drafting and Sewing a Custom Wardrobe (Quarry Books, an imprint of The Quarto Group, 2023) by Elisalex Jewell. Made to Measure publishes November 7, 2023 and can be purchased wherever fine books are sold. Learn more at quarto.com.


What do you think of this project? Let us know!