
Get more details about this project
What you need
Hot Glue Gun/ gluesticks


Scissors
Instructions
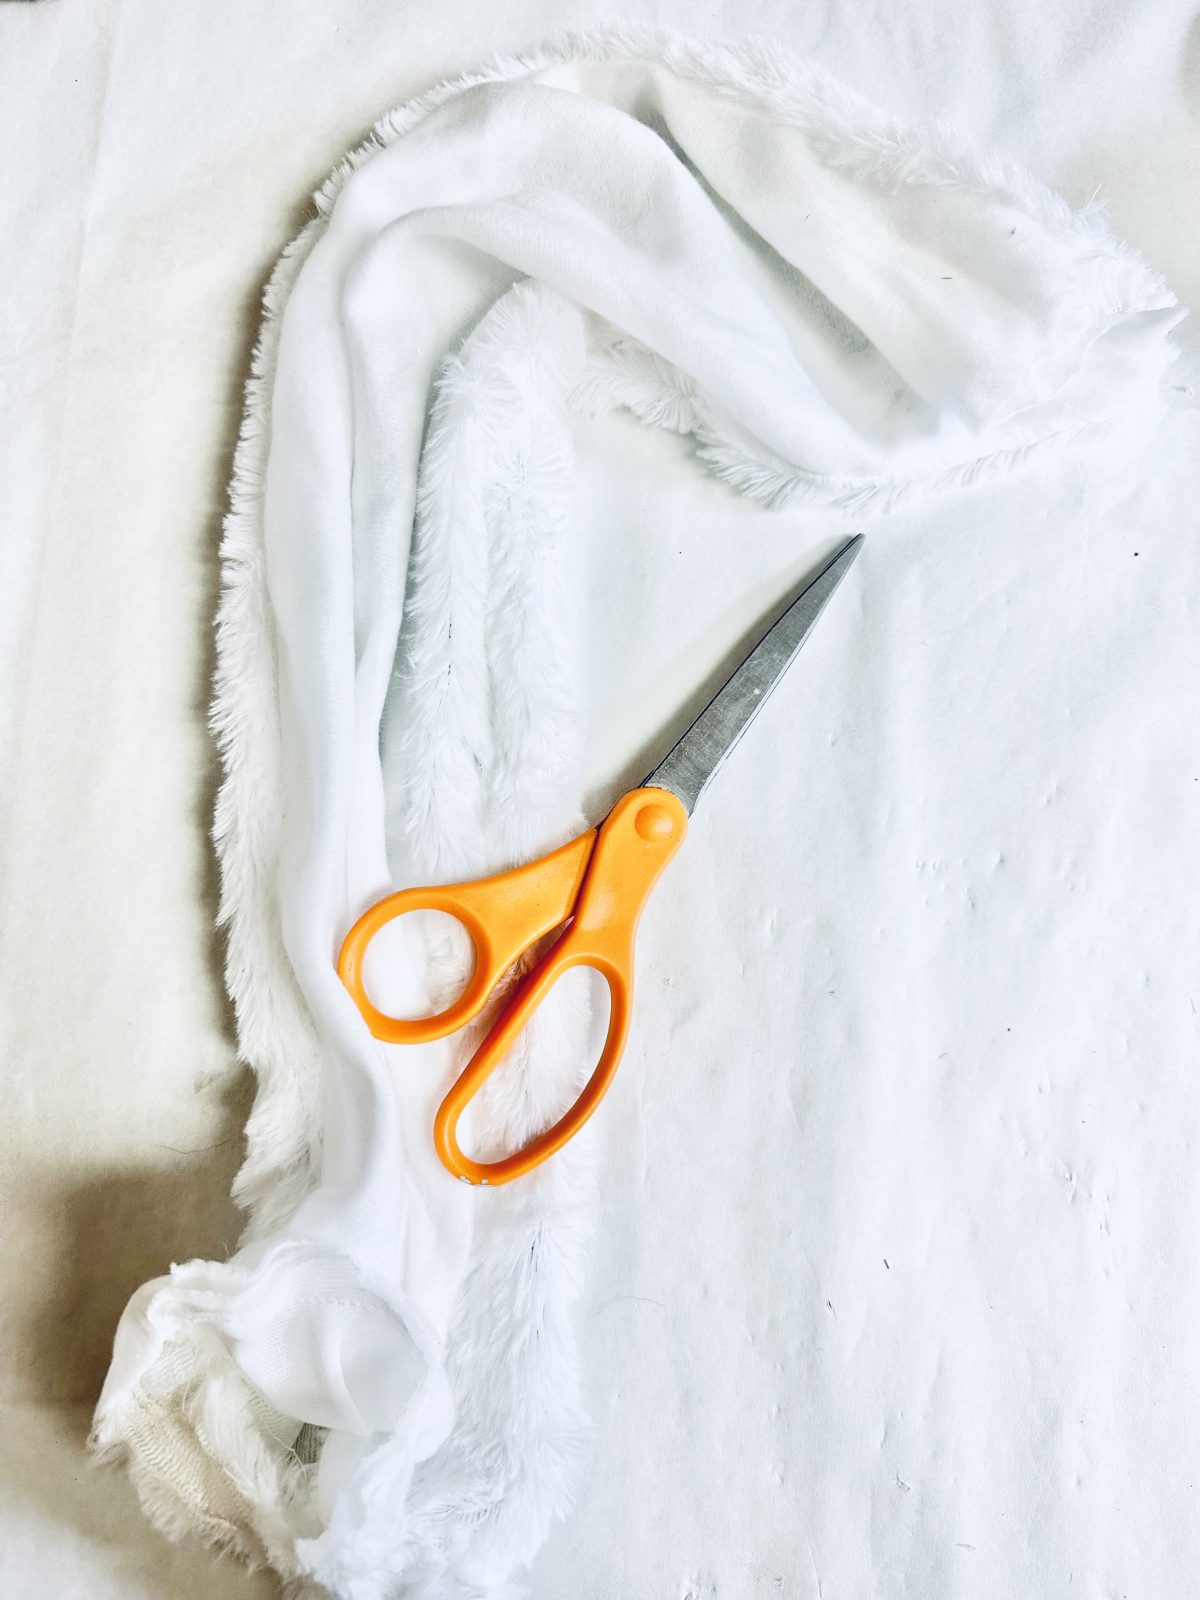
Start by cutting the scarf where the seams meet. This strategic cut will create an opening through which you can easily insert the candy cane wreath form, setting the stage for your creative holiday project.
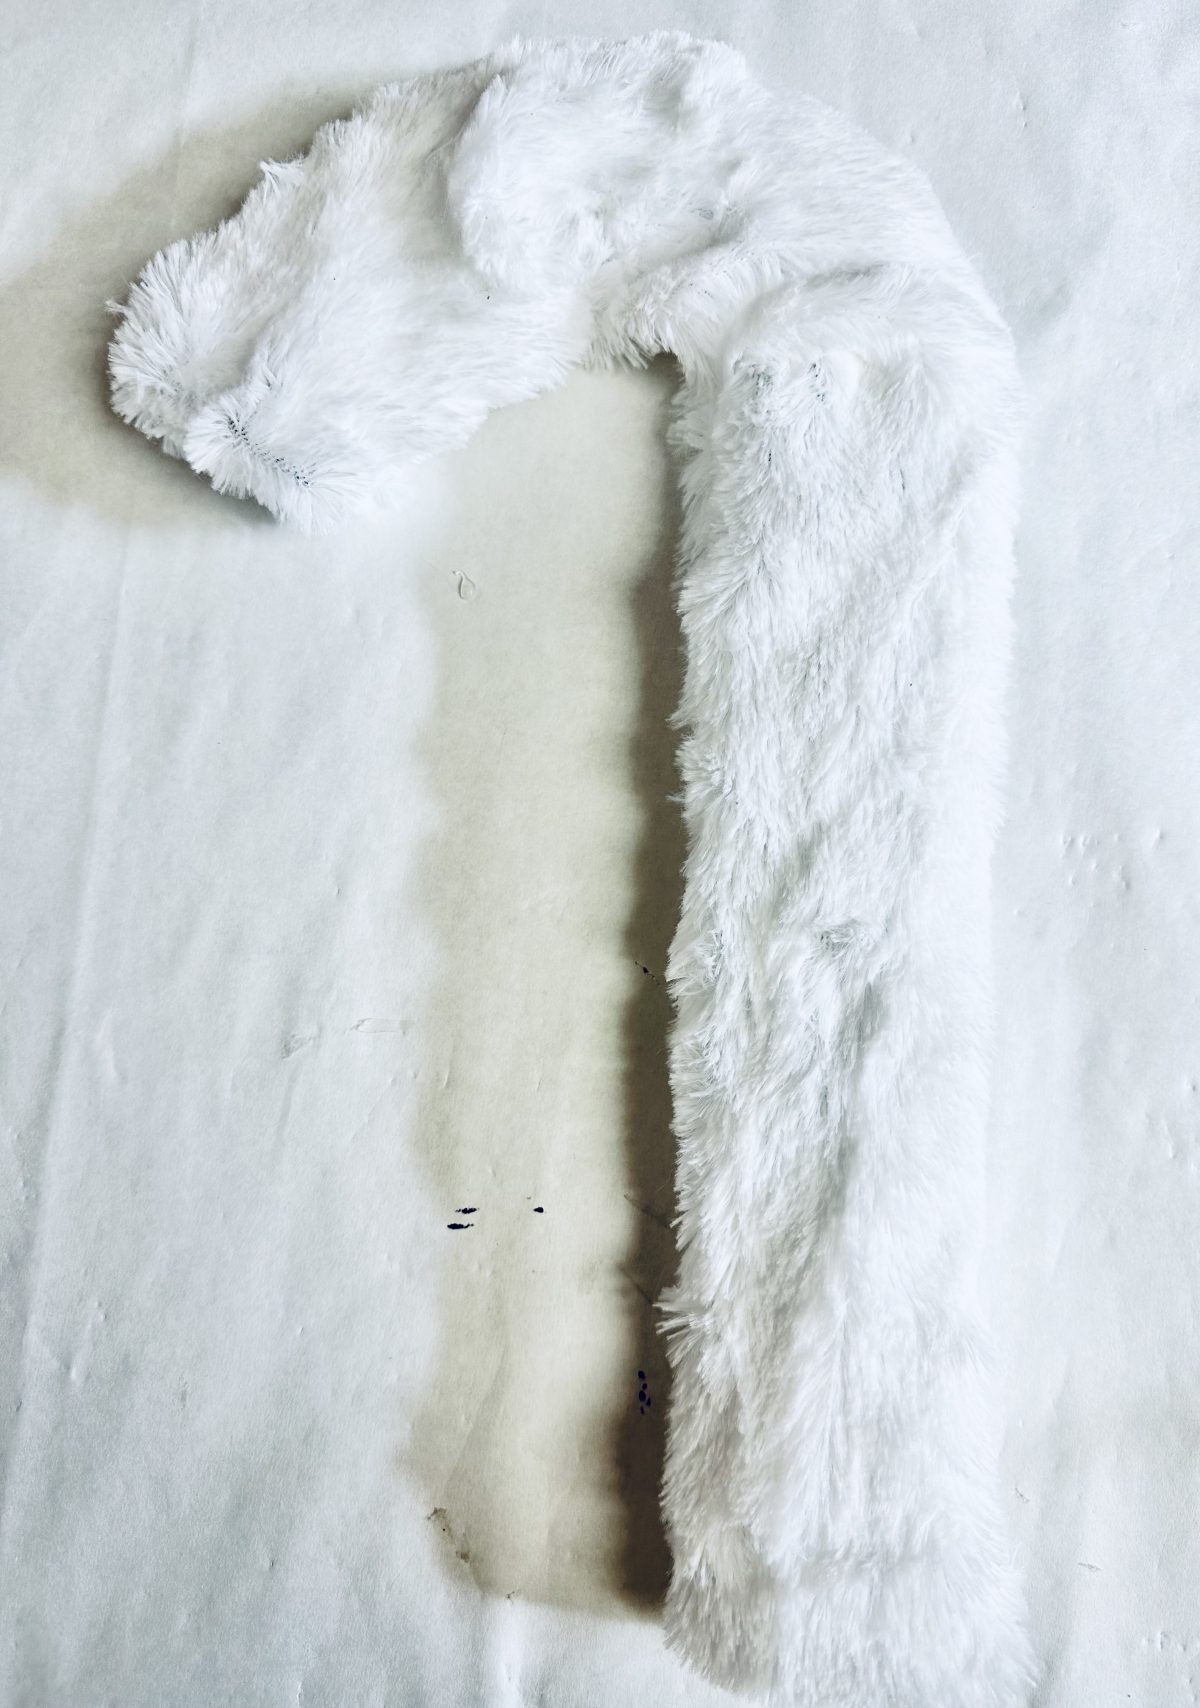
Now, gently slide the candy cane wreath form inside the scarf, ensuring that it goes all the way through. As you do so, make sure that the end of the wreath form, where the curved section concludes, aligns with the finished seam of the scarf. This careful placement will ensure a polished and seamless appearance for your candy cane wreath.
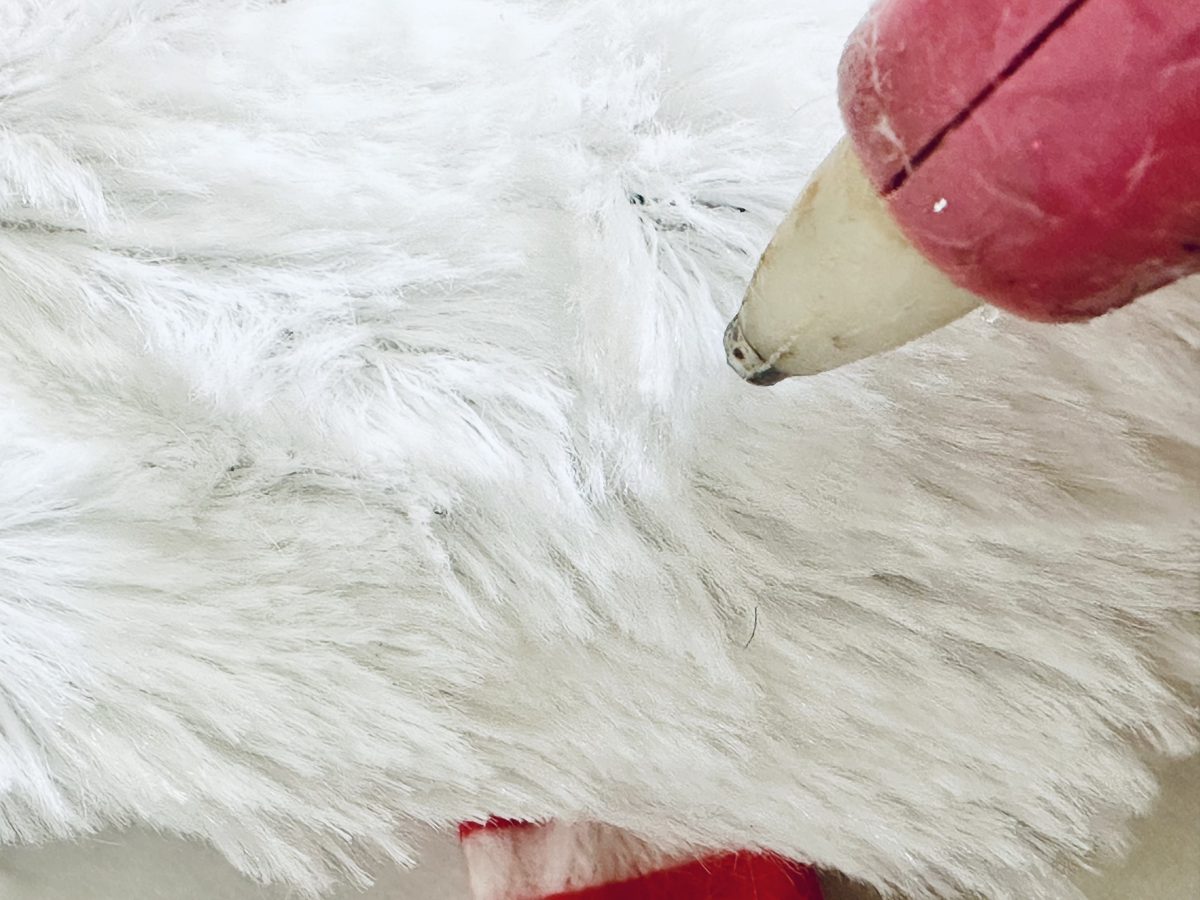
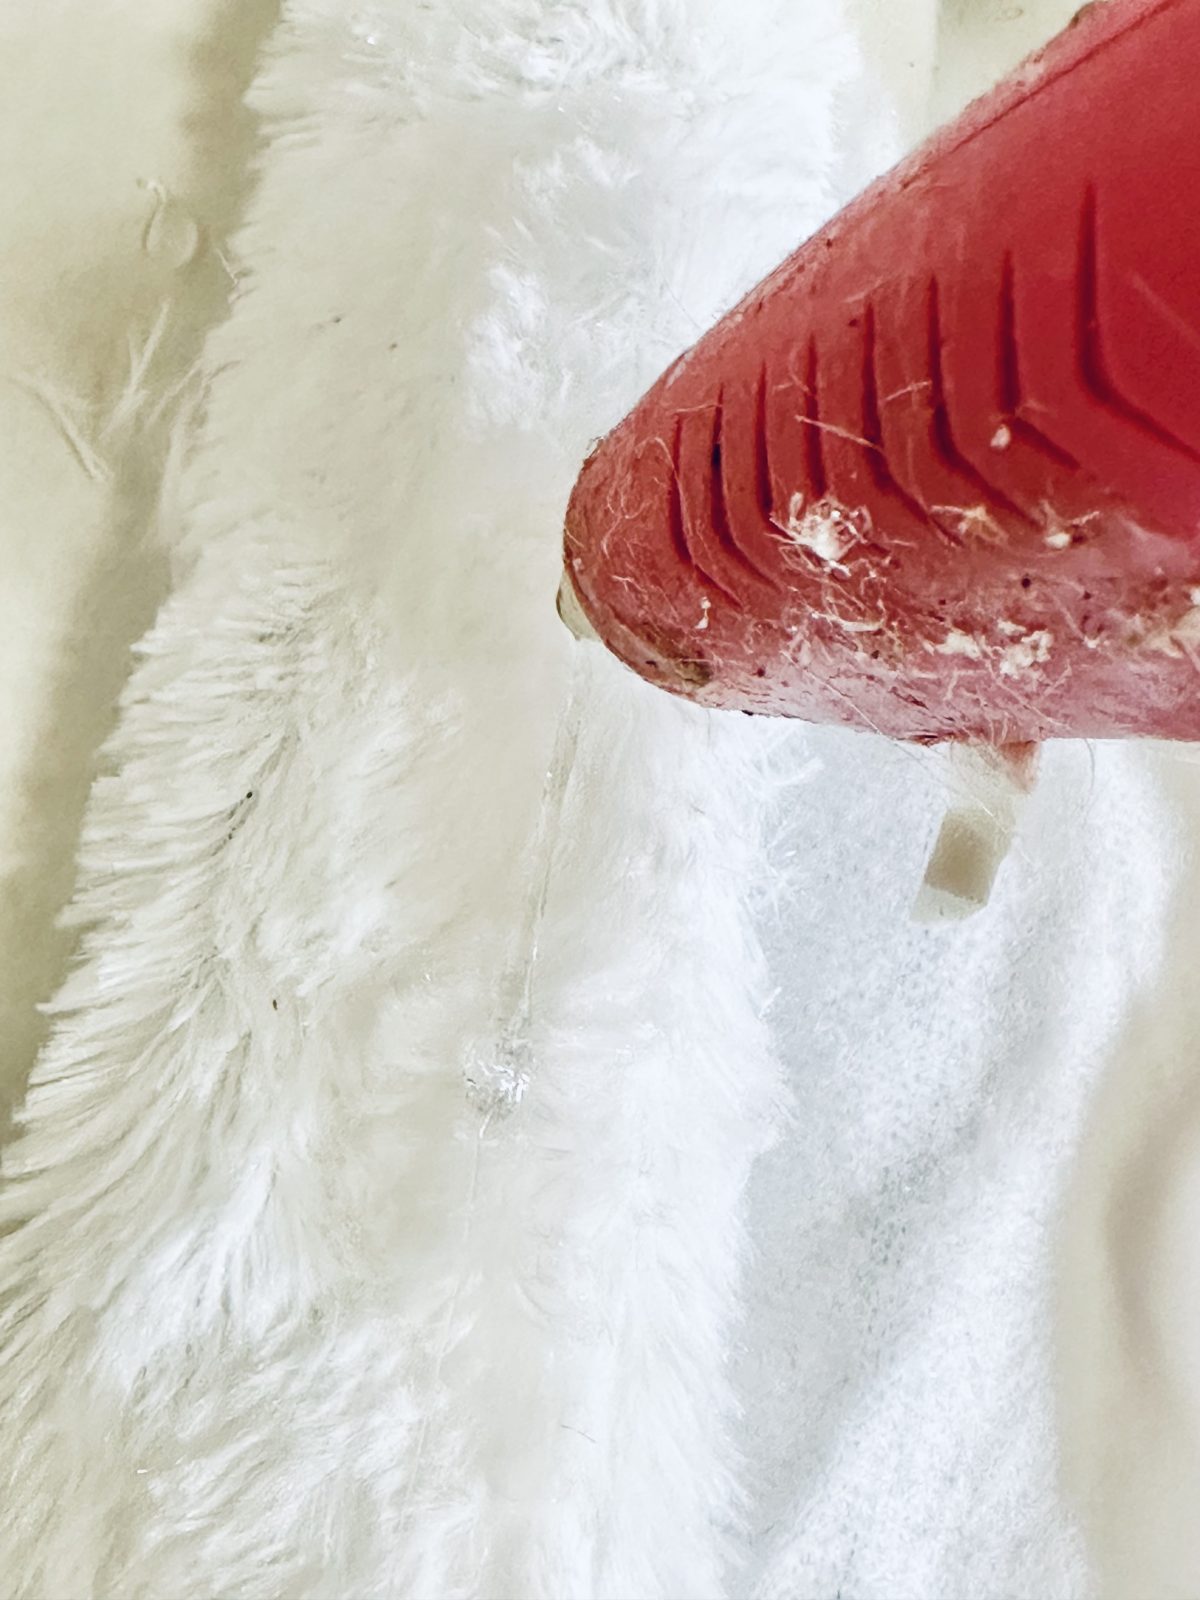
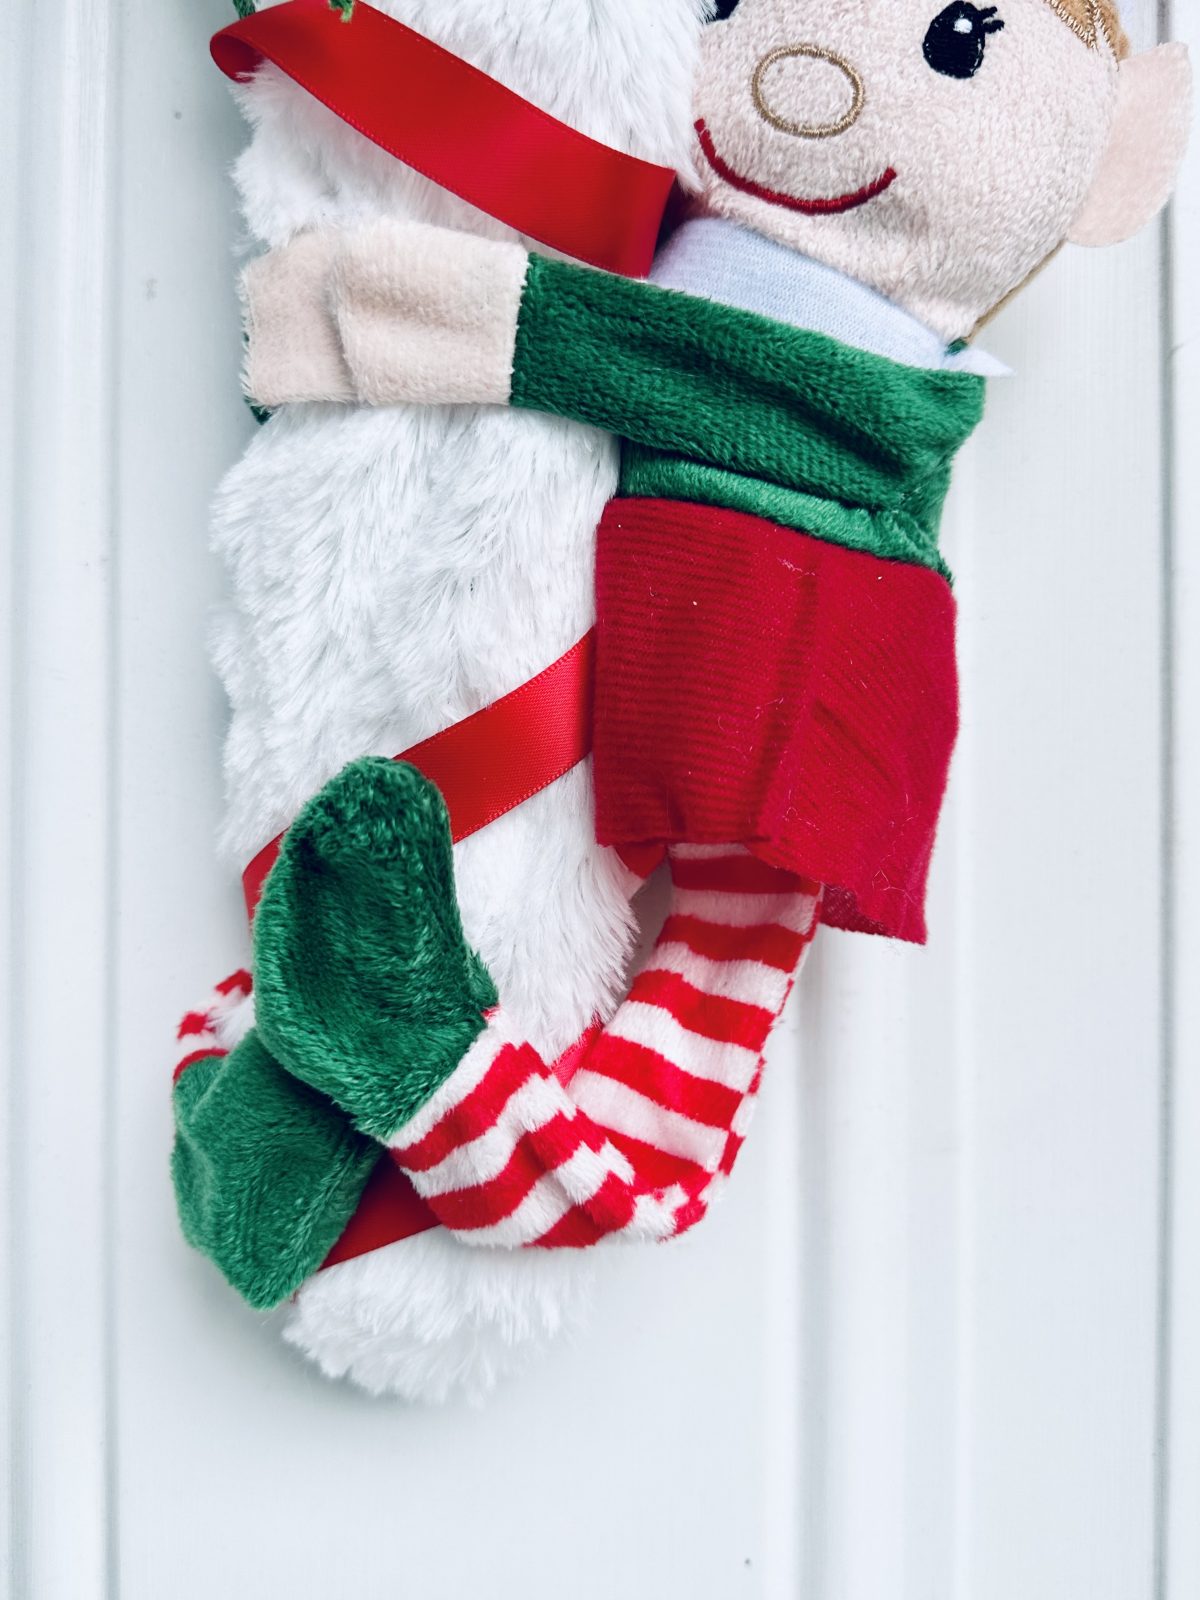
Next pull the excess fabric to the backside of the wreath form and hot glue so that the front side is flush against the wreath form. You could trim the excess material but I found it easier to fold it over and hot glue it. Once you cut the faux fur it starts to come off and fly everywhere.
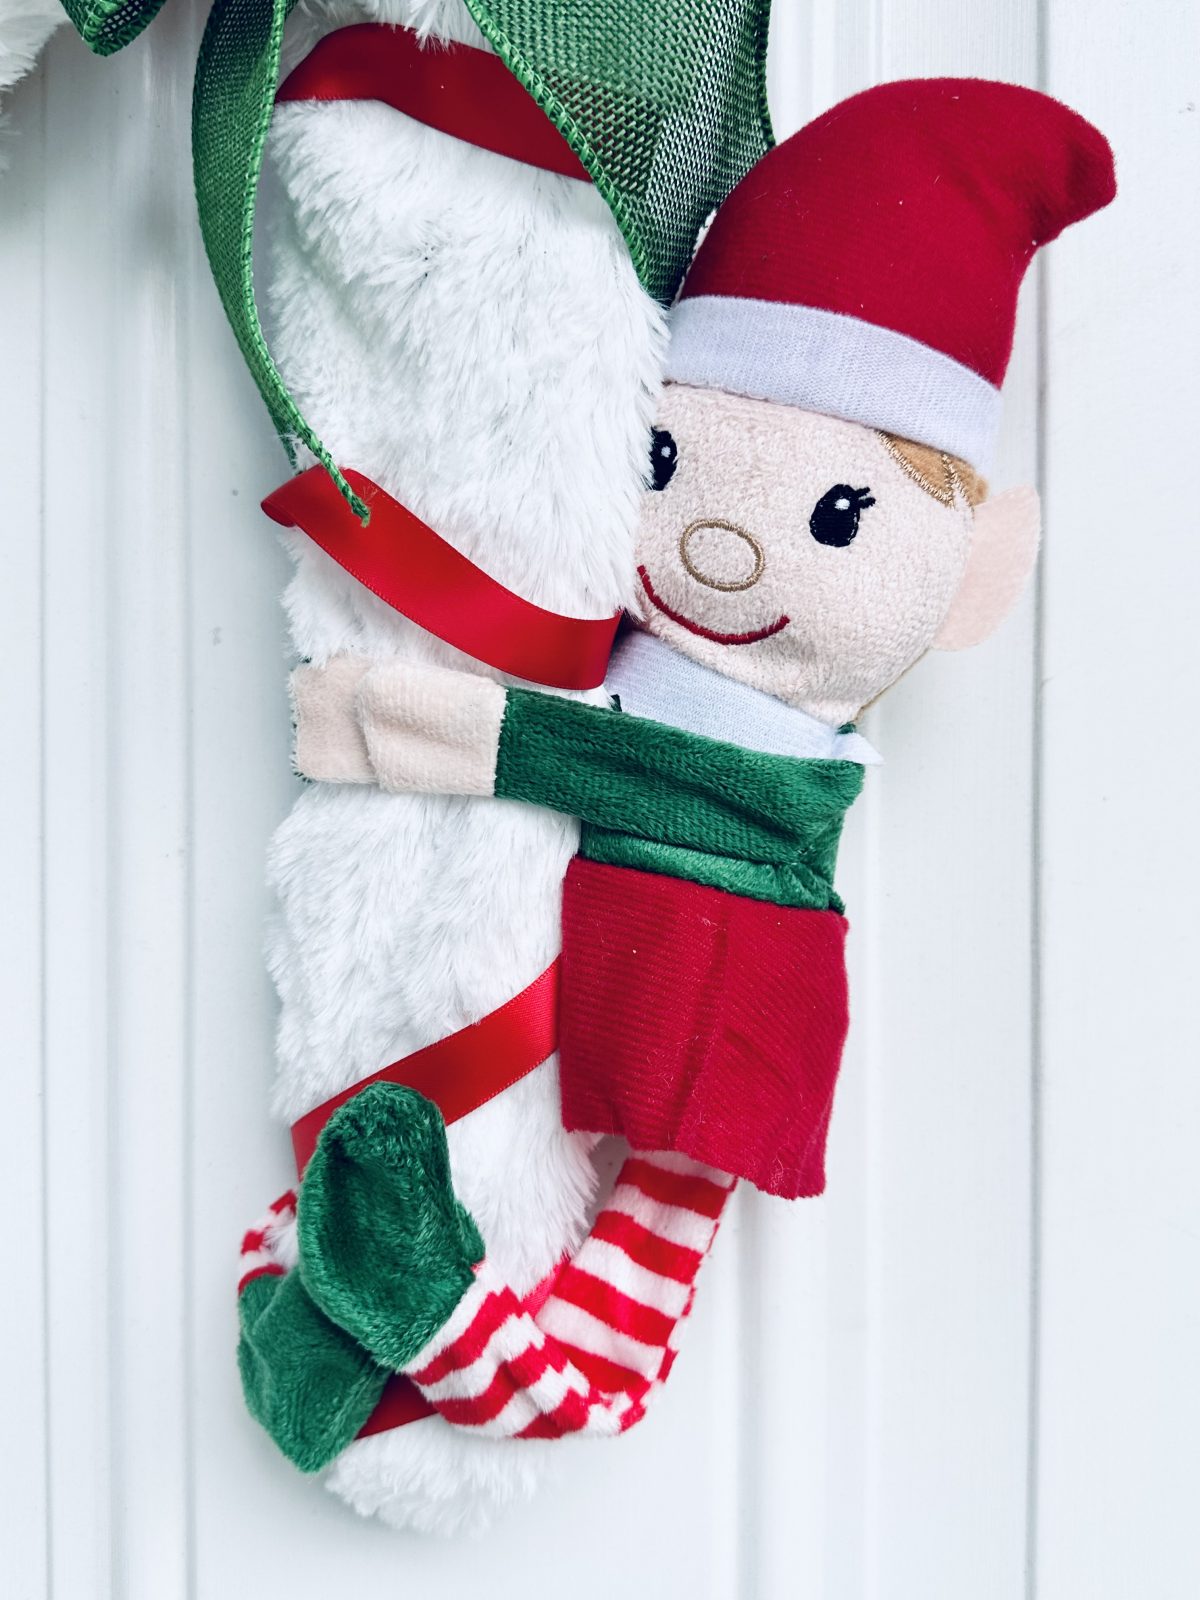
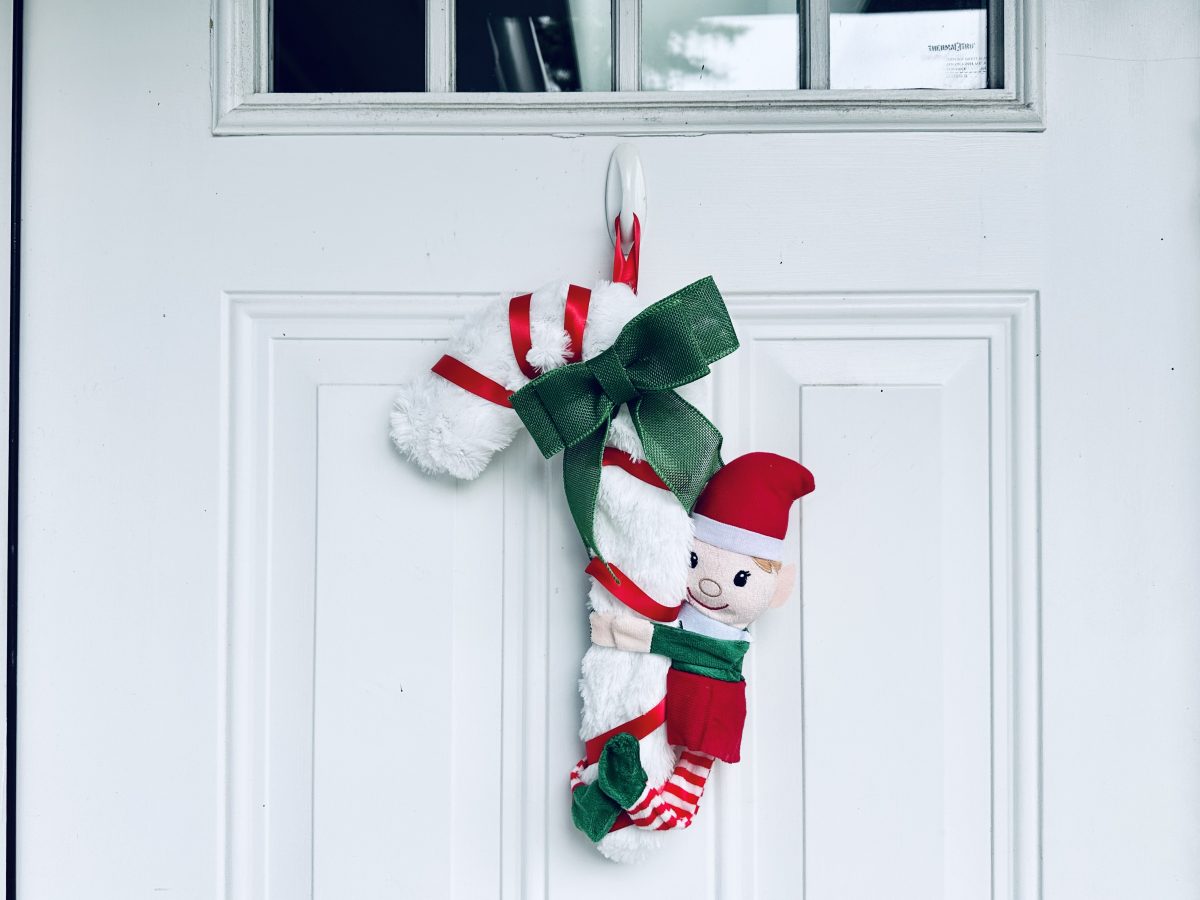
Next, you can attach the little elf to the candy cane wreath form using hot glue. Start by applying hot glue to join the elf’s hands together. Then, secure the elf’s feet to the wreath form by applying hot glue to ensure a stable attachment. If you want the elf to maintain a forward-looking position, you can add a small dab of glue to the head to help it stay in place. This step brings your adorable elf character to life on the candy cane wreath.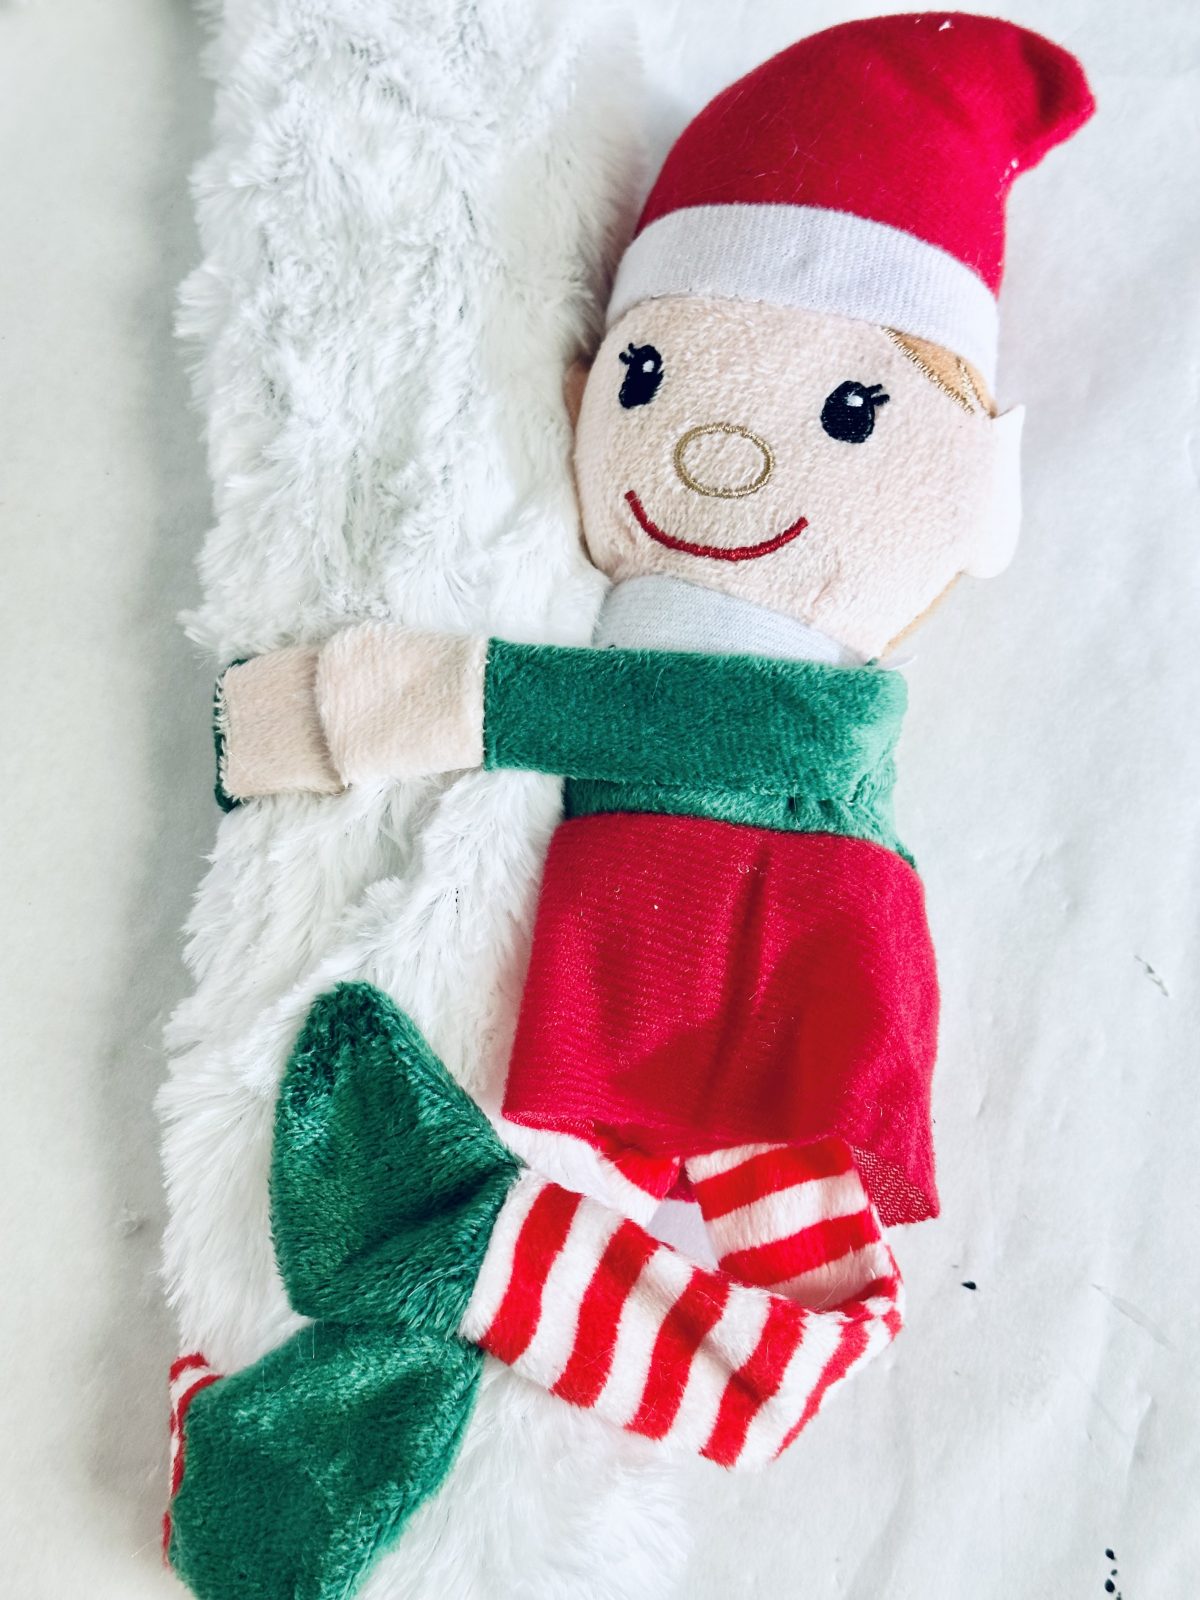
Now, let’s create a charming bow using the green burlap ribbon. Follow these steps to craft the bow:
HOW TO MAKE A BOW
Start by folding the ribbon into thirds and pinching the center section to create a bow-like shape.
Cut a longer piece of ribbon, repeating the same process to form a second, identical bow. Place the two bows on top of each other with the pinched sections aligned.
Take a small piece of ribbon and fold it widthwise into thirds. Apply glue to this folded piece and secure it over the middle section where you’ve pinched the two bows together. This will create the central part of the bow.
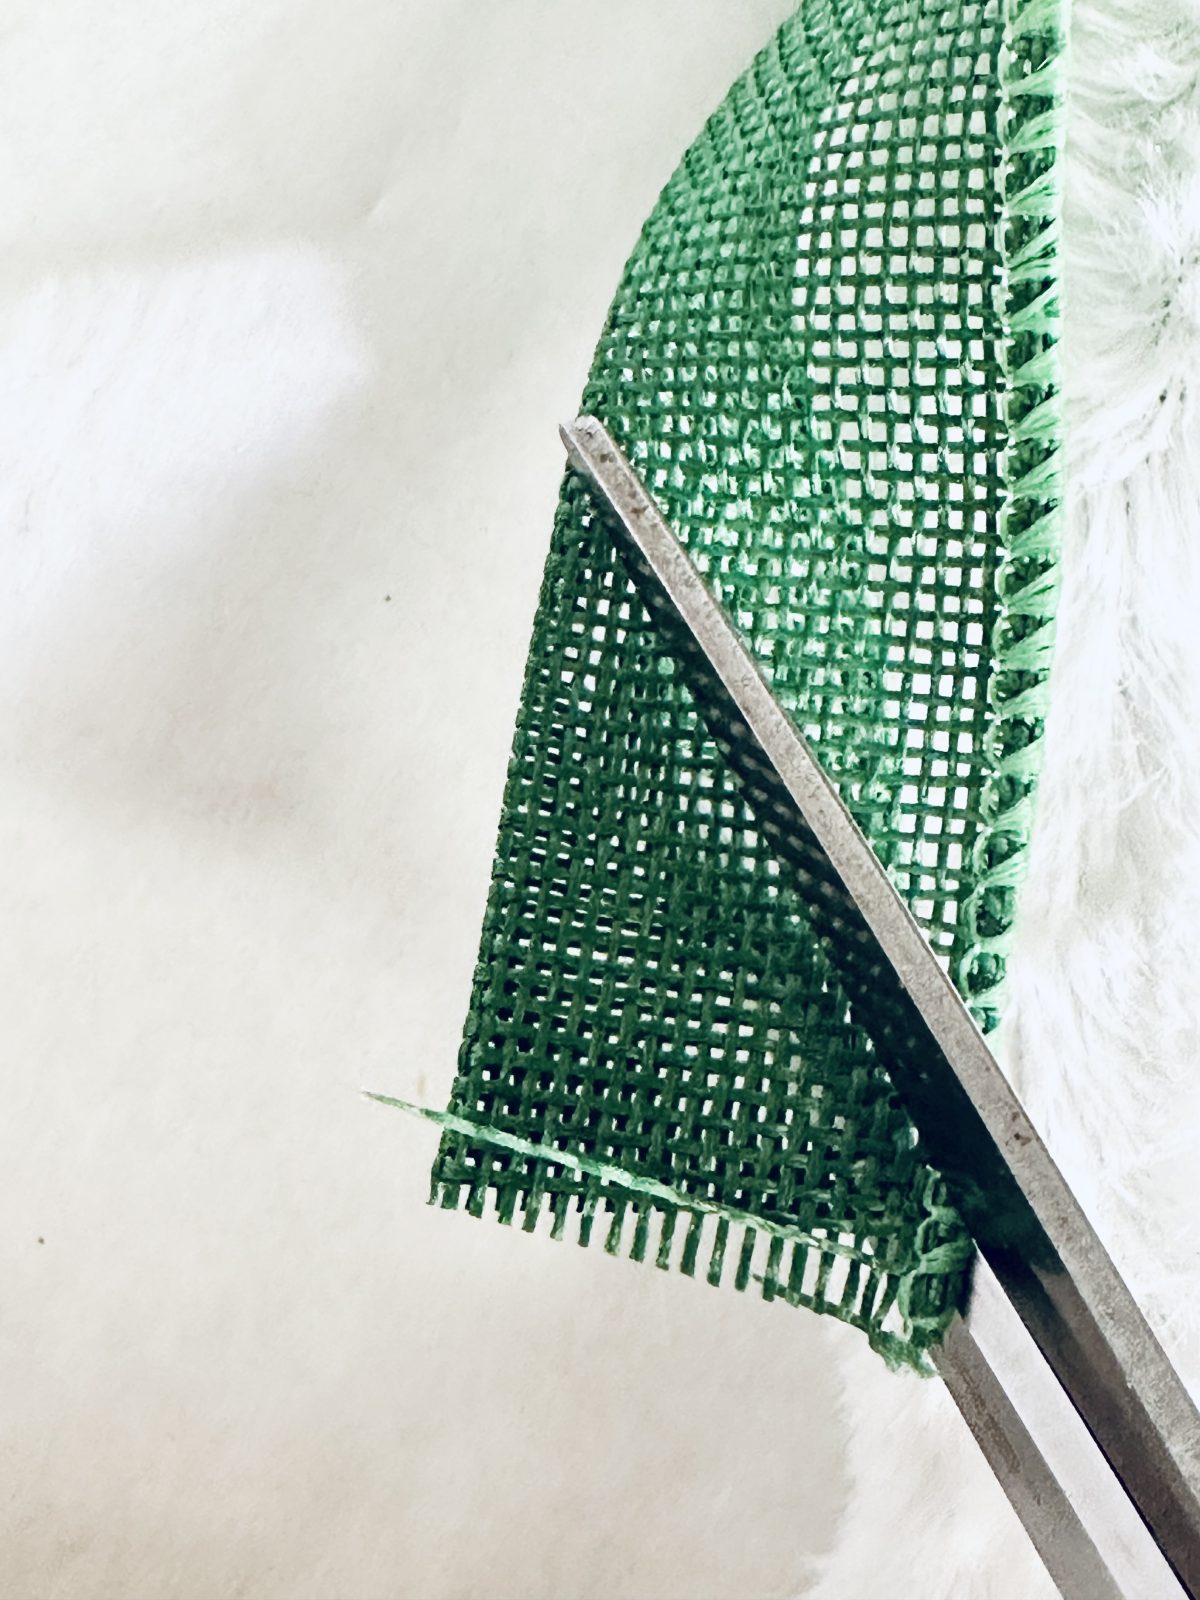
Cut another piece of ribbon and attach it to the backside of the bow to make the tails. Trim the ribbon ends to create a dovetail design, giving your bow a polished finish.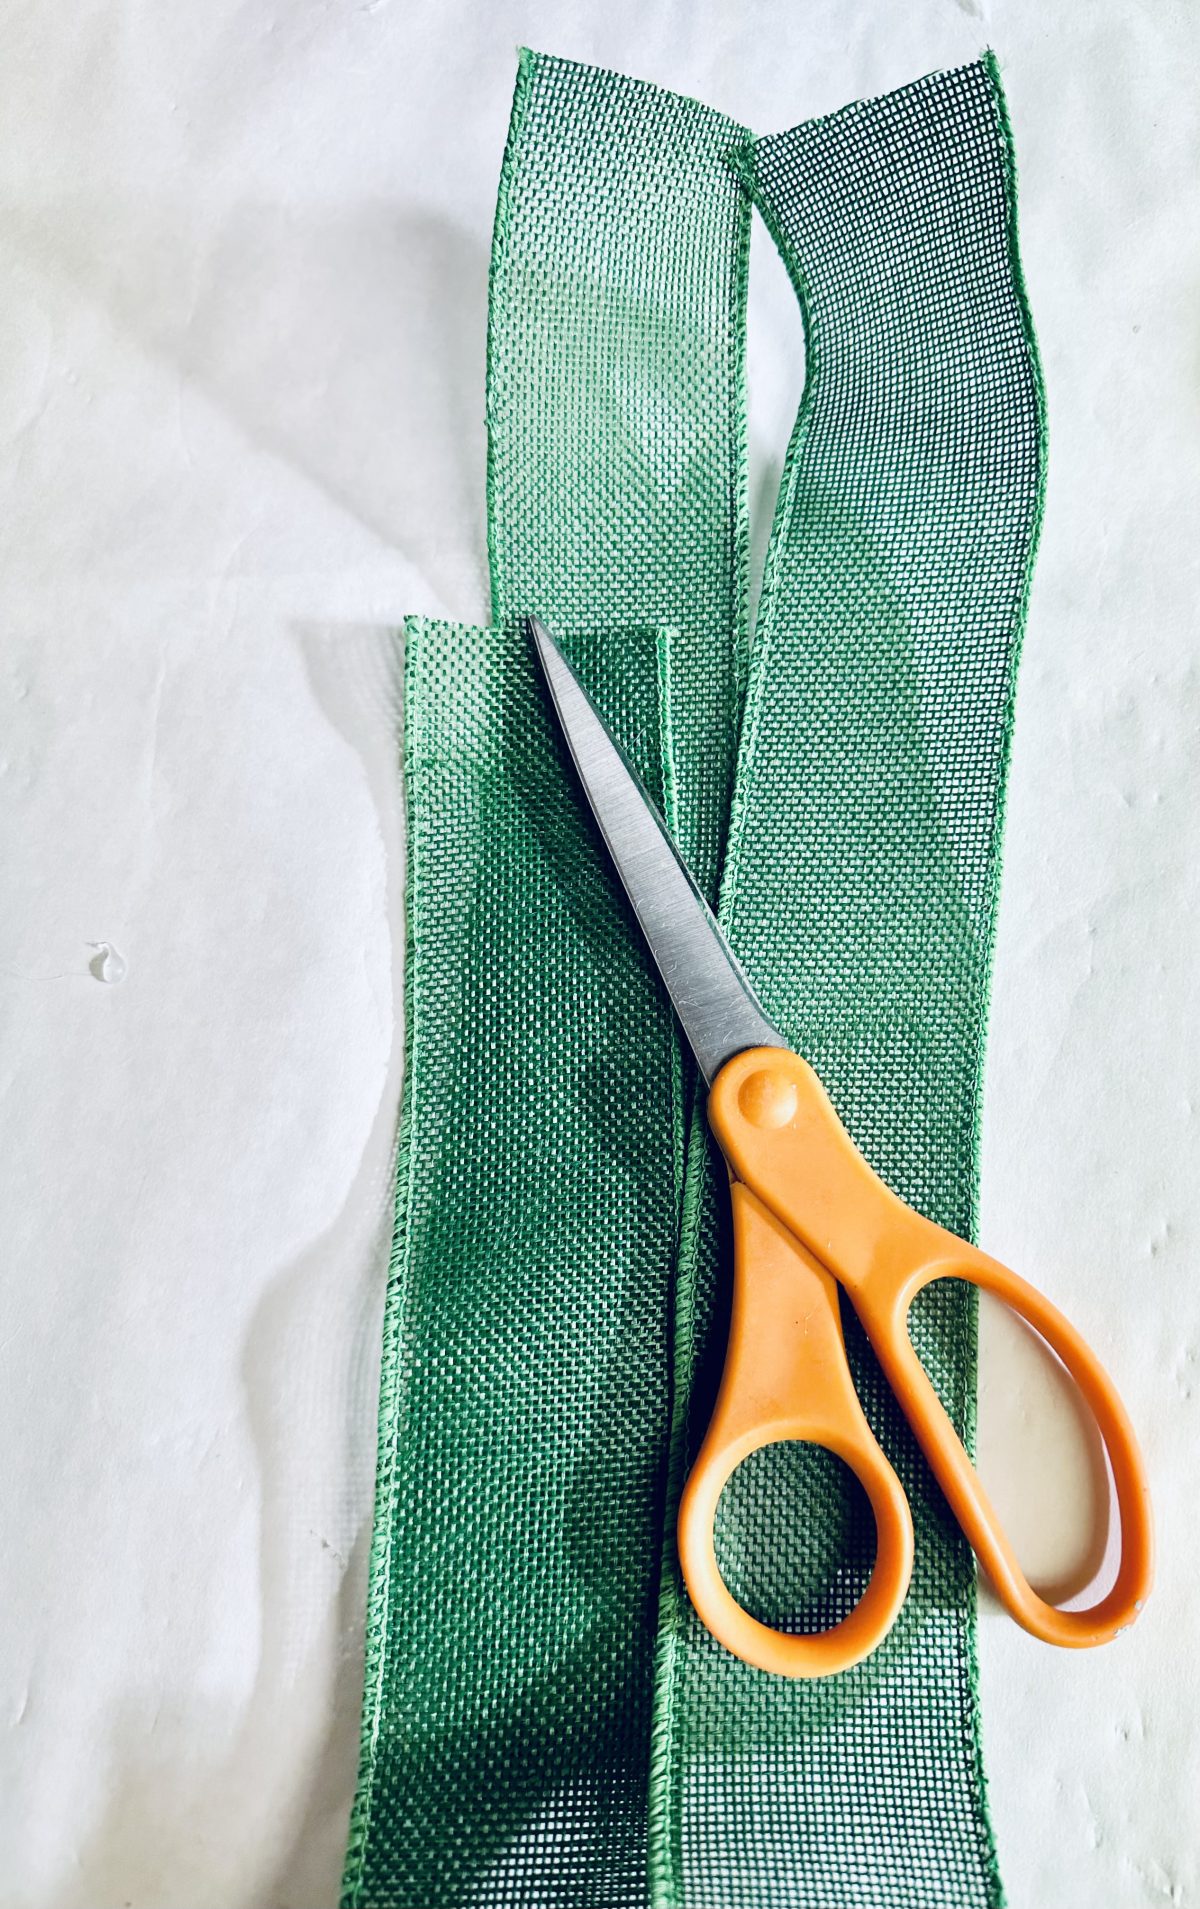
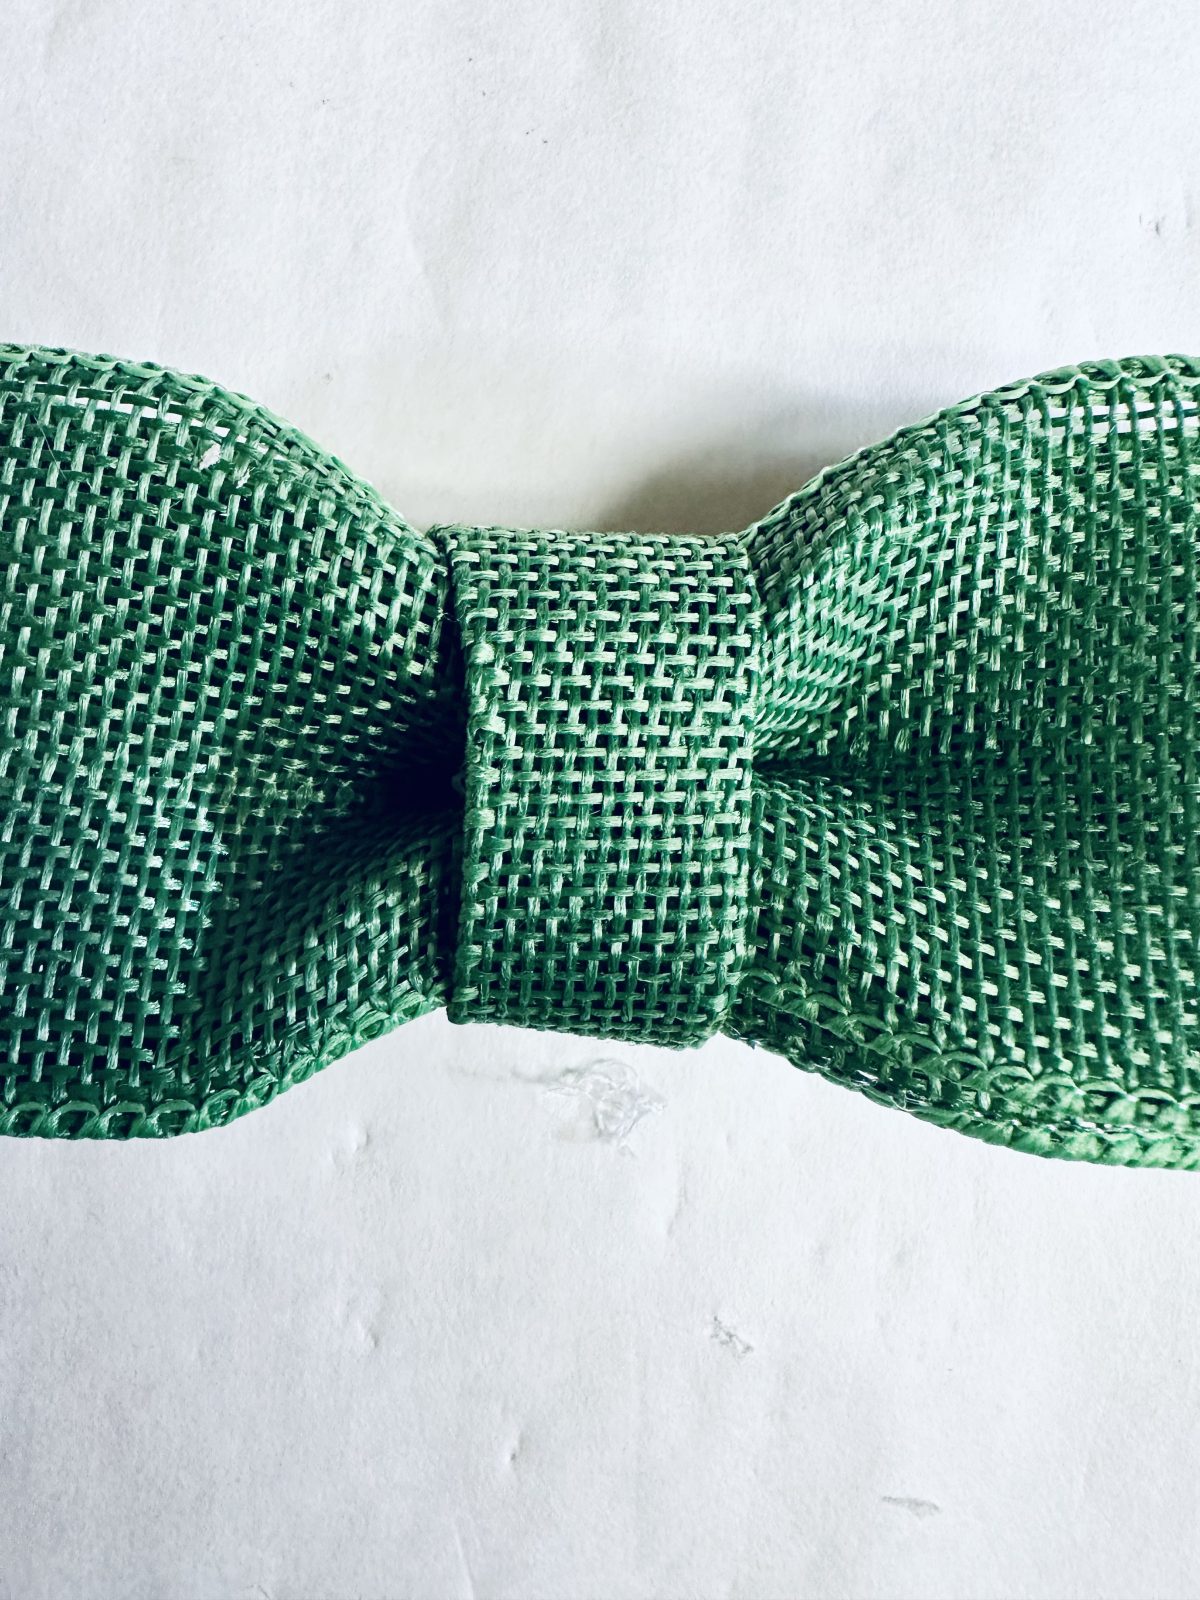
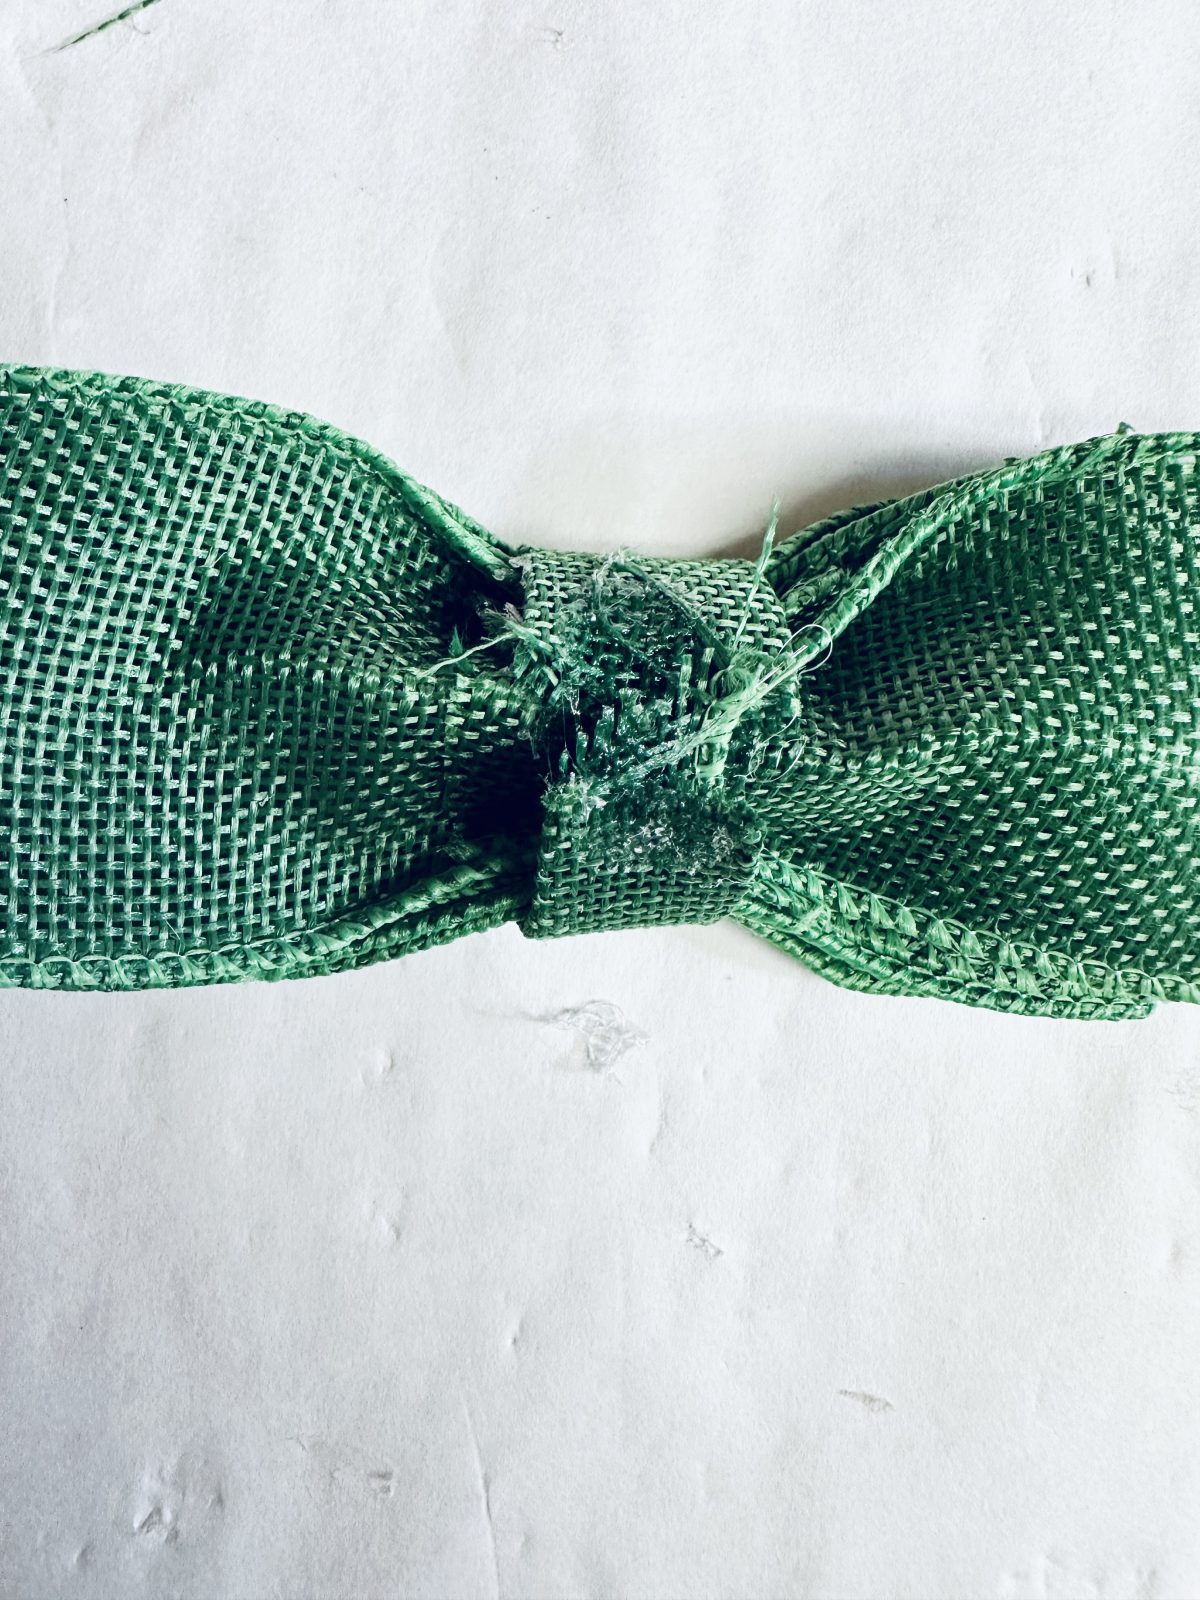
Your handmade burlap bow will add a lovely touch to your candy cane wreath, bringing a touch of elegance to the holiday decor.
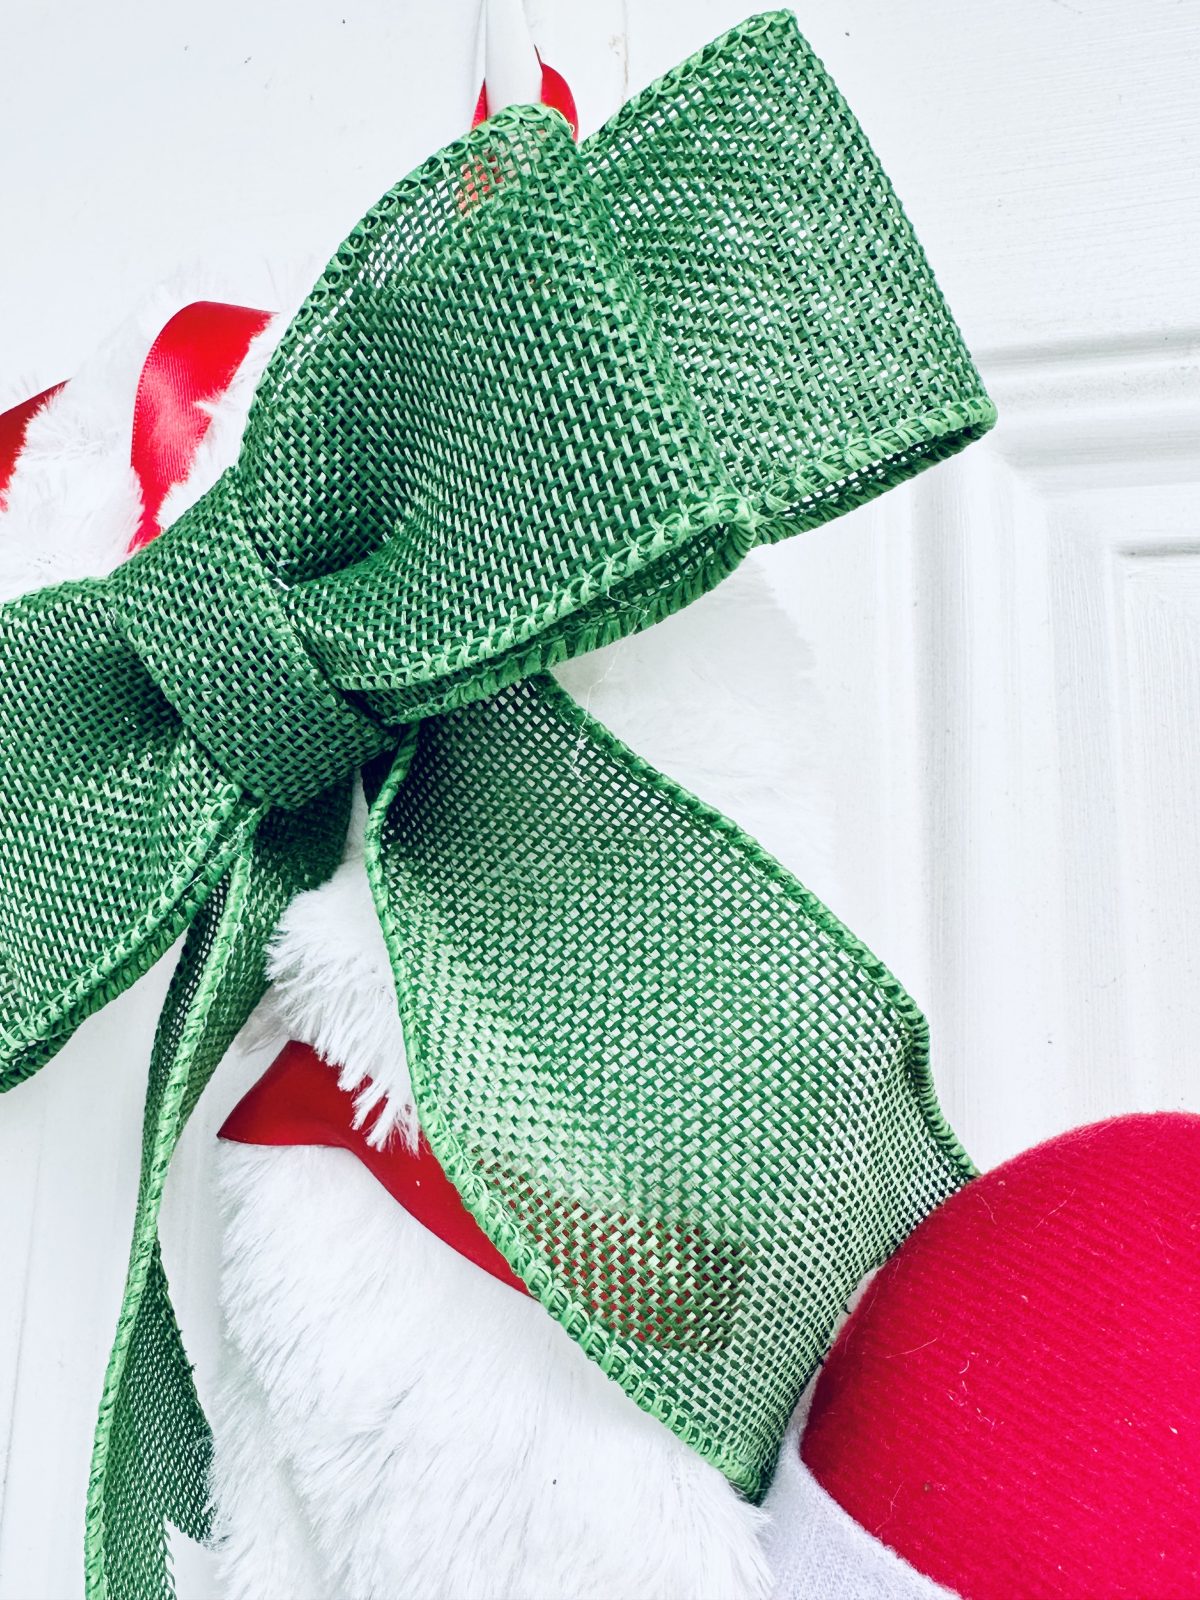
Hot glue the bow to the wreath. I glued it almost at the top of the curve.
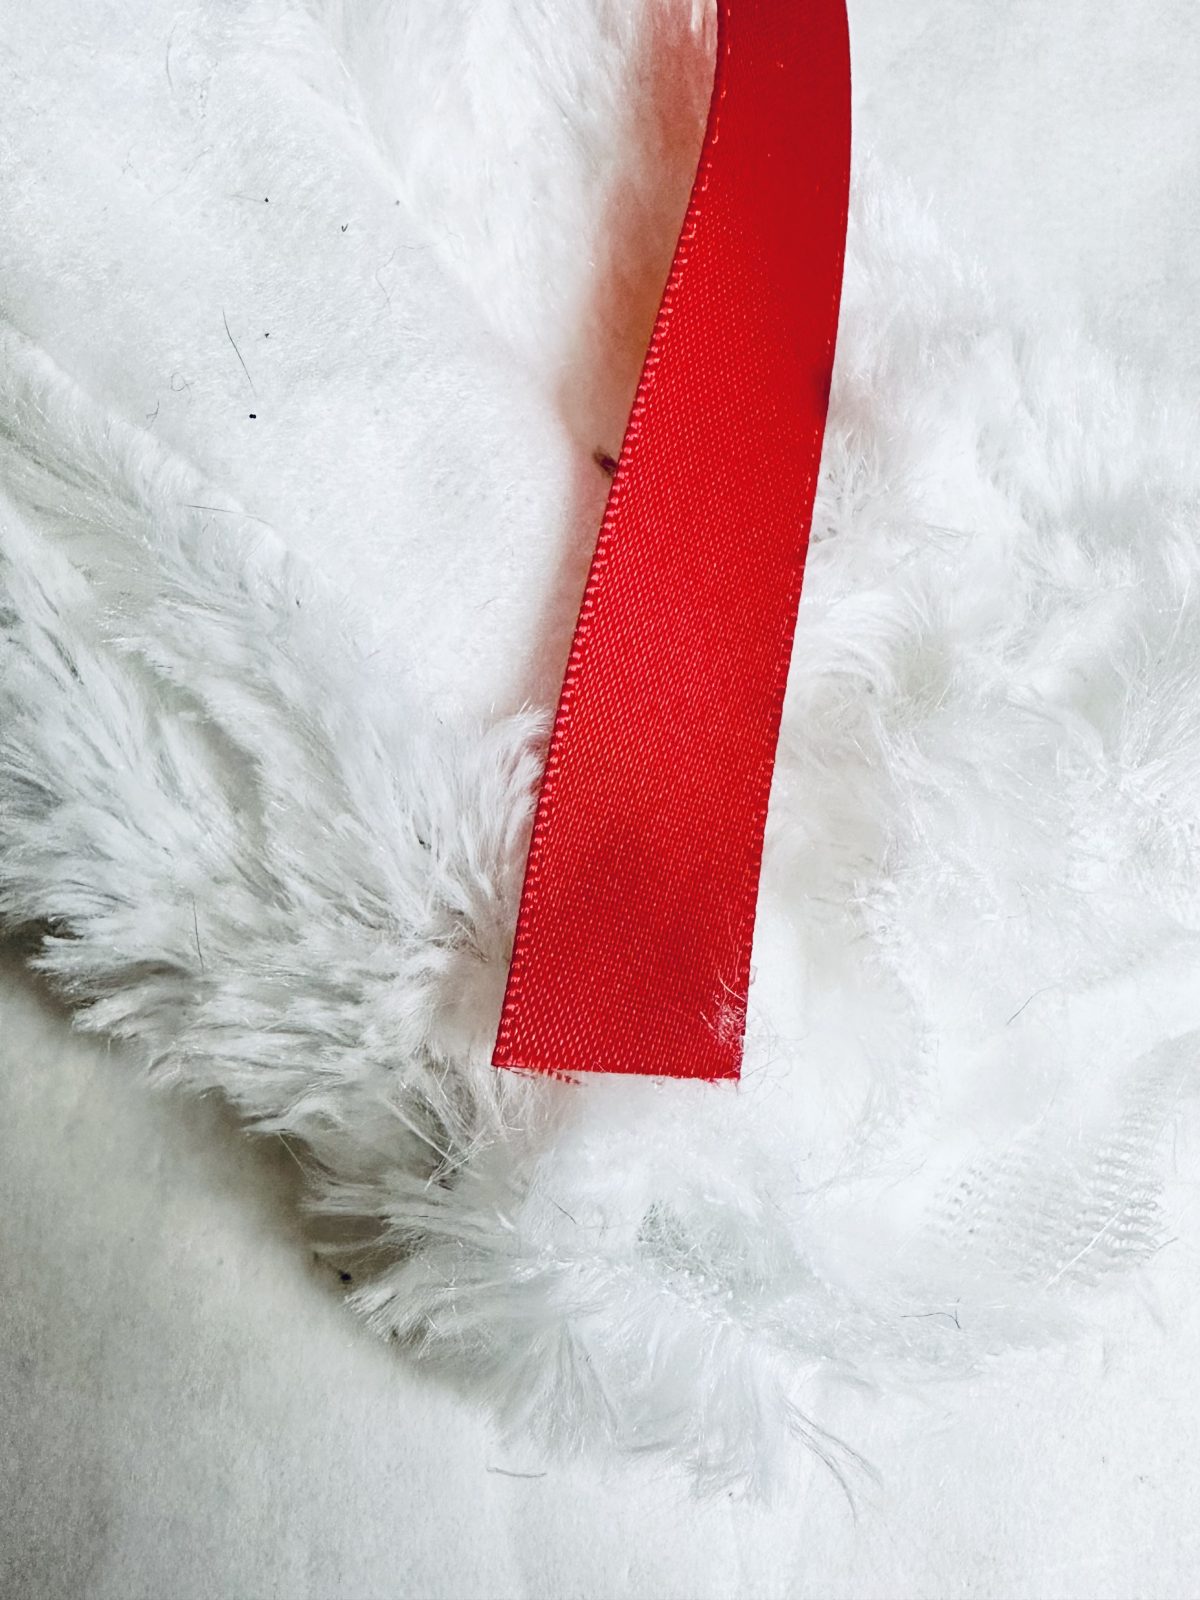
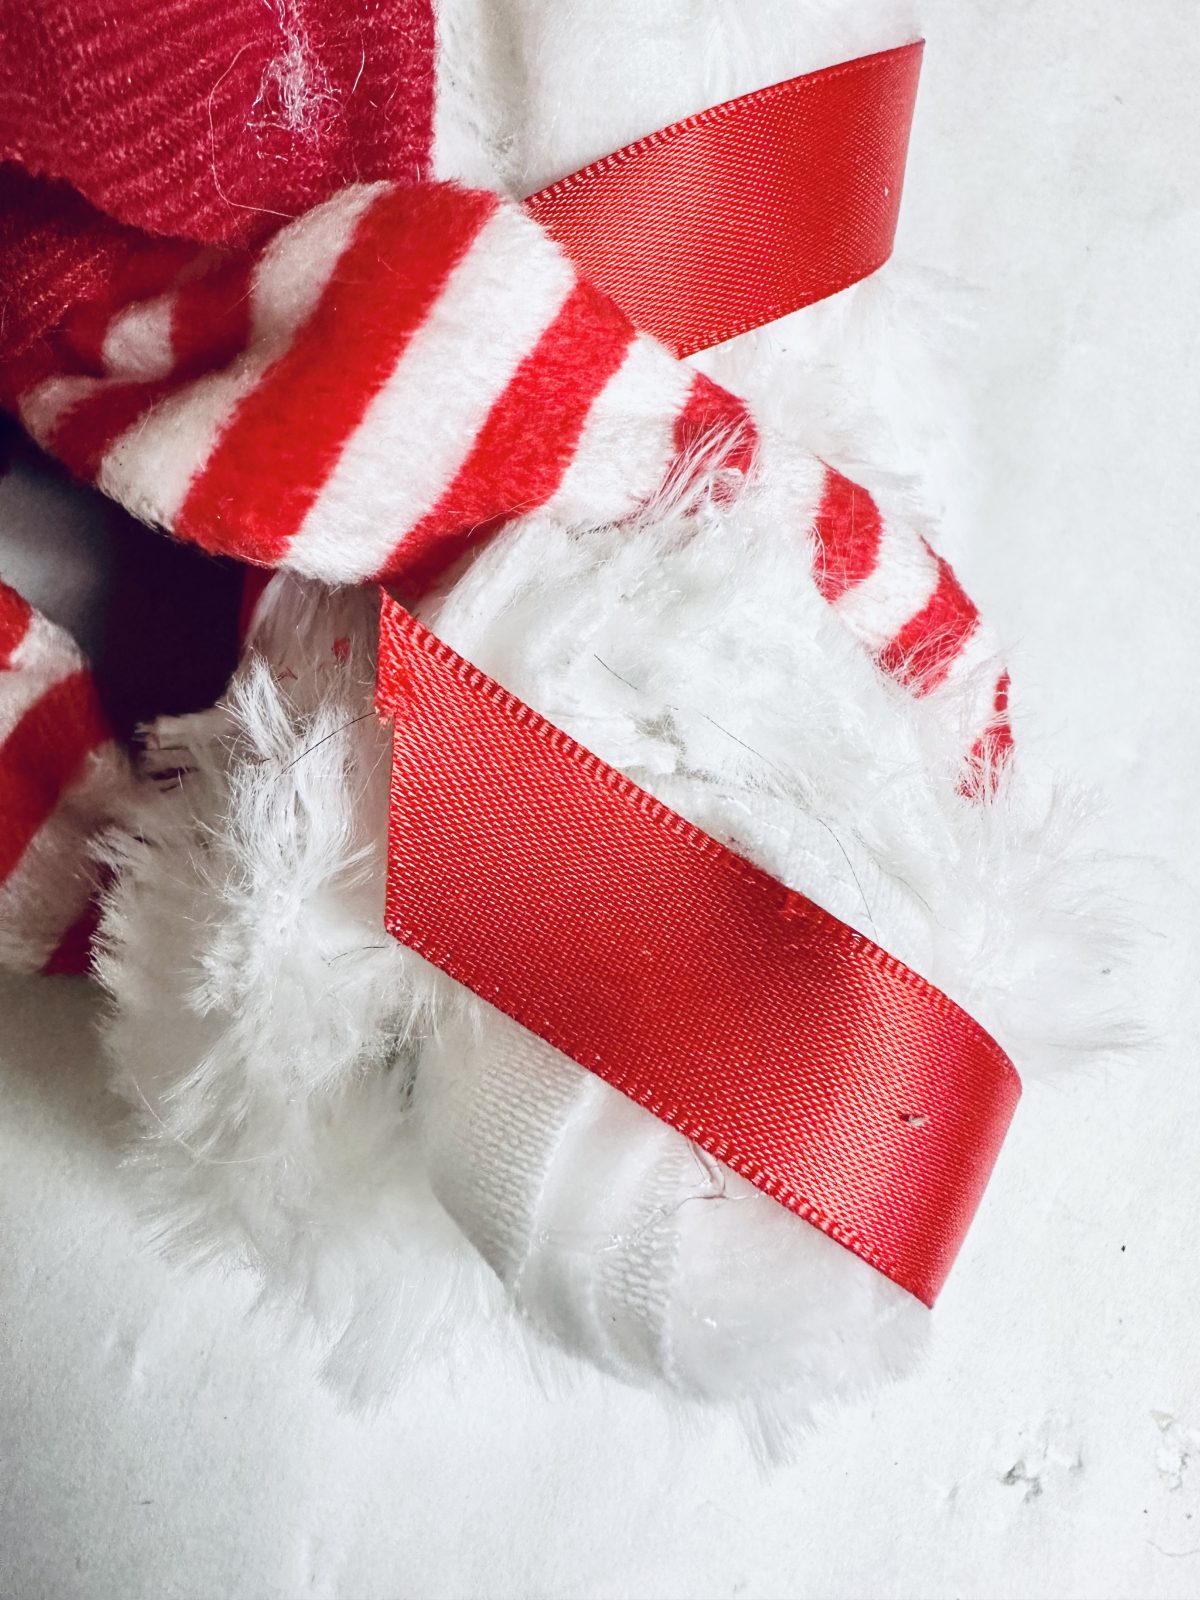
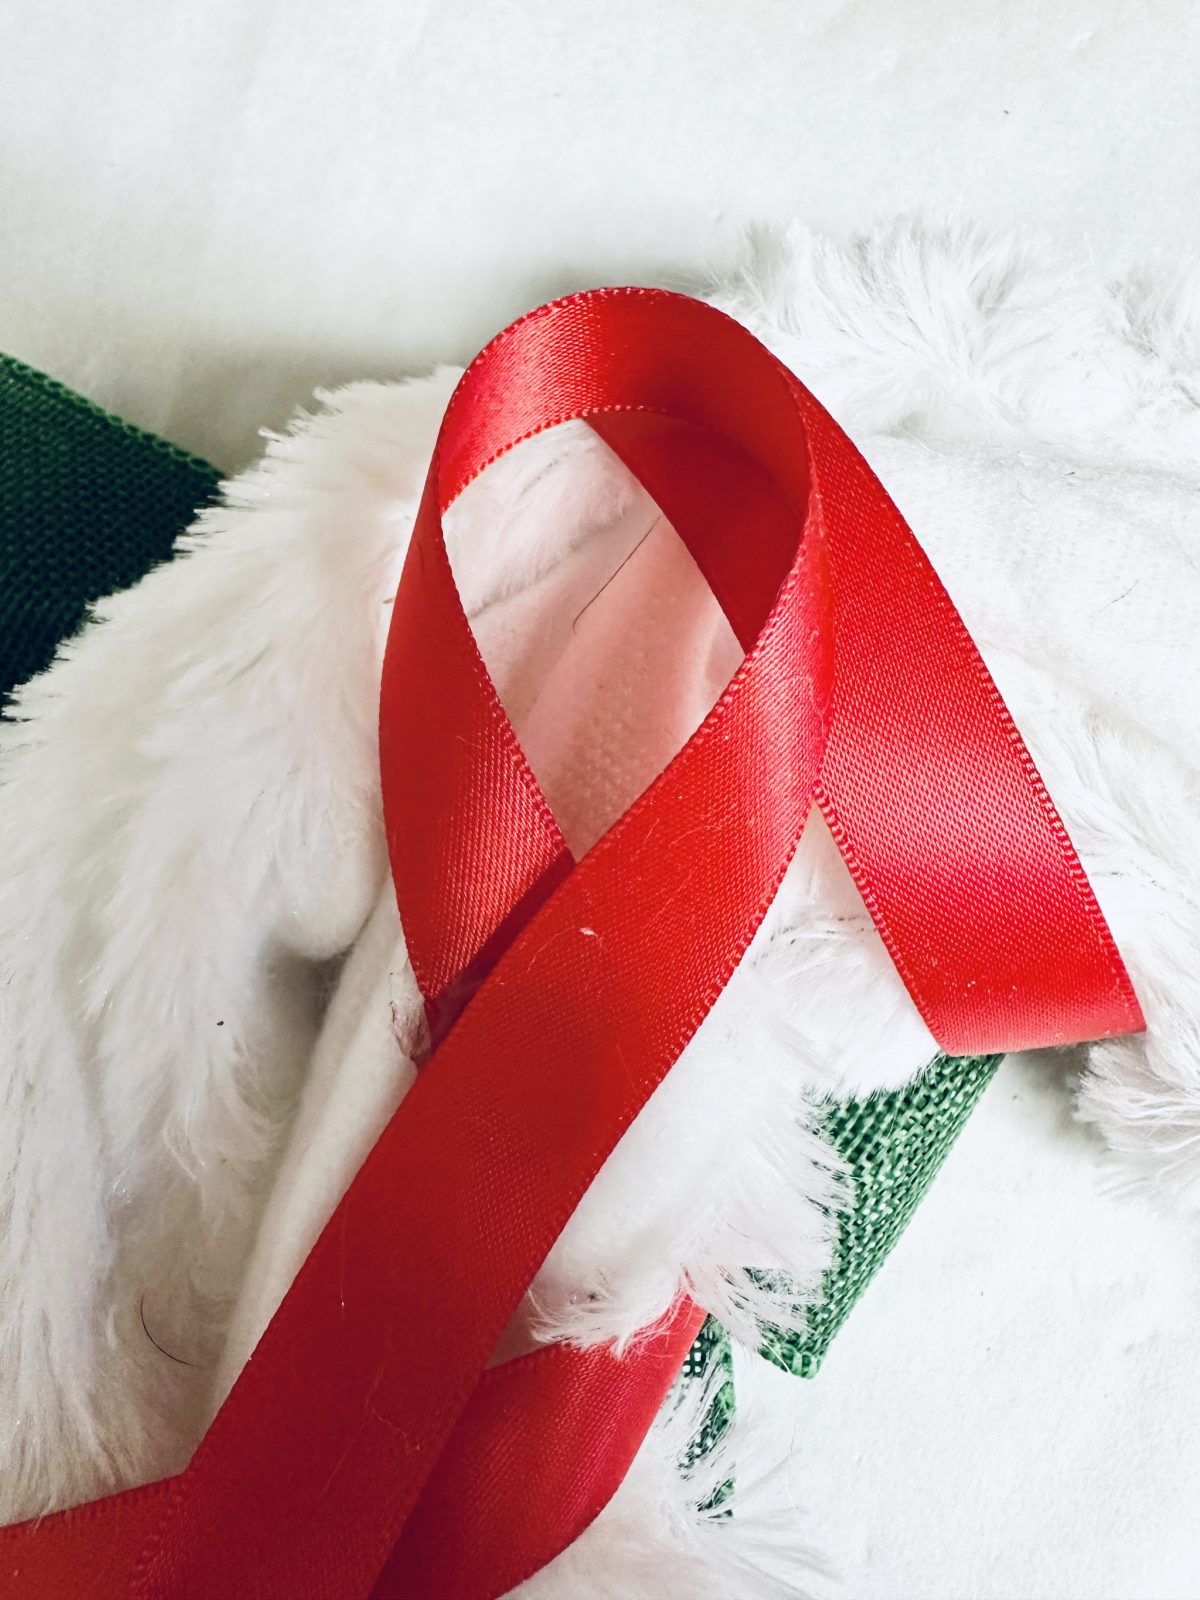
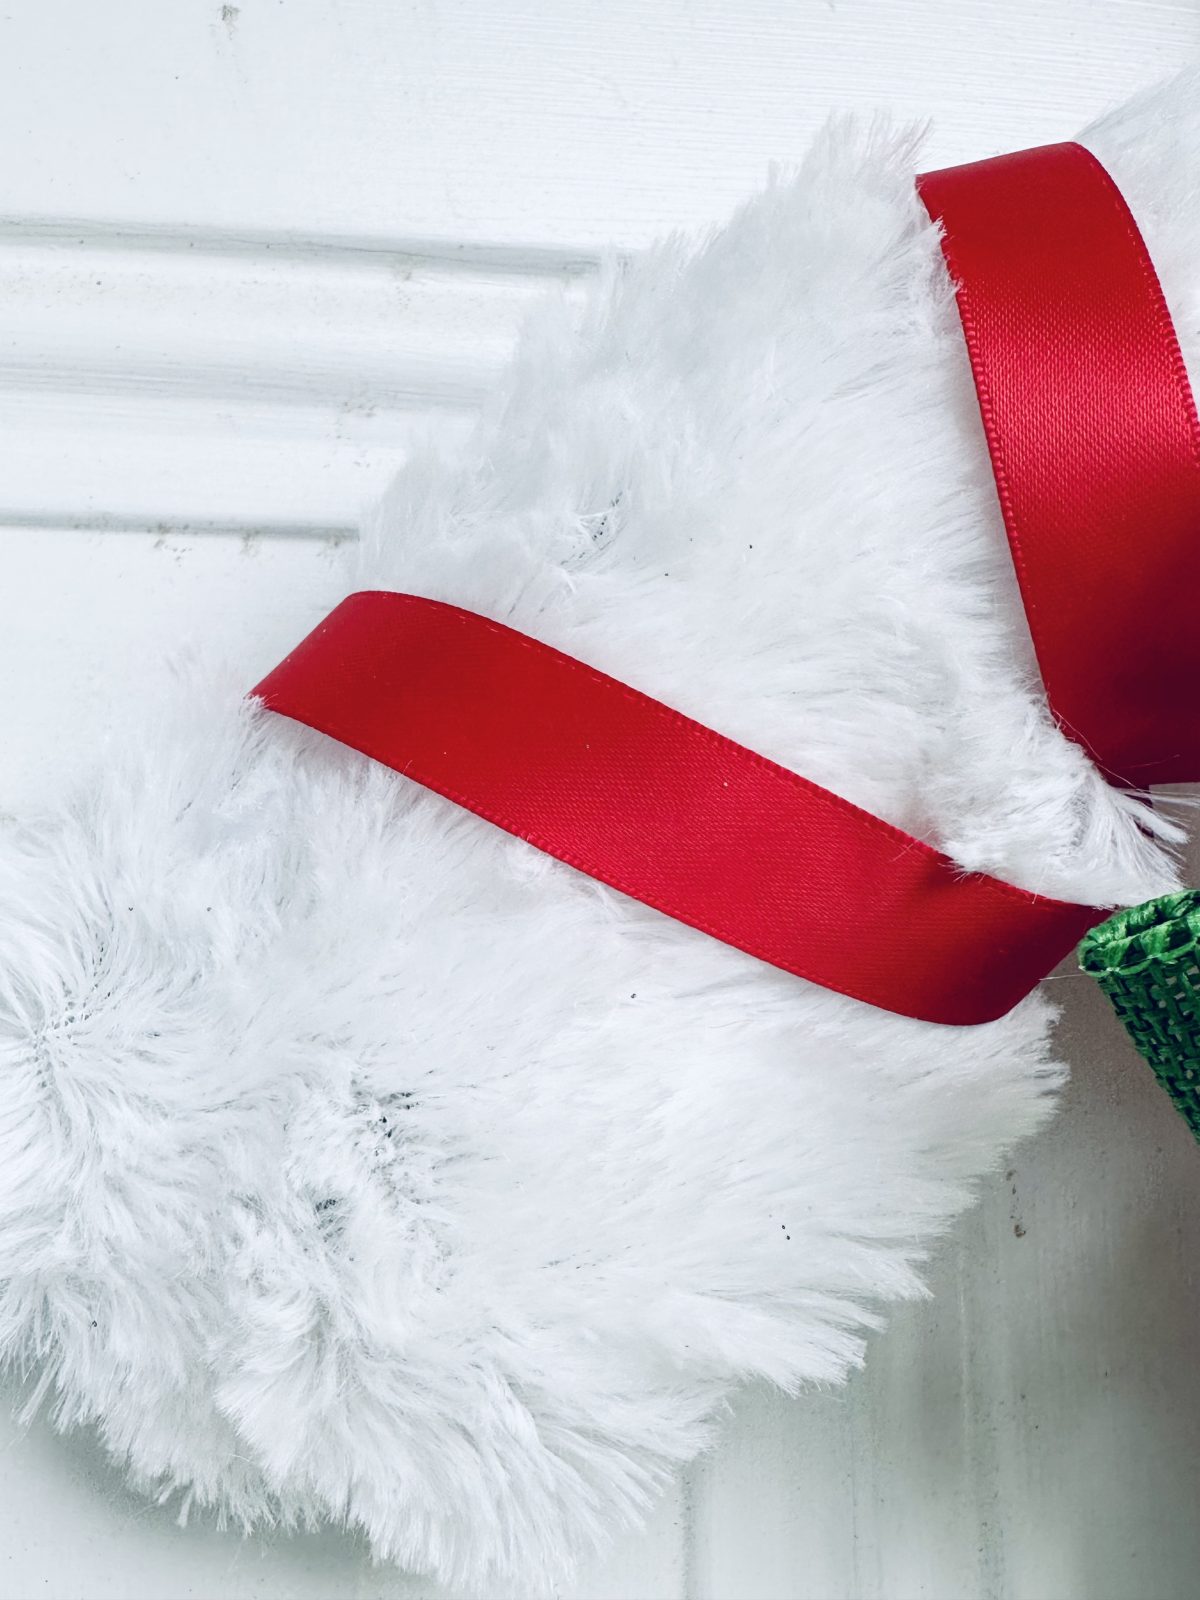
I then added some red ribbon to make it look more like a candy cane. I started by adding some hot glue to the backside of the wreath and adding the ribbon on top. I then wrapped the ribbon around the wreath form adding dabs of glue as I went around the candy cane. I cut a small piece of ribbon to make a loop in the back so that the wreath could hang properly.

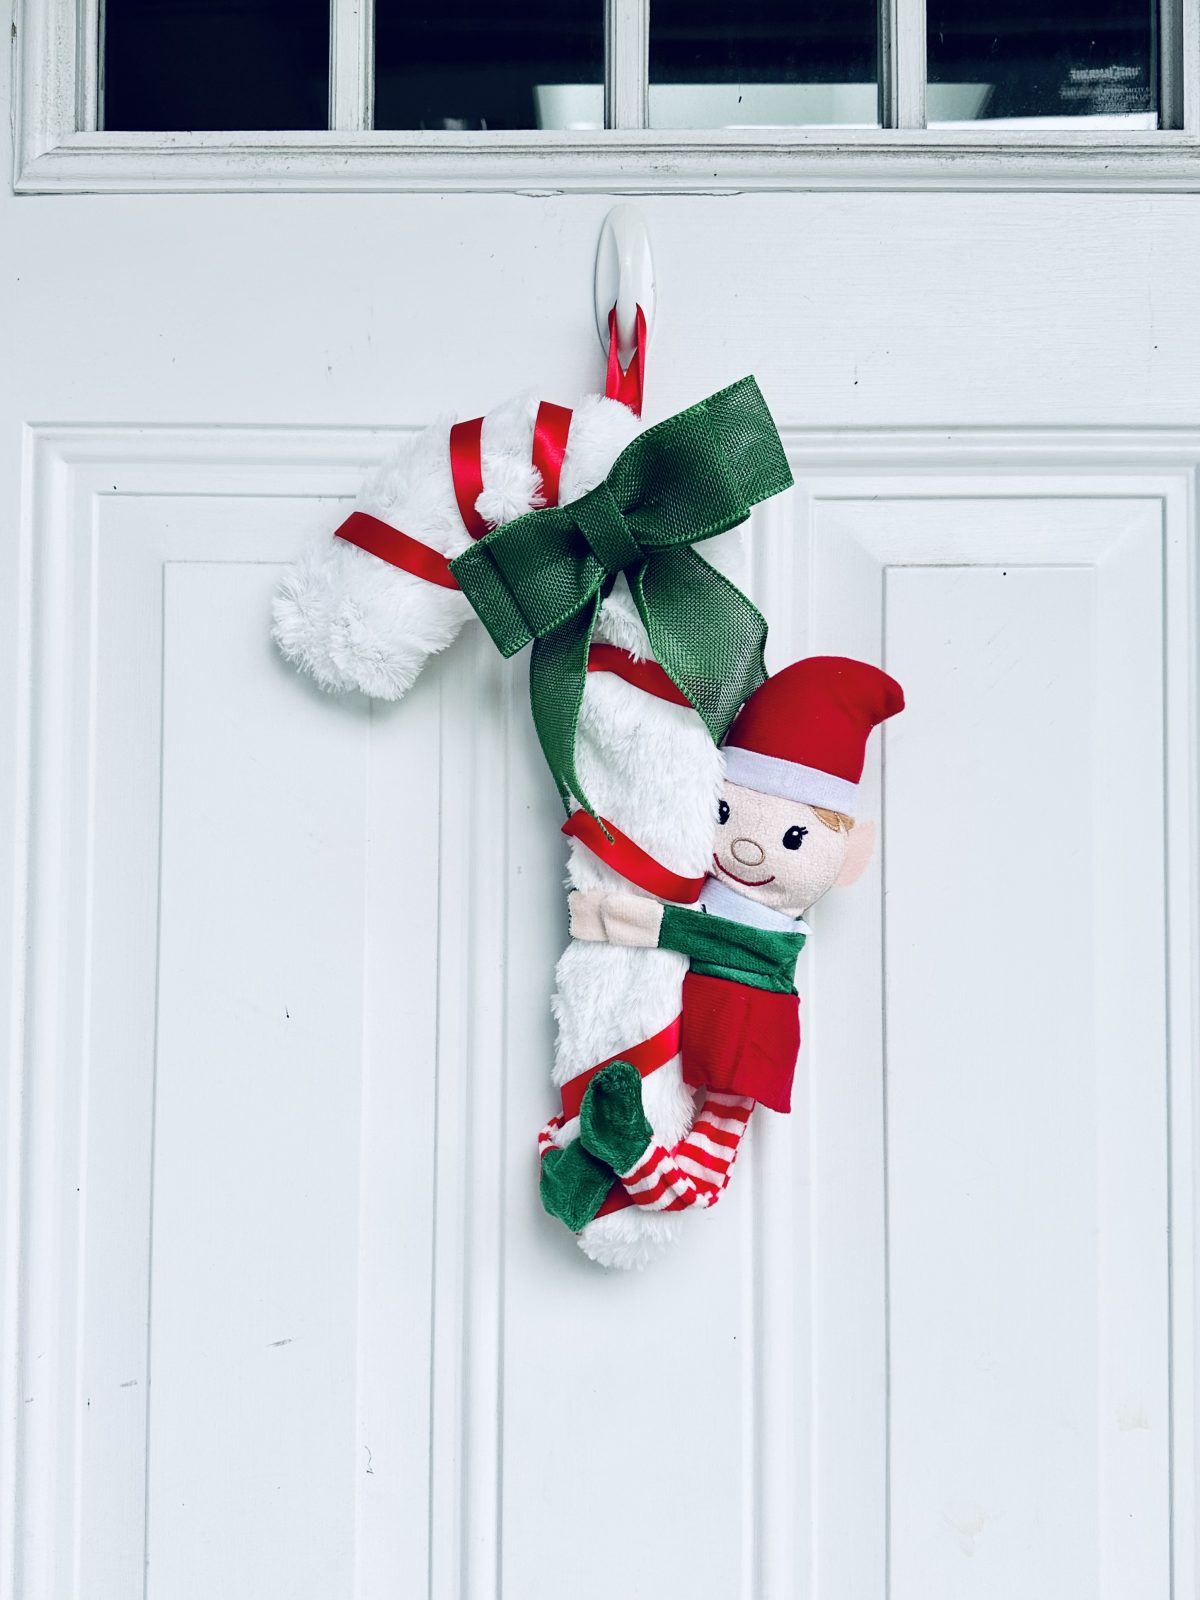


What do you think of this project? Let us know!