
Get more details about this project
What you need
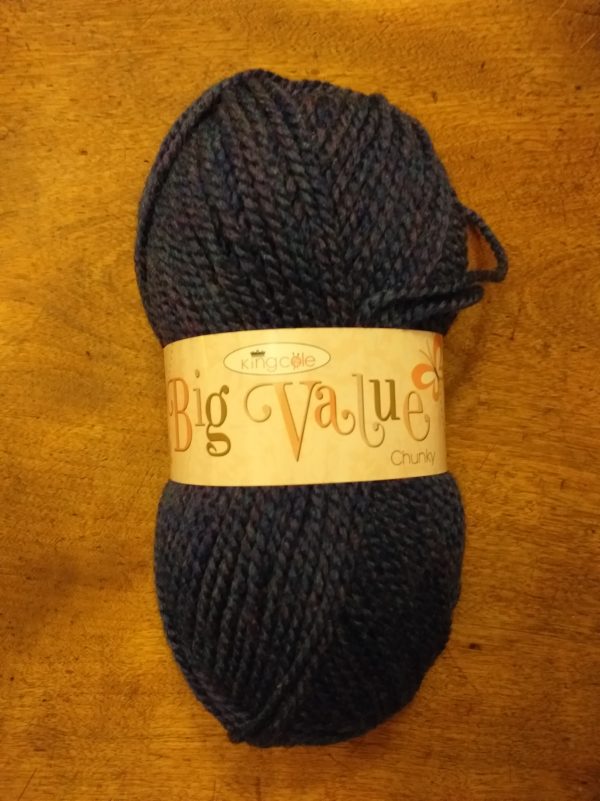
2 x balls of Patons “Chunky” wool
1 pair of 6 US (8 UK) (4mm metric)needles
1 pair of 2 US (11 UK) (3mm metric) needles
Stiffening for peak
1 darning needle
Instructions
— ORIGINAL VINTAGE PATTERN —
TENSION -15 sts. to 10 cm
Using No. 11 (8mm) Needles, cast on 67 sts with Patons Chunky wool
1st row- K.2, * P.1, K.1, rep. from * to last st., K.1.
2nd row-K.1, * P.1, K.1, rep. from * to end.
Rep. 1st and 2nd rows twice, then 1st row once
8th row-Rib 2, * inc. in next st., rib 4. rep. from * to end … 80 sts.
Change to No. 8 (4mm) Needles
1st row- P.3, * y.o.n.. K.3. sl.1. K.2 tog., p.s.s.o. K.3, y.r.n.. P.4. rep. from * ending last rep. P.3
2nd and alt. rows-K.3. * P.9. K 4. rep. from * ending last rep. K.3.
3rd row – P.3. * K.1. y.fwd . K.2, sl.1. K.2 tog., p.s.s.o..
K.2. y.fwd . K.1, P.4. rep. from * ending last rep. P.3.
5th row- P.3, * K.2, y.fwd.. K.1, sl.1, K.2 tog., p.s.s.o.,
K.1. y.fwd.. K.2. P.4, rep. from * ending last rep. P.3.
7th row- P.3, * K.3. y.fwd., sl.1, K.2 tog., p.s.s.o., y.fwd.,
K.3, P.4, rep. from * ending last rep. P.3.
8th row- As 2nd row.
Rep. rows 1 to 8 incl. twice, then 1st and 2nd rows
once.
Shape crown
1st row-P.2 tog., * P.1, patt. 9, P.1, P.2 tog., rep. from * to end.
2nd row-K.2, * P.9, K.3, rep. from * ending last rep. K.2.
3rd row- P.2. * patt. 9, P.2 tog., P.1, rep. from * to last 11 sts., patt. 9, P.2.
4th row- K.2, * P.9, K.2, rep. from * to end.
5th row- P.2 tog., * patt. 9, P.2 tog., rep. from * to end.
6th row- K.1, * P.9, K.1, rep. from * to end.
7th row- P.1, * (K.3 tog.) 3 times, P.1, rep. from * to end.
8th row- (P.2 tog.) 12 times, P.1.
Break off yarn, run end through rem. sts., draw up and fasten off securely.
PEAK
Using No. 11 (8mm) Needles, cast on 47 sts.
Work 2 rows rib as for Cap.
Shape front (NOTE : When turning, bring yarn to front of work, slip next st. on to right-hand needle, take yarn to back, slip st. back on to left-hand needle, then turn and proceed as instructed. This avoids holes).
1st row- Work 2 tog., rib 16, turn.
2nd, 4th and 6th rows – Rib to last 2 sts., work 2 tog.
3rd row- Work 2 tog., rib 10, turn.
5th row- Work 2 tog., rib 4, turn.
7th row- Work 2 tog., rib to last 2 sts., work 2 tog.
8th row -Work 2 tog., rib 15, turn.
9th,11th and 13th rows as 2nd row
10th row -Work 2 tog., rib 9, turn.
12th row- Work 2 tog., rib 3, turn.
14th row as 7th row
rep last row 10 times… 11 sts cont, in rib increasing at each end of every row until there are 31 sts.
35th row- increase in first st, rib 7, turn
36th,38th and 40th rows – Rib to last st, inc in last st
37th row-increase in first st, rib 7, turn
39th row- increase in first st, rib 13, turn
41st row – increase in first st, rib to last st, inc in last st
42nd row-increase in first st, rib 2, turn
43rd , 45th and 47th row as 36th row.
44th row row-increase in first st, rib 8, turn
46th row-increase in first st, rib 14, turn
48th row as 41st row… 47sts work 2 rows, cast off loosely in rib.
Make up
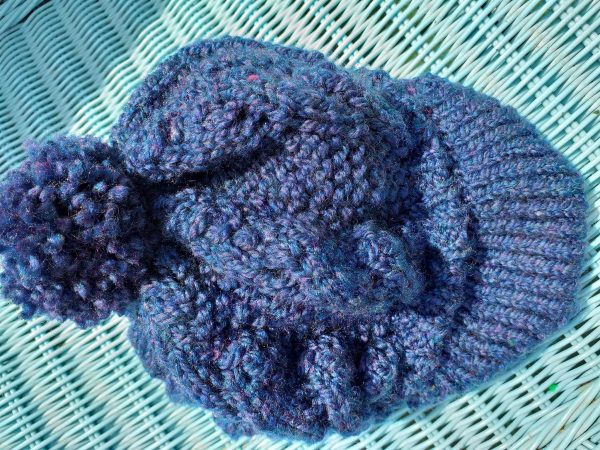
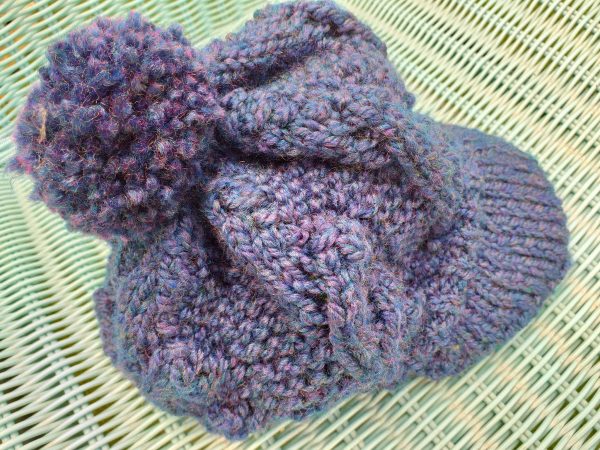
Using back stitch, join back seam. Fold rib band in half on to wrong side and slip stitch in position. Fold peak in half, place stiffening inside and join with flat seam.
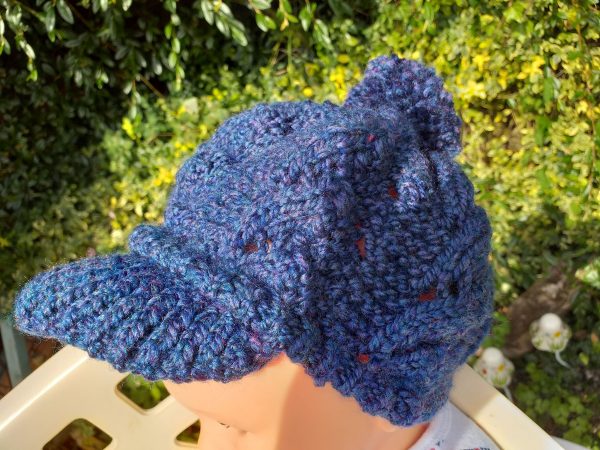
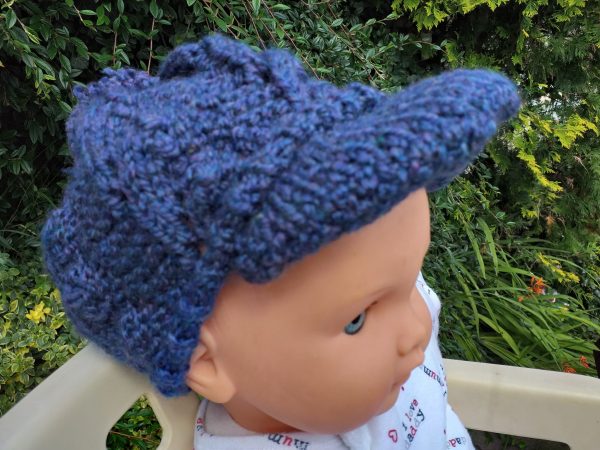
Sew peak to cap. Make a pom pom for the crown.
The pattern calls for a Patons Chunky Wool, but you could try a 12 ply wool but it is yet to be tested.
If you are having problems with abbreviations then take a look at this detailed abbreviation list.
— NEW!!! REVISED USER SUBMITTED MODERN VERSION —
Gauge: 15 sts. to 10 cm
Using No. 11 (8mm) Needles, cast on 67 sts.
Beginning:
1st row: K2, * P1, K1 … rep from * to last st, K1.
2nd row: K1, * P1, K1 … rep from * to end.
3rd row: K2, * P1, K1 … rep from * to last st, K1.
4th row: K1, * P1, K1 … rep from * to end.
5th row: K2, * P1, K1 … rep from * to last st, K1.
6th row: K1, * P1, K1 … rep from * to end.
7th row: K2, * P1, K1 … rep from * to last st, K1.
8th row: P1, K1, * M1, rib 4… rep from * to end … 84 sts.
Change to No. 6 (4mm) Needles
Pattern:
1st row: P3, * YO, K3, sl 1, K2tog, PSSO, K3, YO, P4…rep from * ending last rep. P3
2nd row: K3, * P9, K 4… rep from * ending last rep K3.
3rd row: P3, * K1, YO, K2, sl 1, K2tog, PSSO, K2, YO, K1, P4…rep from * ending last rep P3.
4th row: K3, * P9, K 4… rep from * ending last rep K3.
5th row: P3, * K2, YO, K1, sl 1, K2tog, PSSO, K1, YO, K2, P4, rep from * ending last rep P3.
6th row: K3, * P9, K 4… rep from * ending last rep K3.
7th row: P3, * K3, YO, sl 1, K2tog, PSSO, YO, K3, P4… rep from * ending last rep P3.
8th row: K3, * P9, K 4… rep from * ending last rep K3.
Rep pattern twice, then 1st and 2nd rows once.
Shape crown:
1st row: P2tog, * P1, patt. 9, P1, P2 tog., rep. from * to end.
2nd row: K2, * P9, K3, rep. from * ending last rep. K2.
3rd row: P2. * K1, YO, K2, sl 1, K2tog, PSSO, K2, YO, K1, P4, P2 tog., P1, rep. from * to last 11 sts., K1, YO, K2, sl 1, K2tog, PSSO, K2, YO, K1, P4, P2.
4th row: K2, * P9, K2, rep. from * to end.
5th row: P2 tog., * K1, YO, K2, sl 1, K2tog, PSSO, K2, YO, K1, P4, P2 tog., rep. from * to end.
6th row: K1, * P9, K1, rep. from * to end.
7th row: P1, * (K3 tog.) 3 times, P1, rep. from * to end.
8th row: (P2 tog.) 12 times, P1.
Break off yarn, run end through rem. sts., draw up and fasten off securely.
PEAK
Using No. 11 (8mm) Needles, cast on 47 sts.
Work 2 rows rib as for Cap (K1, P1)
Shape front
(NOTE : When turning, bring yarn to front of work, slip next st. on to right-hand needle, take yarn to back, slip st. back on to left-hand needle, then turn and proceed as instructed. This avoids holes). (“work 2tog” means either p2tog or k2tog depending on where you are in the pattern)
1st row: Work 2 tog., rib 16, turn.
2nd row: Rib to last 2 sts., work 2 tog.
3rd row: Work 2 tog., rib 10, turn.
4th row: Rib to last 2 sts., work 2 tog.
5th row: Work 2 tog., rib 4, turn.
6th row: Rib to last 2 sts., work 2 tog.
7th row: Work 2 tog., rib to last 2 sts., work 2 tog.
8th row: Work 2 tog., rib 15, turn.
9th row: Rib to last 2 sts., work 2 tog.
10th row: Work 2 tog., rib 9, turn.
11th row: Rib to last 2 sts., work 2 tog.
12th row: Work 2 tog., rib 3, turn.
13th row: Rib to last 2 sts., work 2 tog.
14th row: Work 2 tog., rib to last 2 sts., work 2 tog.
Rows 15 – 24:
rep last row 10 times… 11 sts.
Rows 25-34:
Cont in rib increasing at each end of every row until there are 31 sts on needle.
35th row: increase in first st, rib 7, turn
36th row: Rib to last st, inc in last st
37th row: increase in first st, rib 7, turn
38th row: Rib to last st, inc in last st
39th row: increase in first st, rib 13, turn
40th row: Rib to last st, inc in last st
41st row: increase in first st, rib to last st, inc in last st
42nd row: increase in first st, rib 2, turn
43rd row: Rib to last st, inc in last st
44th row: increase in first st, rib 8, turn
45th row: Rib to last st, inc in last st
46th row: increase in first st, rib 14, turn
47th row: Rib to last st, inc in last st
48th row: increase in first st, rib to last st, inc in last st… 47sts.
Work 2 rows, cast off loosely in rib.
Make up
Using back stitch, join back seam. Fold rib band in half on to wrong side and slip stitch in position. Fold peak in half, place stiffening inside and join with flat seam.
Sew peak to cap. Make a pom pom for the crown.
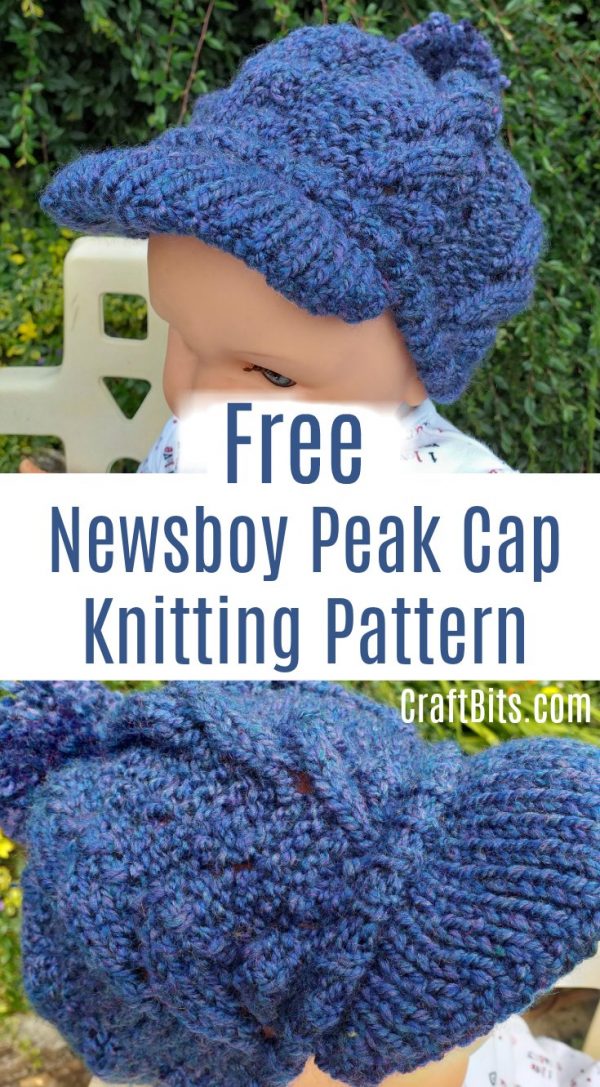
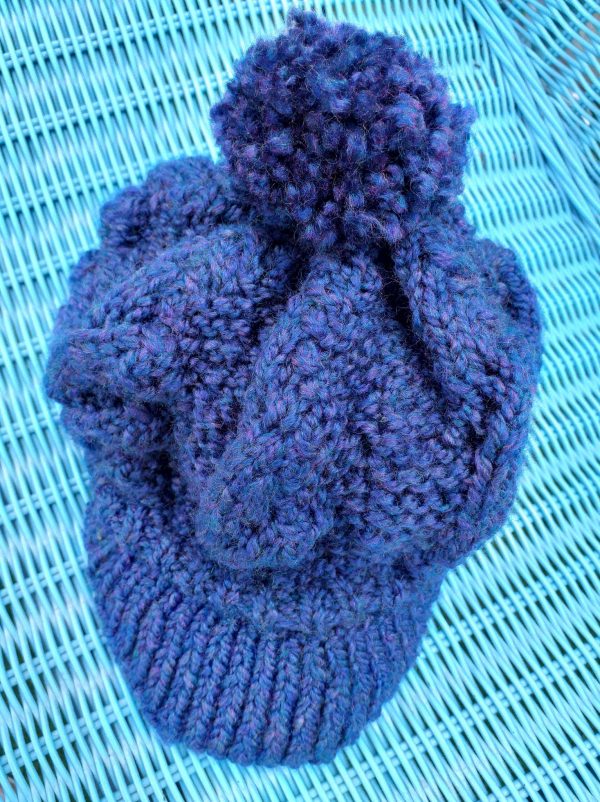
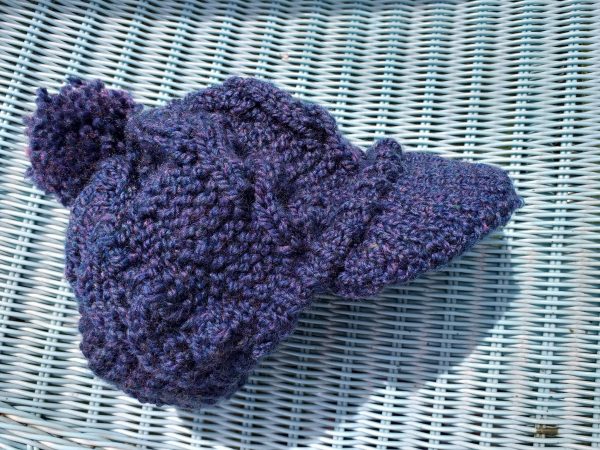
The hat in the photos was knitted on needles size 3.5mm for the rib and then size 5mm Finished hat would fit a toddler


I believe rib 2 and rib 4 respectively means to (k2 p2) and (k4 p4) respectively…..or (knit 2, purl 2) and repeat across…also (knit 4, purl 4) and repeat across. Ribbing can be any number of knit stitches followed by any number of purl stitches, just so that whatever combination you start with, you continue across for continuity for your pattern. I personally prefer k1, p1 for lots of stretch, but k2, p2 is classically used alot.
Love what the hat looks like but was discouraging to get the body of the hat done and when I got to shape crown, the numbers just don’t work no matter how you do them. You can’t repeat the pattern when you re decreasing the amount of stitches, that just can’t work.
I would also like to add on the shape crown row 3. It has you do a grouping of sts and then says “to last 11 sts…then it says: K1, Yo, K2, Sl 1,K2tog, Psso, K2, Yo, K1, P4,(last P2 are the edge sts. That is 13 sts that you need to work this. 2 too many.
Burnetta are you using the revised pattern?
I have since tried the vintage one and was able to work that one.
link for abbreviations does not work … help please.
Elaine
I finally figured out to do pattern 9 from rows 3,5, and 7 and that way it kept to the pattern. Sure would like an illistration to sew peak together after I fold it. Very cute.
I finally made the hat (adult size) after a few adjustments. Using James C Bret Marble Chunky, 4.5mm needles for ribbing and peak and 7.5mm needles for the hat. I found that If on row 8 you just increase by 13 stitches evenly across the row it gives you 80 stitches so you can follow the original pattern, i did add a couple of extra rows in at the end. Drove me mad to get it right but lovely know I have done it.
I cannot get this pattern to PRINT!
Hi there,
WE have sent you an email – but you just need to login, and then click on the print this pattern link.
I made this once…winged it where the ‘new modern’ pattern says to ‘patt 9’…I asked over and over on one knitting forum, and all I could get was ‘you are to follow the pattern there.’ The only thing I saw repeated ‘9’ times was ‘p9’…so that’s what I did…I recently tore that hat all apart because I used a cotton yarn for the ribbing, and an acrylic for the hat…it was way too big, as was the beak…I would love to see this pattern truly “updated” and the old parts of the vintage pattern done away with. I would also like to see a way to print just the newer version…a lot of paper is wasted here. Wish this was a tad easier ’cause I do love that hat!
if knit in 4ply do you think it would be good for a tiny baby?
Nice hat for a guy. Haven’t see guys wearing these in quite a while. Is good to see something old coming out in style again for us guys. It’s high time vintage clothing started making a come back for us men, since so many things have come back in style for women! Needs a bit more tweaking to really make it pop for a man, though, looks like it might be a little small for the average guy.
What does it mean to rib 2? and rib 4? Is this k1 p1 2 times for rib 2 and k1 p1 4 times for rib 4?
This pattern makes into a very cute hat!
I made it in Bernat Softee Chunky, needing only 1 ball! Used size US 8 (for the ribbing parts – brim & cap ribbing) & US 10.5 (cap body) circular needles (magic loop method – 40″ cord), knitting the cap circular with 66 stitches, increasing to 78 for the lacy pattern. The brim (peak) is very cleverly constructed with the short rows to make shaping that is larger on the top than the bottom of the brim to give it a nice shaping when stitched onto the cap. The wrap and turn stitch method did eliminate any holes in the short rows. I used plastic needlepoint canvas (cut to shape) for the brim stiffener.
Thanks for the great pattern!
this pattern is SOOOOOOO confusing!!! how can even a advanced knitter understand this??? this pattern needs to be updated!!!!
Thank you for this pattern! My Nan asked me to find something like this to knit for someone. I’m hoping she’s going to love it.
Is this peak cap for child or adult please
I don’t understand peak instructions. What do you mean patt 9
on the shapeing crown were it said pattern 9 I understand to knit 9 stithes from the beginnig of row 3 I end up with 4 stitches at the end Ithink I have one stitch to many please help
Please help!! I am not sure where to get stiffening for the peak. Any suggestions would be great!!
I used a clean oleo plastic container and cut to size or anything else that is large enough to cut to size for a child or a adult.
When it says on row 8 to rib 2 inc. is that k2, p2, m1? and then k4, p4 m1? So, on row 8, do I k2p2m1, then after that until end of row k4p4m1? Please help!!
There is a mix-up with the needles. It tells you that you need 2 sizes under Materials, but in the directions, it states something else. What is correct?
What does it mean to rib 2? and rib 4? Is this k1 p1?
I love it .Please confirm the needle size . 1 pair of 8mm and 1 pair of 4mm ???
I was just wondering if anyone could explain to me what to do where it says patt 9 when shaping the crown? I’ve never come accross th is before. I understand that patt means pattern but what pattern
Patt 9 means row three above, got that. the next time it shows up are you to do row five, above, and then row seven, and then you should be done with the shaping?
Peak after row 14 repeat 10 times until 11 stitches,then increase till 31 stitches total 20 rows right
thanks
very nice but materials used you show 3mm needles but pattern sys 8mm which one is correct 3mm seems to small for peak
thanks
got the hat knit can’t do the peak,to much to follow and don’t understand knit so many , turn etc/.
Making the peak is not sinking in what is says to do
“patt 9” is row 3
I’m trying this pattern, new to YOs etc and having to make lots of changes. Keeping the leafy effect pattern though. Make a test with a yarn you like, recommended needles and then measure your head. I’m ripping mine back for the 3rd time…will get there!
im still a little confused about the ‘patt 9’. I am new at knitting, but the challenge is GREAT! Im GUESSING it just means to continue the P1 ‘pattern’ 9 times….
am i RIGHT?
your not supposed to use double pointed needles
tell me you’re suppose to use DPN’s ….im kinda new to knitting, and i absolutely LOVE this hat…
please help me!!!
thanks
what do you mean by rib?
Just a reminder that this is a VINTAGE pattern if you are not used to vintage terms or techniques I suggest trying a different hat pattern as you may run into difficulties.
what does Rep.rows 1 to 8 incl. twice, then 1st and 2nd rows once mean?
very cool hat, but the pattern is writing really weird.
i am also wondering what needles to use, as the pattern instructions give completely different sizes that don’t correspond to each other.
PLEASE TELL ME WHAT SIZE NEEDLES TO USE FOR THE CHUNCKY YARN
pattern has a mistake, it should read, after increase 84 sts
Y.R.N Yarn Round Needle
What does Y.R.N mean??
cute!
thanx!!!
4) when it says to “patt 9” it just means continue in the pattern you were already doing, so the first time it says “patt 9” you would be working as for row 3 above to make the eyelet design.
This pattern is written pretty stupid, just a few things:
1) yon & yfwd translate to yo
2) sl1, k2tog, psso =sk2p
3) when working the back of the main pattern, always knit the yo sts
hello I love this pattern, but I have the same question as above. How do I get to find Pattern 9?!!!
thnx!!
What does Patt 9 mean in row 1 of shaping the crown? Thank you. ~Tricia
tpcougar(at)earthlink(dot)net
This has been updated and Patons Chunky Wool Works Best
Love the hat.But I’m having a problem with finding wool to get gauge can you give me suggestion thanks.
The pattern doesn’t specify the size wool needed; and there is no guage shown.
Love it.. Super Retro Super Cool
Would be nice in rainbow colors with scrap yarns
Really Funky.. Love it..