DIY Giant Halloween Pumpkin Made from Dollar Store Punch Bowls

DIY Giant Halloween Pumpkin Made from Dollar Store Punch Bowls

Looking for a budget-friendly fall craft that makes a big statement? This clever DIY pumpkin made from two Dollar Tree punch bowls is a showstopper! It’s an inexpensive, creative way to add a handmade touch to your seasonal decorating, and no one will guess it started with a couple of plastic bowls from the dollar aisle.
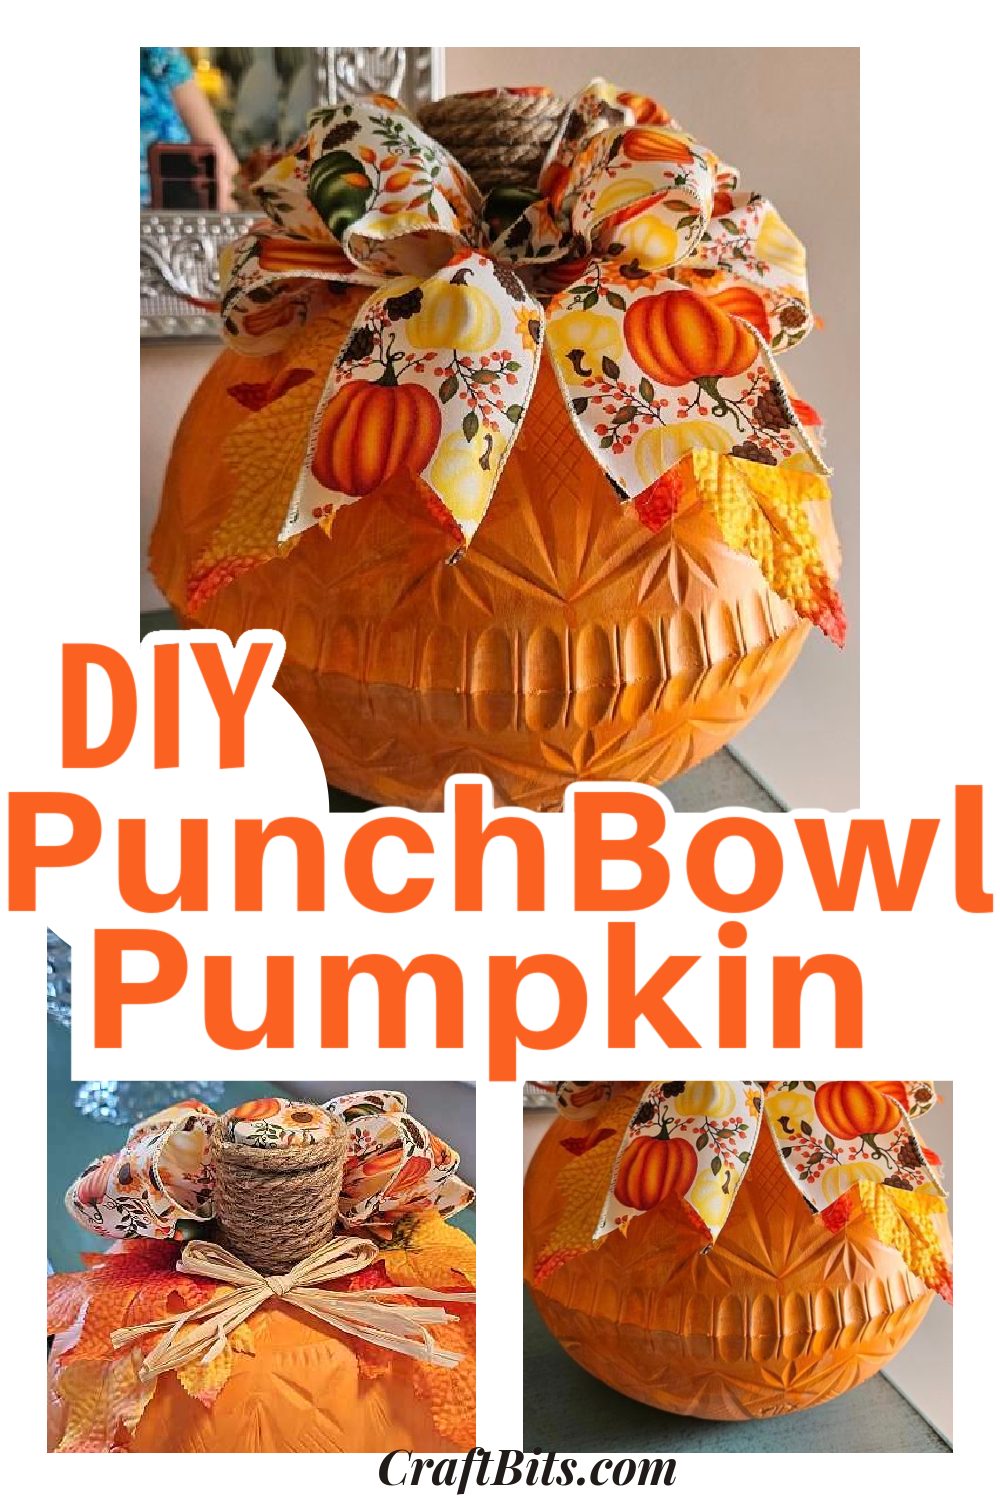
Perfect for Halloween, Thanksgiving, or everyday autumn decor, this charming pumpkin adds rustic farmhouse flair whether you place it on your front porch, dining table, or entryway. It’s a fun weekend project that turns simple, everyday items into a one-of-a-kind fall decoration.


Get more details about this project

What you need

2 Dollar Tree punch bowls

E6000 glue

Cream chalk paint

Orange acrylic paint

Matte spray sealer

Toilet paper roll

Paper towel

Ribbon strip

Rope

Fall leaves (optional)

Straw ribbon (optional)

Hot glue gun and glue sticks

Instructions

This adorable punch bowl pumpkin was contributed by Lynn Wood. We loved her design so much we asked if we could share her photos here with you. Thanks for sharing Lynn.

Looking for a budget-friendly way to decorate for fall? This DIY Dollar Tree pumpkin is the perfect project for adding cozy autumn style to your home. With just a couple of plastic punch bowls, some paint, and a little creativity, you can create a beautiful pumpkin centerpiece that looks high-end but costs only a few dollars to make.

Follow these step-by-step instructions to transform simple Dollar Tree finds into a gorgeous DIY pumpkin for your fall porch, Thanksgiving table, or seasonal mantel display.

Step 1: Create the Pumpkin Shape

Start with two clear plastic punch bowls from Dollar Tree. Make sure they’re clean and completely dry.

Flip one bowl upside down and place it rim-to-rim with the other bowl to form a sphere.

Apply a generous bead of E6000 glue around the rim and press the bowls together.

Use painter’s tape to hold them steady while drying.

Let the glue cure for several hours or overnight. This round form will be the base of your pumpkin.

Step 2: Paint the Pumpkin Base

Once your bowls are secure, it’s time to add color.

Start with a layer of cream chalk paint—this helps the next coats stick to the smooth plastic.

After it dries, brush on orange acrylic paint for that classic pumpkin look.

For a realistic effect, sponge on darker shades of orange and brown for natural depth.

Seal everything with a matte spray sealer to protect the finish and give your pumpkin a soft sheen.

Step 3: Build a Rustic Pumpkin Stem

No pumpkin is complete without a stem!

Cut a toilet paper roll down to your desired stem height.

Stuff it with paper towel or scrap fabric so it keeps its shape.

Cover the opening with a strip of ribbon or fabric.

Wrap the roll tightly with rope, twine, or jute using E6000 glue until fully covered.

This simple trick gives you a farmhouse-style stem that looks surprisingly real.

Step 4: Attach the Stem

Center the stem on top of your pumpkin base.

Use both hot glue (for immediate hold) and E6000 (for a permanent bond).

Press firmly and allow to cure completely before moving.

Step 5: Add Seasonal Details

Dress up your pumpkin with autumn accents:

Tie a bow from buffalo check ribbon, burlap, or fall-themed satin.

Glue the bow at the base of the stem.

Tuck in faux leaves, greenery, or raffia strands to give extra charm and texture.

These finishing touches turn your pumpkin into a custom piece that matches your fall decor perfectly.

Step 6: Dry, Display, and Enjoy

Let everything dry thoroughly before displaying.

Place your finished DIY Dollar Tree pumpkin on your front porch, by the fireplace, or use it as a Thanksgiving centerpiece. Make a few in different sizes for a stunning pumpkin patch effect indoors or outdoors.

Why You’ll Love This Dollar Tree Pumpkin Craft

Costs only a few dollars to make

Quick to finish in under a day

Perfect for fall porch decor, harvest table settings, or farmhouse displays

Easy to customize with ribbon, leaves, or different paint colors

This simple Dollar Tree pumpkin DIY proves you don’t need to spend a fortune for beautiful seasonal decor. Once you’ve made one, you’ll want to create a whole patch for your home!


Comments

  1. Mary Ellen Mandeville says

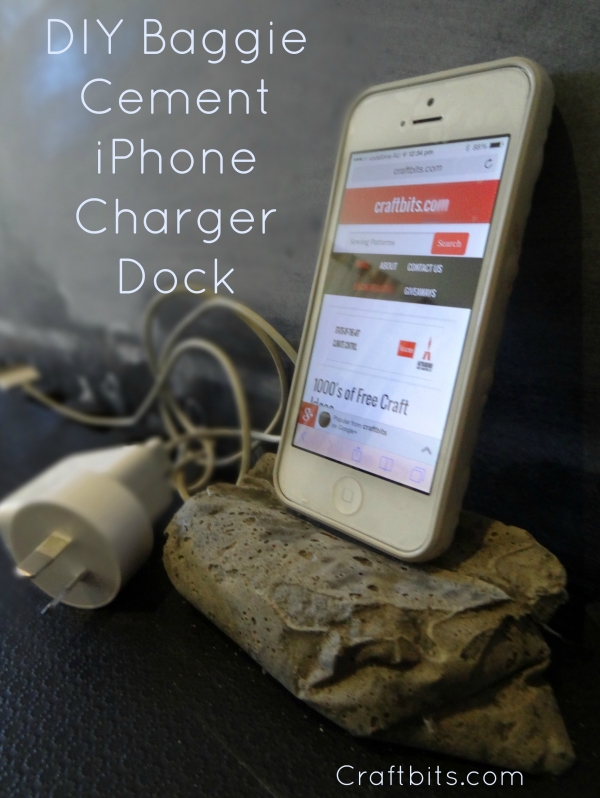
    I most absolutely LOVE this idea! I’m wanting to try my hand at this!

What do you think of this project? Let us know!