
Whether you're a resin rookie or a floral fanatic, this tutorial will walk you through the process in a real-life, no-fuss way.
Get more details about this project
What you need
Clear casting resin (epoxy or UV resin)
Silicone mold (circle, oval, or any shape you like)
Pressed flowers (flat and completely dry)
Magnets (small, strong craft magnets work best)
Gloves & mixing cups
Toothpick or wooden skewer
Tweezers
Strong glue (E6000 or similar)
Tip: You can press your own flowers with a book and parchment paper, or buy ready-made pressed flowers online.
Instructions
Step 1: Prep Your Workspace
Cover your surface with wax paper or a silicone mat. Resin can be messy (ask my poor cutting board…), so set everything out and wear gloves.
Step 2: Mix the Resin
Follow the instructions on your resin kit. For epoxy, you’ll mix two parts together; for UV, it’s ready to pour straight from the bottle.
Stir gently for at least 2–3 minutes until it’s completely combined and clear.
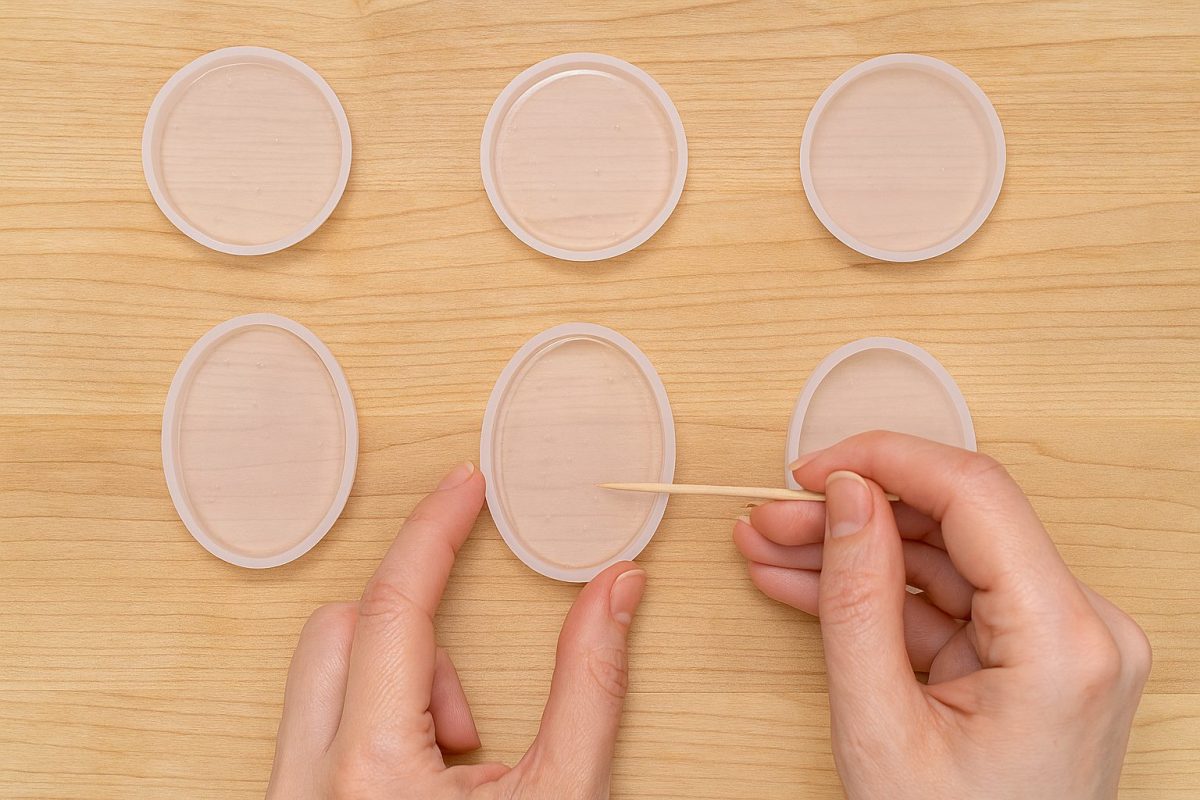
Step 3: Pour the First Layer
Pour a thin layer of resin into your mold—just enough to coat the bottom. This helps suspend the flowers and prevents bubbles from forming underneath.
Let it sit for 5–10 minutes so bubbles can rise and pop. Use a heat gun or a quick breath to burst any stubborn bubbles.
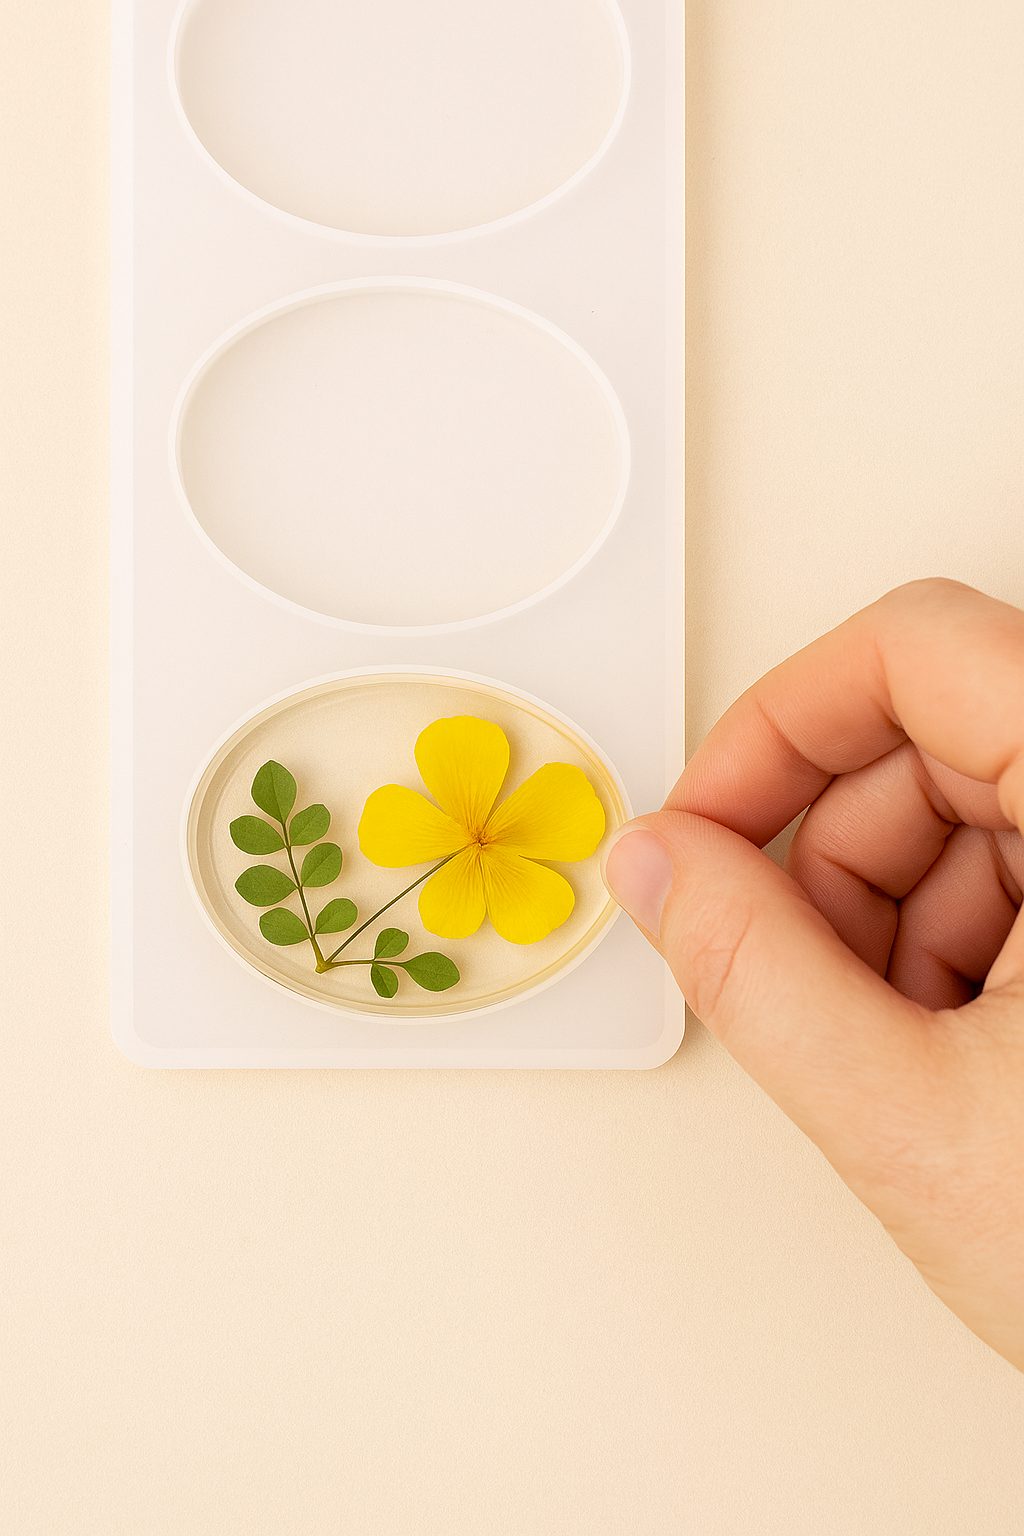 Step 4: Add Pressed Flowers
Use tweezers to gently place your dried flowers into the mold. Press them lightly so they lay flat against the resin.
Arrange them however you like—just remember the bottom of the mold becomes the front of the magnet, so place your prettiest side down.
Step 5: Add the Second Layer
Once the flowers are in place, pour another layer of resin over them until the mold is full. Again, pop those bubbles!
If you’re using UV resin, you’ll cure each layer under a UV light. For epoxy, leave it to cure for 24–48 hours in a dust-free area.
Step 6: De-mold & Sand Edges
Once fully cured, pop your magnets out of the mold. If any edges are sharp or uneven, gently sand them with fine-grit sandpaper.
Step 7: Attach the Magnets
Use a strong adhesive to glue a magnet to the back of each resin piece. Let dry according to your glue’s instructions.
Crafty Tips:
- Add a name or word decal before your final resin layer for a personalized touch.
- Mix in a bit of gold leaf or mica flakes for an elevated look.
- Make seasonal sets: spring daisies, autumn leaves, Christmas holly…
These fridge magnets are like tiny botanical time capsules. They’re fun to make, easy to gift, and honestly… they look like something you’d buy at a boutique market stall.
Whether you’re preserving garden blooms, wedding petals, or just making use of a rainy afternoon, this project is a beautiful way to bring the outside in—all year round.


What do you think of this project? Let us know!