
Get more details about this project
What you need

 or Gap Filler


Instructions
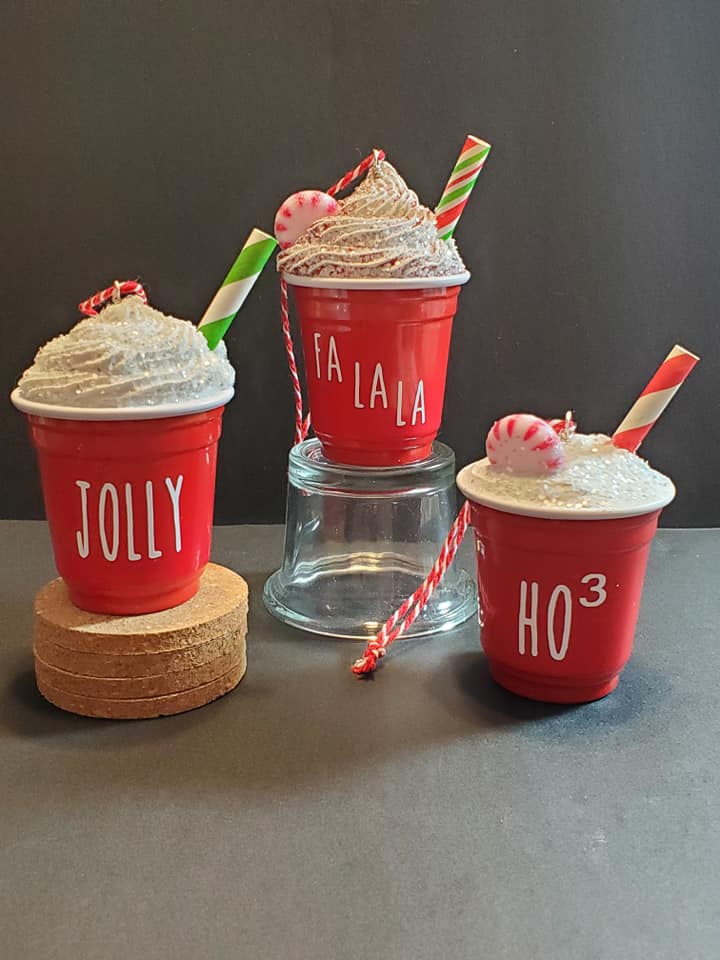
A tiny cup of hot chocolate topped with a generous swirl of whipped cream is rather hard to resist—even when it’s made entirely from craft supplies. These miniature Christmas ornaments have all the cheerful details of a festive drink, right down to the striped straw and peppermint decoration.
I love how the white lettering stands out against the red cups. You can make a coordinated collection for your tree or give each cup its own little message. They would also look lovely tied onto a baker’s gift basket or displayed beside a Christmas cocoa station.
Here in Queensland, the weather doesn’t always call for hot chocolate at Christmas, but I’m quite happy to enjoy the ornament version!
Thank you to Debby M. M. for sharing this project and her construction tips.
Instructions
1. Fill the Cup
Cut foam to fit snugly inside a miniature cup. This supports the decorations and reduces the amount of lightweight spackle needed.
2. Make the Faux Cream
Spread lightweight spackle over the foam with a craft stick, or pipe it into a swirl using a dedicated craft piping bag and tip.
3. Insert the Hanger
Form an eye at the top of a wire stem. Push the stem through the wet topping into the foam, leaving the eye exposed.
4. Add the Decorations
Dust the wet spackle with glitter.
Insert a short wooden dowel inside a striped straw for support, then push it into the foam. For a faux peppermint with a mounting hole, glue in a wire stem and insert that into the foam too.
5. Add the Lettering
Decorate the cup with small vinyl letters or stickers. Try JOLLY, FA LA LA or a personalised name.
6. Dry and Finish
Leave for at least a day, or longer according to the product directions. Once fully dry, attach baker’s twine through the wire eye and check that everything is secure.
Finishing Tips
Keep your lettering short so it’s easy to read on the small, curved cup. Plan its position before sticking anything down, especially if you want the words centred beneath the straw.
Use faux sweets rather than edible decorations so your ornaments can be packed away for another year. These are decorative pieces, so keep the spackle and craft utensils separate from food preparation supplies.
For another kitchen-themed ornament, try our rolling pin snowmen. You can also continue the festive treats theme with these Christmas painted rocks.



Very cute idea!! How did you do the lettering on the cups?
It says in her ‘items what needed’. She used a Cricut to make the lettering on the cups. You can also use stickers or hand write the wording on the cups with a white marker.
Very cute idea!! How did you do the wording on the cups?
Would like to have a video to see how the cup orderment was made