
Whether you're decorating your mantle, setting a cozy table, or gifting homemade goodies, these upcycled Christmas cans are the perfect handmade touch.
And yes—you finally have a use for those pretty holiday napkins you’ve been “saving.”
Get more details about this project
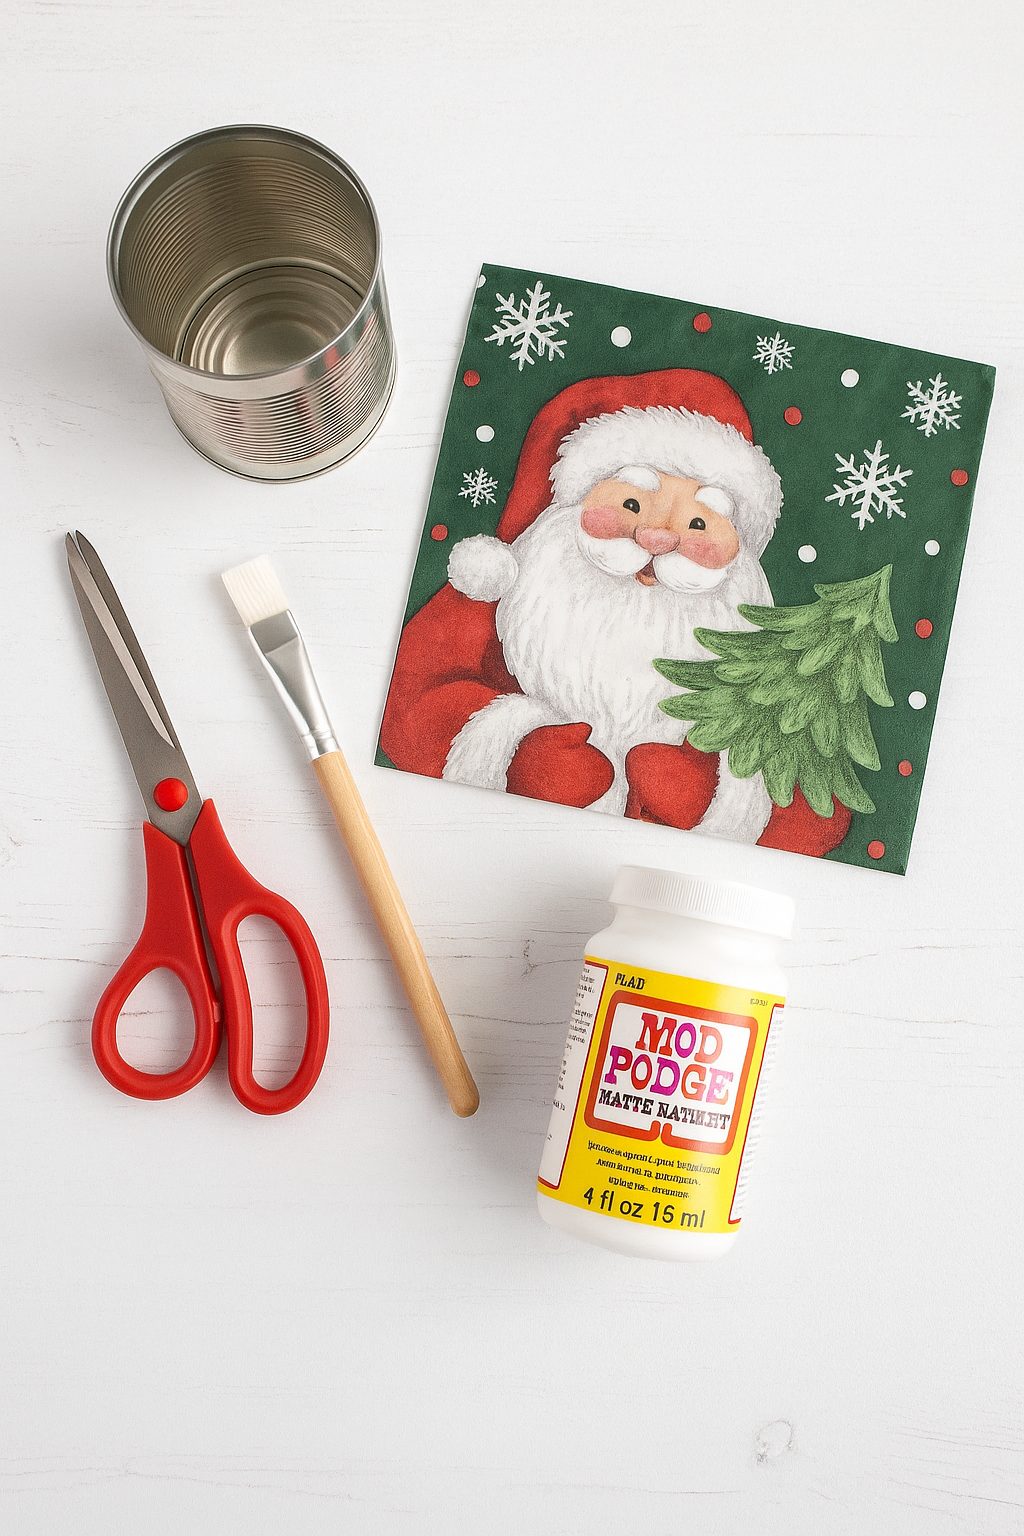
What you need
Empty tin cans (washed and label-free)
Christmas-themed paper napkins (snowflakes, holly, Santa, plaid—your call!)
Foam brush or soft paintbrush
Scissors
White acrylic paint (optional, for a clean base)
Sandpaper (optional, for better glue adhesion)
Decorative trims: twine, gold cord, mini bells, lace, ribbon
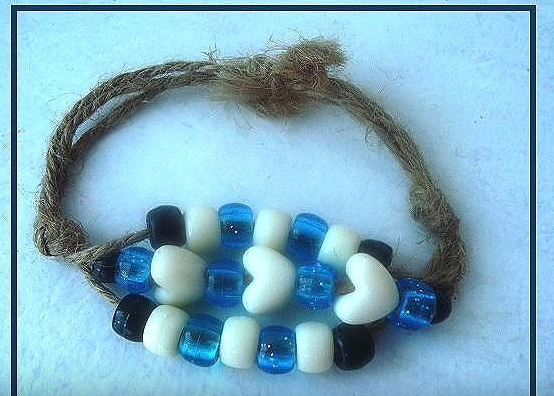
Craft wire for the Handle
Twine for a handle
Bead for Handle
Instructions
 Step 1: Prepare Your Can
Give your can a good scrub and dry. If you’re using a darker can or napkins with light designs, paint the outside white first—it’ll help those holiday prints pop.
Let it dry completely.
Step 2: Get Your Napkin Ready
Carefully separate the napkin layers and keep only the top printed sheet. Measure your can’s height and trim the napkin to fit.
Roughly torn edges look more rustic and blend better than sharp scissor cuts—like a snowy edge effect.
Step 3: Apply the Napkin
Brush a light coat of Mod Podge onto part of the can, then gently press the napkin down, smoothing it with your brush or fingertips.
Work in sections to avoid tearing or bubbling. A few wrinkles? No biggie—it adds that handmade holiday charm!
Step 4: Seal It In
Once the entire napkin is in place and dry, brush a top layer of Mod Podge to seal it. Let it dry completely before adding embellishments.
Step 5: Add Holiday Sparkle
Wrap the top or bottom rim with rustic twine, sparkly ribbon, mini bells, or even a sprig of faux greenery. You could even hot glue on a tiny pinecone or button if you’re feeling extra merry.
Optional Handle – Use a nail to hammer a hole into the side. Use some craft wire to twist it through and create the handle, then use twine and a bead to wrap the wire for an optional handle.
Holiday Uses for These Upcycled Beauties
- Table centerpiece: Add battery-operated tea lights or a small bouquet of pine branches.
- Utensil holder: Perfect for the Christmas buffet table.
- Gift container: Fill with cookies, homemade fudge, or candy canes.
- Mantle decor: Pop in a few glittery branches or candy canes for instant holiday cheer.
- Advent can countdown: Number them 1–24 and fill with daily treats!
Crafty Tips
- Metallic napkins (gold foil, silver stars) look gorgeous with a matte Mod Podge finish.
- For kids’ versions, use cartoon Santa or reindeer napkins—instant hit!
- Line the inside with parchment and use for wrapped baked goods or a hot cocoa kit.
This DIY is joyful, easy, and uses what you already have on hand. Let your creativity (and that Christmas playlist) guide you.
Crafted with love at Christmas by CraftBits.com


What do you think of this project? Let us know!