
The strips are fanned into a rounded pumpkin shape and finished with green paper leaves and a curled pipe-cleaner stem. The completed pumpkin makes an inexpensive Thanksgiving decoration and a thoughtful way to encourage gratitude.
Get more details about this project
What you need
two sheets of orange, yellow or patterned cardstock
Ruler
Pencil
Paper trimmer or scissors
Small hole punch
Two metal brads
Green cardstock or construction paper
One brown or green pipe cleaner
Markers, crayons or coloured pencils
Stickers, stamps or Thanksgiving embellishments, optional
Leaf template, optional
Instructions
Step 1: Cut the Cardstock Strips
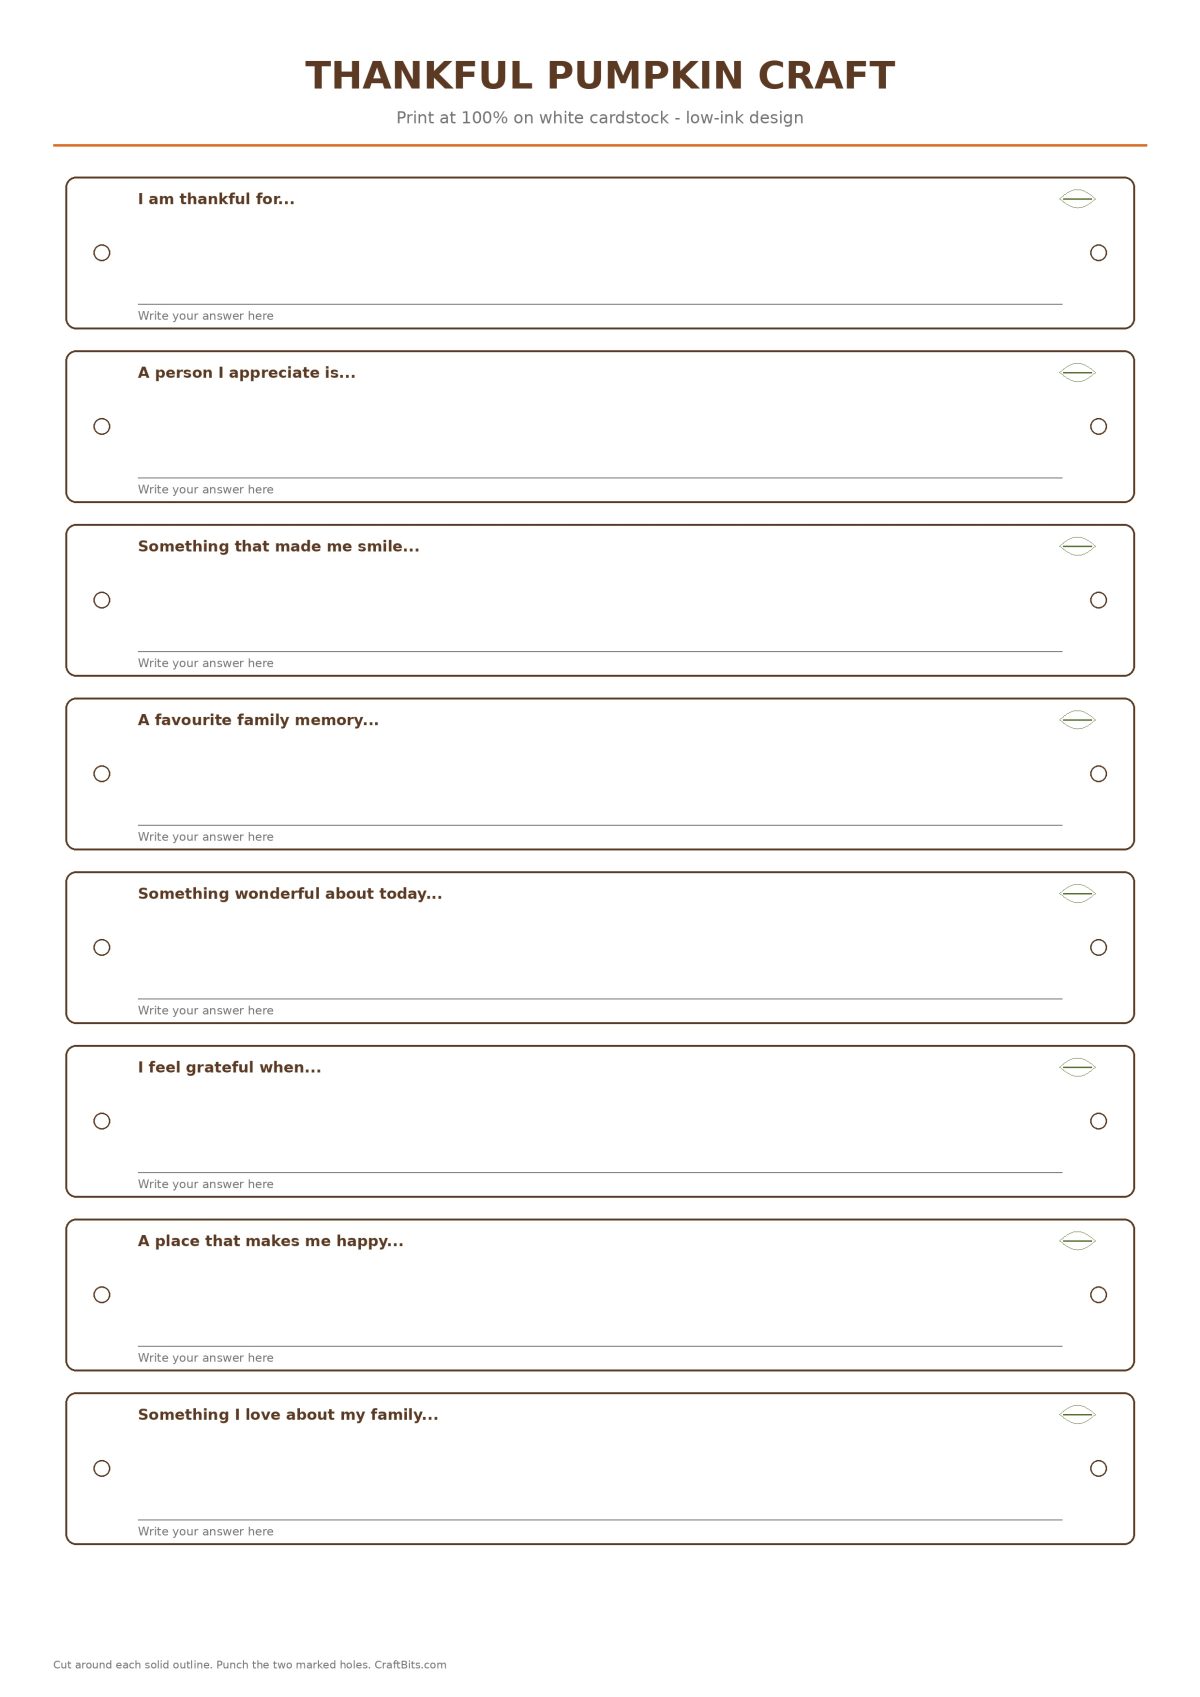
Cut ten cardstock strips measuring approximately 1½ inches wide by 8½ inches long.
Use a paper trimmer for straight, even strips, or draw the cutting lines with a ruler and pencil before cutting with scissors.
All ten strips should be the same size so the finished pumpkin forms an even round shape.
Step 2: Add the Gratitude Messages
Write a short gratitude prompt on five of the strips, such as:
- I am thankful for…
- Something that made me smile…
- A person I appreciate…
- My favourite family memory…
- Something wonderful about today…
Complete each sentence with your own answer.
Keep the writing in the centre section of the strips so it remains visible once the pumpkin is assembled.
Step 3: Decorate the Remaining Strips
Decorate the other five strips with phrases such as Happy Thanksgiving, Give Thanks, Grateful or Thankful.
You can also add small pumpkin drawings, leaves, stickers, stamps, dots or simple seasonal patterns.
For a balanced design, alternate highly decorated strips with simpler gratitude strips.
Step 4: Punch the Holes
Stack the strips together so their edges line up evenly.
Use a small hole punch to make one hole through the centre of each end of the strips. Punch approximately ¼ inch from the edge.
Make sure the holes are in the same position on every strip. Uneven holes can make the finished pumpkin sit crooked.
Step 5: Attach the First Brad
Arrange the strips in a stack, alternating the gratitude messages and decorated strips.
Push the prongs of the first brad through the holes at one end. The rounded head of the brad should sit against the decorated side of the cardstock.
Open the prongs on the reverse side to secure the stack.
Do not press them completely flat yet, as a little movement will make it easier to fan out the strips.
Step 6: Fan Out the Strips
Spread the strips out around the first brad so they form a circular fan.
Place the decorated or written sides facing down toward the table. Check that the strips are evenly spaced before joining the opposite ends.
Step 7: Form the Pumpkin Shape
Lift one strip at a time and bring its loose end upward.
Push the second brad through the punched hole at the free end. Continue adding the remaining strips in order, working around the circle.
As the strips gather onto the second brad, they will bend outward and form a rounded paper pumpkin.
Once all ten strips have been added, spread them evenly around the shape. Open the brad prongs to hold the pumpkin together.
Step 8: Adjust the Shape
Gently rotate and separate the strips until the spaces between them are even.
The pumpkin should sit flat without leaning. Tighten the brads slightly if the strips move too freely, but avoid crushing or creasing the cardstock.
Step 9: Make the Leaves
Cut two simple leaf shapes from green cardstock or construction paper.
Punch a small hole near the base of each leaf. Add leaf veins with a marker or fold each leaf lightly down the centre for extra dimension.
Step 10: Curl the Stem
Wrap a brown or green pipe cleaner around a pencil to create a spiral.
Slide it gently off the pencil without pulling the curl straight. Leave a short uncurled section at one end for attaching it to the pumpkin.
Step 11: Attach the Leaves and Stem
Carefully lift the prongs of the top brad while holding the brad head in place from underneath.
Slide the two paper leaves onto the brad. Position the straight end of the pipe cleaner between the prongs.
Fold the prongs back down firmly to hold the leaves and curled stem in place.
Step 12: Display the Thankful Pumpkin
Place the finished pumpkin on a Thanksgiving table, mantel, classroom shelf or entryway display.
You can also make one pumpkin for each guest and use them as handmade Thanksgiving place settings.
Craft Tip: Invite family members to write a new thankful message on each strip before assembling the pumpkin. Reading the messages aloud at Thanksgiving dinner creates a simple and meaningful gratitude tradition.



What do you think of this project? Let us know!